Page 111 of 223
Cruise control allows you to maintain
asetspeedabove25mph(40km/h)
without keeping your f oot on the
accelerator pedal. It should be used
f or cruising on straight, open
highways. It is not recommended f or
city driving, winding roads, slippery
roads, heavy rain, or bad weather.Accelerate to the desired cruising
speedabove25mph(40km/h).
Push in the Cruise Control Master
Button. The indicator in the button
comes on.
Press and release the SET/decel
buttononthesteeringwheel.The
indicator on the instrument panel
comes on to show the system is
now activated.
1. 2. 3.
OnLXandEXmodelsintheU.S.,and
LXandSimodelsinCanada
Cruise Control
Using the Cruise Control
Features
117
SET/decel
BUTTON RESUME/accel
BUTTON
CANCEL BUTTON
Improper use of the cruise
control can lead to a crash.
Use the cruise control only
when traveling on open
highways in good weather.
�����—�����—�����y�
�������������y���
�(�����������y���
�����y
Page 113 of 223

Even with the cruise control turned
on, you can still use the accelerator
pedal to speed up f or passing. Af ter
completing the pass, take your foot
of f the accelerator pedal. The vehicle
will return to the set cruising speed.
Resting your f oot on the brake or
clutch pedal causes the cruise
control to cancel.Youcancancelthecruisecontrolin
any of these ways:
Tap the brake or clutch pedal.
Push the CANCEL button on the
steering wheel.
Push the Cruise Control Master
Button. When you push the CANCEL button,
or tap the brake or clutch pedal, the
system remember the previously-set
cruising speed. To return to that
speed, accelerate to above 25 mph
(40 km/h) and then press and
release the RESUME/accel button.
The CRUISE CONTROL indicator
comes on. The vehicle will accelerate
to the same cruising speed as before.
PressingtheCruiseControlMaster
button turns the system off and
erases the previous cruising speed.
Cruise Control
Cancelling the Cruise Control Resuming the Set Speed
Features
119
�����—�����—�����y�
������
����
�y���
�(�����������y���
�����y
Page 121 of 223

Some examples are:Raising your vehicle with an
af termarket suspension kit can
af f ect the handling and stability.
Af termarket wheels, because they
are a universal design, can cause
excessive stress on suspension
components. Larger or smaller wheels and tires
can interf ere with the operation of
your vehicle’s anti-lock brakes and
other systems.
Removing parts f rom your vehicle,
or replacing components with
af termarket components could
seriously af f ect your vehicle’s
handling, stability, and reliability.
Lowering your vehicle with an
aftermarket suspension kit that
signif icantly reduces ground
clearance can allow the
undercarriage to hit speed bumps
or other raised objects, which
could cause the airbags to deploy. If you plan to modif y your vehicle,
consult your dealer.Modif ying your steering wheel or
any other part of your vehicle’s
safety features can make the
systems inef f ective.
Modif ying Your Vehicle
A ccessories and Modif ications
128
�����—�����—�����y�
�������������y���
�(�����������y���
���
�y
Page 126 of 223
Make sure all windows, mirrors,
and outside lights are clean and
unobstructed. Remove f rost, snow,
or ice.
Check that the hood and trunk are
f ully closed.
Visually check the tires. If a tire
looks low, use a gauge to check its
pressure.Check that any items you may be
carrying are stored properly or
f astened down securely.
Check the seat adjustment (see
page ).
Check the adjustment of the
inside and outside mirrors (see
page ).
Check the steering wheel
adjustment (see page ).
Make sure the doors are securely
closed and locked.Fasten your seat belt. Check that
your passengers have f astened
their seat belts (see page ).
When you start the engine, check
the gauges and indicator lights in
the instrument panel (see page
).
Youshoulddothefollowingchecks
and adjustments every day bef ore
you drive your vehicle. 1. 2. 3. 4.
9.
8.
7.
6.
5.
76
81 68 15
53
Preparing to Drive
134
�����—�����—�����y�
���������
���y���
�(�����������y���
�����y
Page 134 of 223

Your vehicle is equipped with f ront
disc brakes. The brakes on the rear
wheels are drum. A power assist
helps reduce the ef f ort needed on
thebrakepedal.TheABS(on
models equipped) helps you retain
steering control when braking very
hard.Check the brakes after driving
through deep water. Apply the
brakes moderately to see if they f eel
normal. If not, apply them gently and
f requently until they do. Be extra
cautious in your driving.
Resting your f oot on the pedal keeps
the brakes applied lightly, builds up
heat, and reduces their ef f ectiveness.
It also keeps your brake lights on all
the time, conf using drivers behind
you.
Constant application of the brakes
when going down a long hill builds
up heat and reduces their ef f ective-
ness. Use the engine to assist the
brakes by taking your f oot of f the
accelerator and downshif ting to a
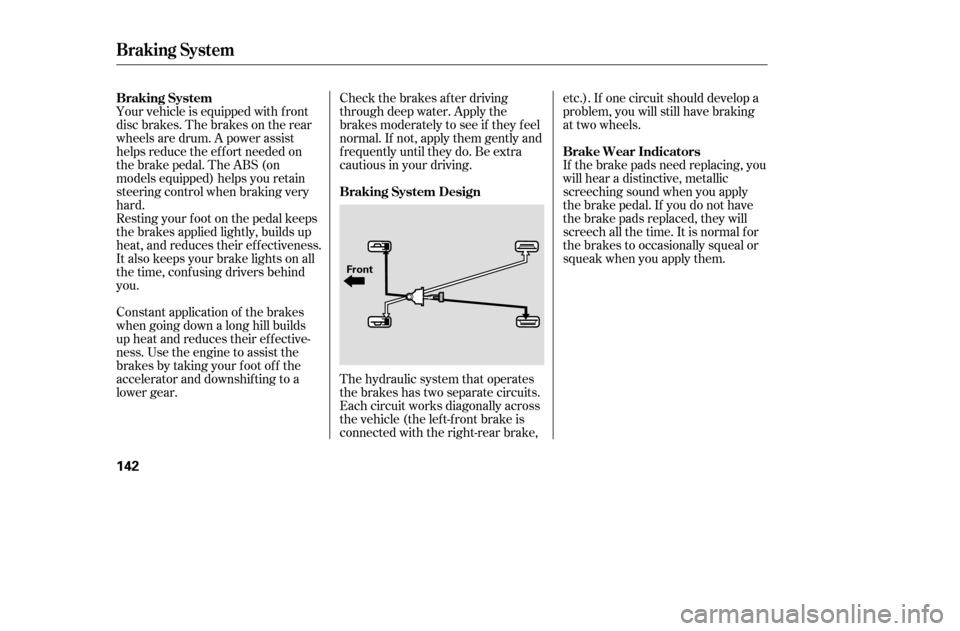
lower gear. The hydraulic system that operates
the brakes has two separate circuits.
Each circuit works diagonally across
the vehicle (the lef t-f ront brake is
connected with the right-rear brake,etc.). If one circuit should develop a
problem, you will still have braking
at two wheels.
If the brake pads need replacing, you
will hear a distinctive, metallic
screeching sound when you apply
the brake pedal. If you do not have
the brake pads replaced, they will
screech all the time. It is normal f or
the brakes to occasionally squeal or
squeak when you apply them.
Braking System
Braking System
Braking System DesignBrake Wear Indicators
142
Front
�����—�����—�����y�
�������������y���
�(�����������y���
�����y
Page 135 of 223

The Anti-lock Brake System (ABS)
helps prevent the brakes f rom
locking up and helps you retain
steering control by pumping the
brakes rapidly; much f aster than a
person.
Let the ABS work f or you by always
keeping f irm, steady pressure on the
brake pedal. This is sometimes
ref erred to as ‘‘stomp and steer.’’such as trying to take a
corner too f ast or making a sudden
lane change.
Always steer moderately
when you are braking hard. Severe
or sharp steering wheel movement
can still cause your vehicle to veer
into oncoming traffic or off the road.
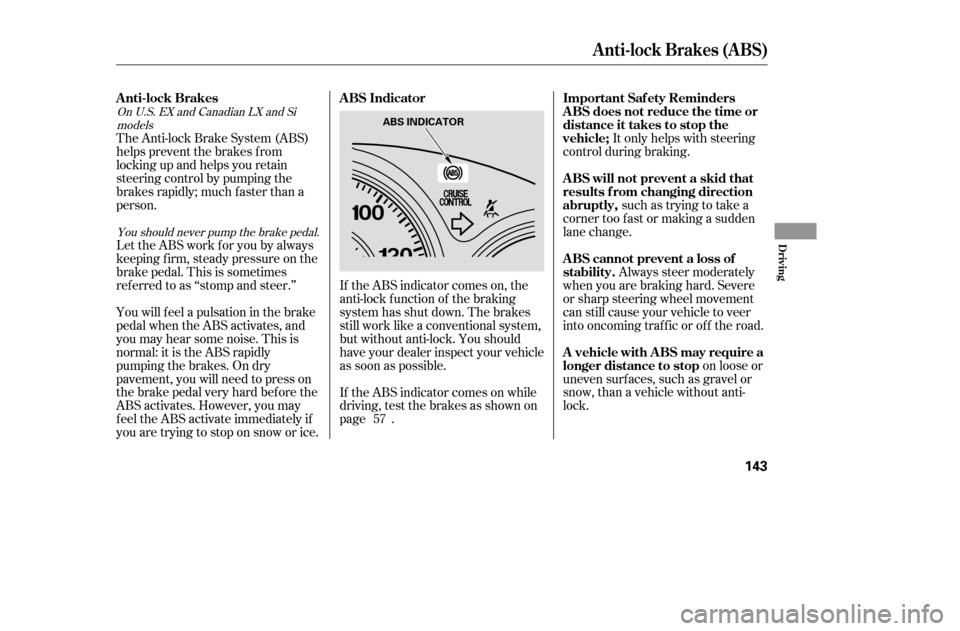
If the ABS indicator comes on, the
anti-lock f unction of the braking
system has shut down. The brakes
still work like a conventional system,
but without anti-lock. You should
have your dealer inspect your vehicle
as soon as possible. It only helps with steering
control during braking.
on loose or
uneven surf aces, such as gravel or
snow, than a vehicle without anti-
lock.
You will f eel a pulsation in the brake
pedal when the ABS activates, and
you may hear some noise. This is
normal: it is the ABS rapidly
pumpingthebrakes.Ondry
pavement, you will need to press on
thebrakepedalveryhardbeforethe
ABS activates. However, you may
feel the ABS activate immediately if
you are trying to stop on snow or ice.
If the ABS indicator comes on while
driving, test the brakes as shown on
page .
57
You should never pump the brake pedal.
On U.S. EX and Canadian LX and Si
models
ABS Indicator Important Saf ety Reminders
A BS will not prevent a skid that
results f rom changing direction
abruptly,
A BS cannot prevent a loss of
stability.
Anti-lock Brakes
A BS does not reduce the time or
distance it takes to stop the
vehicle;
A vehicle with A BS may require a
longer distance to stop
Anti-lock Brakes (ABS)
Driving
143
ABS INDICATOR
�����—�����—�����y�
�������������y���
�(�����������y���
�����y
Page 153 of 223

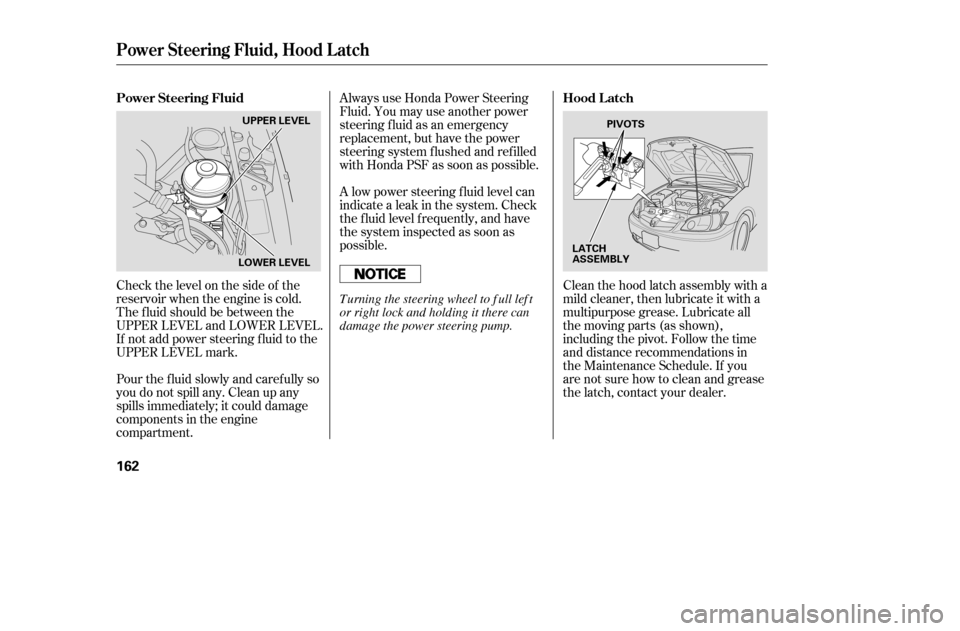
Check the level on the side of the
reservoir when the engine is cold.
The f luid should be between the
UPPER LEVEL and LOWER LEVEL.
If not add power steering f luid to the
UPPER LEVEL mark.Clean the hood latch assembly with a
mild cleaner, then lubricate it with a
multipurpose grease. Lubricate all
the moving parts (as shown),
including the pivot. Follow the time
and distance recommendations in
the Maintenance Schedule. If you
are not sure how to clean and grease
the latch, contact your dealer.
Always use Honda Power Steering
Fluid. You may use another power
steering f luid as an emergency
replacement, but have the power
steering system f lushed and ref illed
with Honda PSF as soon as possible.
Pour the f luid slowly and caref ully so
you do not spill any. Clean up any
spills immediately; it could damage
components in the engine
compartment. A low power steering f luid level can
indicate a leak in the system. Check
the f luid level f requently, and have
the system inspected as soon as
possible.
Power Steering Fluid, Hood L atch
Power Steering Fluid
Hood L atch
162
UPPER LEVEL
LOWER LEVEL PIVOTS
LATCH
ASSEMBLY
T urning the steering wheel to f ull lef t
or right lock and holding it there can
damage the power steering pump.
�����—�����—�����y�
�������������y���
�(�����������y���
�����y
Page 156 of 223

Push the electrical connector back
onto the bulb. Make sure it is on
all the way.
Turn on the headlights to test the
new bulb.
(Passenger’s side)
Put the battery back to its original
position, reinstall the bolt in the
stay and tighten it securely.
If you removed the upper part of
the windshield reservoir, put it
back in place. Install the holding
clip. Lock it in place by pushing on
the center.
Reinstall the power steering
reservoir.
(Driver’s side)
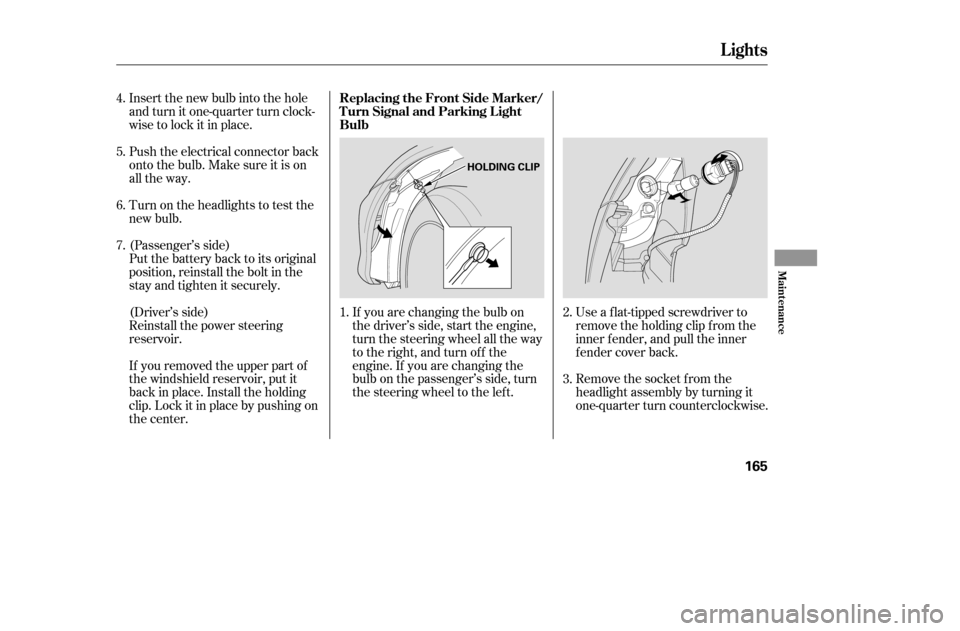
Use a f lat-tipped screwdriver to
remove the holding clip f rom the
inner f ender, and pull the inner
f ender cover back.
Remove the socket from the
headlight assembly by turning it
one-quarter turn counterclockwise.
If you are changing the bulb on
the driver’s side, start the engine,
turn the steering wheel all the way
to the right, and turn off the
engine. If you are changing the
bulb on the passenger’s side, turn
the steering wheel to the left.
Insert the new bulb into the hole
and turn it one-quarter turn clock-
wise to lock it in place.
2.
4. 5.6.
1.3.
7.
Lights
Replacing the Front Side Marker/
Turn Signal and Parking L ightBulb
Maint enance
165
HOLDING CLIP
�����—�����—�����y�
������
������y���
�(�����������y���
�����y