2005 GMC SIERRA DENALI tow
[x] Cancel search: towPage 269 of 428
Parking on Hills
{CAUTION:
You really should not park your vehicle, with a
trailer attached, on a hill. If something goes
wrong, your rig could start to move. People
can be injured, and both your vehicle and the
trailer can be damaged.
But if you ever have to park your rig on a hill, here’s
how to do it:
1. Apply your regular brakes, but don’t shift into
PARK (P) yet.
2. Have someone place chocks under the trailer
wheels.
3. When the wheel chocks are in place, release the
regular brakes until the chocks absorb the load.
4. Reapply the regular brakes. Then apply your
parking brake and shift into PARK (P).
5. Release the regular brakes.
When You Are Ready to Leave After
Parking on a Hill
1. Apply your regular brakes and hold the pedal down
while you:
start your engine,
shift into a gear, and
release the parking brake.
2. Let up on the brake pedal.
3. Drive slowly until the trailer is clear of the chocks.
4. Stop and have someone pick up and store the
chocks.
Maintenance When Trailer Towing
Your vehicle will need service more often when you’re
pulling a trailer. See the Maintenance Schedule for more
on this. Things that are especially important in trailer
operation are automatic transmission �uid (don’t over�ll),
engine oil, axle lubricant, belts, cooling system and brake
system. Each of these is covered in this manual, and the
Index will help you �nd them quickly. If you’re trailering,
it’s a good idea to review these sections before you start
your trip.
Check periodically to see that all hitch nuts and bolts
are tight.
4-61
Page 270 of 428
Trailer Wiring Harness
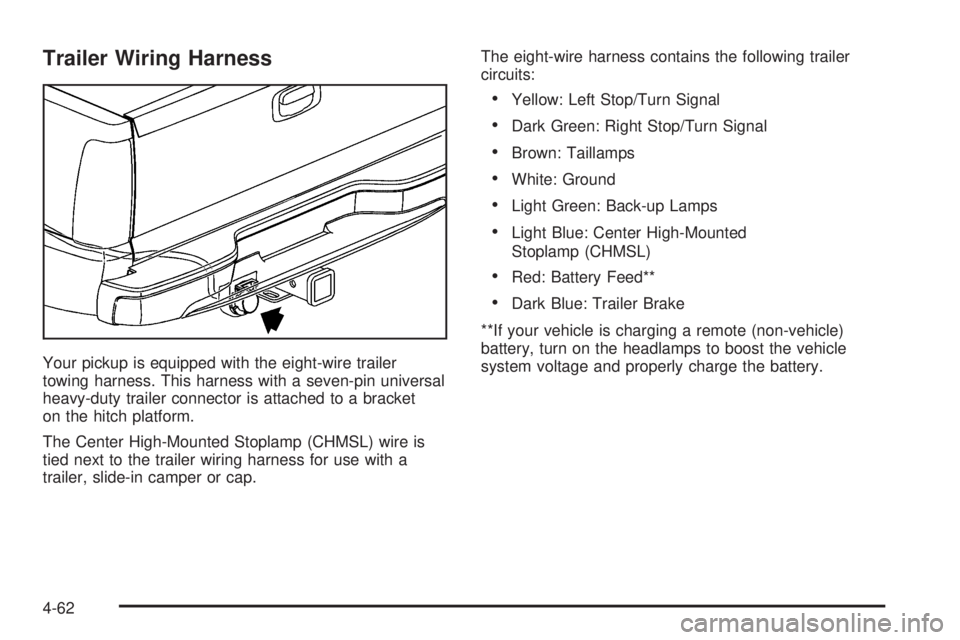
Your pickup is equipped with the eight-wire trailer
towing harness. This harness with a seven-pin universal
heavy-duty trailer connector is attached to a bracket
on the hitch platform.
The Center High-Mounted Stoplamp (CHMSL) wire is
tied next to the trailer wiring harness for use with a
trailer, slide-in camper or cap.The eight-wire harness contains the following trailer
circuits:
Yellow: Left Stop/Turn Signal
Dark Green: Right Stop/Turn Signal
Brown: Taillamps
White: Ground
Light Green: Back-up Lamps
Light Blue: Center High-Mounted
Stoplamp (CHMSL)
Red: Battery Feed**
Dark Blue: Trailer Brake
**If your vehicle is charging a remote (non-vehicle)
battery, turn on the headlamps to boost the vehicle
system voltage and properly charge the battery.
4-62
Page 286 of 428
Engine Oil
If the CHECK OIL LEVEL message appears on the
Driver Information Center (DIC), it means you need to
check your engine oil level right away. For more
information, see CHECK OIL LEVEL underDIC
Warnings and Messages on page 3-45.
You should check your engine oil level regularly; this is
an added reminder.
Checking Engine Oil
It is a good idea to check your engine oil every time you
get fuel. In order to get an accurate reading, the oil
must be warm and the vehicle must be on level ground.
The engine oil dipstick handle is a yellow loop. See
Engine Compartment Overview on page 5-12for
the location of the engine oil dipstick.
1. Turn off the engine and give the oil several minutes
to drain back into the oil pan. If you do not do this,
the oil dipstick might not show the actual level.
2. Pull out the dipstick and clean it with a paper towel
or cloth, then push it back in all the way. Remove it
again, keeping the tip down, and check the level.
When to Add Engine Oil
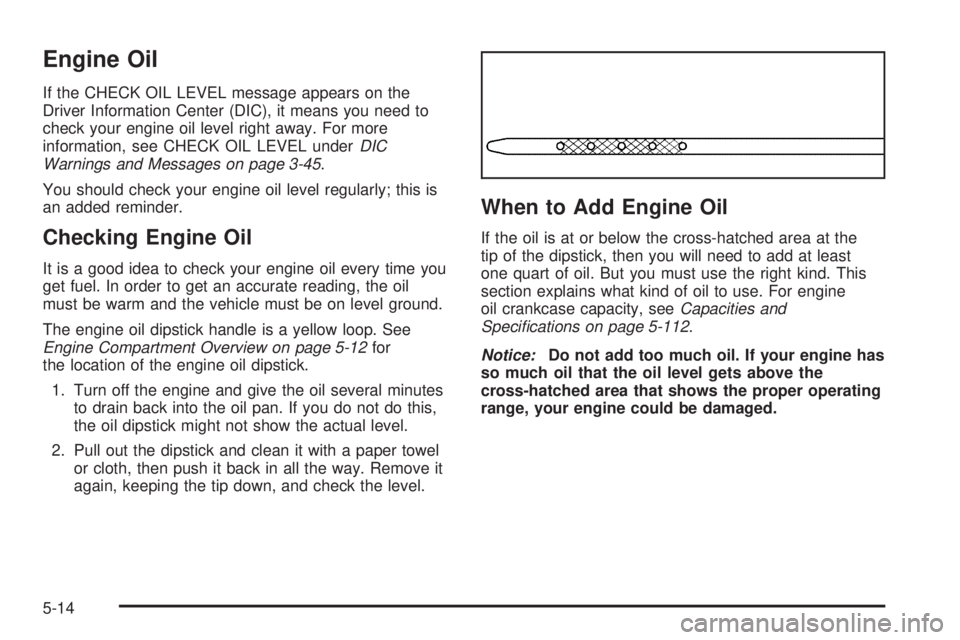
If the oil is at or below the cross-hatched area at the
tip of the dipstick, then you will need to add at least
one quart of oil. But you must use the right kind. This
section explains what kind of oil to use. For engine
oil crankcase capacity, seeCapacities and
Speci�cations on page 5-112.
Notice:Do not add too much oil. If your engine has
so much oil that the oil level gets above the
cross-hatched area that shows the proper operating
range, your engine could be damaged.
5-14
Page 293 of 428
{CAUTION:
Operating the engine with the air cleaner/�lter
off can cause you or others to be burned. The
air cleaner not only cleans the air; it helps to
stop �ame if the engine back�res. If it is not
there and the engine back�res, you could
be burned. Do not drive with it off, and be
careful working on the engine with the air
cleaner/�lter off.
Automatic Transmission Fluid
When to Check and Change
A good time to check your automatic transmission �uid
level is when the engine oil is changed.
Change both the �uid and �lter every 50,000 miles
(83 000 km) if the vehicle is mainly driven under one or
more of these conditions:
In heavy city traffic where the outside temperature
regularly reaches 90°F (32°C) or higher.
In hilly or mountainous terrain.
When doing frequent trailer towing.
Uses such as found in taxi, police or delivery
service.
If you do not use your vehicle under any of these
conditions, change the �uid and �lter every
100,000 miles (166 000 km).
SeeScheduled Maintenance on page 6-4.
5-21
Page 295 of 428
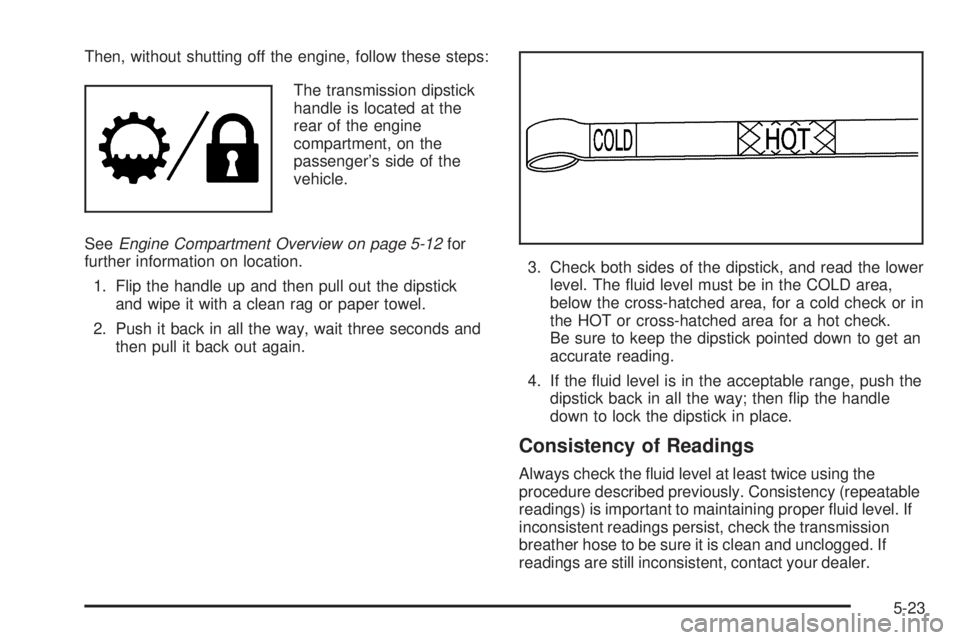
Then, without shutting off the engine, follow these steps:
The transmission dipstick
handle is located at the
rear of the engine
compartment, on the
passenger’s side of the
vehicle.
SeeEngine Compartment Overview on page 5-12for
further information on location.
1. Flip the handle up and then pull out the dipstick
and wipe it with a clean rag or paper towel.
2. Push it back in all the way, wait three seconds and
then pull it back out again.3. Check both sides of the dipstick, and read the lower
level. The �uid level must be in the COLD area,
below the cross-hatched area, for a cold check or in
the HOT or cross-hatched area for a hot check.
Be sure to keep the dipstick pointed down to get an
accurate reading.
4. If the �uid level is in the acceptable range, push the
dipstick back in all the way; then �ip the handle
down to lock the dipstick in place.
Consistency of Readings
Always check the �uid level at least twice using the
procedure described previously. Consistency (repeatable
readings) is important to maintaining proper �uid level. If
inconsistent readings persist, check the transmission
breather hose to be sure it is clean and unclogged. If
readings are still inconsistent, contact your dealer.
5-23
Page 299 of 428
If Steam Is Coming From Your Engine
{CAUTION:
Steam from an overheated engine can burn you
badly, even if you just open the hood. Stay away
from the engine if you see or hear steam coming
from it. Just turn it off and get everyone away
from the vehicle until it cools down. Wait until
there is no sign of steam or coolant before you
open the hood.
If you keep driving when your engine is
overheated, the liquids in it can catch �re. You
or others could be badly burned. Stop your
engine if it overheats, and get out of the vehicle
until the engine is cool.
SeeOverheated Engine Protection Operating
Mode on page 5-28for information on driving to
a safe place in an emergency.Notice:If your engine catches �re because you
keep driving with no coolant, your vehicle can
be badly damaged. The costly repairs would not be
covered by your warranty. SeeOverheated Engine
Protection Operating Mode on page 5-28for
information on driving to a safe place in an
emergency.
If No Steam Is Coming From Your
Engine
An overheat warning, along with a low coolant condition,
can indicate a serious problem.
If you get an engine overheat warning but see or hear
no steam, the problem may not be too serious.
Sometimes the engine can get a little too hot when you:
Climb a long hill on a hot day.
Stop after high-speed driving.
Idle for long periods in traffic.
Tow a trailer. SeeTowing a Trailer on page 4-52.
5-27
Page 300 of 428
If you get the overheat warning with no sign of steam,
try this for a minute or so:
1. If your air conditioner is on, turn it off.
2. Turn on your heater to full hot at the highest fan
speed and open the windows as necessary.
3. If you are in a traffic jam, shift to NEUTRAL (N);
otherwise, shift to the highest gear while
driving — DRIVE (D).
If you no longer have the overheat warning, you can
drive. Just to be safe, drive slower for about 10 minutes.
If the warning does not come back on, you can drive
normally.
If the warning continues, pull over, stop, and park your
vehicle right away.
If there is still no sign of steam and your vehicle is
equipped with an engine-driven cooling fan, push down
the accelerator until the engine speed is about twice
as fast as normal idle speed for at least three minutes
while you are parked.
If there is still no sign of steam and your vehicle is
equipped with an electric engine cooling fan, idle the
engine for three minutes while you are parked.If you still have the warning,turn off the engine and get
everyone out of the vehicleuntil it cools down. Also,
see “Overheated Engine Protection Operating Mode”
later in this section.
You may decide not to lift the hood but to get service
help right away.
Overheated Engine Protection
Operating Mode
If an overheated engine condition exists and the
REDUCED ENGINE POWER message is displayed, an
overheat protection mode which alternates �ring
groups of cylinders helps prevent engine damage. In
this mode, you will notice a loss in power and engine
performance. This operating mode allows your vehicle to
be driven to a safe place in an emergency. Driving
extended miles (km) and/or towing a trailer in the
overheat protection mode should be avoided.
Notice:After driving in the overheated engine
protection operating mode, to avoid engine damage,
allow the engine to cool before attempting any
repair. The engine oil will be severely degraded.
Repair the cause of coolant loss, change the oil and
reset the oil life system. SeeEngine Oil on
page 5-14.
5-28
Page 306 of 428
Engine Fan Noise
If your vehicle is equipped with a clutched engine cooling
fan, when the clutch is engaged, the fan spins faster to
provide more air to cool the engine. In most everyday
driving conditions, the fan is spinning slower and the
clutch is not fully engaged. This improves fuel economy
and reduces fan noise. Under heavy vehicle loading,
trailer towing, and/or high outside temperatures, the fan
speed increases as the clutch more fully engages, so you
may hear an increase in fan noise. This is normal and
should not be mistaken as the transmission slipping or
making extra shifts. It is merely the cooling system
functioning properly. The fan will slow down when
additional cooling is not required and the clutch
disengages.
You may also hear this fan noise when you start the
engine. It will go away as the fan clutch partially
disengages.
If your vehicle is equipped with electric cooling fans, you
may hear the fans spinning at low speed during most
everyday driving. The fans may turn off if no cooling is
required. Under heavy vehicle loading, trailer towing,
and/or high outside temperatures, or if you are operating
your air conditioning system, the fans change to high
speed and you may hear an increase in fan noise. This
is normal and indicates that the cooling system is
functioning properly. The fans will change to low speed
when additional cooling is no longer required.
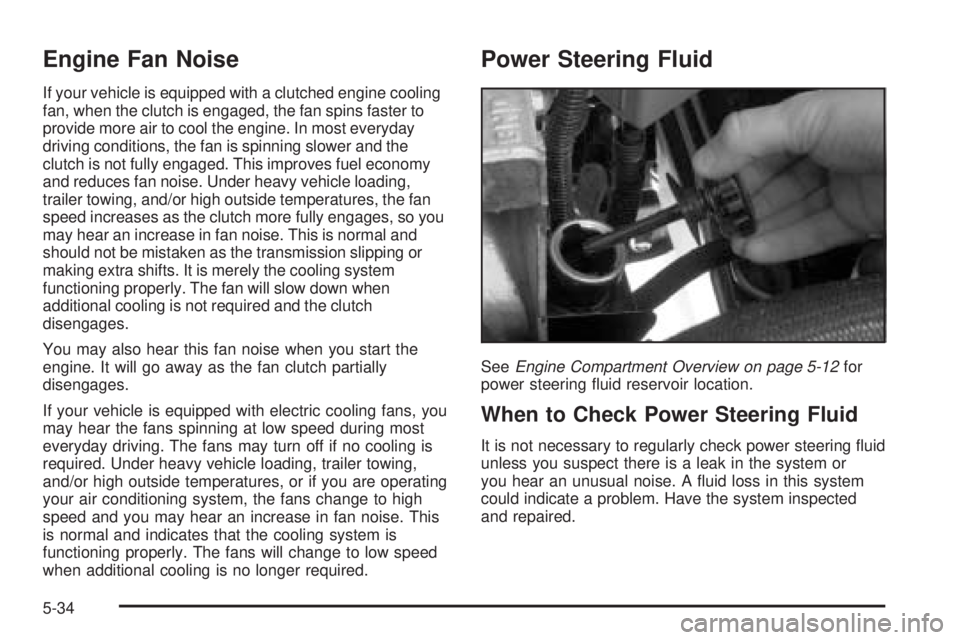
Power Steering Fluid
SeeEngine Compartment Overview on page 5-12for
power steering �uid reservoir location.
When to Check Power Steering Fluid
It is not necessary to regularly check power steering �uid
unless you suspect there is a leak in the system or
you hear an unusual noise. A �uid loss in this system
could indicate a problem. Have the system inspected
and repaired.
5-34