Page 66 of 428

Adding Equipment to Your
Airbag-Equipped Vehicle
Q:Is there anything I might add to the front or
sides of the vehicle that could keep the
airbags from working properly?
A:Yes. If you add things that change your vehicle’s
frame, bumper system, front end or side sheet metal
or height, they may keep the airbag system from
working properly. Also, the airbag system may not
work properly if you relocate any of the airbag
sensors. If you have any questions about this, you
should contact Customer Assistance before you
modify your vehicle. The phone numbers and
addresses for Customer Assistance are in Step Two
of the Customer Satisfaction Procedure in this
manual. SeeCustomer Satisfaction Procedure on
page 7-2.
Q:Because I have a disability, I have to get my
vehicle modi�ed. How can I �nd out whether
this will affect my advanced airbag system?
A:Changing or moving any parts of the front seats,
safety belts, the airbag sensing and diagnostic
module (located under the driver’s seat), or
the inside rearview mirror can affect the operation
of the advanced airbag system. If you have
questions, call Customer Assistance. The phone
numbers and addresses for Customer Assistance
are in Step Two of the Customer Satisfaction
Procedure in this manual. SeeCustomer
Satisfaction Procedure on page 7-2.
1-60
Page 100 of 428

Outside Power Mirrors
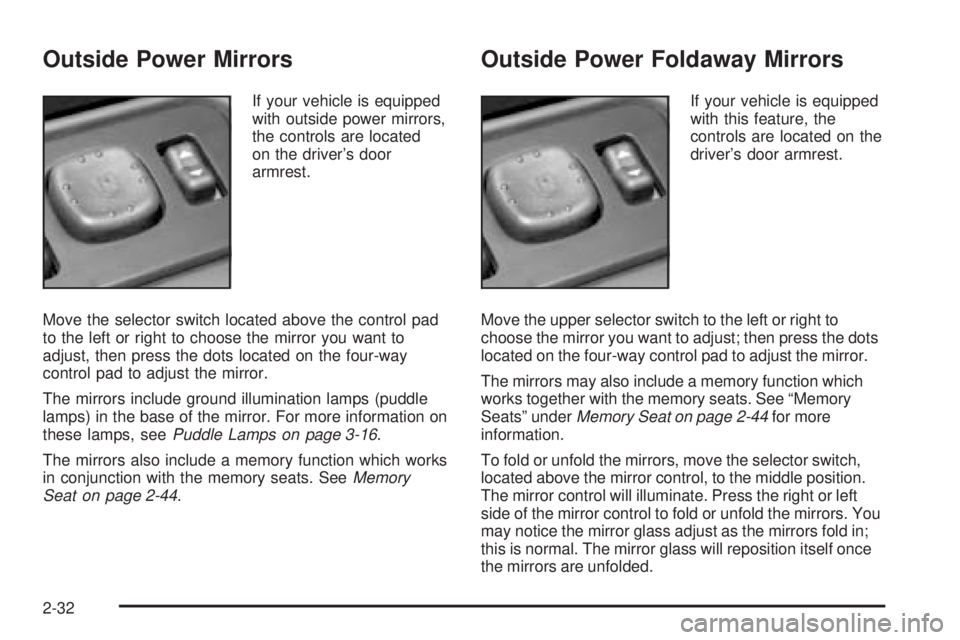
If your vehicle is equipped
with outside power mirrors,
the controls are located
on the driver’s door
armrest.
Move the selector switch located above the control pad
to the left or right to choose the mirror you want to
adjust, then press the dots located on the four-way
control pad to adjust the mirror.
The mirrors include ground illumination lamps (puddle
lamps) in the base of the mirror. For more information on
these lamps, seePuddle Lamps on page 3-16.
The mirrors also include a memory function which works
in conjunction with the memory seats. SeeMemory
Seat on page 2-44.
Outside Power Foldaway Mirrors
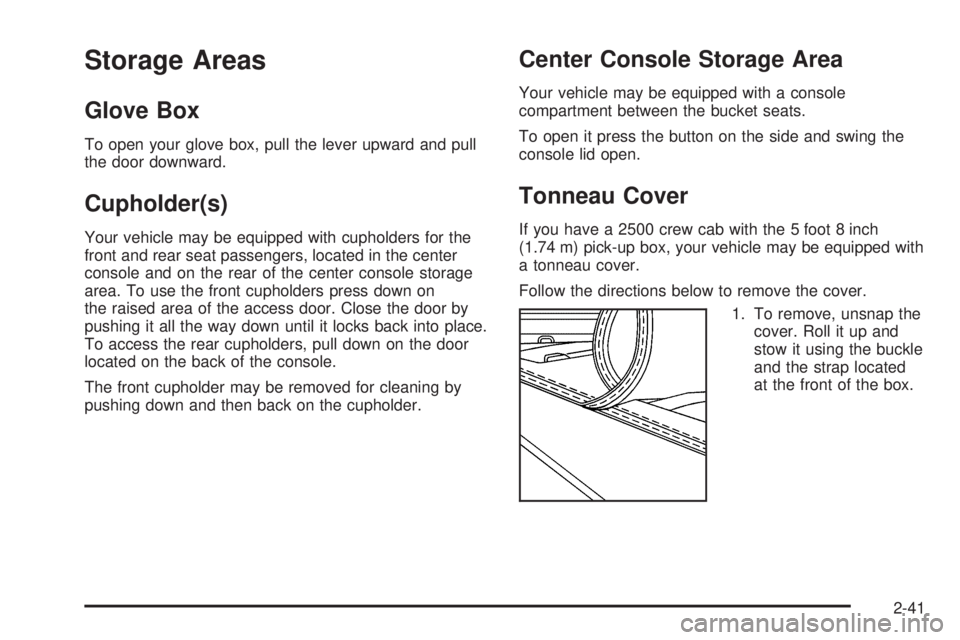
If your vehicle is equipped
with this feature, the
controls are located on the
driver’s door armrest.
Move the upper selector switch to the left or right to
choose the mirror you want to adjust; then press the dots
located on the four-way control pad to adjust the mirror.
The mirrors may also include a memory function which
works together with the memory seats. See “Memory
Seats” underMemory Seat on page 2-44for more
information.
To fold or unfold the mirrors, move the selector switch,
located above the mirror control, to the middle position.
The mirror control will illuminate. Press the right or left
side of the mirror control to fold or unfold the mirrors. You
may notice the mirror glass adjust as the mirrors fold in;
this is normal. The mirror glass will reposition itself once
the mirrors are unfolded.
2-32
Page 109 of 428

Storage Areas
Glove Box
To open your glove box, pull the lever upward and pull
the door downward.
Cupholder(s)
Your vehicle may be equipped with cupholders for the
front and rear seat passengers, located in the center
console and on the rear of the center console storage
area. To use the front cupholders press down on
the raised area of the access door. Close the door by
pushing it all the way down until it locks back into place.
To access the rear cupholders, pull down on the door
located on the back of the console.
The front cupholder may be removed for cleaning by
pushing down and then back on the cupholder.
Center Console Storage Area
Your vehicle may be equipped with a console
compartment between the bucket seats.
To open it press the button on the side and swing the
console lid open.
Tonneau Cover
If you have a 2500 crew cab with the 5 foot 8 inch
(1.74 m) pick-up box, your vehicle may be equipped with
a tonneau cover.
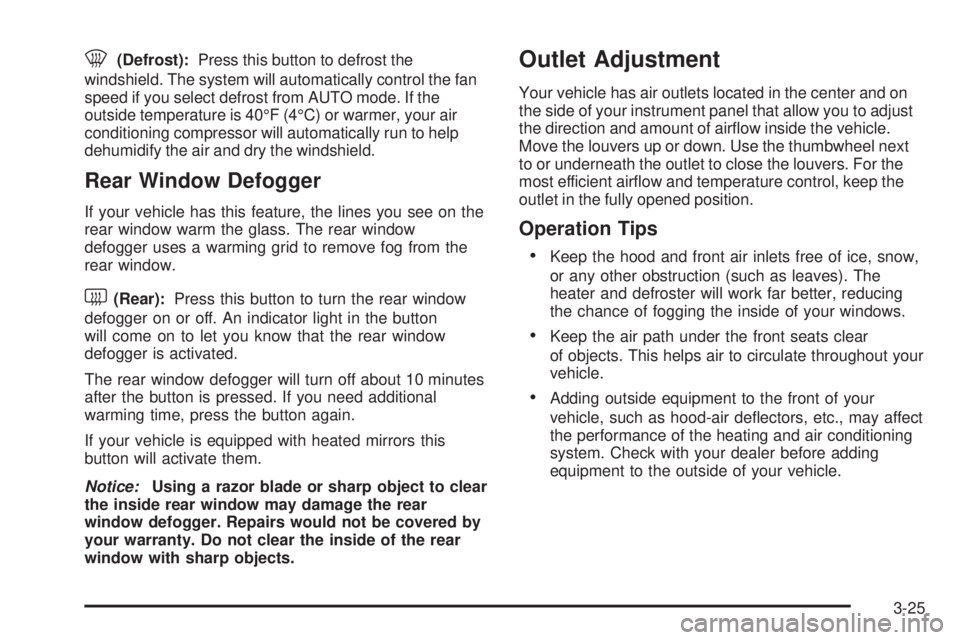
Follow the directions below to remove the cover.
1. To remove, unsnap the
cover. Roll it up and
stow it using the buckle
and the strap located
at the front of the box.
2-41
Page 139 of 428

0(Defrost):Press this button to defrost the
windshield. The system will automatically control the fan
speed if you select defrost from AUTO mode. If the
outside temperature is 40°F (4°C) or warmer, your air
conditioning compressor will automatically run to help
dehumidify the air and dry the windshield.
Rear Window Defogger
If your vehicle has this feature, the lines you see on the
rear window warm the glass. The rear window
defogger uses a warming grid to remove fog from the
rear window.
<(Rear):Press this button to turn the rear window
defogger on or off. An indicator light in the button
will come on to let you know that the rear window
defogger is activated.
The rear window defogger will turn off about 10 minutes
after the button is pressed. If you need additional
warming time, press the button again.
If your vehicle is equipped with heated mirrors this
button will activate them.
Notice:Using a razor blade or sharp object to clear
the inside rear window may damage the rear
window defogger. Repairs would not be covered by
your warranty. Do not clear the inside of the rear
window with sharp objects.
Outlet Adjustment
Your vehicle has air outlets located in the center and on
the side of your instrument panel that allow you to adjust
the direction and amount of air�ow inside the vehicle.
Move the louvers up or down. Use the thumbwheel next
to or underneath the outlet to close the louvers. For the
most efficient air�ow and temperature control, keep the
outlet in the fully opened position.
Operation Tips
Keep the hood and front air inlets free of ice, snow,
or any other obstruction (such as leaves). The
heater and defroster will work far better, reducing
the chance of fogging the inside of your windows.
Keep the air path under the front seats clear
of objects. This helps air to circulate throughout your
vehicle.
Adding outside equipment to the front of your
vehicle, such as hood-air de�ectors, etc., may affect
the performance of the heating and air conditioning
system. Check with your dealer before adding
equipment to the outside of your vehicle.
3-25
Page 255 of 428

{CAUTION:
Things you put inside your vehicle can strike
and injure people in a sudden stop or turn, or
in a crash.
Put things in the cargo area of your
vehicle. Try to spread the weight evenly.
Never stack heavier things, like suitcases,
inside the vehicle so that some of them
are above the tops of the seats.
Do not leave an unsecured child restraint
in your vehicle.
When you carry something inside the
vehicle, secure it whenever you can.
Do not leave a seat folded down unless
you need to.
There’s also important loading information for off-road
driving in this manual. See “Loading Your Vehicle
for Off-Road Driving“ underOperating Your
All-Wheel-Drive Vehicle Off Paved Roads on page 4-13.
Two-Tiered Loading
By positioning four 2” x 6” wooden planks across the
width of the pickup box, you can create an upper
load platform. The planks must be inserted in the pickup
box depressions. The length of the planks must allow
for at least a 3/4 inch (2 cm) bearing surface on
each end of the plank.
When using this upper load platform, be sure the load is
securely tied down to prevent it from shifting. The
load’s center of gravity should be positioned in a zone
over the rear axle. The zone is located in the area
between the front of each wheel well and the rear of
each wheel well. The center of gravity height must not
extend above the top of the pickup box �areboard.
Any load that extends beyond the vehicle’s taillamp area
must be properly marked according to local laws and
regulations.
Remember not to exceed the Gross Axle Weight
Rating (GAWR) of the front or rear axle.
4-47
Page 332 of 428

Tire Terminology and De�nitions
Air Pressure:The amount of air inside the tire pressing
outward on each square inch of the tire. Air pressure
is expressed in pounds per square inch (psi) or
kiloPascal (kPa).
Accessory Weight:This means the combined weight
of optional accessories. Some examples of optional
accessories are, automatic transmission, power steering,
power brakes, power windows, power seats, and air
conditioning.
Aspect Ratio:The relationship of a tire’s height to its
width.
Belt:A rubber coated layer of cords that is located
between the plies and the tread. Cords may be made
from steel or other reinforcing materials.
Bead:The tire bead contains steel wires wrapped by
steel cords that hold the tire onto the rim.
Bias Ply Tire:A pneumatic tire in which the plies are
laid at alternate angles less than 90 degrees to the
centerline of the tread.
Cold In�ation Pressure:The amount of air pressure in
a tire, measured in pounds per square inch (psi) or
kilopascals (kPa) before a tire has built up heat
from driving. SeeIn�ation - Tire Pressure on page 5-62.Curb Weight:This means the weight of a motor
vehicle with standard and optional equipment including
the maximum capacity of fuel, oil and coolant, but
without passengers and cargo.
DOT Markings:A code molded into the sidewall of a
tire signifying that the tire is in compliance with the U.S.
Department of Transportation (DOT) motor vehicle
safety standards. The DOT code includes the Tire
Identi�cation Number (TIN), an alphanumeric designator
which can also identify the tire manufacturer, production
plant, brand and date of production.
GVWR:Gross Vehicle Weight Rating, seeLoading
Your Vehicle on page 4-42.
GAWR FRT:Gross Axle Weight Rating for the front
axle, seeLoading Your Vehicle on page 4-42.
GAWR RR:Gross Axle Weight Rating for the rear axle,
seeLoading Your Vehicle on page 4-42.
Intended Outboard Sidewall:The side of an
asymmetrical tire, that must always face outward when
mounted on a vehicle.
KiloPascal (kPa):The metric unit for air pressure.
Light Truck (LT-Metric) Tire:A tire used on light duty
trucks and some multipurpose passenger vehicles.
5-60
Page 355 of 428
8. Tighten the nuts �rmly
in a crisscross
sequence as shown by
turning the wheel
wrench clockwise.
When you reinstall the regular wheel and tire, you must
also reinstall the center cap. Place the cap on the wheel
and tap it into place until it seats �ush with the wheel. The
cap only goes on one way. Be sure to line up the tab on
the center cap with the indentation on the wheel.Secondary Latch System
Your vehicle has an underbody-mounted tire hoist
assembly equipped with a secondary latch system. It is
designed to stop the spare tire from suddenly falling
off your vehicle. For the secondary latch to work,
the spare must be installed with the valve stem pointing
down. SeeStoring a Flat or Spare Tire and Tools on
page 5-87.
5-83
Page 376 of 428
Fuses Usage
RR WPR Not Used
SEO ACCYSpecial Equipment Option
Accessory
WS WPR Windshield Wipers
TBC ACCYTruck Body Controller
Accessory
Fuses Usage
IGN 3 Ignition, Heated Seats
4WDFour-Wheel Drive System,
Auxiliary Battery
HTR/AC Climate Control System
LOCK (Relay)Power Door Lock Relay
(Lock Function)
HVAC 1 Climate Control System
L DOORDriver’s Door Harness
Connection
CRUISECruise Control, Power Take
Off (PTO)
5-104