2005 GMC SIERRA DENALI automatic transmission
[x] Cancel search: automatic transmissionPage 128 of 428

;(Parking Lamps):Turning the control to this
position turns on the parking lamps, together with the
following:
Sidemarker Lamps
Taillamps
License Plate Lamps
Instrument Panel Lights
Roof Marker Lamps (If Equipped)
5(Headlamps):Turning the control to this position
turns on the headlamps, together with the previously
listed lamps and lights.
You can switch your headlamps from high to low-beam
by pushing the turn signal/multifunction lever towards
the instrument panel.
Headlamps on Reminder
A reminder chime will sound when your headlamps or
parking lamps are manually turned on and your ignition is
off, in LOCK, ACCESSORY, or your door is open. To
disable the chime, turn the light off, then back on.
Daytime Running Lamps (DRL)
Daytime Running Lamps (DRL) can make it easier for
others to see the front of your vehicle during the
day. DRL can be helpful in many different driving
conditions, but they can be especially helpful in the short
periods after dawn and before sunset. Fully functional
daytime running lamps are required on all vehicles
�rst sold in Canada.
The DRL system will come on when the following
conditions are met:
The ignition is on,
the exterior lamp control is in AUTO
the automatic transmission is not in PARK (P), and
the light sensor determines it is daytime.
When the DRL are on, only your DRL lamps will be on.
The taillamps, sidemarker and other lamps won’t be
on. The instrument panel won’t be lit up either.
When it begins to get dark, the automatic headlamp
system will switch from DRL to the headlamps or the last
chosen headlamp setting that was used.
When you turn the exterior lamp control to off, the
headlamps will go off, and your DRL lamps will
illuminate, provided it is not dark outside.
3-14
Page 129 of 428

Shifting the transmission into PARK (P) will allow you to
idle the vehicle with the DRL off. The DRL will stay
off until you release the parking brake or shift the
transmission out of PARK (P).
Automatic Headlamp System
When it is dark enough outside, your automatic
headlamp system will turn on your headlamps at the
normal brightness along with other lamps such as
the taillamps, sidemarker, parking lamps and the
instrument panel lights. The radio lights will also be dim.
Your vehicle is equipped with a headlamp off delay,
which will keep the headlamps on for a short time after
the ignition is turned off. For more information see
DIC Vehicle Customization on page 3-54.
Your vehicle has a light sensor located on the top of the
instrument panel in the defroster grille. Be sure it is
not covered, or the system will be on whenever
the ignition is on.
The system may also turn on your headlamps when
driving through a parking garage, heavy overcast
weather or a tunnel. This is normal.There is a delay in the transition between the daytime
and nighttime operation of the Daytime Running
Lamps (DRL) and the automatic headlamp systems so
that driving under bridges or bright overhead street
lights does not affect the system. The DRL and
automatic headlamp system will only be affected when
the light sensor sees a change in lighting lasting
longer than the delay.
If you start your vehicle in a dark garage, the automatic
headlamp system will come on immediately. Once
you leave the garage, it will take approximately
one minute for the automatic headlamp system to
change to DRL if it is bright enough outside. During that
delay, your instrument panel cluster may not be as
bright as usual. Make sure your instrument panel
brightness control is in the full bright position. See
Instrument Panel Brightness on page 3-16.
To idle your vehicle with the automatic headlamp
system off, turn the control to the off position.
You may be able to turn off your automatic headlamp
system. See Daytime Running Lamps (DRL) later in this
section for more information.
As with any vehicle, you should turn on the regular
headlamps if you need them.
3-15
Page 261 of 428
If You Do Decide To Pull A Trailer
If you do, here are some important points:
There are many different laws, including speed limit
restrictions, having to do with trailering. Make sure
your rig will be legal, not only where you live
but also where you’ll be driving. A good source for
this information can be state or provincial police.
Consider using a sway control. See “Hitches” later
in this section.
Don’t tow a trailer at all during the �rst 500 miles
(800 km) your new vehicle is driven. Your engine,
axle or other parts could be damaged.
Then, during the �rst 500 miles (800 km) that you
tow a trailer, don’t drive over 50 mph (80 km/h)
and don’t make starts at full throttle. This helps your
engine and other parts of your vehicle wear in at
the heavier loads.
You can tow in DRIVE (D). You may want to shift the
transmission to THIRD (3) or, if necessary, a lower
gear selection if the transmission shifts too often
(e.g., under heavy loads and/or hilly conditions).
Three important considerations have to do with weight:
the weight of the trailer
the weight of the trailer tongue
and the weight on your vehicle’s tires
Tow/Haul Mode
Tow/Haul is a feature that assists when pulling a heavy
trailer or a large or heavy load. The purpose of the
Tow/Haul mode is to:
Reduce the frequency and improve the predictability
of transmission shifts when pulling a heavy trailer or
a large or heavy load.
Provide the same solid shift feel when pulling a
heavy trailer or a large or heavy load as when
the vehicle is unloaded.
Improve control of vehicle speed while requiring
less throttle pedal activity when pulling a heavy
trailer or a large or heavy load.
Your vehicle may be equipped with a switch at the end
of the shift lever which when pressed enables
Tow/Haul. When the switch is pressed, a light on the
instrument panel will illuminate to indicate that Tow/Haul
has been selected. Tow/Haul may be turned off by
pressing the switch again, at which time the indicator
light on the instrument panel will turn off. The vehicle will
automatically turn off Tow/Haul every time it is started.
4-53
Page 268 of 428
Making Turns
Notice:Making very sharp turns while trailering
could cause the trailer to come in contact with the
vehicle. Your vehicle could be damaged. Avoid
making very sharp turns while trailering.
When you’re turning with a trailer, make wider turns
than normal. Do this so your trailer won’t strike
soft shoulders, curbs, road signs, trees or other objects.
Avoid jerky or sudden maneuvers. Signal well in
advance.
Turn Signals When Towing a Trailer
The arrows on your instrument panel will �ash whenever
you signal a turn or lane change. Properly hooked up,
the trailer lamps will also �ash, telling other drivers
you’re about to turn, change lanes or stop.
When towing a trailer, the arrows on your instrument
panel will �ash for turns even if the bulbs on the trailer
are burned out. Thus, you may think drivers behind
you are seeing your signal when they are not. It’s
important to check occasionally to be sure the trailer
bulbs are still working.
Driving On Grades
Reduce speed and shift to a lower gearbeforeyou start
down a long or steep downgrade. If you don’t shift
down, you might have to use your brakes so much that
they would get hot and no longer work well.
You can tow in DRIVE (D). You may want to shift the
transmission to THIRD (3) or, if necessary, a lower gear
selection if the transmission shifts too often (e.g., under
heavy loads and/or hilly conditions).
You may also want to activate the tow/haul mode if the
transmission shifts too often. See “Tow/Haul Mode”
earlier in this section.
When towing at high altitude on steep uphill grades,
consider the following: Engine coolant will boil at a lower
temperature than at normal altitudes. If you turn your
engine off immediately after towing at high altitude
on steep uphill grades, your vehicle may show signs
similar to engine overheating. To avoid this, let the
engine run while parked (preferably on level ground)
with the automatic transmission in PARK (P) for a
few minutes before turning the engine off. If you do get
the overheat warning, seeEngine Overheating on
page 5-26.
4-60
Page 269 of 428
Parking on Hills
{CAUTION:
You really should not park your vehicle, with a
trailer attached, on a hill. If something goes
wrong, your rig could start to move. People
can be injured, and both your vehicle and the
trailer can be damaged.
But if you ever have to park your rig on a hill, here’s
how to do it:
1. Apply your regular brakes, but don’t shift into
PARK (P) yet.
2. Have someone place chocks under the trailer
wheels.
3. When the wheel chocks are in place, release the
regular brakes until the chocks absorb the load.
4. Reapply the regular brakes. Then apply your
parking brake and shift into PARK (P).
5. Release the regular brakes.
When You Are Ready to Leave After
Parking on a Hill
1. Apply your regular brakes and hold the pedal down
while you:
start your engine,
shift into a gear, and
release the parking brake.
2. Let up on the brake pedal.
3. Drive slowly until the trailer is clear of the chocks.
4. Stop and have someone pick up and store the
chocks.
Maintenance When Trailer Towing
Your vehicle will need service more often when you’re
pulling a trailer. See the Maintenance Schedule for more
on this. Things that are especially important in trailer
operation are automatic transmission �uid (don’t over�ll),
engine oil, axle lubricant, belts, cooling system and brake
system. Each of these is covered in this manual, and the
Index will help you �nd them quickly. If you’re trailering,
it’s a good idea to review these sections before you start
your trip.
Check periodically to see that all hitch nuts and bolts
are tight.
4-61
Page 273 of 428
Service............................................................5-3
Doing Your Own Service Work.........................5-4
Adding Equipment to the Outside of Your
Vehicle......................................................5-5
Fuel................................................................5-5
Gasoline Octane............................................5-5
Gasoline Speci�cations....................................5-5
California Fuel...............................................5-6
Additives.......................................................5-6
Fuels in Foreign Countries...............................5-7
Filling Your Tank............................................5-7
Filling a Portable Fuel Container.......................5-9
Checking Things Under the Hood....................5-10
Hood Release..............................................5-10
Engine Compartment Overview.......................5-12
Engine Oil...................................................5-14
Engine Oil Life System..................................5-17
Engine Air Cleaner/Filter................................5-19
Automatic Transmission Fluid.........................5-21
Engine Coolant.............................................5-24
Coolant Surge Tank Pressure Cap..................5-26
Engine Overheating.......................................5-26
Overheated Engine Protection Operating Mode . . .5-28
Cooling System............................................5-29
Engine Fan Noise.........................................5-34
Power Steering Fluid.....................................5-34Windshield Washer Fluid................................5-36
Brakes........................................................5-37
Battery........................................................5-40
Jump Starting...............................................5-41
All-Wheel Drive..............................................5-46
Rear Axle.......................................................5-47
Front Axle......................................................5-48
Bulb Replacement..........................................5-49
Halogen Bulbs..............................................5-49
Headlamps..................................................5-49
Front Turn Signal, Sidemarker and Daytime
Running Lamps.........................................5-50
Center High-Mounted Stoplamp (CHMSL) and
Cargo Lamp.............................................5-51
Taillamps.....................................................5-53
Replacement Bulbs.......................................5-54
Windshield Wiper Blade Replacement..............5-55
Tires..............................................................5-56
Tire Sidewall Labelling...................................5-57
Tire Terminology and De�nitions.....................5-60
In�ation - Tire Pressure.................................5-62
Tire Inspection and Rotation...........................5-63
When It Is Time for New Tires.......................5-65
Buying New Tires.........................................5-66
Uniform Tire Quality Grading..........................5-67
Section 5 Service and Appearance Care
5-1
Page 285 of 428
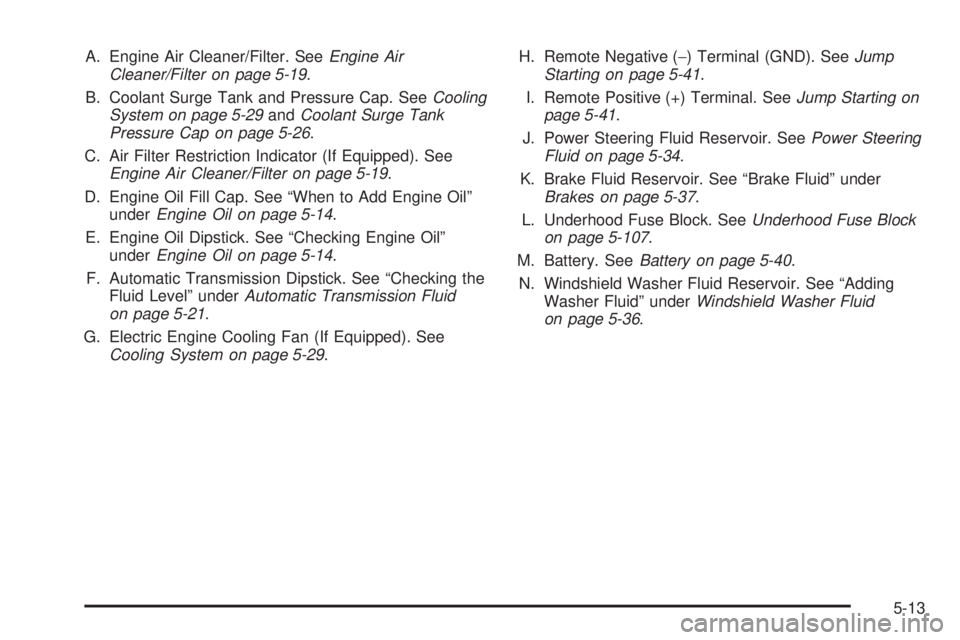
A. Engine Air Cleaner/Filter. SeeEngine Air
Cleaner/Filter on page 5-19.
B. Coolant Surge Tank and Pressure Cap. SeeCooling
System on page 5-29andCoolant Surge Tank
Pressure Cap on page 5-26.
C. Air Filter Restriction Indicator (If Equipped). See
Engine Air Cleaner/Filter on page 5-19.
D. Engine Oil Fill Cap. See “When to Add Engine Oil”
underEngine Oil on page 5-14.
E. Engine Oil Dipstick. See “Checking Engine Oil”
underEngine Oil on page 5-14.
F. Automatic Transmission Dipstick. See “Checking the
Fluid Level” underAutomatic Transmission Fluid
on page 5-21.
G. Electric Engine Cooling Fan (If Equipped). See
Cooling System on page 5-29.H. Remote Negative (−) Terminal (GND). SeeJump
Starting on page 5-41.
I. Remote Positive (+) Terminal. SeeJump Starting on
page 5-41.
J. Power Steering Fluid Reservoir. SeePower Steering
Fluid on page 5-34.
K. Brake Fluid Reservoir. See “Brake Fluid” under
Brakes on page 5-37.
L. Underhood Fuse Block. SeeUnderhood Fuse Block
on page 5-107.
M. Battery. SeeBattery on page 5-40.
N. Windshield Washer Fluid Reservoir. See “Adding
Washer Fluid” underWindshield Washer Fluid
on page 5-36.
5-13
Page 293 of 428
{CAUTION:
Operating the engine with the air cleaner/�lter
off can cause you or others to be burned. The
air cleaner not only cleans the air; it helps to
stop �ame if the engine back�res. If it is not
there and the engine back�res, you could
be burned. Do not drive with it off, and be
careful working on the engine with the air
cleaner/�lter off.
Automatic Transmission Fluid
When to Check and Change
A good time to check your automatic transmission �uid
level is when the engine oil is changed.
Change both the �uid and �lter every 50,000 miles
(83 000 km) if the vehicle is mainly driven under one or
more of these conditions:
In heavy city traffic where the outside temperature
regularly reaches 90°F (32°C) or higher.
In hilly or mountainous terrain.
When doing frequent trailer towing.
Uses such as found in taxi, police or delivery
service.
If you do not use your vehicle under any of these
conditions, change the �uid and �lter every
100,000 miles (166 000 km).
SeeScheduled Maintenance on page 6-4.
5-21