2005 GMC SAVANA belt
[x] Cancel search: beltPage 187 of 384
Care of Your Cassette Tape Player
A tape player that is not cleaned regularly can cause
reduced sound quality, ruined cassettes, or a damaged
mechanism. Cassette tapes should be stored in their
cases away from contaminants, direct sunlight, and
extreme heat. If they are not, they may not operate
properly or may cause failure of the tape player.
The tape player should be cleaned regularly after every
50 hours of use. The radio may display CLEAN to
indicate that the tape player has been used for 50 hours
without resetting the tape clean timer. If this message
appears on the display, the cassette tape player
needs to be cleaned. It will still play tapes, but it should
be cleaned as soon as possible to prevent damage
to the tapes and player. If there is a reduction in sound
quality, try a known good cassette to see if the tape
or the tape player is at fault. If this other cassette has no
improvement in sound quality, clean the tape player.
For best results, use a scrubbing action, non-abrasive
cleaning cassette with pads which scrub the tape
head as the hubs of the cleaner cassette turn. The
recommended cleaning cassette is available through
your dealer.
When cleaning the cassette tape player with the
recommended non-abrasive cleaning cassette, it is
possible that the cassette may eject, because the cuttape detection feature on the radio may recognize it as
a broken tape, in error. To prevent the cleaning
cassette from being ejected, use the following steps:
1. Turn the ignition on.
2. Turn the radio off.
3. Press and hold the TAPE DISC button for ve
seconds. READY will appear on the display and
the cassette symbol will ash for ve seconds.
4. Insert the scrubbing action cleaning cassette.
5. Eject the cleaning cassette after the manufacturer’s
recommended cleaning time.
When the cleaning cassette has been ejected, the
cut tape detection feature will be active again.
A non-scrubbing action, wet-type cleaner which uses a
cassette with a fabric belt to clean the tape head
can be used. This type of cleaning cassette will not
eject on its own. A non-scrubbing action cleaner may not
clean as thoroughly as the scrubbing type cleaner.
The use of a non-scrubbing action, dry-type cleaning
cassette is not recommended.
After the player is cleaned, press and hold the eject
button for ve seconds to reset the CLEAN indicator.
The radio will display --- or CLEANED to show the
indicator was reset.
3-73
Page 190 of 384
Your Driving, the Road, and
Your Vehicle
Defensive Driving
The best advice anyone can give about driving is:
Drive defensively.
Please start with a very important safety device in your
vehicle: Buckle up. SeeSafety Belts: They Are for
Everyone on page 1-10.
Defensive driving really means “be ready for anything.”
On city streets, rural roads, or freeways, it means
“always expect the unexpected.”
Assume that pedestrians or other drivers are going to
be careless and make mistakes. Anticipate what
they might do. Be ready for their mistakes.Rear-end collisions are about the most preventable of
accidents. Yet they are common. Allow enough following
distance. It is the best defensive driving maneuver, in
both city and rural driving. You never know when the
vehicle in front of you is going to brake or turn suddenly.
Defensive driving requires that a driver concentrate on
the driving task. Anything that distracts from the
driving task — such as concentrating on a cellular
telephone call, reading, or reaching for something on
the oor — makes proper defensive driving more difficult
and can even cause a collision, with resulting injury.
Ask a passenger to help do things like this, or pull off the
road in a safe place to do them yourself. These simple
defensive driving techniques could save your life.
4-2
Page 201 of 384
An emergency like this requires close attention and a
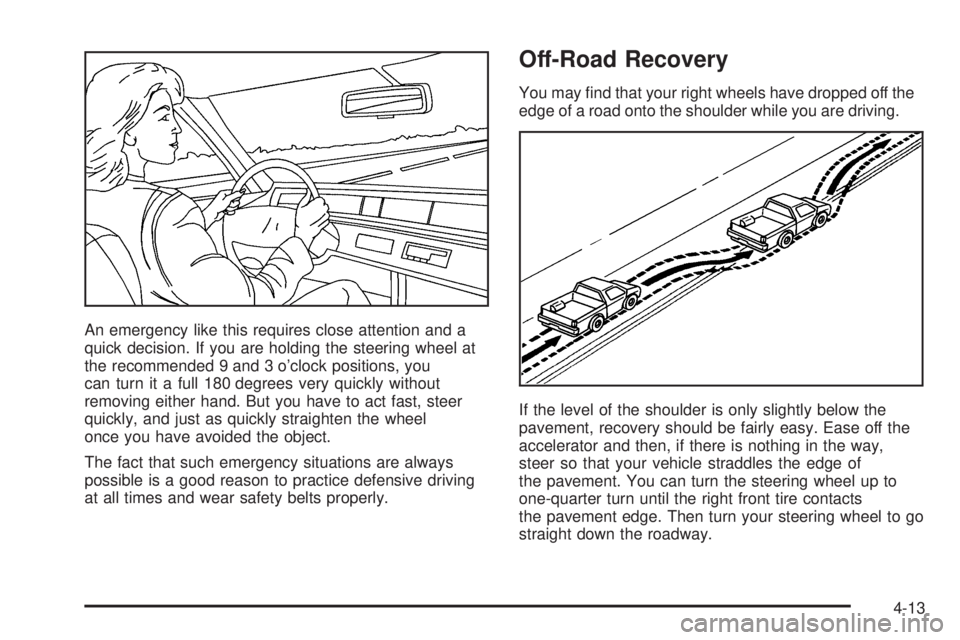
quick decision. If you are holding the steering wheel at
the recommended 9 and 3 o’clock positions, you
can turn it a full 180 degrees very quickly without
removing either hand. But you have to act fast, steer
quickly, and just as quickly straighten the wheel
once you have avoided the object.
The fact that such emergency situations are always
possible is a good reason to practice defensive driving
at all times and wear safety belts properly.
Off-Road Recovery
You may nd that your right wheels have dropped off the
edge of a road onto the shoulder while you are driving.
If the level of the shoulder is only slightly below the
pavement, recovery should be fairly easy. Ease off the
accelerator and then, if there is nothing in the way,
steer so that your vehicle straddles the edge of
the pavement. You can turn the steering wheel up to
one-quarter turn until the right front tire contacts
the pavement edge. Then turn your steering wheel to go
straight down the roadway.
4-13
Page 237 of 384

When You Are Ready to Leave After
Parking on a Hill
1. Apply your regular brakes and hold the pedal down
while you:
start your engine,
shift into a gear, and
release the parking brake.
2. Let up on the brake pedal.
3. Drive slowly until the trailer is clear of the chocks.
4. Stop and have someone pick up and store
the chocks.
Maintenance When Trailer Towing
Your vehicle will need service more often when you’re
pulling a trailer. See the Maintenance Schedule for more
on this. Things that are especially important in trailer
operation are automatic transmission uid (don’t overll),
engine oil, axle lubricant, belt, cooling system and
brake system. Each of these is covered in this manual,
and the Index will help you nd them quickly. If you’re
trailering, it’s a good idea to review these sections
before you start your trip.
Check periodically to see that all hitch nuts and bolts
are tight.
Trailer Wiring Harness
The optional heavy-duty trailer wiring package includes
a seven-wire harness assembly at the rear of the
vehicle and a four-wire harness assembly under the
left hand side of the instrument panel. The seven-wire
harness assembly is taped together and located in
a frame pocket at the driver side rear left corner of the
frame. The seven-wire harness includes a 30-amp
feed wire. Both harnesses come without connectors and
should be wired by a qualied electrical technician.
The technician can use the following color code chart
when connecting the wiring harness to your trailer
and trailer brake controller.
Seven-Wire Harness
Light Green: Back-up lamps
Brown: Parking lamps
Yellow: Left stoplamp and turn signal
Dark Green: Right stoplamp and turn signal
Dark Blue: Use for electric trailer brakes
Orange: Trailer accessory
White (heavy gage): Ground wire
Four-Wire Harness (Trailer Brake Controller)
Black: Ground
Red/White Stripe: Fused Battery
Dark Blue: Trailer Brake Feed
Light Blue: Fused Stoplamp/CHMSL
4-49
Page 240 of 384

Windshield Wiper Blade Replacement..............5-51
Tires..............................................................5-52
Tire Sidewall Labelling...................................5-53
Tire Terminology and Denitions.....................5-56
Ination - Tire Pressure.................................5-58
Dual Tire Operation.......................................5-60
Tire Inspection and Rotation...........................5-60
When It Is Time for New Tires.......................5-62
Buying New Tires.........................................5-63
Uniform Tire Quality Grading..........................5-64
Wheel Alignment and Tire Balance..................5-65
Wheel Replacement......................................5-65
Tire Chains..................................................5-67
If a Tire Goes Flat........................................5-68
Changing a Flat Tire.....................................5-68
Removing the Spare Tire and Tools................5-70
Removing the Flat Tire and Installing
the Spare Tire..........................................5-73
Secondary Latch System...............................5-79
Storing a Flat or Spare Tire and Tools............5-82
Spare Tire...................................................5-83
Appearance Care............................................5-84
Fabric/Carpet...............................................5-85
Vinyl...........................................................5-86
Instrument Panel..........................................5-86
Interior Plastic Components............................5-86Glass Surfaces.............................................5-86
Care of Safety Belts......................................5-87
Weatherstrips...............................................5-87
Washing Your Vehicle...................................5-87
Cleaning Exterior Lamps/Lenses.....................5-88
Finish Care..................................................5-88
Windshield and Wiper Blades.........................5-89
Aluminum Wheels.........................................5-89
Tires...........................................................5-90
Sheet Metal Damage.....................................5-90
Finish Damage.............................................5-90
Underbody Maintenance................................5-90
Chemical Paint Spotting.................................5-90
Vehicle Care/Appearance Materials..................5-91
Vehicle Identication......................................5-92
Vehicle Identication Number (VIN).................5-92
Service Parts Identication Label.....................5-92
Electrical System............................................5-93
Add-On Electrical Equipment..........................5-93
Headlamp Wiring..........................................5-93
Windshield Wiper Fuses................................5-93
Fuses and Circuit Breakers............................5-93
Floor Console Fuse Block..............................5-94
Engine Compartment Fuse Block....................5-95
Capacities and Specications..........................5-98
Section 5 Service and Appearance Care
5-2
Page 293 of 384

(G) Single Tire Maximum Load:Maximum load that
can be carried and the maximum pressure needed
to support that load when used as a single. For
information on recommended tire pressure see
Ination - Tire Pressure on page 5-58andLoading Your
Vehicle on page 4-31.
Tire Size
The following examples show the different parts of
a tire size.(A) Passenger (P-Metric) Tire:The United States
version of a metric tire sizing system. The letter P as the
rst character in the tire size means a passenger
vehicle tire engineered to standards set by the U.S. Tire
and Rim Association.
(A) Light Truck (LT-Metric) Tire:The United States
version of a metric tire sizing system. The letters LT as
the rst two characters in the tire size means a light
truck tire engineered to standards set by the U.S. Tire
and Rim Association.
(B) Tire Width:The three-digit number indicates the
tire section width in millimeters from sidewall to sidewall.
(C) Aspect Ratio:A two-digit number that indicates
the tire height-to-width measurements. For example, if
the tire size aspect ratio is 75, as shown in item C of the
light truck (LT-Metric) tire illustration, it would mean
that the tire’s sidewall is 75% as high as it is wide.
(D) Construction Code:A letter code is used to
indicate the type of ply construction in the tire. The letter
R means radial ply construction; the letter D means
diagonal or bias ply construction; and the letter B means
belted-bias ply construction.
(E) Rim Diameter:Diameter of the wheel in inches.
(F) Service Description:The service description
indicates the load range and speed rating of a tire. The
load index can range from 1 to 279. Speed ratings
range from A to Z. Passenger (P-Metric) Tire
Light Truck (LT-Metric) Tire
5-55
Page 294 of 384

Tire Terminology and Denitions
Air Pressure:The amount of air inside the tire pressing
outward on each square inch of the tire. Air pressure
is expressed in pounds per square inch (psi) or
kiloPascal (kPa).
Accessory Weight:This means the combined weight
of optional accessories. Some examples of optional
accessories are, automatic transmission, power steering,
power brakes, power windows, power seats, and air
conditioning.
Aspect Ratio:The relationship of a tire’s height
to its width.
Belt:A rubber coated layer of cords that is located
between the plies and the tread. Cords may be made
from steel or other reinforcing materials.
Bead:The tire bead contains steel wires wrapped by
steel cords that hold the tire onto the rim.
Bias Ply Tire:A pneumatic tire in which the plies are
laid at alternate angles less than 90 degrees to the
centerline of the tread.Cold Ination Pressure:The amount of air pressure in
a tire, measured in pounds per square inch (psi) or
kilopascals (kPa) before a tire has built up heat
from driving. SeeInation - Tire Pressure on page 5-58.
Curb Weight:This means the weight of a motor
vehicle with standard and optional equipment including
the maximum capacity of fuel, oil and coolant, but
without passengers and cargo.
DOT Markings:A code molded into the sidewall of a
tire signifying that the tire is in compliance with the U.S.
Department of Transportation (DOT) motor vehicle
safety standards. The DOT code includes the Tire
Identication Number (TIN), an alphanumeric designator
which can also identify the tire manufacturer, production
plant, brand and date of production.
GVWR:Gross Vehicle Weight Rating, seeLoading
Your Vehicle on page 4-31.
GAWR FRT:Gross Axle Weight Rating for the front
axle, seeLoading Your Vehicle on page 4-31.
GAWR RR:Gross Axle Weight Rating for the rear axle,
seeLoading Your Vehicle on page 4-31.
Intended Outboard Sidewall:The side of an
asymmetrical tire, that must always face outward when
mounted on a vehicle.
5-56
Page 301 of 384

The tire has a bump, bulge or split.
The tire has a puncture, cut or other damage that
can’t be repaired well because of the size or
location of the damage.
Buying New Tires
To nd out what kind and size of tires you need, look at
the Certication/Tire label or the Tire and Loading
Information label. For examples of these labels and their
location on your vehicle, seeLoading Your Vehicle on
page 4-31.
The tires installed on your vehicle when it was new had a
Tire Performance Criteria Specication (TPC Spec)
number on each tire’s sidewall. When you get new tires,
General Motors recommends that you get tires with that
same TPC Spec number. That way your vehicle will
continue to have tires that are designed to give proper
endurance, handling, speed rating, load range, traction,
ride and other things during normal service on your
vehicle. If your tires have an all-season tread design, the
TPC number will be followed by an “MS” (for mud
and snow).
If you replace your tires with those not having a TPC
Spec number, make sure they are the same size, load
range, speed rating and construction type (bias,
bias-belted or radial) as your original tires.
{CAUTION:
Mixing tires could cause you to lose control
while driving. If you mix tires of different sizes
or types (radial and bias-belted tires) the
vehicle may not handle properly, and you
could have a crash. Using tires of different
sizes may also cause damage to your vehicle.
Be sure to use the same size and type tires on
all wheels.
{CAUTION:
If you use bias-ply tires on your vehicle, the
wheel rim anges could develop cracks after
many miles of driving. A tire and/or wheel
could fail suddenly, causing a crash. Use only
radial-ply tires with the wheels on your vehicle.
5-63