2005 GMC ENVOY XL ECU
[x] Cancel search: ECUPage 314 of 480
{CAUTION:
Do not load your vehicle any heavier than the
Gross Vehicle Weight Rating (GVWR), or either
the maximum front or rear Gross Axle Weight
Rating (GAWR). If you do, parts on your
vehicle can break, and it can change the way
your vehicle handles. These could cause you
to lose control and crash. Also, overloading
can shorten the life of your vehicle.
Using heavier suspension components to get
added durability might not change your vehicle’s weight
ratings. Ask your dealer to help you load your vehicle
the right way.
Notice:Overloading your vehicle may cause
damage. Repairs would not be covered by your
warranty. Do not overload your vehicle.
If you put things inside your vehicle — like suitcases,
tools, packages, or anything else — they will go as
fast as the vehicle goes. If you have to stop or
turn quickly, or if there’s a crash, they will keep going.
{CAUTION:
Things you put inside your vehicle can strike
and injure people in a sudden stop or turn, or
in a crash.
Put things in the cargo area of your
vehicle. Try to spread the weight evenly.
Never stack heavier things, like suitcases,
inside the vehicle so that some of them
are above the tops of the seats.
Do not leave an unsecured child restraint
in your vehicle.
When you carry something inside the
vehicle, secure it whenever you can.
Do not leave a seat folded down unless
you need to.
There’s also important loading information for off-road
driving in this manual. See “Loading Your Vehicle
for Off-Road Driving” underOff-Road Driving with Your
Four-Wheel-Drive Vehicle on page 4-15.
4-48
Page 318 of 480

Four-Wheel-Drive Vehicles
Four-wheel-drive vehicles can be dinghy towed if you
follow the proper procedures. The transmission has
no provisions for internal lubrication while being towed,
so it is important that you follow all the steps listed
in this manual to dinghy tow your four-wheel-drive
vehicle.
Use the following procedure to tow your vehicle:
1. Shift the transmission to PARK (P).
2. Turn the engine off, but leave the ignition on.3. Firmly set the parking brake.
4. Securely attach the vehicle being towed to the
tow vehicle.
{CAUTION:
Shifting a four-wheel-drive vehicle’s transfer
case into NEUTRAL can cause your vehicle to
roll even if the transmission is in PARK (P).
You or others could be injured. Make sure the
parking brake is �rmly set before you shift the
transfer case to NEUTRAL.
5. Shift the transfer case to NEUTRAL (N). See
Four-Wheel Drive on page 2-27for the proper
procedure to select the NEUTRAL (N) position for
your vehicle.
6. Release the parking brake only after the
vehicle being towed is �rmly attached to the
towing vehicle.
7. Turn the ignition off.
After towing, see “Shifting Out of Neutral” under
Four-Wheel Drive on page 2-27.
4-52
Page 319 of 480

Dolly Towing
Front Towing (Front Wheels Off the
Ground)
Two-Wheel-Drive Vehicles
Notice:If you tow a two-wheel-drive vehicle with
the rear wheels on the ground, the transmission
could be damaged. The repairs would not be
covered by your warranty. Never tow your vehicle
with the rear wheels on the ground.
Four-Wheel-Drive Vehicles
Four-wheel-drive vehicles can be dolly towed with the
rear wheels on the ground.
Use the following procedure to tow your vehicle:
1. Drive the vehicle onto the tow dolly.
2. Shift the automatic transmission to PARK (P).
3. Turn the engine off, but leave the ignition on.
4. Firmly set the parking brake.
5. Securely attach the vehicle being towed to
the dolly.
{CAUTION:
Shifting a four-wheel-drive vehicle’s transfer
case into NEUTRAL can cause your vehicle to
roll even if the transmission is in PARK (P).
You or others could be injured. Make sure the
parking brake is �rmly set before you shift the
transfer case to NEUTRAL.
6. Shift the transfer case to NEUTRAL (N). See
Four-Wheel Drive on page 2-27for the proper
procedure to select the NEUTRAL (N) position for
your vehicle.
7. Release the parking brake only after the
vehicle being towed is �rmly attached to the
towing vehicle.
8. Turn the ignition off.
After towing, see “Shifting Out of Neutral” under
Four-Wheel Drive on page 2-27.
4-53
Page 320 of 480
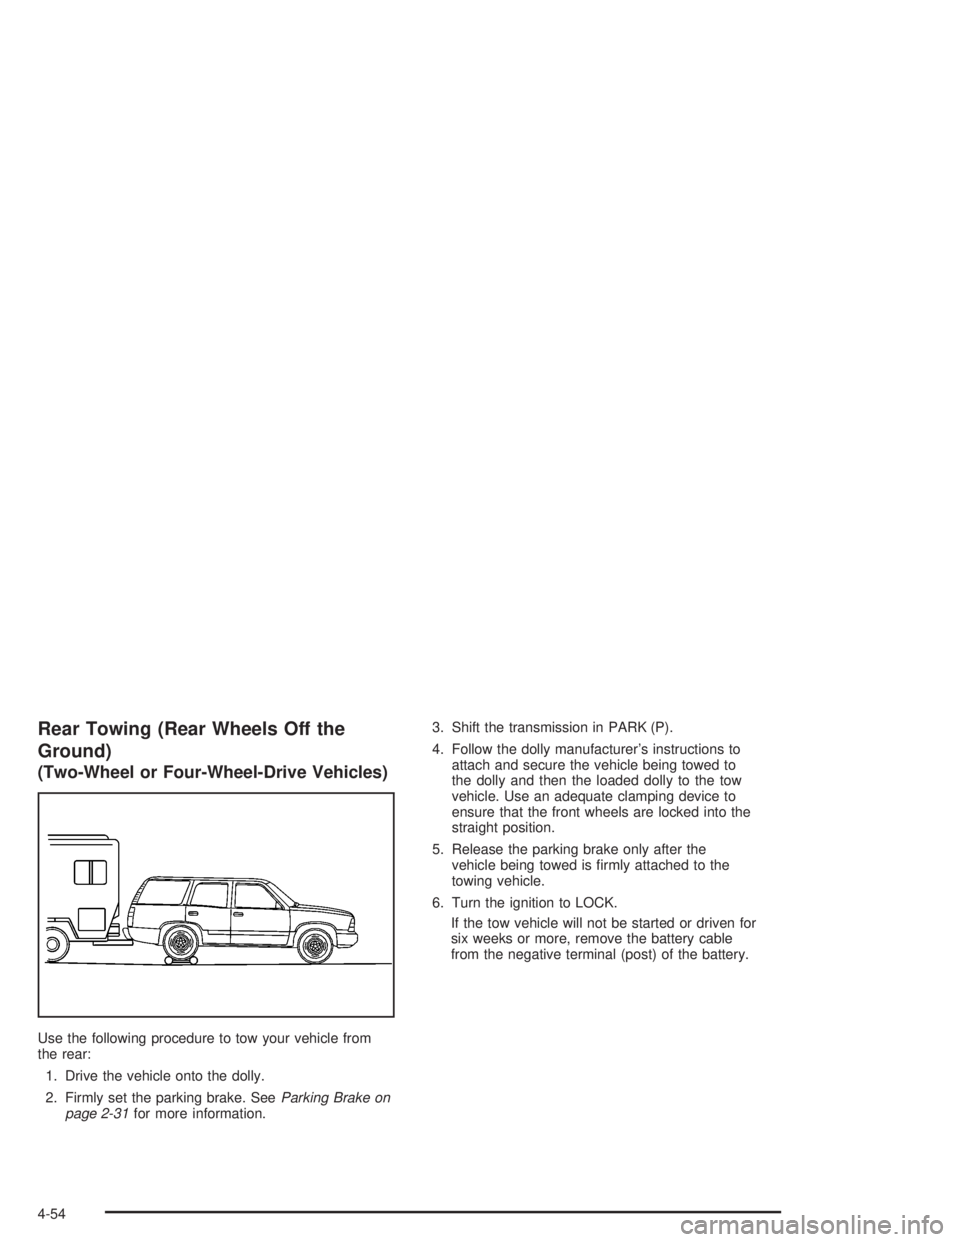
Rear Towing (Rear Wheels Off the
Ground)
(Two-Wheel or Four-Wheel-Drive Vehicles)
Use the following procedure to tow your vehicle from
the rear:
1. Drive the vehicle onto the dolly.
2. Firmly set the parking brake. SeeParking Brake on
page 2-31for more information.3. Shift the transmission in PARK (P).
4. Follow the dolly manufacturer’s instructions to
attach and secure the vehicle being towed to
the dolly and then the loaded dolly to the tow
vehicle. Use an adequate clamping device to
ensure that the front wheels are locked into the
straight position.
5. Release the parking brake only after the
vehicle being towed is �rmly attached to the
towing vehicle.
6. Turn the ignition to LOCK.
If the tow vehicle will not be started or driven for
six weeks or more, remove the battery cable
from the negative terminal (post) of the battery.
4-54
Page 327 of 480

Driving with a Trailer
{CAUTION:
If you have a rear-most window open and
you pull a trailer with your vehicle, carbon
monoxide (CO) could come into your vehicle.
You can not see or smell CO. It can cause
unconsciousness or death. SeeEngine
Exhaust on page 2-35. To maximize your safety
when towing a trailer:
Have your exhaust system inspected for
leaks and make necessary repairs before
starting on your trip.
Keep the rear-most windows closed.If exhaust does come into your vehicle
through a window in the rear or another
opening, drive with your front, main
heating or cooling system on and with the
fan on any speed. This will bring fresh,
outside air into your vehicle. Do not use
the climate control setting for maximum air
because it only recirculates the air inside
your vehicle. SeeDual Climate Control
System on page 3-20orDual Automatic
Climate Control System on page 3-23.Towing a trailer requires a certain amount of experience.
Before setting out for the open road, you’ll want to get
to know your rig. Acquaint yourself with the feel of
handling and braking with the added weight of the trailer.
And always keep in mind that the vehicle you are
driving is now a good deal longer and not nearly as
responsive as your vehicle is by itself.
Before you start, check all trailer hitch parts and
attachments, safety chains, electrical connection, lamps,
tires and mirror adjustment. If the trailer has electric
brakes, start your vehicle and trailer moving and then
apply the trailer brake controller by hand to be sure
the brakes are working. This lets you check your
electrical connection at the same time.
During your trip, check occasionally to be sure that the
load is secure, and that the lamps and any trailer
brakes are still working.
4-61
Page 358 of 480
Radiator Pressure Cap
Notice:If the pressure cap is not tightly installed,
coolant loss and possible engine damage may
occur. Be sure the cap is properly and tightly
secured.
SeeEngine Compartment Overview on page 5-12for
information on location.
Engine Overheating
You will �nd a coolant temperature gage on your
vehicle’s instrument panel. SeeEngine Coolant
Temperature Gage on page 3-40for more information.
If your vehicle has a Driver Information Center (DIC),
the display will show an Engine Coolant Hot/Engine
Overheated message. SeeDIC Warnings and Messages
on page 3-53for more information.
If Steam Is Coming From Your Engine
{CAUTION:
Steam from an overheated engine can burn
you badly, even if you just open the hood.
Stay away from the engine if you see or hear
steam coming from it. Just turn it off and get
everyone away from the vehicle until it cools
down. Wait until there is no sign of steam or
coolant before you open the hood.
If you keep driving when your engine is
overheated, the liquids in it can catch �re.
You or others could be badly burned. Stop
your engine if it overheats, and get out of the
vehicle until the engine is cool.
Notice:If your engine catches �re because you
keep driving with no coolant, your vehicle can
be badly damaged. The costly repairs would not
be covered by your warranty.
5-26
Page 379 of 480
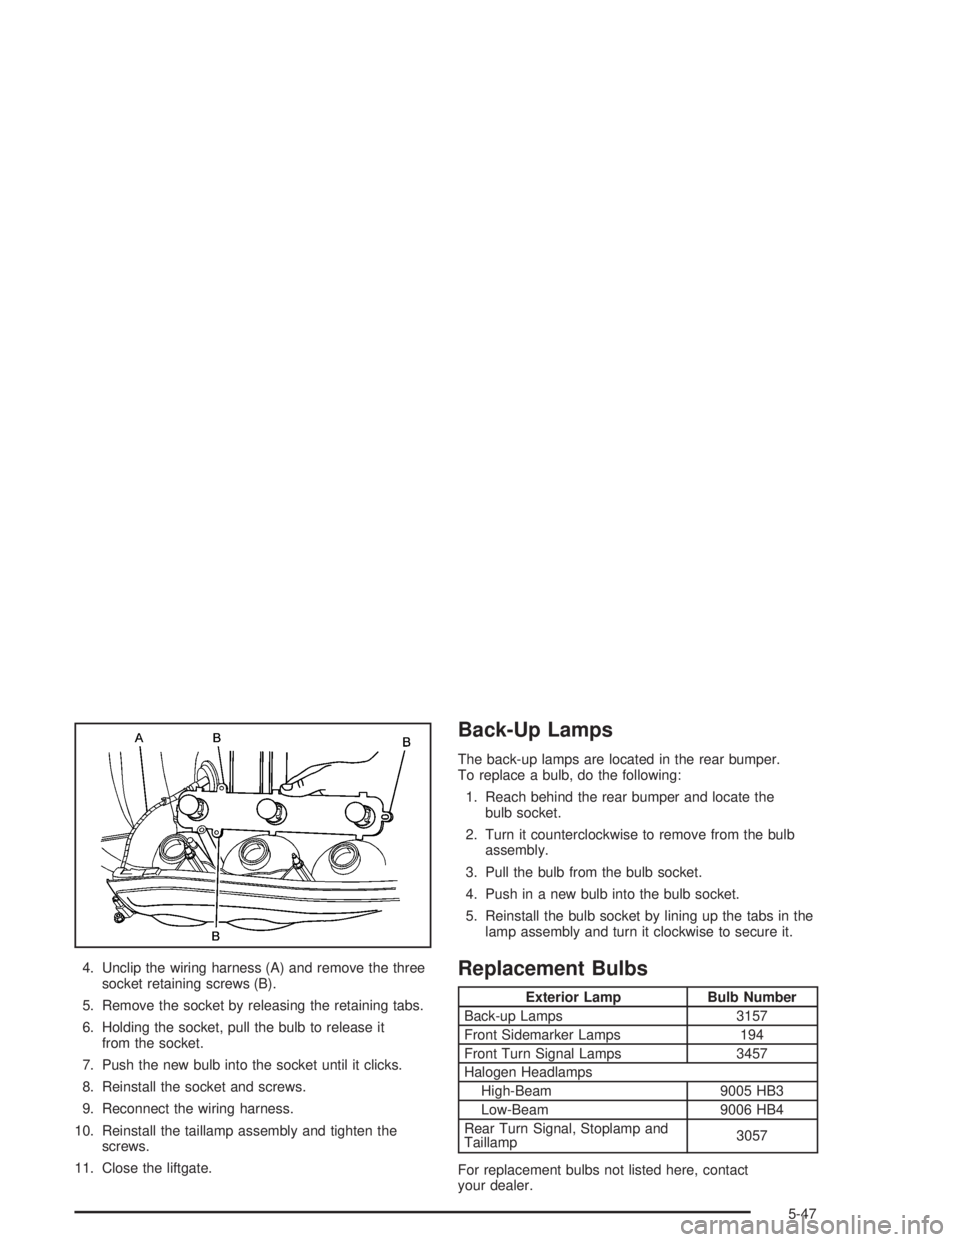
4. Unclip the wiring harness (A) and remove the three
socket retaining screws (B).
5. Remove the socket by releasing the retaining tabs.
6. Holding the socket, pull the bulb to release it
from the socket.
7. Push the new bulb into the socket until it clicks.
8. Reinstall the socket and screws.
9. Reconnect the wiring harness.
10. Reinstall the taillamp assembly and tighten the
screws.
11. Close the liftgate.
Back-Up Lamps
The back-up lamps are located in the rear bumper.
To replace a bulb, do the following:
1. Reach behind the rear bumper and locate the
bulb socket.
2. Turn it counterclockwise to remove from the bulb
assembly.
3. Pull the bulb from the bulb socket.
4. Push in a new bulb into the bulb socket.
5. Reinstall the bulb socket by lining up the tabs in the
lamp assembly and turn it clockwise to secure it.
Replacement Bulbs
Exterior Lamp Bulb Number
Back-up Lamps 3157
Front Sidemarker Lamps 194
Front Turn Signal Lamps 3457
Halogen Headlamps
High-Beam 9005 HB3
Low-Beam 9006 HB4
Rear Turn Signal, Stoplamp and
Taillamp3057
For replacement bulbs not listed here, contact
your dealer.
5-47
Page 389 of 480
A Tire and Loading Information label is attached to the
vehicle’s center pillar (B-pillar), below the driver’s
door latch. This label shows your vehicle’s original
equipment tires and the correct in�ation pressures for
your tires when they are cold. The recommended
cold tire in�ation pressure, shown on the label, is the
minimum amount of air pressure needed to support your
vehicle’s maximum load carrying capacity.
For additional information regarding how much weight
your vehicle can carry, and an example of the tire
and loading information label, seeLoading Your Vehicle
on page 4-43. How you load your vehicle affects
vehicle handling and ride comfort, never load your
vehicle with more weight than it was designed to carry.
When to Check
Check your tires once a month or more.
Also, check the tire pressure of the spare tire.
How to Check
Use a good quality pocket-type gage to check tire
pressure. You cannot tell if your tires are properly
in�ated simply by looking at them. Radial tires may look
properly in�ated even when they’re underin�ated.
Check the tire’s in�ation pressure when the tires
are cold. Cold means your vehicle has been sitting
for at least three hours or driven no more than
1 mile (1.6 km).Remove the valve cap from the tire valve stem. Press
the tire gage �rmly onto the valve to get a pressure
measurement. If the cold tire in�ation pressure matches
the recommended pressure on the tire and loading
information label, no further adjustment is necessary.
If the pressure is low, add air until you reach the
recommended amount.
If you over�ll the tire, release air by pushing on the
metal stem in the center of the tire valve. Recheck the
tire pressure with the tire gage.
Be sure to put the valve caps back on the valve
stems. They help prevent leaks by keeping out dirt
and moisture.
Tire Inspection and Rotation
Tires should be rotated every 5,000 to 8,000 miles
(8 000 to 13 000 km).
Any time you notice unusual wear, rotate your tires as
soon as possible and check wheel alignment. Also
check for damaged tires or wheels. SeeWhen It Is Time
for New Tires on page 5-59andWheel Replacement
on page 5-62for more information.
Make sure the spare tire is stored securely. Push,
pull, and then try to rotate or turn the tire. If it moves,
use the wheel wrench to tighten the cable. For
information on storing or removing the spare tire,
seeChanging a Flat Tire on page 5-66.
5-57