2005 FORD SUPER DUTY oil
[x] Cancel search: oilPage 77 of 304

LOW OIL PRESSURE.Displayed when the engine oil pressure is low. If
this warning message is displayed, check the level of the engine oil.
Refer toEngine oilin theMaintenance and Specificationschapter for
information about adding engine oil. If the oil level is OK and this
warning persists, shut down the engine immediately and contact your
dealership for service.
CHECK FUEL CAP.Displayed when the fuel filler cap is not properly
installed. Check the fuel filler cap for proper installation. Refer toFuel
filler capunder theFuel Information sectionin theMaintenance and
Specificationschapter.
ENGINE FAILSAFE MODE.Displayed when the engine has defaulted
to a ’limp-home’ operation. If the warning stays on or continues to come
on, contact your dealer as soon as possible.
CHECK COMPASS MODULE.Displayed when the compass is not
operating properly. If the warning stays on or continues to come on,
contact your dealer as soon as possible.
TRAILER DISCONNECTED (if equipped):Displayed when a trailer
connection becomes disconnected, either intentionally or unintentionally,
and has been sensed during a given ignition cycle. Refer toIntergrated
trailer brake controllerin theTires, Wheels and Loadingchapter for
more information.
TRAILER FAULT (if equipped):Displayed if there is a short circuit on
the electric brake output wire or the trailer brakes are drawing too much
current. Refer toIntergrated trailer brake controllerin theTires,
Wheels and Loadingchapter for more information.
TBC FAULT (if equipped):Displayed in response to faults sensed by
the TBC. In the event this message is seen, please take your vehicle to
an authorized Ford dealership for diagnosis and repair. Refer to
Intergrated trailer brake controllerin theTires, Wheels and Loading
chapter for more information.
WATER IN FUEL (diesel only):Refer toInstrumentationin your6.0
Liter Power Stroke Direct Injection Turbo Diesel Owner’s Guide
Supplement.
CHECK AIR FILTER (diesel only):Refer toInstrumentationin your
6.0 Liter Power Stroke Direct Injection Turbo Diesel Owner’s Guide
Supplement.
REVIEW COPY
2005 F250/350/450/550(f23), Owners Guide (post-2002-fmt)(own2002),
Market:USA_English(fus)
Driver Controls
77
Page 149 of 304
Bolt size Wheel lug nut torque*
lb.ft. N•m
M14 x 1.5 150 200
* Torque specifications are for nut and bolt threads free of dirt and
rust. Use only Ford recommended replacement fasteners.
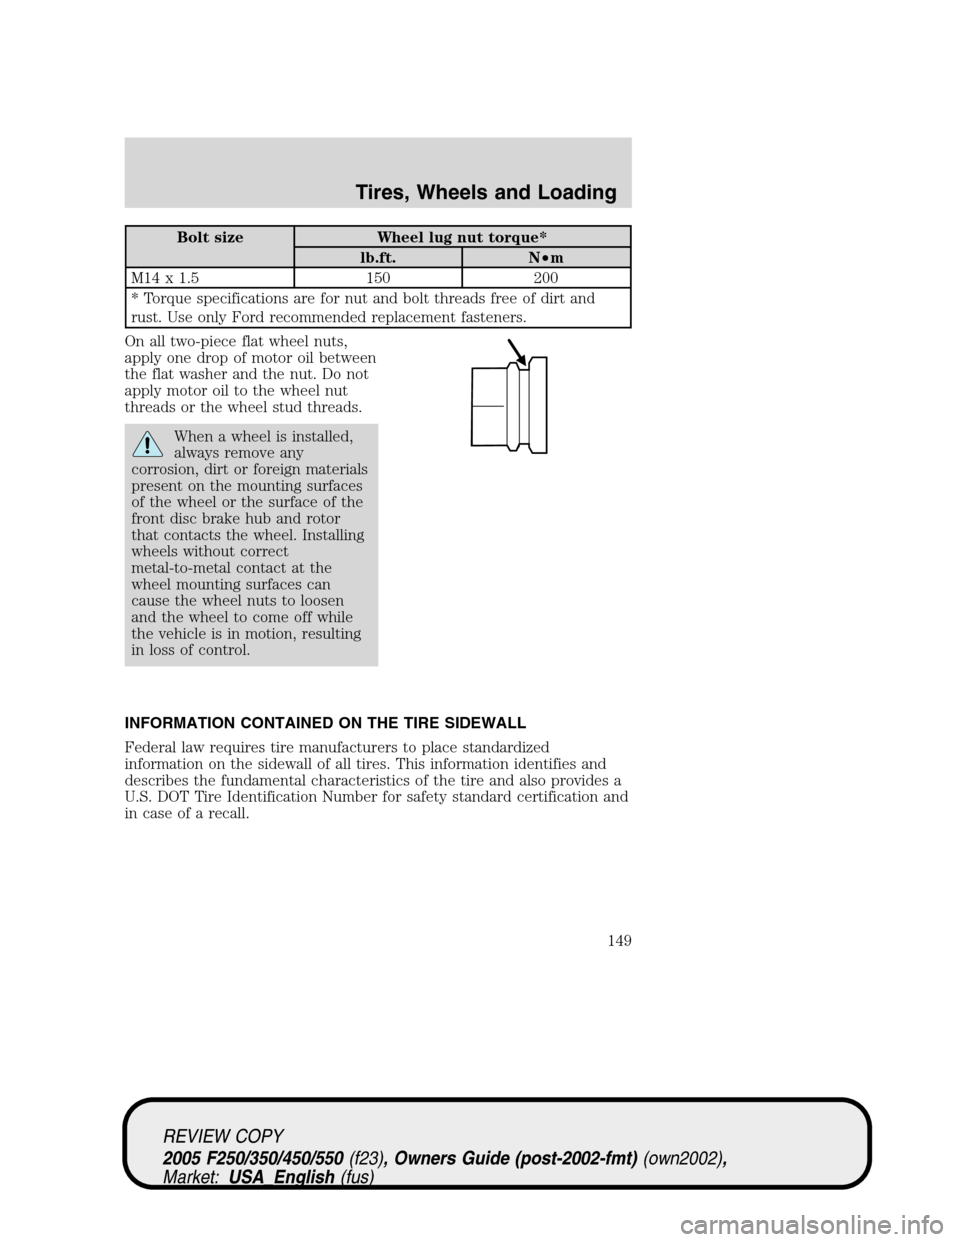
On all two-piece flat wheel nuts,
apply one drop of motor oil between
the flat washer and the nut. Do not
apply motor oil to the wheel nut
threads or the wheel stud threads.
When a wheel is installed,
always remove any
corrosion, dirt or foreign materials
present on the mounting surfaces
of the wheel or the surface of the
front disc brake hub and rotor
that contacts the wheel. Installing
wheels without correct
metal-to-metal contact at the
wheel mounting surfaces can
cause the wheel nuts to loosen
and the wheel to come off while
the vehicle is in motion, resulting
in loss of control.
INFORMATION CONTAINED ON THE TIRE SIDEWALL
Federal law requires tire manufacturers to place standardized
information on the sidewall of all tires. This information identifies and
describes the fundamental characteristics of the tire and also provides a
U.S. DOT Tire Identification Number for safety standard certification and
in case of a recall.
REVIEW COPY
2005 F250/350/450/550(f23), Owners Guide (post-2002-fmt)(own2002),
Market:USA_English(fus)
Tires, Wheels and Loading
149
Page 209 of 304
Operating the vehicle with the snowplow attached
Do not use your vehicle for snow removal until it has been driven at
least 500 miles (800 km).
The attached snowplow blade restricts airflow to the radiator, and may
cause the engine to run at a higher temperature:
•If you are driving more than 15 miles (24 km) where outside air
temperatures are above freezing, then angle the plow blade to full left
or right to maximize airflow to the radiator.
•If you are driving less than 15 miles (24 km) at speeds up to 40 mph
(64 km/h) in cold weather you will not need to adjust blade position
Follow the severe duty schedule in yourScheduled Maintenance Guide
for engine oil and transmission fluid change intervals.
Snowplowing with your air bag-equipped vehicle
Your vehicle is equipped with a driver and passenger air bag
Supplemental Restraint System (SRS) The SRS is designed to activate in
certain frontal and offset frontal collisions when the vehicle sustains
sufficient longitudinal deceleration.
Careless or high speed driving while plowing snow which results in
sufficient vehicle decelerations can deploy the air bag. Such driving also
increases the risk of accidents.
All occupants of the vehicle, including the driver, should always
properly wear their safety belts, even when an air bag
supplemental restraint system (SRS) is provided.
Never remove or defeat the “tripping mechanisms” designed into the
snow removal equipment by its manufacturer. Doing so may cause
damage to the vehicle and the snow removal equipment as well as
possible air bag deployment.
Do not attempt to service, repair, or modify the air bag
supplemental restraint system (SRS) or its fuses. See your Ford
or Lincoln Mercury dealer.
Additional equipment such as snowplow equipment may effect
the performance of the air bag sensors increasing the risk of
injury. Please refer to theBody Builders Layout Bookfor instructions
about the appropriate installation of additional equipment.
REVIEW COPY
2005 F250/350/450/550(f23), Owners Guide (post-2002-fmt)(own2002),
Market:USA_English(fus)
Driving
209
Page 221 of 304
Fuse/Relay
LocationFuse Amp
RatingPower Distribution Box
Description
12 2A** Brake pressure switch
13 15A** Daytime Running Lamps (DRL)
14 — Not used
15 15A** IDM logic (Diesel engine only)
16 — Not used
17 10A** A/C clutch
18 10A** IDM relay (Diesel engine only)
19 — Not used
20 10A** Trailer tow back-up lamps
21 — Not used
22 60A*** ABS (Coils)
23 60A*** ABS (Pump)
201
1�2ISO relay Trailer tow right turn signal/stop
lamp
202
1�2ISO relay Trailer tow left turn signal/stop
lamp
203
1�2ISO relay A/C clutch
204 — Not used
205
1�2ISO relay DRL #1
206
1�2ISO relay DRL #2
301 Full ISO relay DRL #3
302 Full ISO relay HFCM
303 Full ISO relay Blower
304 High-current
relayIDM (Diesel engine only)
* Cartdrige Fuse ** Mini Fuses *** Maxi fuse
JUMP STARTING YOUR VEHICLE
The gases around the battery can explode if exposed to flames,
sparks, or lit cigarettes. An explosion could result in injury or
vehicle damage.
REVIEW COPY
2005 F250/350/450/550(f23), Owners Guide (post-2002-fmt)(own2002),
Market:USA_English(fus)
Roadside Emergencies
221
Page 242 of 304
•Remove light stains and soil with Motorcraft Extra Strength
Upholstery Cleaner (ZC-41).
•If grease or tar is present on the material, spot-clean the area first
with Motorcraft Spot and Stain Remover (ZC-14).
•Never saturate the seat covers with cleaning solution.
•Do not use household cleaning products or glass cleaners, which can
stain and discolor the fabric and affect the flame retardant abilities of
the seat materials.
Do not use cleaning solvents, bleach or dye on the vehicle’s
seatbelts, as these actions may weaken the belt webbing.
LEATHER SEATS
(IF EQUIPPED, EXCEPT FOR THE KING RANCH F–250
AND F–350 CREWCAB)
Your leather seating surfaces have a clear, protective coating over the
leather.
For King Ranch F-250 and F-350 CrewCab leather seats, refer to
separate section in this chapter.
•To clean, use a soft cloth with Motorcraft Deluxe Leather and Vinyl
Cleaner (ZC-11–A). Dry the area with a soft cloth.
•To help maintain its resiliency and color, use the Motorcraft Deluxe
Leather Care Kit (ZC-11–D), available from your authorized dealer.
•Do not use household cleaning products, alcohol solutions, solvents or
cleaners intended for rubber, vinyl and plastics, or oil/petroleum-based
leather conditioners. These products may cause premature wearing of
the clear, protective coating on the seat.
Note:In some instances, color or dye transfer can occur when wet
clothing comes in contact with leather upholstery. If this occurs, the
leather should be cleaned immediately to avoid permanent staining.
LEATHER SEATS FOR THE KING RANCH F-250 AND F-350
CREWCAB ONLY (IF EQUIPPED)
Your vehicle is equipped with seating covered in premium, top-grain
leather which is extremely durable, but still requires special care and
maintenance in order to ensure longevity and comfort.
Regular cleaning and conditioning will maintain the appearance of the
leather. Failure to care for the leather can result in drying out and fading
of the material.
REVIEW COPY
2005 F250/350/450/550(f23), Owners Guide (post-2002-fmt)(own2002),
Market:USA_English(fus)
Cleaning
242
Page 243 of 304

Cleaning
For dirt, use a vacuum cleaner then use a clean, damp cloth or soft
brush.
First use a damp cloth then wipe with a dry cloth. Allow the area to dry,
then apply conditioner.
•Clean spills as quickly as possible.
•Test any cleaner or stain remover on an inconspicuous part of the
leather as cleaners may darken the leather. For more specific cleaning
information, contact the King Ranch Saddle Shop at 1–800–282–KING
(5464).
•Do not spill coffee, ketchup, mustard, orange juice or oil-based
products on the leather as they may permanently stain the leather.
•Do not use household cleaning products, alcohol solutions, solvents or
cleaners intended for rubber, vinyl or plastics.
Scratches
In order to lessen the appearance of certain scratches and other wear
marks, apply conditioner on the affected area following the same
instructions as in theConditioningsection.
Conditioning
Bottles of King Ranch Leather Conditioner are available at the King
Ranch Saddle Shop. Visit the Web site atwww.krsaddleshop.com,or
telephone (in the United States) 1–800–282–KING (5464). If you are
unable to obtain King Ranch Leather Conditioner, use another premium
leather conditioner.
•Apply your first conditioning treatment within six months of taking
delivery of your vehicle. Condition twice yearly in order to replenish
lost oils and revitalize the aroma, suppleness and resilience of the
leather.
•Clean the surfaces using the steps outlined in theCleaningsection.
•Ensure the leather is dry then apply a nickel-sized amount of
conditioner to a clean, dry cloth
•Rub the conditioner into leather until it disappears. Allow the
conditioner to dry and repeat the process for the entire interior. If a
film appears, wipe off film with a dry, clean cloth.
UNDERBODY
Flush the complete underside of your vehicle frequently. Keep body and
door drain holes free from packed dirt.
REVIEW COPY
2005 F250/350/450/550(f23), Owners Guide (post-2002-fmt)(own2002),
Market:USA_English(fus)
Cleaning
243
Page 247 of 304
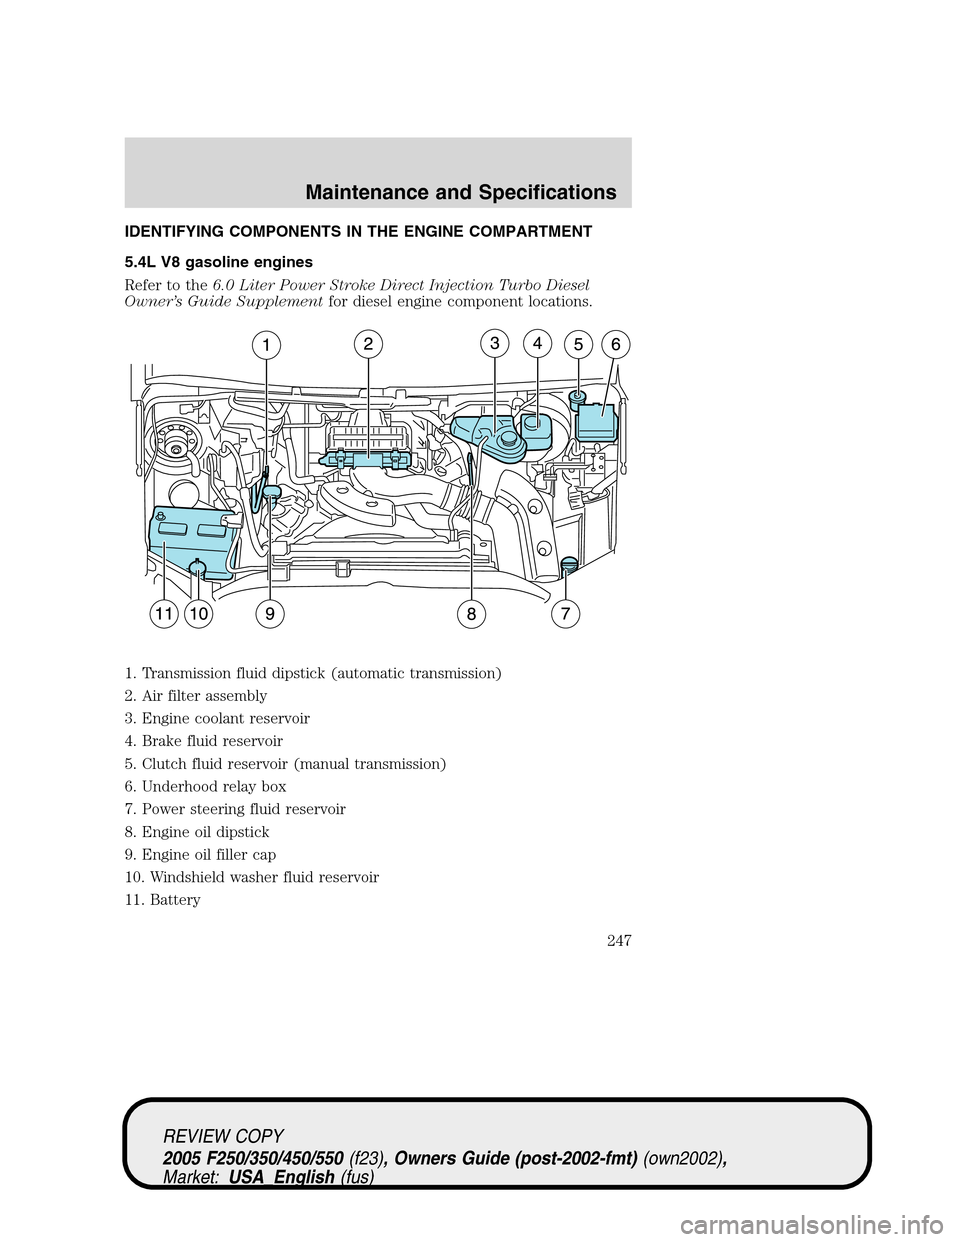
IDENTIFYING COMPONENTS IN THE ENGINE COMPARTMENT
5.4L V8 gasoline engines
Refer to the6.0 Liter Power Stroke Direct Injection Turbo Diesel
Owner’s Guide Supplementfor diesel engine component locations.
1. Transmission fluid dipstick (automatic transmission)
2. Air filter assembly
3. Engine coolant reservoir
4. Brake fluid reservoir
5. Clutch fluid reservoir (manual transmission)
6. Underhood relay box
7. Power steering fluid reservoir
8. Engine oil dipstick
9. Engine oil filler cap
10. Windshield washer fluid reservoir
11. Battery
REVIEW COPY
2005 F250/350/450/550(f23), Owners Guide (post-2002-fmt)(own2002),
Market:USA_English(fus)
Maintenance and Specifications
247
Page 248 of 304

6.8L V10 gasoline engine
Refer to the6.0 Liter Power Stroke Direct Injection Turbo Diesel
Owner’s Guide Supplementfor diesel engine component locations.
1. Transmission fluid dipstick (automatic transmission)
2. Engine coolant reservoir
3. Brake fluid reservoir
4. Clutch fluid reservoir (manual transmission)
5. Underhood relay box
6. Power steering fluid reservoir
7. Air filter assembly
8. Engine oil dipstick
9. Engine oil filler cap
10. Windshield washer fluid reservoir
11. Battery
12345
10987611
REVIEW COPY
2005 F250/350/450/550(f23), Owners Guide (post-2002-fmt)(own2002),
Market:USA_English(fus)
Maintenance and Specifications
248