Page 35 of 288
Removing a CD/DVD (while playing)
1. Press the STOP/EJECT control to stop playback if a disc is playing.
2. Press the STOP/EJECT control again to eject the CD/DVD.
If the CD/DVD is not removed within the allotted time, the system will
pull the CD/DVD back into the system for safety purposes.
If the CD/DVD will not eject from the system, press and hold the EJECT
control for approximately 2 seconds. The disc should eject whether the
vehicle ignition is ON or OFF.
Playing a video game/auxiliary device
1. Connect the video line from your video game device to the YELLOW
auxiliary input jack.
2. Connect the left and right audio lines to the WHITE (left) and RED
(right) auxiliary input jacks respectively.
3. Press the MODE control repeatedly until DVD/CD AUX (no disc in
player) or DVD/CD play (disc in player) illuminates in the radio display.
If a disc is in the system, playback should begin. To enable the aux
inputs, press the STOP control or press the AUX control on the DVD
player.
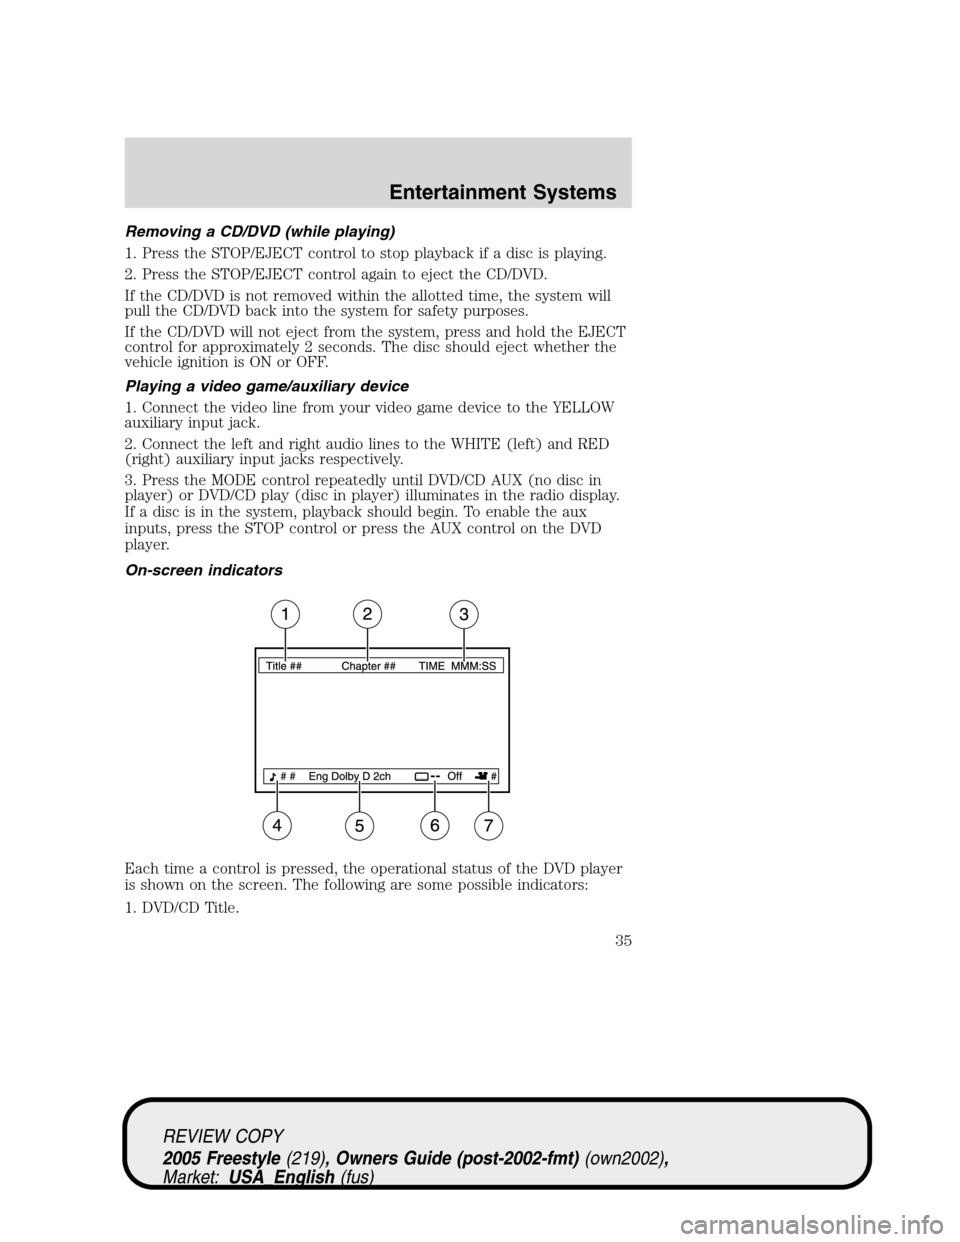
On-screen indicators
Each time a control is pressed, the operational status of the DVD player
is shown on the screen. The following are some possible indicators:
1. DVD/CD Title.
REVIEW COPY
2005 Freestyle(219), Owners Guide (post-2002-fmt)(own2002),
Market:USA_English(fus)
Entertainment Systems
35
Page 50 of 288
Do not place objects on top of the instrument panel as these
objects may become projectiles in a collision or sudden stop.
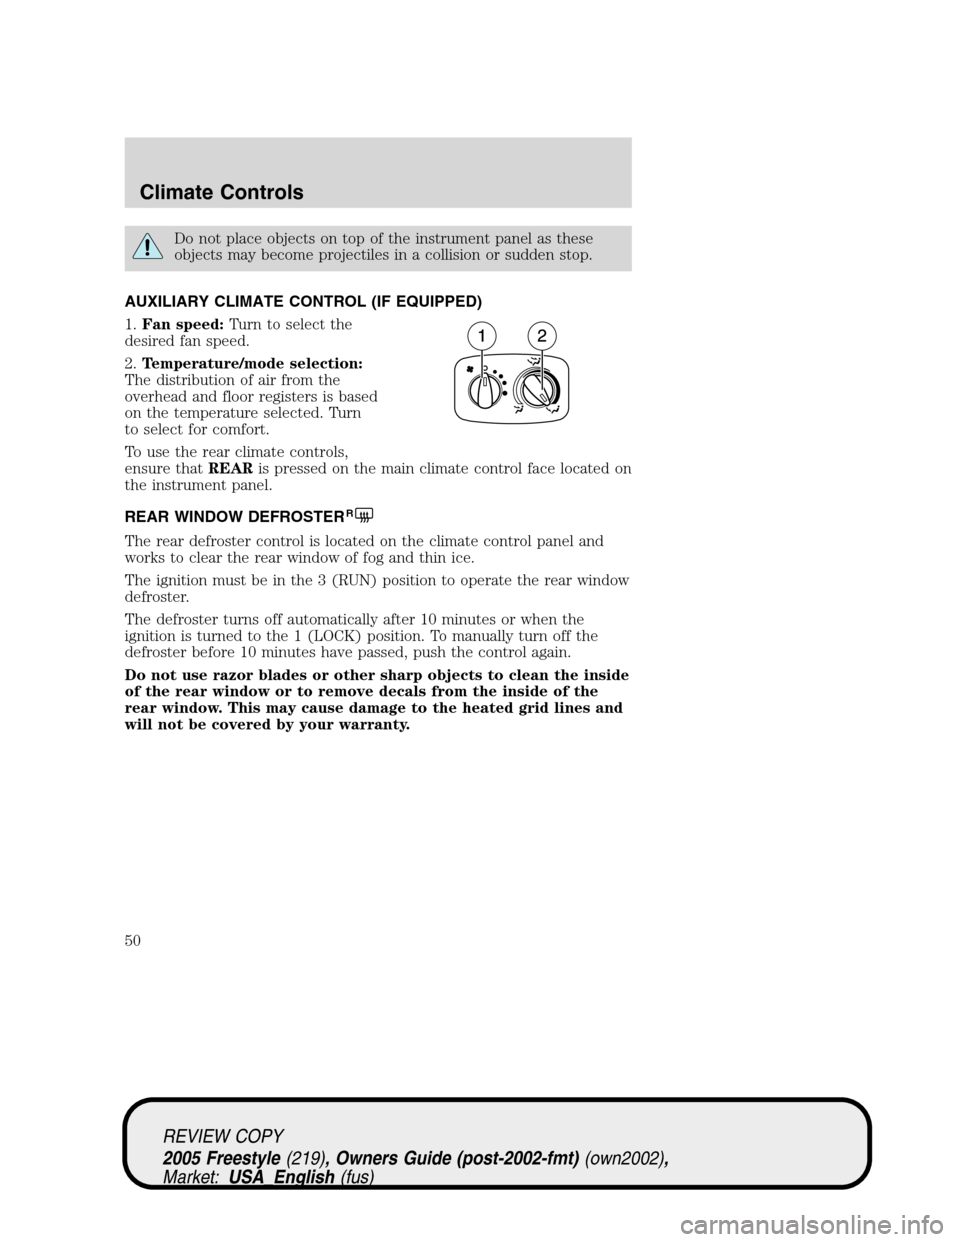
AUXILIARY CLIMATE CONTROL (IF EQUIPPED)
1.Fan speed:Turn to select the
desired fan speed.
2.Temperature/mode selection:
The distribution of air from the
overhead and floor registers is based
on the temperature selected. Turn
to select for comfort.
To use the rear climate controls,
ensure thatREARis pressed on the main climate control face located on
the instrument panel.
REAR WINDOW DEFROSTER
R
The rear defroster control is located on the climate control panel and
works to clear the rear window of fog and thin ice.
The ignition must be in the 3 (RUN) position to operate the rear window
defroster.
The defroster turns off automatically after 10 minutes or when the
ignition is turned to the 1 (LOCK) position. To manually turn off the
defroster before 10 minutes have passed, push the control again.
Do not use razor blades or other sharp objects to clean the inside
of the rear window or to remove decals from the inside of the
rear window. This may cause damage to the heated grid lines and
will not be covered by your warranty.
REVIEW COPY
2005 Freestyle(219), Owners Guide (post-2002-fmt)(own2002),
Market:USA_English(fus)
Climate Controls
50
Page 51 of 288
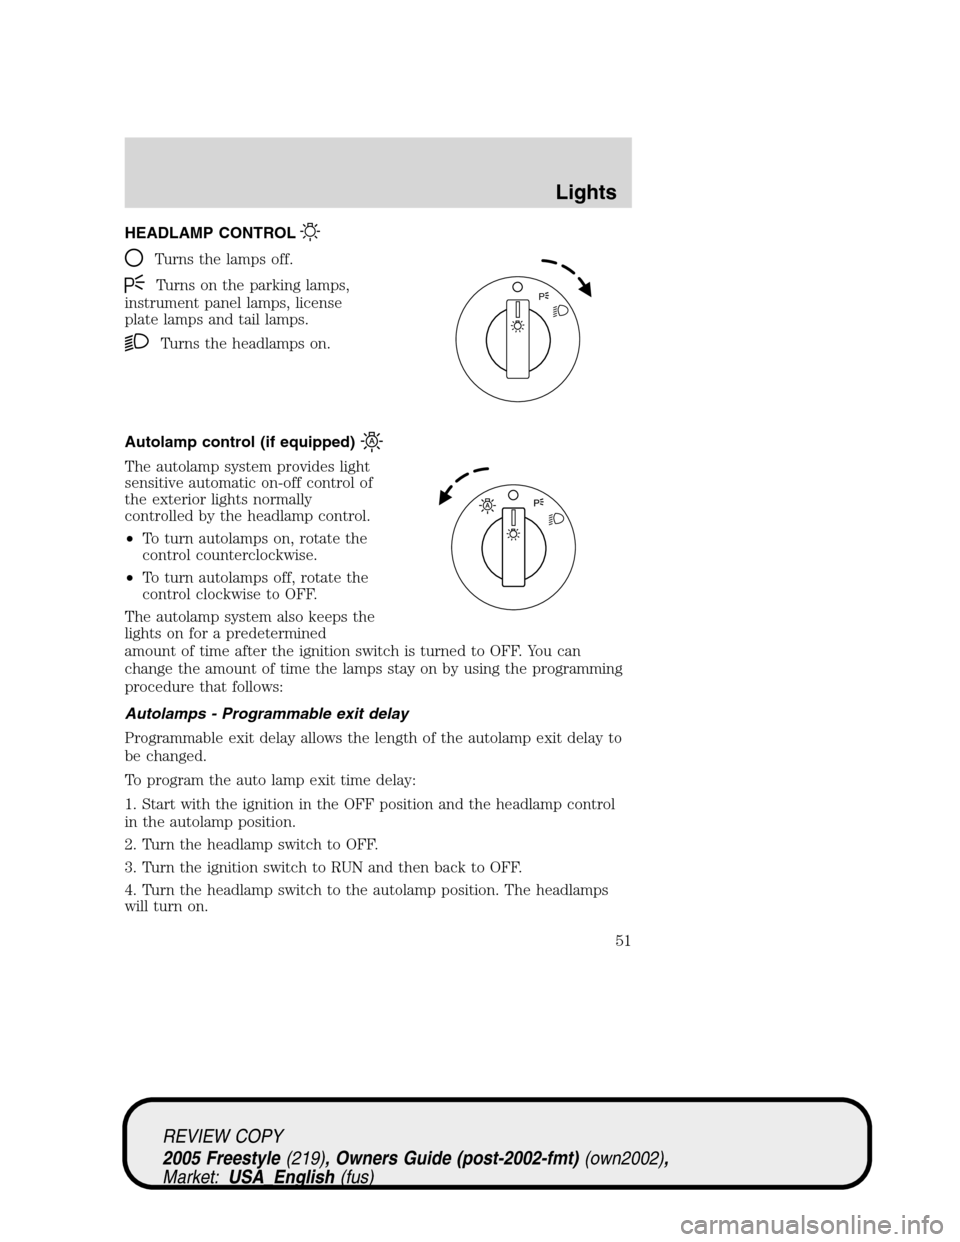
HEADLAMP CONTROL
Turns the lamps off.
Turns on the parking lamps,
instrument panel lamps, license
plate lamps and tail lamps.
Turns the headlamps on.
Autolamp control (if equipped)
The autolamp system provides light
sensitive automatic on-off control of
the exterior lights normally
controlled by the headlamp control.
•To turn autolamps on, rotate the
control counterclockwise.
•To turn autolamps off, rotate the
control clockwise to OFF.
The autolamp system also keeps the
lights on for a predetermined
amount of time after the ignition switch is turned to OFF. You can
change the amount of time the lamps stay on by using the programming
procedure that follows:
Autolamps - Programmable exit delay
Programmable exit delay allows the length of the autolamp exit delay to
be changed.
To program the auto lamp exit time delay:
1. Start with the ignition in the OFF position and the headlamp control
in the autolamp position.
2. Turn the headlamp switch to OFF.
3. Turn the ignition switch to RUN and then back to OFF.
4. Turn the headlamp switch to the autolamp position. The headlamps
will turn on.
P
REVIEW COPY
2005 Freestyle(219), Owners Guide (post-2002-fmt)(own2002),
Market:USA_English(fus)
Lights
Lights
51
Page 52 of 288
5. Wait the desired amount of time for the exit delay you want (up to
three minutes), then turn the headlamp switch to OFF. The headlamps
will turn off.
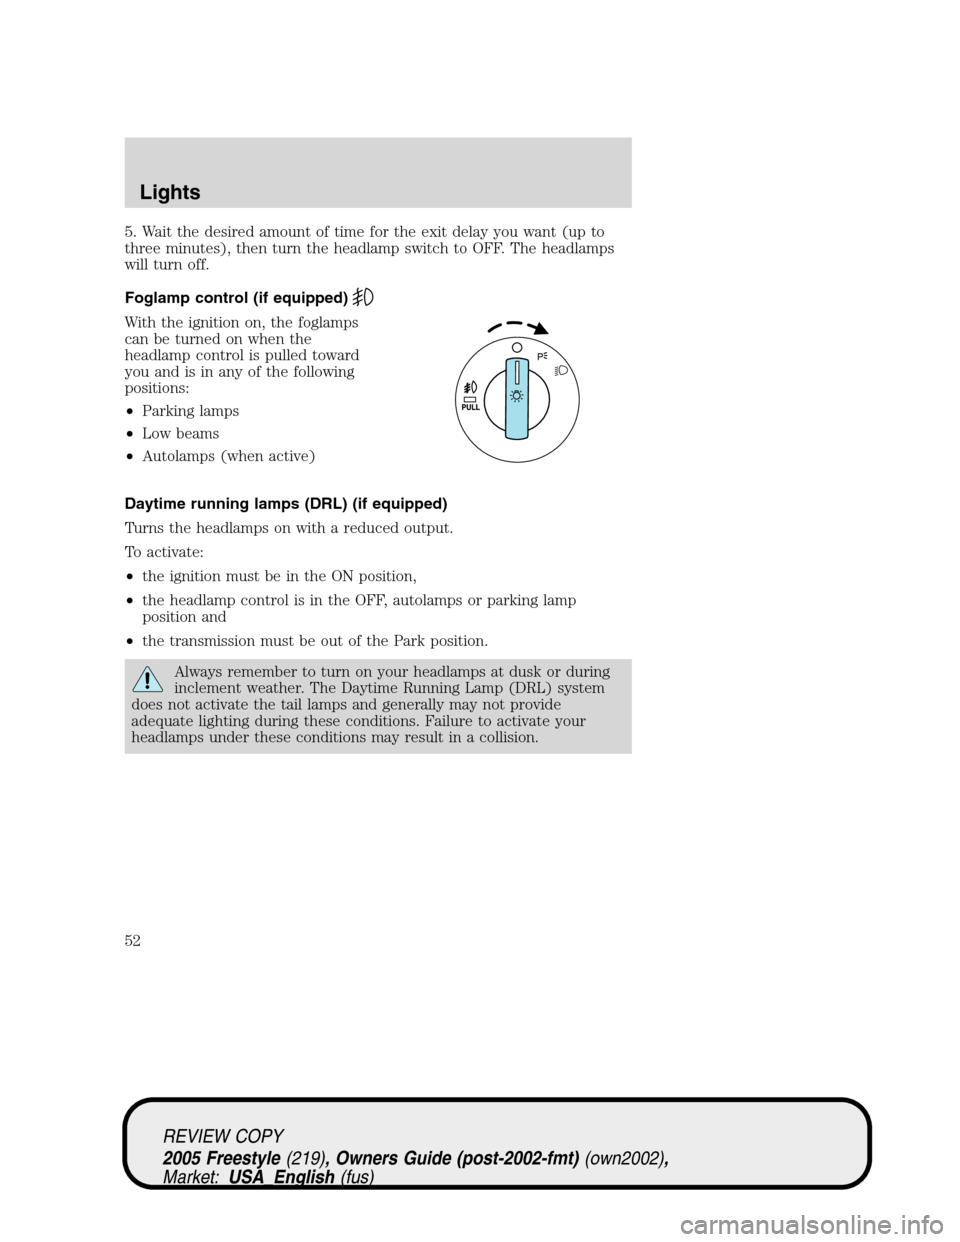
Foglamp control (if equipped)
With the ignition on, the foglamps
can be turned on when the
headlamp control is pulled toward
you and is in any of the following
positions:
•Parking lamps
•Low beams
•Autolamps (when active)
Daytime running lamps (DRL) (if equipped)
Turns the headlamps on with a reduced output.
To activate:
•the ignition must be in the ON position,
•the headlamp control is in the OFF, autolamps or parking lamp
position and
•the transmission must be out of the Park position.
Always remember to turn on your headlamps at dusk or during
inclement weather. The Daytime Running Lamp (DRL) system
does not activate the tail lamps and generally may not provide
adequate lighting during these conditions. Failure to activate your
headlamps under these conditions may result in a collision.
REVIEW COPY
2005 Freestyle(219), Owners Guide (post-2002-fmt)(own2002),
Market:USA_English(fus)
Lights
52
Page 59 of 288
Replacing stop/tail/turn/backup bulbs
The stop, tail, turn and backup lamp bulbs are located in the tail lamp
assembly. Follow the same steps to replace either bulb.
1. Make sure the headlamp switch is
in the OFF position and open the
liftgate.
2. Remove the two screws in the
liftgate opening, then pull the lamp
assembly away from the vehicle.
3. Remove the bulb socket by
rotating it counterclockwise, then
pulling it out of the lamp assembly.
4. Pull the bulb straight from the
socket.
Install new bulb(s) in reverse order.
Replacing high-mount brake lamp bulbs
1. Make sure the ignition control is
in the OFF position.
2. Remove the two screws.
3. Unclip the bulb holder from the
reflector.
4. Pull the bulb straight out.
Install in reverse order.
REVIEW COPY
2005 Freestyle(219), Owners Guide (post-2002-fmt)(own2002),
Market:USA_English(fus)
Lights
59
Page 66 of 288
If the switch is pressed and held to the normal open or ONE TOUCH
DOWN position during a ONE TOUCH UP event, the window will stop. If,
after 1/2 second the switch is still held, the window will perform a
normal open or ONE TOUCH DOWN.
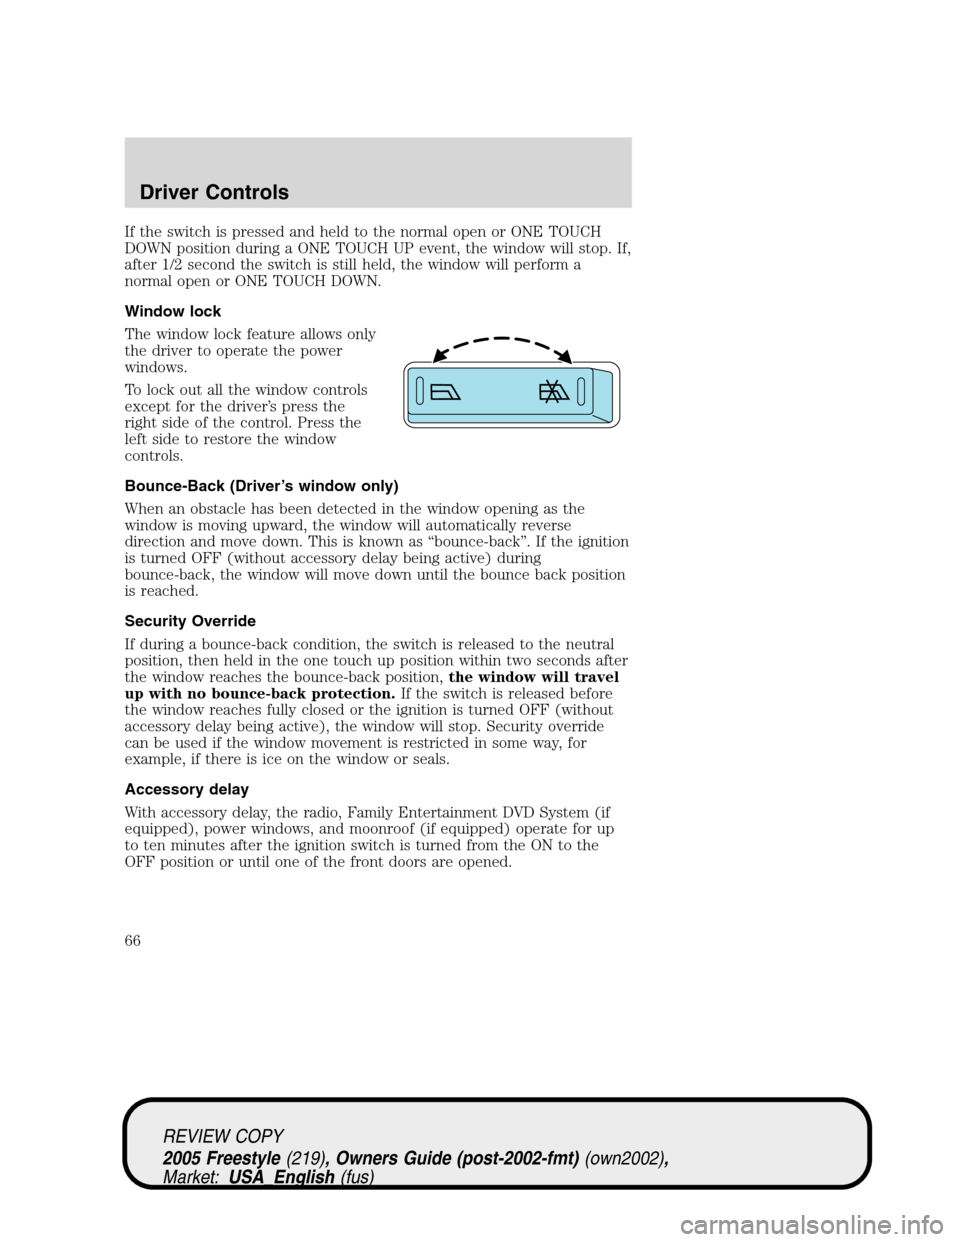
Window lock
The window lock feature allows only
the driver to operate the power
windows.
To lock out all the window controls
except for the driver’s press the
right side of the control. Press the
left side to restore the window
controls.
Bounce-Back (Driver’s window only)
When an obstacle has been detected in the window opening as the
window is moving upward, the window will automatically reverse
direction and move down. This is known as“bounce-back”. If the ignition
is turned OFF (without accessory delay being active) during
bounce-back, the window will move down until the bounce back position
is reached.
Security Override
If during a bounce-back condition, the switch is released to the neutral
position, then held in the one touch up position within two seconds after
the window reaches the bounce-back position,the window will travel
up with no bounce-back protection.If the switch is released before
the window reaches fully closed or the ignition is turned OFF (without
accessory delay being active), the window will stop. Security override
can be used if the window movement is restricted in some way, for
example, if there is ice on the window or seals.
Accessory delay
With accessory delay, the radio, Family Entertainment DVD System (if
equipped), power windows, and moonroof (if equipped) operate for up
to ten minutes after the ignition switch is turned from the ON to the
OFF position or until one of the front doors are opened.
REVIEW COPY
2005 Freestyle(219), Owners Guide (post-2002-fmt)(own2002),
Market:USA_English(fus)
Driver Controls
66
Page 71 of 288
Turning off speed control
There are two ways to turn off the speed control:
•Depress the brake pedal or press
CNCL (Cancel). This will not
erase your vehicle’s previously set
speed.
•Press the speed control OFF
control.
Note:When you turn off the speed
control or the ignition, your speed
control set speed memory is erased.
STEERING WHEEL CONTROLS (IF EQUIPPED)
Radio control features
•Press MEDIA to select AM, FM1,
FM2, or CD (if equipped).
In Radio mode:
•Press SEEK to access the
next/previous strong station.
In CD mode:
•Press SEEK to listen to the next
track on the disc.
SET
SET
RSM CNCLON
OFF
MUTE
MEDIA
SEEKVOL
MUTE
MEDIA
SEEKVOL
REVIEW COPY
2005 Freestyle(219), Owners Guide (post-2002-fmt)(own2002),
Market:USA_English(fus)
Driver Controls
71
Page 73 of 288
with a single built-in device. This feature will learn the radio frequency
codes of most transmitters to operate garage doors, entry gate operators,
security systems, entry door locks, and home or office lighting.
When programming your HomeLink�Wireless Control System to
a garage door or gate, be sure that people and objects are out of
the way to prevent potential harm or damage.
Do not use the HomeLink�Wireless Control System with any garage
door opener that lacks safety stop and reverse features as required by
U.S. federal safety standards (this includes any garage door opener
model manufactured before April 1, 1982). A garage door which cannot
detect an object, signaling the door to stop and reverse, does not meet
current U.S. federal safety standards. For more information, contact
HomeLink�at:www.homelink.comor1–800–355–3515.
Retain the original transmitter for use in other vehicles as well as for
future programming procedures (i.e. new HomeLink�equipped vehicle
purchase). It is also suggested that upon the sale of the vehicle, the
programmed Homelink�buttons be erased for security purposes, refer to
Programmingin this section.
Programming
Do not program HomeLink�with the vehicle parked in the garage.
Note:Your vehicle may require the ignition switch to be turned to the
ACC position for programming and/or operation of the HomeLink�.Itis
also recommended that a new battery be placed in the hand-held
transmitter of the device being programmed to HomeLink�for quicker
training and accurate transmission of the radio-frequency signal.
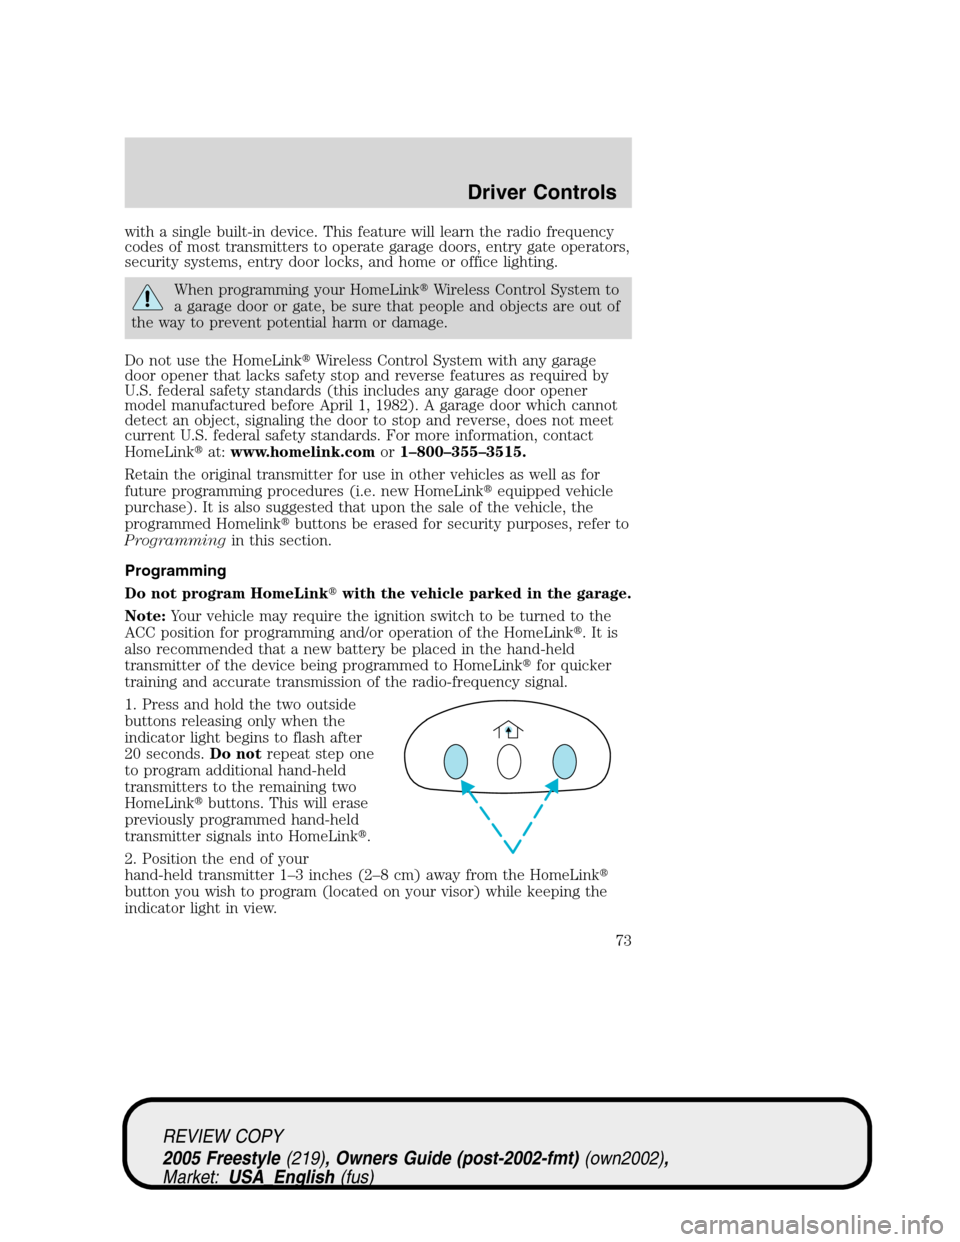
1. Press and hold the two outside
buttons releasing only when the
indicator light begins to flash after
20 seconds.Do notrepeat step one
to program additional hand-held
transmitters to the remaining two
HomeLink�buttons. This will erase
previously programmed hand-held
transmitter signals into HomeLink�.
2. Position the end of your
hand-held transmitter 1–3 inches (2–8 cm) away from the HomeLink�
button you wish to program (located on your visor) while keeping the
indicator light in view.
REVIEW COPY
2005 Freestyle(219), Owners Guide (post-2002-fmt)(own2002),
Market:USA_English(fus)
Driver Controls
73