Page 3 of 312
Maintenance and Specifications 247Engine compartment 249
Engine oil 251
Battery 255
Engine Coolant 257
Fuel information 263
Air filter(s) 280
Part numbers 282
Refill capacities 283
Lubricant specifications 286
Accessories 299
Index 302
All rights reserved. Reproduction by any means, electronic or mechanical
including photocopying, recording or by any information storage and retrieval
system or translation in whole or part is not permitted without written
authorization from Ford Motor Company. Ford may change the contents without
notice and without incurring obligation.
Copyright © 2004 Ford Motor Company Table of Contents
3
2005 F250/350/450/550 (f23)
Owners Guide (post-2002-fmt)
USA_English (fus)
Page 11 of 312
Vehicle Symbol Glossary
Power Windows
Front/Rear Power Window Lockout
Child Safety Door
Lock/Unlock Interior Luggage
Compartment Release
Symbol
Panic Alarm Engine Oil
Engine Coolant Engine Coolant
Temperature
Do Not Open When Hot Battery
Avoid Smoking, Flames,
or Sparks Battery Acid
Explosive Gas Fan Warning
Power Steering Fluid Maintain Correct Fluid
Level MAX
MIN
Emission System Engine Air Filter
Passenger Compartment
Air Filter Jack
Check fuel cap Low tire warning
2005 F250/350/450/550 (f23)
Owners Guide (post-2002-fmt)
USA_English (fus) Introduction
11
Page 14 of 312

Driving a vehicle with the brake system warning light on is
dangerous. A significant decrease in braking performance may
occur. It will take you longer to stop the vehicle. Have the vehicle
checked by your dealer immediately.
Anti-lock brake system: If the
ABS light stays illuminated or
continues to flash, a malfunction has
been detected, have the system
serviced immediately. Normal
braking is still functional unless the brake warning light also is
illuminated.
Air bag readiness: If this light fails
to illuminate when ignition is turned
to ON, continues to flash or remains
on, have the system serviced
immediately. A chime will also sound when a malfunction in the
supplemental restraint system has been detected.
Safety belt: Reminds you to fasten
your safety belt. A chime will also
sound to remind you to fasten your
safety belt.
Charging system: Illuminates when
the battery is not charging properly.
Transmission Tow/Haul Feature
(automatic transmission):
Illuminates when the Tow/Haul
feature has been activated. Refer to
the Driving chapter for transmission function and operation. If the light
flashes steadily, have the system serviced immediately, damage to the
transmission could occur. ABS
2005 F250/350/450/550 (f23)
Owners Guide (post-2002-fmt)
USA_English (fus)Instrument Cluster
14
Page 18 of 312

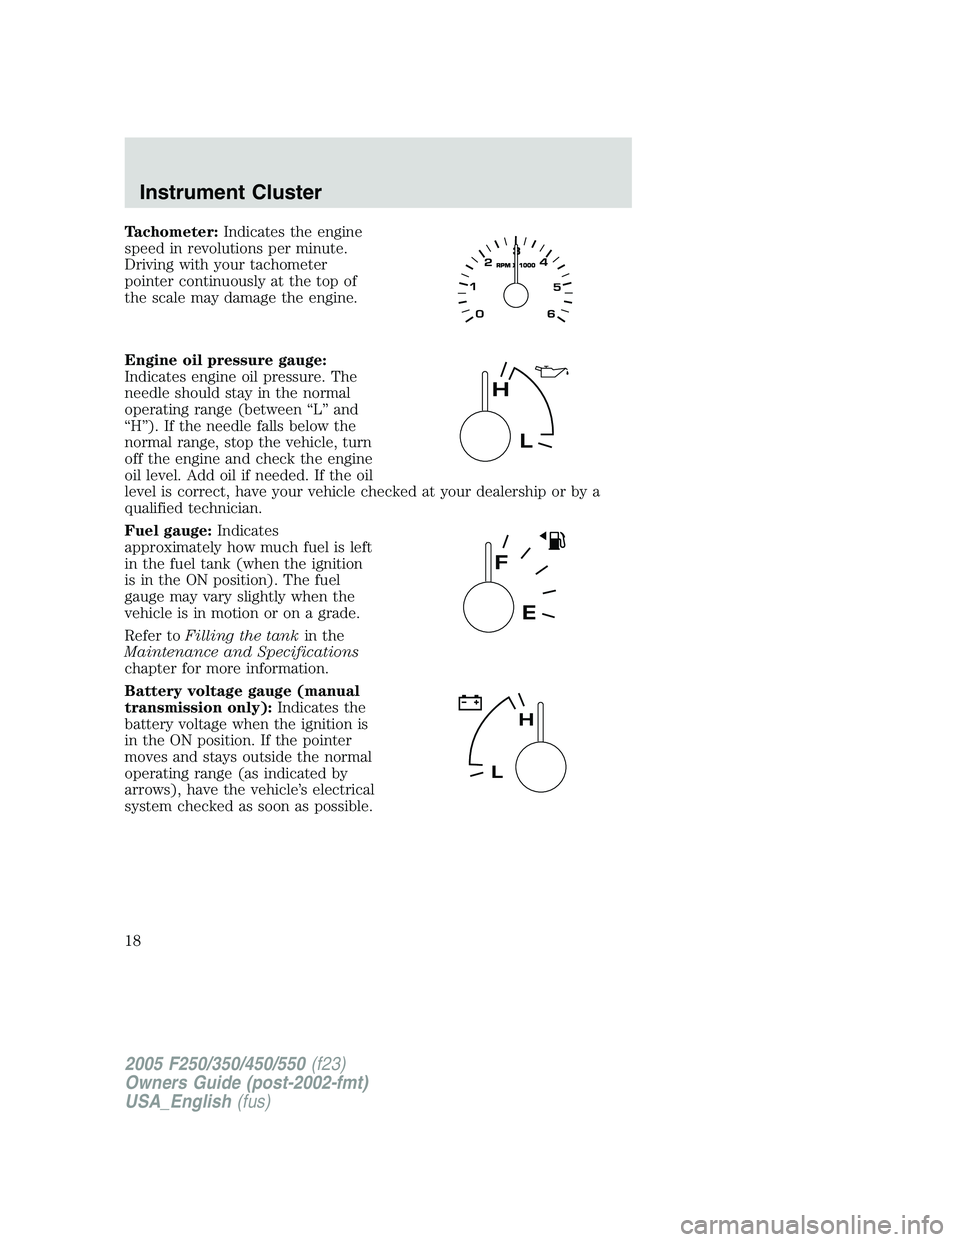
Tachometer: Indicates the engine
speed in revolutions per minute.
Driving with your tachometer
pointer continuously at the top of
the scale may damage the engine.
Engine oil pressure gauge:
Indicates engine oil pressure. The
needle should stay in the normal
operating range (between “L” and
“H”). If the needle falls below the
normal range, stop the vehicle, turn
off the engine and check the engine
oil level. Add oil if needed. If the oil
level is correct, have your vehicle checked at your dealership or by a
qualified technician.
Fuel gauge: Indicates
approximately how much fuel is left
in the fuel tank (when the ignition
is in the ON position). The fuel
gauge may vary slightly when the
vehicle is in motion or on a grade.
Refer to Filling the tank in the
Maintenance and Specifications
chapter for more information.
Battery voltage gauge (manual
transmission only): Indicates the
battery voltage when the ignition is
in the ON position. If the pointer
moves and stays outside the normal
operating range (as indicated by
arrows), have the vehicle’s electrical
system checked as soon as possible.
2005 F250/350/450/550 (f23)
Owners Guide (post-2002-fmt)
USA_English (fus)Instrument Cluster
18
Page 71 of 312
![FORD F250 SUPER DUTY 2005 Owners Manual 7. Press the RESET control to start
the compass calibration function.
8. Slowly drive the vehicle in a
circle (less than 3 mph [5 km/h])
until the CIRCLE SLOWLY TO
CALIBRATE display changes to CALIBRA FORD F250 SUPER DUTY 2005 Owners Manual 7. Press the RESET control to start
the compass calibration function.
8. Slowly drive the vehicle in a
circle (less than 3 mph [5 km/h])
until the CIRCLE SLOWLY TO
CALIBRATE display changes to CALIBRA](/manual-img/11/58779/w960_58779-70.png)
7. Press the RESET control to start
the compass calibration function.
8. Slowly drive the vehicle in a
circle (less than 3 mph [5 km/h])
until the CIRCLE SLOWLY TO
CALIBRATE display changes to CALIBRATION COMPLETED. It will take
up to five circles to complete calibration.
9. The compass is now calibrated.
Distance to empty (DTE)
Selecting this function from the
INFO menu estimates approximately
how far you can drive with the fuel
remaining in your tank under
normal driving conditions.
Remember to turn the ignition OFF
when refueling to allow this feature to correctly detect the added fuel.
The DTE function will display LOW FUEL LEVEL and sound a tone for
one second when you have approximately 50 miles (80 km) to empty. If
you RESET this warning message, this display and tone will return
within 10 minutes.
DTE is calculated using a running average fuel economy, which is based
on your recent driving history of 500 miles (800 km). This value is not
the same as the average fuel economy display. The running average fuel
economy is reinitialized to a factory default value if the battery is
disconnected.
Average fuel economy (AFE)
Select this function from the INFO
menu to display your average fuel
economy in miles/gallon or liters/100
km.
If you calculate your average fuel
economy by dividing gallons of fuel
used by 100 miles traveled (kilometers traveled by liters used), your
figure may be different than displayed for the following reasons:
• Your vehicle was not perfectly level during fill-up
2005 F250/350/450/550 (f23)
Owners Guide (post-2002-fmt)
USA_English (fus) Driver Controls
71
Page 82 of 312

The UNLOCK feature will work again after:
• a door has become ajar,
• the ignition is turned to the 4 (ON) position,
• unlocking the vehicle using the keyless entry keypad,
• or using the UNLOCK
control on your remote entry transmitter (if
equipped).
This feature is initially deactivated, but may be activated by taking your
vehicle to an authorized Ford dealer.
Sounding a panic alarm
Press
to activate the alarm. Press again or turn the ignition to 4
(ON) to deactivate.
Note: The panic alarm will only operate when the ignition is in the 2
(LOCK) or 3 (OFF) position.
Replacing the battery
The remote entry transmitter uses one coin type three-volt lithium
battery CR2032 or equivalent.
To replace the battery:
1. Twist a thin coin between the two
halves of the remote entry
transmitter near the key ring. DO
NOT TAKE THE RUBBER COVER
AND CIRCUIT BOARD OFF THE
FRONT HOUSING OF THE
REMOTE ENTRY TRANSMITTER.
2005 F250/350/450/550 (f23)
Owners Guide (post-2002-fmt)
USA_English (fus)Locks and Security
82
Page 83 of 312

2. Do not wipe off any grease on the
battery terminals on the back
surface of the circuit board.
3. Remove the old battery. Note: Please refer to local regulations when
disposing of transmitter batteries.
4. Insert the new battery. Refer to the diagram inside the remote entry
transmitter for the correct orientation of the battery. Press the battery
down to ensure that the battery is fully seated in the battery housing
cavity.
5. Snap the two halves back together.
Note: Replacement of the battery will not cause the remote transmitter
to become deprogrammed from your vehicle. The remote transmitter
should operate normally after battery replacement.
Replacing lost remote entry transmitters
If you would like to have your remote entry transmitter reprogrammed
because you lost one, or would like to buy additional remote entry
transmitters, you can either reprogram them yourself, or take all
remote entry transmitters to your authorized dealer for
reprogramming.
How to reprogram your remote entry transmitters
You must have all remote keyless entry keypads and remote entry
transmitters (maximum of four) available before beginning this
procedure.
2005 F250/350/450/550 (f23)
Owners Guide (post-2002-fmt)
USA_English (fus) Locks and Security
83
Page 85 of 312

• the 7 • 8 and the 9 • 0 controls on the keyless entry keypad are
pressed, or
• after 25 seconds of illumination.
The dome lamp control (if equipped) must not be set to the off position
for the illuminated entry system to operate.
The inside lights will not turn off if:
• they have been turned on with the dimmer control, or
• any door is open.
The battery saver will shut off the interior lamps 30 minutes after the
ignition has been turned to the 3 (OFF) position, 10 minutes after if the
dome lamp is off, and 30 minutes after if the dome lamp switch is left
on.
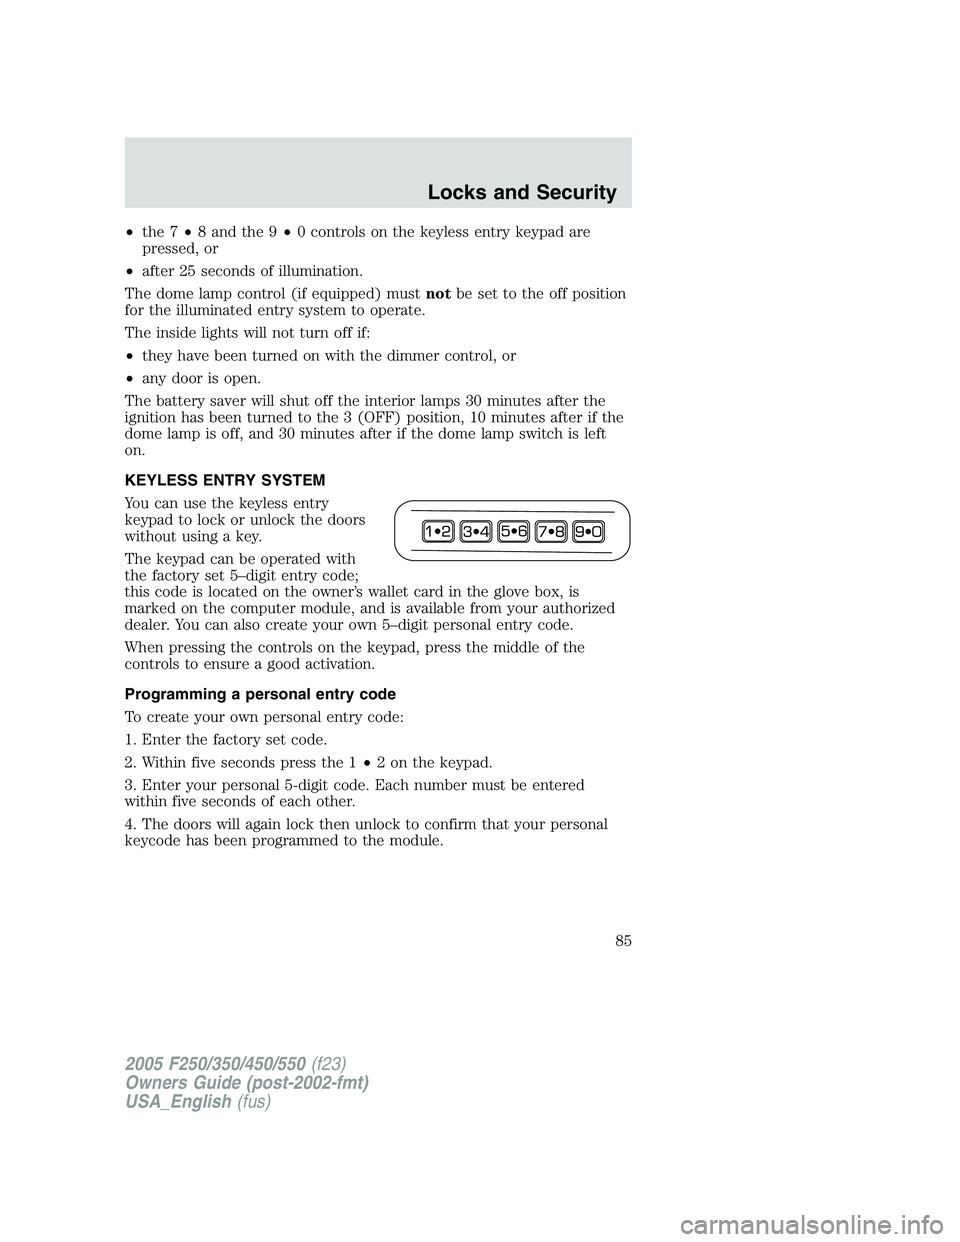
KEYLESS ENTRY SYSTEM
You can use the keyless entry
keypad to lock or unlock the doors
without using a key.
The keypad can be operated with
the factory set 5–digit entry code;
this code is located on the owner’s wallet card in the glove box, is
marked on the computer module, and is available from your authorized
dealer. You can also create your own 5–digit personal entry code.
When pressing the controls on the keypad, press the middle of the
controls to ensure a good activation.
Programming a personal entry code
To create your own personal entry code:
1. Enter the factory set code.
2. Within five seconds press the 1 • 2 on the keypad.
3. Enter your personal 5-digit code. Each number must be entered
within five seconds of each other.
4. The doors will again lock then unlock to confirm that your personal
keycode has been programmed to the module.
2005 F250/350/450/550 (f23)
Owners Guide (post-2002-fmt)
USA_English (fus) Locks and Security
85