2005 FORD F250 fuses
[x] Cancel search: fusesPage 2 of 312
Seating and Safety Restraints 89
Seating 89
Safety restraints 96
Air bags 107
Child restraints 116
Tires, Wheels and Loading 128
Tire Information 132
Tire Inflation 133
Changing tires 137
Wheel lug nut torque 148
Vehicle loading 160
Trailer towing 167
Trailer Brake Controller-Integrated 171
Recreational towing 177
Driving 178
Starting 178
Brakes 183
Transmission operation 187
Roadside Emergencies 213
Getting roadside assistance 213
Hazard flasher switch 214
Fuel pump shut-off switch 214
Fuses and relays 215
Jump starting 224
Wrecker towing 229
Customer Assistance 231
Reporting safety defects (U.S. only) 239
Cleaning 240
Table of Contents
2
2005 F250/350/450/550(f23)
Owners Guide (post-2002-fmt)
USA_English(fus)
Page 109 of 312

Do not attempt to service, repair, or modify the air bag
supplemental restraint systems or its fuses. See your Ford or
Lincoln/Mercury dealer.
The front passenger air bag is not designed to offer protection to
an occupant in the center front seating position.
Modifying or adding equipment to the front end of the vehicle
(including frame, bumper, front end body structure and tow
hooks) may affect the performance of the air bag system, increasing
the risk of injury. Do not modify the front end of the vehicle.
Additional equipment such as snowplow equipment may effect
the performance of the air bag sensors increasing the risk of
injury. Please refer to theBody Builders Layout Bookfor instructions
about the appropriate installation of additional equipment.
Removing the blocker beam without installing snow plow
attachment hardware may effect air bag deployment in a crash.
Do not operate the truck unless either the blocker beam or snow plow
attachment hardware is installed on the vehicle.
Children and air bags
For additional important safety information, read all information on
safety restraints in this guide.
Children must always be properly restrained. Failure to follow these
instructions may increase the risk of injury in a collision.
An infant in a rear-facing seat faces a high risk of serious or fatal
injuries from a deploying passenger air bag. Rear facing infant
seats should NEVER be placed in the front seats, unless the passenger
air bag is turned off. SeePassenger air bag ON/OFF switch.
2005 F250/350/450/550(f23)
Owners Guide (post-2002-fmt)
USA_English(fus)
Seating and Safety Restraints
109
Page 177 of 312
•Disconnect the trailer tow electrical connector to prevent blown fuses
caused by water entering into your trailer’s electrical wiring.
Exceeding these limits may allow water to enter critical vehicle
components, adversely affecting driveability, emissions and reliability.
Replace front and rear axle lubricants any time the axles have been
submerged in water. Axle lubricant quantities are not to be checked
unless a leak is suspected.
RECREATIONAL TOWING
This applies to all 4x2 trucks with rear wheel drive capability.
An example of recreational towing is towing your vehicle behind a
motorhome. The following recreational towing guidelines are designed to
ensure that your transmission is not damaged.
•Place the transmission in N (Neutral).
•Maximum speed is 35 mph (56 km/h).
•Maximum distance is 50 miles (80 km).
If a distance of 50 miles (80 km) or a speed of 35 mph (56 km/h) must
be exceeded, you must disconnect the driveshaft. Ford recommends the
driveshaft be removed/installed only by a qualified technician. See your
local dealer for driveshaft removal/installation.
Improper removal/installation of the driveshaft can cause
transmission fluid loss, damage to the driveshaft and internal
transmission components.
4x4 with manual shift transfer case:
•Place the transfer case in N (Neutral).
•Front hub locks are in the FREE position.
4x4 electronic shift transfer case vehicles with automatic
transmissions:
Regarding recreational towing or having your vehicle towed, 4x4 vehicles
with electronic shift on the fly cannot be towed with any wheels on the
ground unless the rear driveshaft is removed and the front hub locks are
in the FREE position (with the exception of moving it as a disabled
vehicle off the road out of traffic).
2005 F250/350/450/550(f23)
Owners Guide (post-2002-fmt)
USA_English(fus)
Tires, Wheels and Loading
177
Page 187 of 312
Loaded vehicles, with a higher center of gravity, may handle
differently than unloaded vehicles. Extra precautions such as
slower speeds and increased stopping distance should be taken when
driving a heavily loaded vehicle.
AUTOMATIC TRANSMISSION OPERATION (IF EQUIPPED)
Brake-shift interlock
This vehicle is equipped with a brake-shift interlock feature that prevents
the gearshift lever from being moved from P (Park) when the ignition is
in the ON position unless brake pedal is depressed.
If you cannot move the gearshift lever out of P (Park) with ignition in
the ON position and the brake pedal depressed:
1. Apply the parking brake, turn ignition key to LOCK, then remove the
key.
2. Insert the key and turn it to OFF.Apply the brake pedal and shift
to N (Neutral).
When the key is in the ignition and in the OFF position, the
automatic transmission shift lever can be moved from the P
(Park) position without the brake pedal depressed. To avoid unwanted
vehicle movement, always set the parking brake.
3. Start the vehicle.
If it is necessary to use the above procedure to move the gearshift lever,
it is possible that a fuse has blown or the vehicle’s brakelamps are not
operating properly. Refer toFuses and relaysin theRoadside
Emergencieschapter.
Do not drive your vehicle until you verify that the brakelamps
are working.
Always set the parking brake fully and make sure the gearshift is
latched in P (Park). Turn the ignition to the LOCK position and
remove the key whenever you leave your vehicle.
2005 F250/350/450/550(f23)
Owners Guide (post-2002-fmt)
USA_English(fus)
Driving
187
Page 212 of 312

Do not attempt to service, repair, or modify the air bag
supplemental restraint system (SRS) or its fuses. See your Ford
or Lincoln Mercury dealer.
Additional equipment such as snowplow equipment may effect
the performance of the air bag sensors increasing the risk of
injury. Please refer to theBody Builders Layout Bookfor instructions
about the appropriate installation of additional equipment.
Transmission operation while plowing
•Shift transfer case to 4x4 LOW (4WD Low) when plowing in small
areas at speeds below 5 mph (8 km/h).
•
Shift transfer case to 4x4 HIGH (4WD High) when plowing larger areas
or light snow at higher speeds. Do not exceed 15 mph (24 km/h).
•Do not shift the transmission from a forward gear to R (Reverse) until
the engine is at idle and the wheels are stopped.
•If the vehicle is stuck, shift the transmission in a steady motion
between forward and reverse gears. Do not rock the vehicle for more
than a few minutes. The transmission and tires may be damaged or
the engine can overheat.
Do not rock the vehicle if the engine is not at normal operating
temperature. Do not rock the vehicle for more than a minute. The
transmission and tires may be damaged or the engine may overheat.
Refer toTransmission temperature gaugein theInstrument Cluster
chapter for transmission fluid temperature information.
Do not spin the wheels at over 35 mph (55 km/h). The tires may
fail and injure a passenger or bystander.
Removing the snowplow frame mount
A metal crossmember is included below the front bumper on Super Duty
vehicles called a “BlockerBeam”. Typical snowplow installations require
removal of this BlockerBeam to install the snowplow mounting hardware
to the vehicle frame.
The BlockerBeam must be re-installed if the snowplow
frame-mounting hardware is removed from the vehicle to assure
proper air bag deployment in a crash.
2005 F250/350/450/550(f23)
Owners Guide (post-2002-fmt)
USA_English(fus)
Driving
212
Page 215 of 312
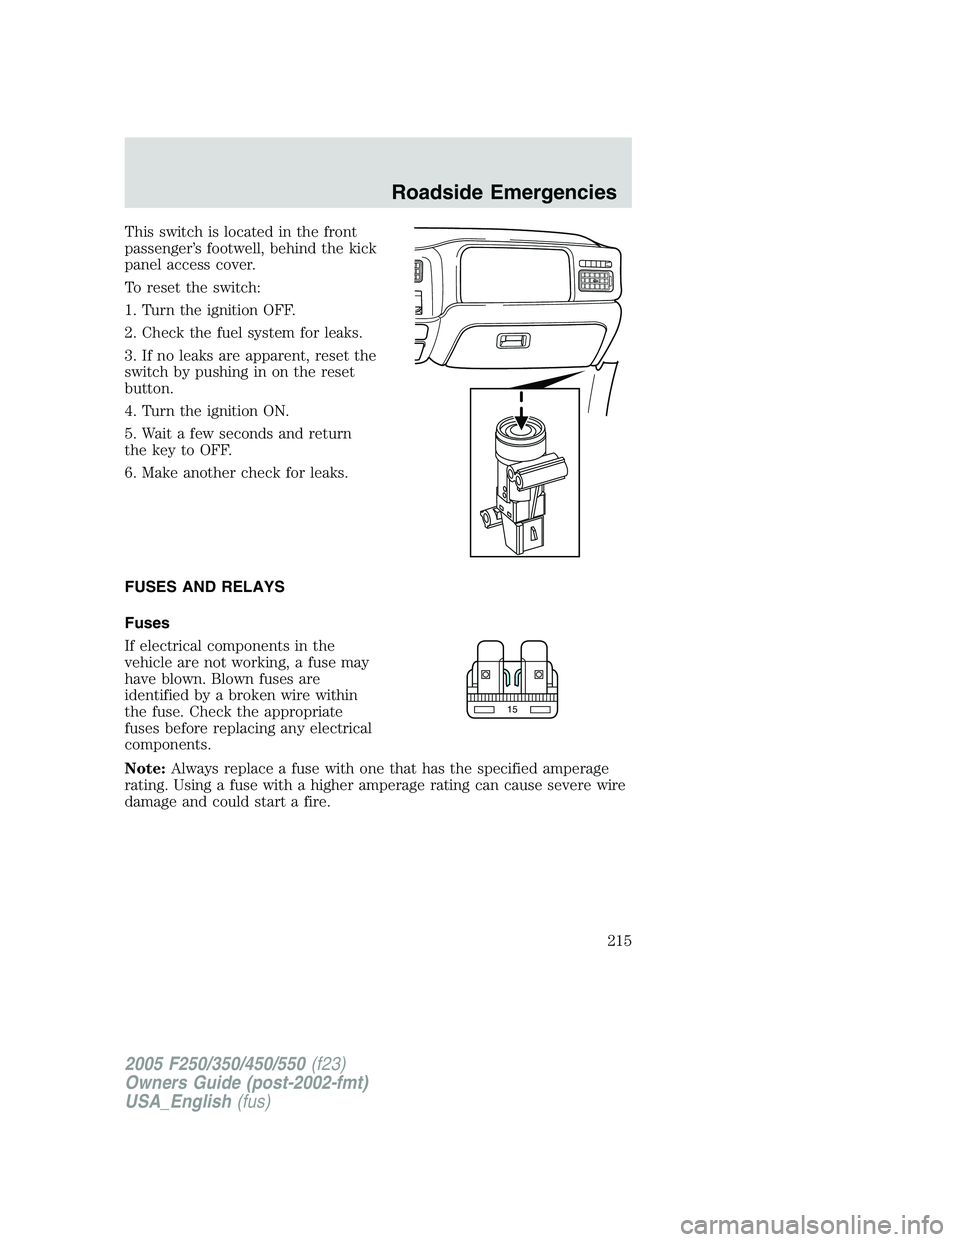
This switch is located in the front
passenger’s footwell, behind the kick
panel access cover.
To reset the switch:
1. Turn the ignition OFF.
2. Check the fuel system for leaks.
3. If no leaks are apparent, reset the
switch by pushing in on the reset
button.
4. Turn the ignition ON.
5. Wait a few seconds and return
the key to OFF.
6. Make another check for leaks.
FUSES AND RELAYS
Fuses
If electrical components in the
vehicle are not working, a fuse may
have blown. Blown fuses are
identified by a broken wire within
the fuse. Check the appropriate
fuses before replacing any electrical
components.
Note:Always replace a fuse with one that has the specified amperage
rating. Using a fuse with a higher amperage rating can cause severe wire
damage and could start a fire.
15
2005 F250/350/450/550(f23)
Owners Guide (post-2002-fmt)
USA_English(fus)
Roadside Emergencies
215
Page 216 of 312
Standard fuse amperage rating and color
COLOR
Fuse
ratingMini
fusesStandard
fusesMaxi
fusesCartridge
maxi
fusesFuse link
cartridge
2A Grey Grey — — —
3A Violet Violet — — —
4A Pink Pink — — —
5A Tan Tan — — —
7.5A Brown Brown — — —
10A Red Red — — —
15A Blue Blue — — —
20A Yellow Yellow Yellow Blue Blue
25A Natural Natural — — —
30A Green Green Green Pink Pink
40A — — Orange Green Green
50A — — Red Red Red
60A — — Blue — Yellow
70A — — Tan — Brown
80A — — Natural — Black
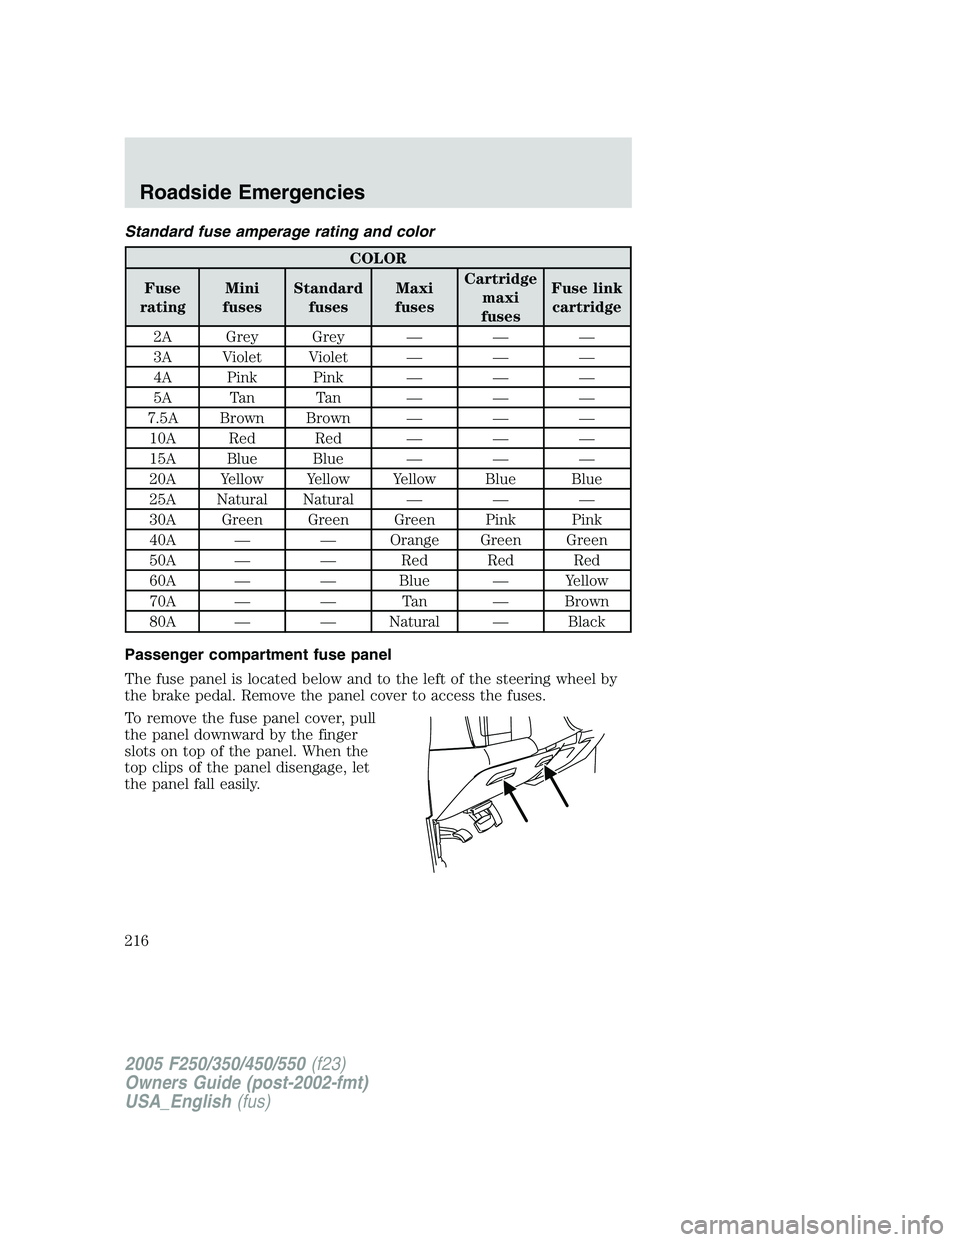
Passenger compartment fuse panel
The fuse panel is located below and to the left of the steering wheel by
the brake pedal. Remove the panel cover to access the fuses.
To remove the fuse panel cover, pull
the panel downward by the finger
slots on top of the panel. When the
top clips of the panel disengage, let
the panel fall easily.
2005 F250/350/450/550(f23)
Owners Guide (post-2002-fmt)
USA_English(fus)
Roadside Emergencies
216
Page 217 of 312
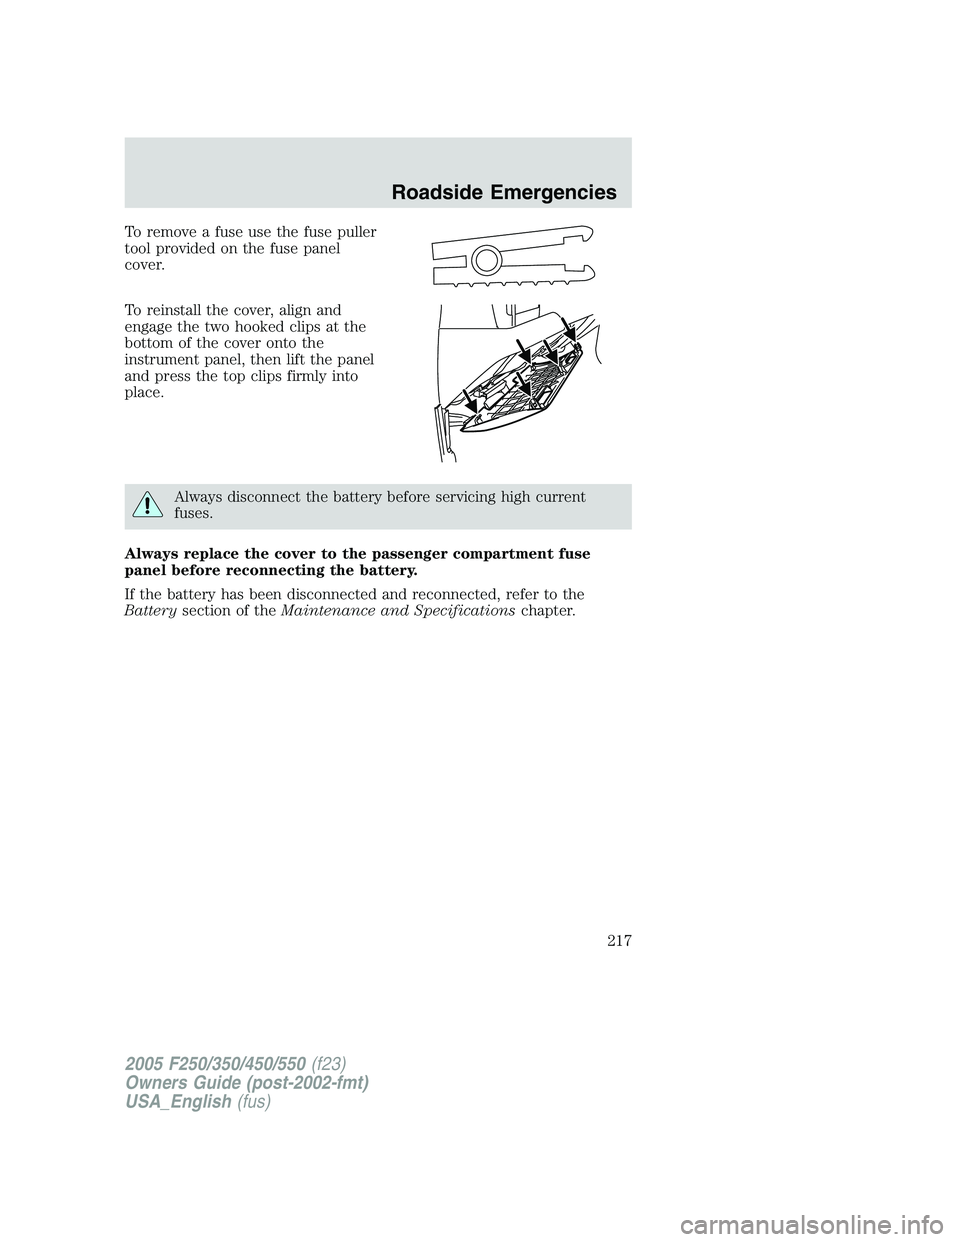
To remove a fuse use the fuse puller
tool provided on the fuse panel
cover.
To reinstall the cover, align and
engage the two hooked clips at the
bottom of the cover onto the
instrument panel, then lift the panel
and press the top clips firmly into
place.
Always disconnect the battery before servicing high current
fuses.
Always replace the cover to the passenger compartment fuse
panel before reconnecting the battery.
If the battery has been disconnected and reconnected, refer to the
Batterysection of theMaintenance and Specificationschapter.
2005 F250/350/450/550(f23)
Owners Guide (post-2002-fmt)
USA_English(fus)
Roadside Emergencies
217