Page 55 of 312
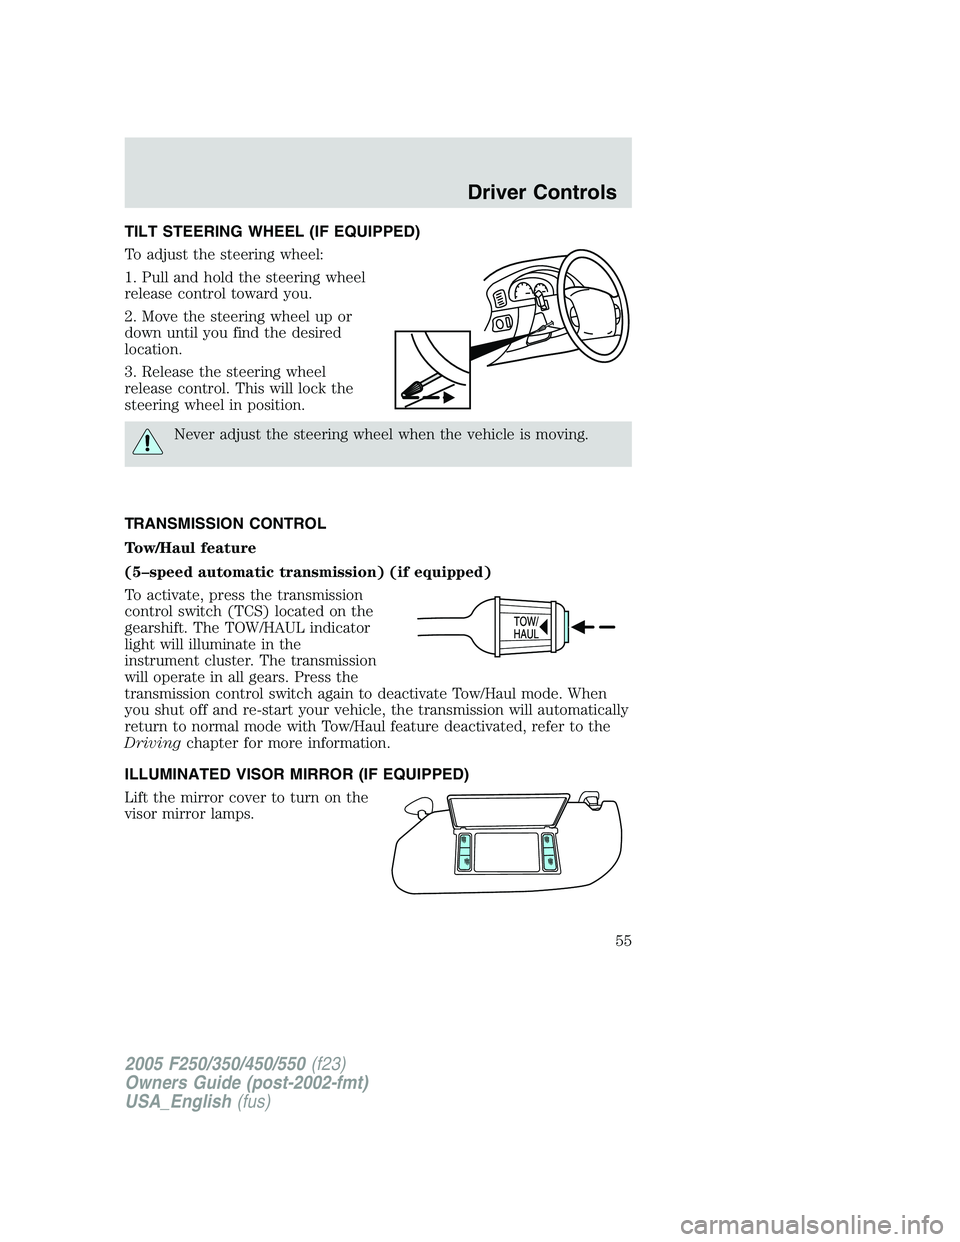
TILT STEERING WHEEL (IF EQUIPPED)
To adjust the steering wheel:
1. Pull and hold the steering wheel
release control toward you.
2. Move the steering wheel up or
down until you find the desired
location.
3. Release the steering wheel
release control. This will lock the
steering wheel in position.
Never adjust the steering wheel when the vehicle is moving.
TRANSMISSION CONTROL
Tow/Haul feature
(5–speed automatic transmission) (if equipped)
To activate, press the transmission
control switch (TCS) located on the
gearshift. The TOW/HAUL indicator
light will illuminate in the
instrument cluster. The transmission
will operate in all gears. Press the
transmission control switch again to deactivate Tow/Haul mode. When
you shut off and re-start your vehicle, the transmission will automatically
return to normal mode with Tow/Haul feature deactivated, refer to the
Drivingchapter for more information.
ILLUMINATED VISOR MIRROR (IF EQUIPPED)
Lift the mirror cover to turn on the
visor mirror lamps.
2005 F250/350/450/550(f23)
Owners Guide (post-2002-fmt)
USA_English(fus)
Driver Controls
55
Page 57 of 312
To vent the moon roof:Press and hold thecontrol.The moon
roof must be in the closed position in order to move it into the
vent position.To close, press and hold the AUTO control until the glass
panel stops moving.
The moon roof has a built-in sliding shade that can be manually opened
or closed when the glass panel is shut. To close the shade, pull it toward
the front of the vehicle.
When closing the moon roof, you should verify that it is free of
obstructions and ensure that children and/or pets are not in the
proximity of the moon roof opening.
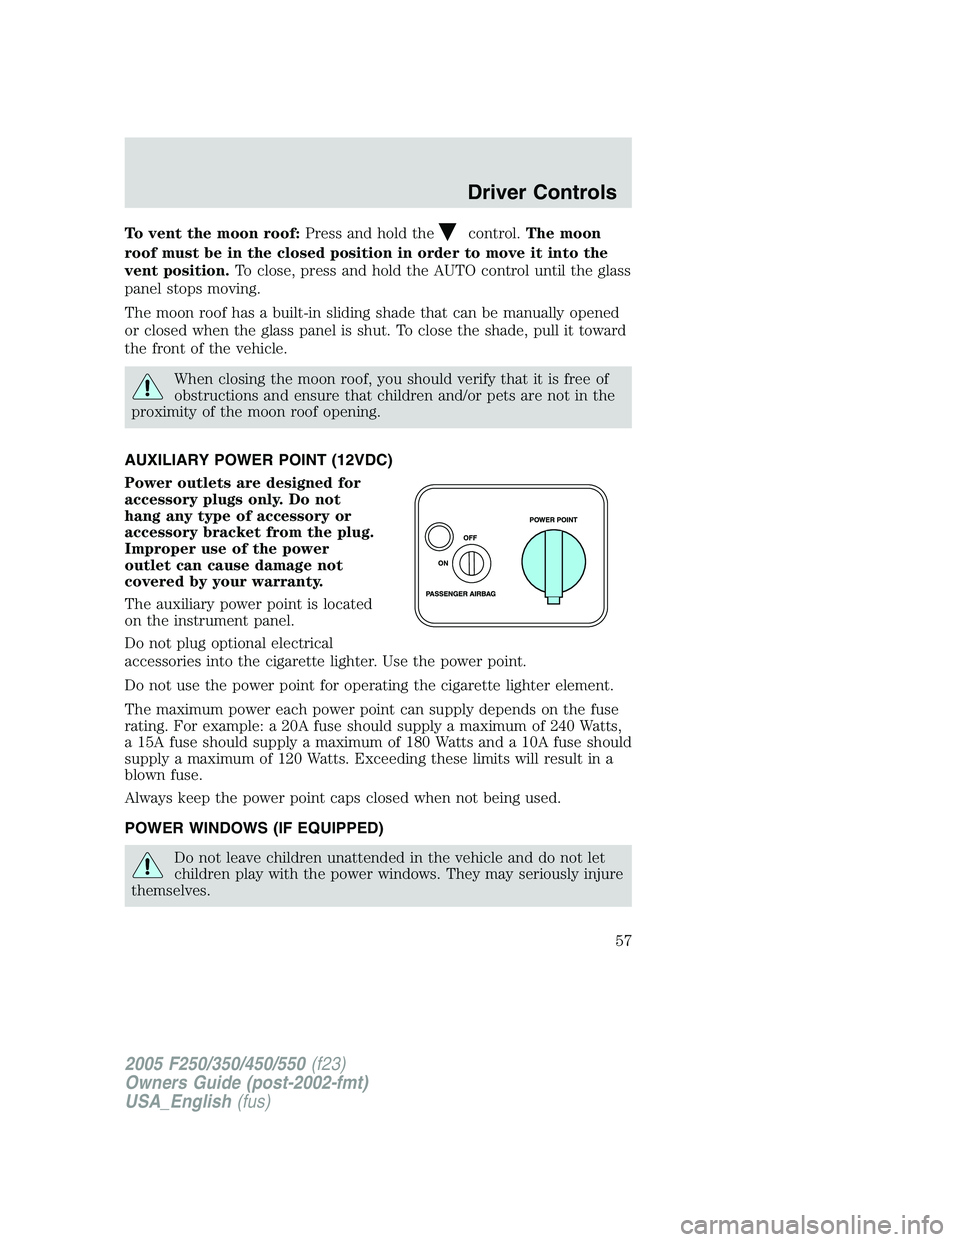
AUXILIARY POWER POINT (12VDC)
Power outlets are designed for
accessory plugs only. Do not
hang any type of accessory or
accessory bracket from the plug.
Improper use of the power
outlet can cause damage not
covered by your warranty.
The auxiliary power point is located
on the instrument panel.
Do not plug optional electrical
accessories into the cigarette lighter. Use the power point.
Do not use the power point for operating the cigarette lighter element.
The maximum power each power point can supply depends on the fuse
rating. For example: a 20A fuse should supply a maximum of 240 Watts,
a 15A fuse should supply a maximum of 180 Watts and a 10A fuse should
supply a maximum of 120 Watts. Exceeding these limits will result in a
blown fuse.
Always keep the power point caps closed when not being used.
POWER WINDOWS (IF EQUIPPED)
Do not leave children unattended in the vehicle and do not let
children play with the power windows. They may seriously injure
themselves.
2005 F250/350/450/550(f23)
Owners Guide (post-2002-fmt)
USA_English(fus)
Driver Controls
57
Page 59 of 312
Accessory delay (if equipped)
With accessory delay, the window switches may be used for up to ten
minutes after the ignition switch is turned to the OFF position or until
any door is opened.
MIRRORS
Automatic dimming inside rear view mirror (if equipped)
Your vehicle is equipped with an inside rear view mirror with an
auto-dimming function. The electronic day/night mirror will change from
the normal state to the non-glare state when bright lights (glare) reach
the mirror. When the mirror detects bright light from front or behind, it
will automatically adjust to minimize glare.
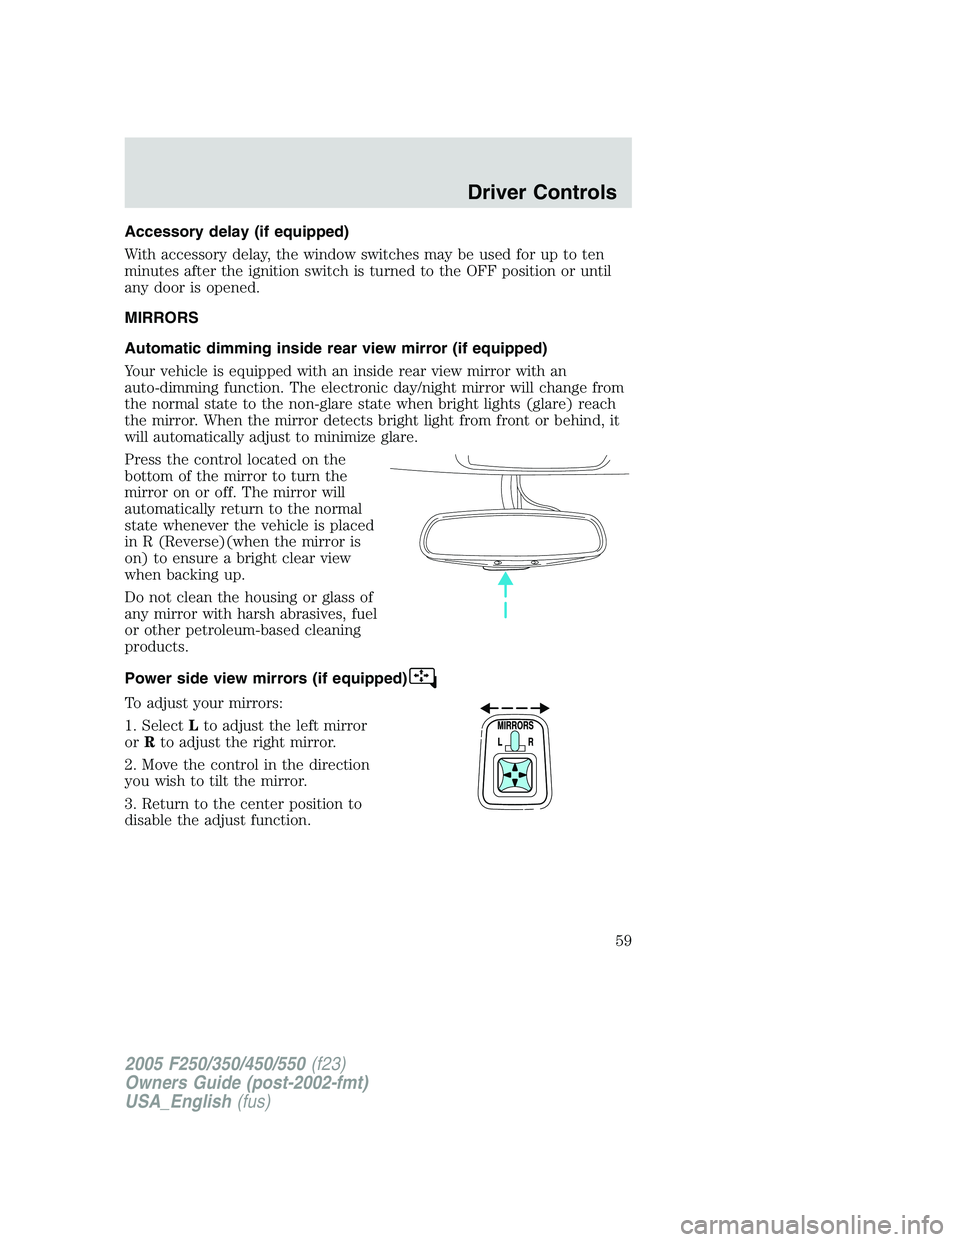
Press the control located on the
bottom of the mirror to turn the
mirror on or off. The mirror will
automatically return to the normal
state whenever the vehicle is placed
in R (Reverse)(when the mirror is
on) to ensure a bright clear view
when backing up.
Do not clean the housing or glass of
any mirror with harsh abrasives, fuel
or other petroleum-based cleaning
products.
Power side view mirrors (if equipped)
To adjust your mirrors:
1. SelectLto adjust the left mirror
orRto adjust the right mirror.
2. Move the control in the direction
you wish to tilt the mirror.
3. Return to the center position to
disable the adjust function.
2005 F250/350/450/550(f23)
Owners Guide (post-2002-fmt)
USA_English(fus)
Driver Controls
59
Page 63 of 312
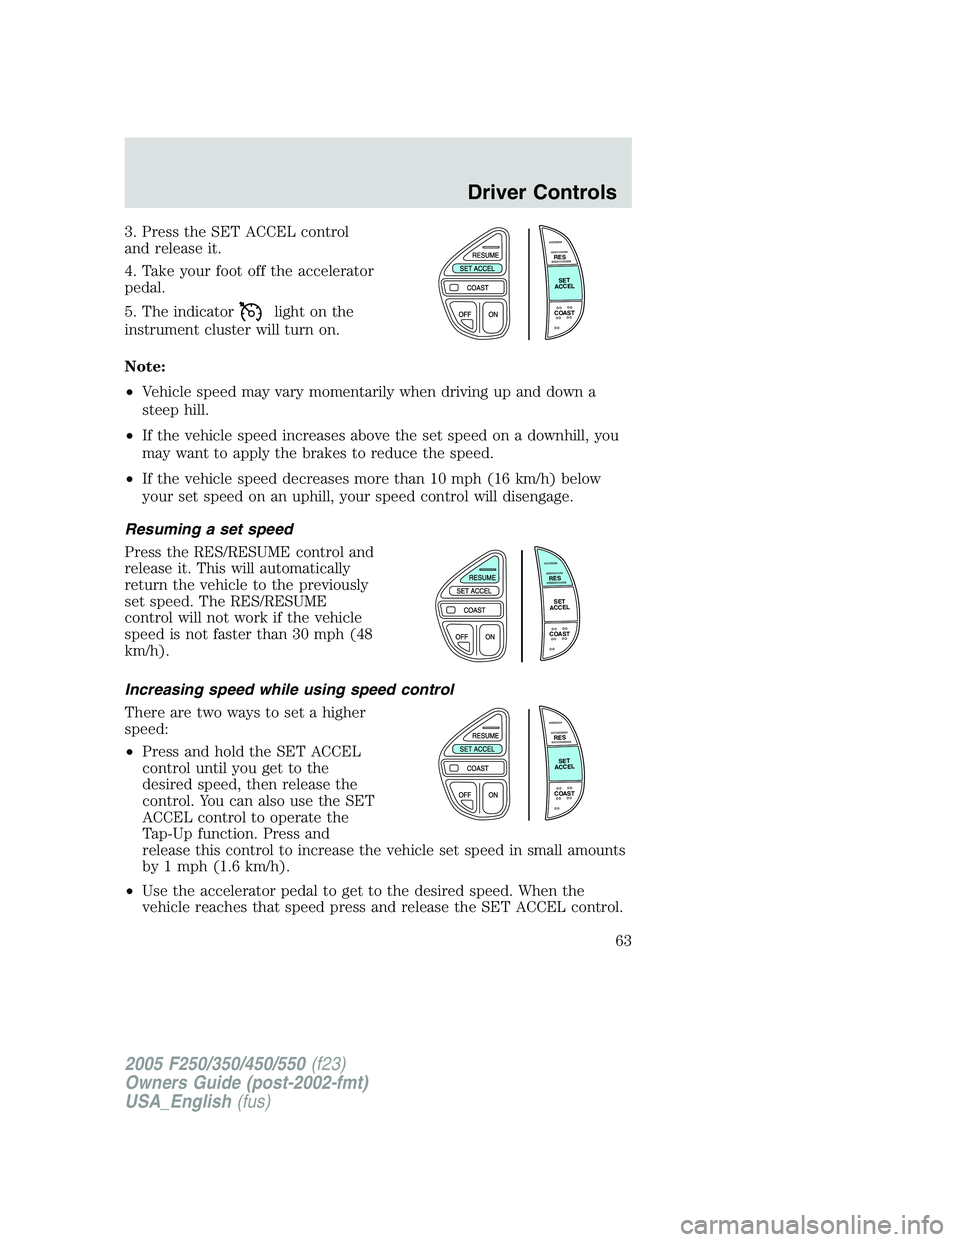
3. Press the SET ACCEL control
and release it.
4. Take your foot off the accelerator
pedal.
5. The indicator
light on the
instrument cluster will turn on.
Note:
•Vehicle speed may vary momentarily when driving up and down a
steep hill.
•If the vehicle speed increases above the set speed on a downhill, you
may want to apply the brakes to reduce the speed.
•If the vehicle speed decreases more than 10 mph (16 km/h) below
your set speed on an uphill, your speed control will disengage.
Resuming a set speed
Press the RES/RESUME control and
release it. This will automatically
return the vehicle to the previously
set speed. The RES/RESUME
control will not work if the vehicle
speed is not faster than 30 mph (48
km/h).
Increasing speed while using speed control
There are two ways to set a higher
speed:
•Press and hold the SET ACCEL
control until you get to the
desired speed, then release the
control. You can also use the SET
ACCEL control to operate the
Tap-Up function. Press and
release this control to increase the vehicle set speed in small amounts
by 1 mph (1.6 km/h).
•Use the accelerator pedal to get to the desired speed. When the
vehicle reaches that speed press and release the SET ACCEL control.
R
E
S
S
E
T
A
C
C
E
L
C
O
A
S
T
R
E
S
S
E
T
A
C
C
E
L
C
O
A
S
T
R
E
S
S
E
T
A
C
C
E
L
C
O
A
S
T
2005 F250/350/450/550(f23)
Owners Guide (post-2002-fmt)
USA_English(fus)
Driver Controls
63
Page 64 of 312
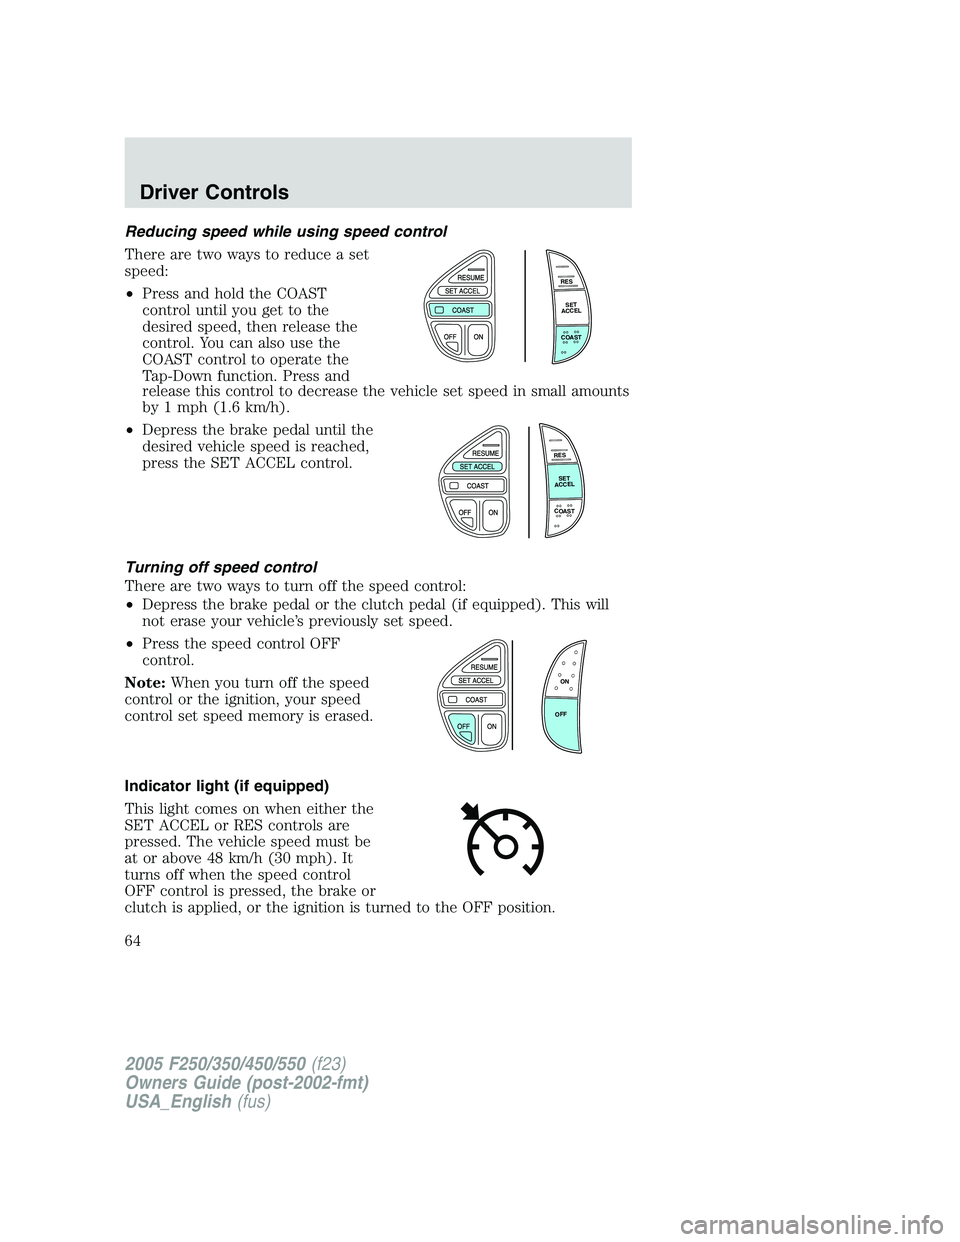
Reducing speed while using speed control
There are two ways to reduce a set
speed:
•Press and hold the COAST
control until you get to the
desired speed, then release the
control. You can also use the
COAST control to operate the
Tap-Down function. Press and
release this control to decrease the vehicle set speed in small amounts
by 1 mph (1.6 km/h).
•Depress the brake pedal until the
desired vehicle speed is reached,
press the SET ACCEL control.
Turning off speed control
There are two ways to turn off the speed control:
•Depress the brake pedal or the clutch pedal (if equipped). This will
not erase your vehicle’s previously set speed.
•Press the speed control OFF
control.
Note:When you turn off the speed
control or the ignition, your speed
control set speed memory is erased.
Indicator light (if equipped)
This light comes on when either the
SET ACCEL or RES controls are
pressed. The vehicle speed must be
at or above 48 km/h (30 mph). It
turns off when the speed control
OFF control is pressed, the brake or
clutch is applied, or the ignition is turned to the OFF position.
R
E
S
S
E
T
A
C
C
E
L
C
O
A
S
T
R
E
S
S
E
T
A
C
C
E
L
C
O
A
S
T
ON
OFF
2005 F250/350/450/550(f23)
Owners Guide (post-2002-fmt)
USA_English(fus)
Driver Controls
64
Page 67 of 312

Door ajar:Displays when the
ignition is in the ON position and
any door is open.
Check fuel cap:Displays when the
fuel cap may not be properly
installed. Continued driving with
this display on may cause the
Service engine soon warning light to
come on. Refer toFuel filler capunder theFuel Information sectionin
theMaintenance and Specificationschapter.
Trailer fault (if equipped):
Displayed if there is a short circuit
on the electric brake output wire or
the trailer brakes are drawing too
much current. Refer toIntegrated
trailer brake controllerin theTires, Wheels and Loadingchapter for
more information.
TBC fault (if equipped):Displays
in response to faults sensed by the
TBC. In the event this message is
seen, please take your vehicle to an
authorized Ford dealership for
diagnosis and repair. Refer toIntegrated trailer brake controllerin the
Tires, Wheels and Loadingchapter for more information.
Note:The following warning messages will reappear on the display every
ten minutes.
Low fuel:Displays when the fuel
level in the fuel tank is at or near
empty (refer toFuel gaugein this
chapter).
Check gauge:Displays when any of
the following conditions has
occurred:
•The engine coolant temperature
is high.
•The engine oil pressure is low.
•The fuel gauge is at or near empty.
2005 F250/350/450/550(f23)
Owners Guide (post-2002-fmt)
USA_English(fus)
Driver Controls
67
Page 70 of 312
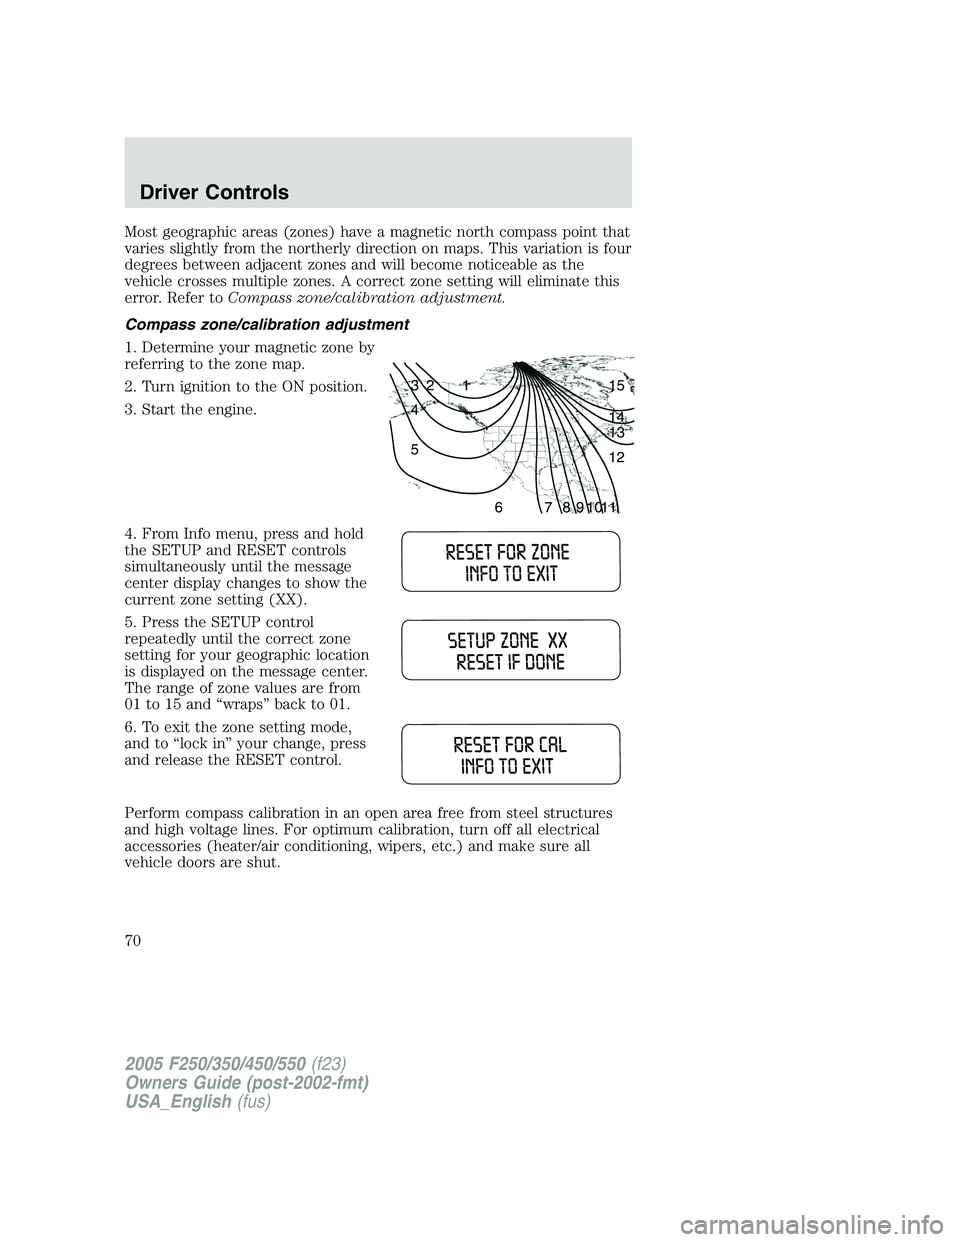
Most geographic areas (zones) have a magnetic north compass point that
varies slightly from the northerly direction on maps. This variation is four
degrees between adjacent zones and will become noticeable as the
vehicle crosses multiple zones. A correct zone setting will eliminate this
error. Refer toCompass zone/calibration adjustment.
Compass zone/calibration adjustment
1. Determine your magnetic zone by
referring to the zone map.
2. Turn ignition to the ON position.
3. Start the engine.
4. From Info menu, press and hold
the SETUP and RESET controls
simultaneously until the message
center display changes to show the
current zone setting (XX).
5. Press the SETUP control
repeatedly until the correct zone
setting for your geographic location
is displayed on the message center.
The range of zone values are from
01 to 15 and “wraps” back to 01.
6. To exit the zone setting mode,
and to “lock in” your change, press
and release the RESET control.
Perform compass calibration in an open area free from steel structures
and high voltage lines. For optimum calibration, turn off all electrical
accessories (heater/air conditioning, wipers, etc.) and make sure all
vehicle doors are shut.
1 2 3
4
5
6 7 8 9 101112 13 14 15
2005 F250/350/450/550(f23)
Owners Guide (post-2002-fmt)
USA_English(fus)
Driver Controls
70
Page 73 of 312

The sequence of the system check report and how it appears in the
message center is as follows:
1. ENGINE TEMP
2. TRANS TEMP
3. OIL PRESSURE
4. BRAKE FLUID LEVEL
5. DOOR AJAR
6. FUEL CAP
7. AIR FILTER (diesel only)
8. FUEL LEVEL
Units (English/Metric)
1. Select this function from the
SETUP menu for the current units
to be displayed.
2. Press the RESET control to
change from English to Metric.
Autolocks
This feature automatically locks all vehicle doors when the vehicle is
shifted into any gear, putting the vehicle in motion.
1. To disable/enable the autolock
feature, select this function from the
SETUP control for the current
display mode.
2. Press the RESET control to turn
the autolocks ON or OFF.
Autolamp delay
This feature keeps your headlights on for up to three minutes after the
ignition is switched off.
1. To disable/enable the autolamp
delay feature, select this function
from the SETUP control for the
current display mode.
2. Press the RESET control to select
the new Autolamp delay values of >0, >10, >20, >30, >60, >90, >120 or
>180.
2005 F250/350/450/550(f23)
Owners Guide (post-2002-fmt)
USA_English(fus)
Driver Controls
73