2005 FORD EXPLORER brake
[x] Cancel search: brakePage 95 of 320

•Compass
•Outside temperature
•Engine sensor
Contact your dealer as soon as possible if these messages occur on a
regular basis.
POSITIVE RETENTION FLOOR MAT
Position the driver floor mat so that
the eyelet is over the pointed end of
the retention post and rotate
forward to lock in. Make sure that
the mat does not interfere with the
operation of the accelerator or the
brake pedal. To remove the floor
mat, reverse the installation
procedure.
REAR LIFTGATE
The liftgate area is only intended for cargo, not passengers. You can open
and close the liftgate from outside the vehicle. It cannot be opened from
inside the cargo area.
•To open the liftgate window,
press the control on the remote
entry key fob or, with the liftgate
unlocked, push the control button
on theright sideunder the
license plate lamp shield.
•To open the liftgate, unlock the
liftgate (with the power door
locks, the remote entry or the
keyless entry pad) and pull the
middlelever under the license
plate lamp shield.
To lock the liftgate and the liftgate window, use the power door locks or
press the door lock switch on the left side of the cargo area. To manually
lock or unlock the liftgate, move the button located below the window
down or up.
REVIEW COPY
2005 Explorer(exp), Owners Guide (post-2002-fmt)(own2002),
Market:USA_English(fus)
Driver Controls
95
Page 107 of 320
To unlock all doors and liftgate,press the 3•4 control within five
seconds.
To open the liftgate window,press the 5•6 control within five
seconds.
To lock all doors, liftgate and liftgate window,press the 7•8 and
the 9•0 at the same time.Note:The driver’s door must be closed. You
do notneed to enter the keypad code first.
Autolock
The autolock feature will lock all the doors, liftgate and liftgate window
when:
•all the doors, the liftgate and liftgate window are closed,
•the ignition is in the 3 (ON) position,
•you shift into any gear putting the vehicle in motion, and
•the brake pedal is released and the vehicle attains a speed greater
than 8 km/h (5 mph).
The autolock feature repeats when:
•any door, liftgate or liftgate window is opened then closed while the
ignition is in the 3 (ON) position, and
•you put the vehicle in motion by releasing the brake pedal and the
vehicle attains a speed greater than 5 mph (8 km/h).
Deactivating/activating autolock
Your vehicle comes with the autolock feature activated. There are four
methods to enable/disable this feature: One is through your dealer, the
second with a power door unlock/lock sequence, the third with the
keypad, and the fourth by using the message center (if equipped).
Before following the activation or deactivation procedures, make sure
that the anti-theft system is not armed, ignition is off, and all vehicle
doors, liftgate and liftgate window are closed.
REVIEW COPY
2005 Explorer(exp), Owners Guide (post-2002-fmt)(own2002),
Market:USA_English(fus)
Locks and Security
107
Page 127 of 320
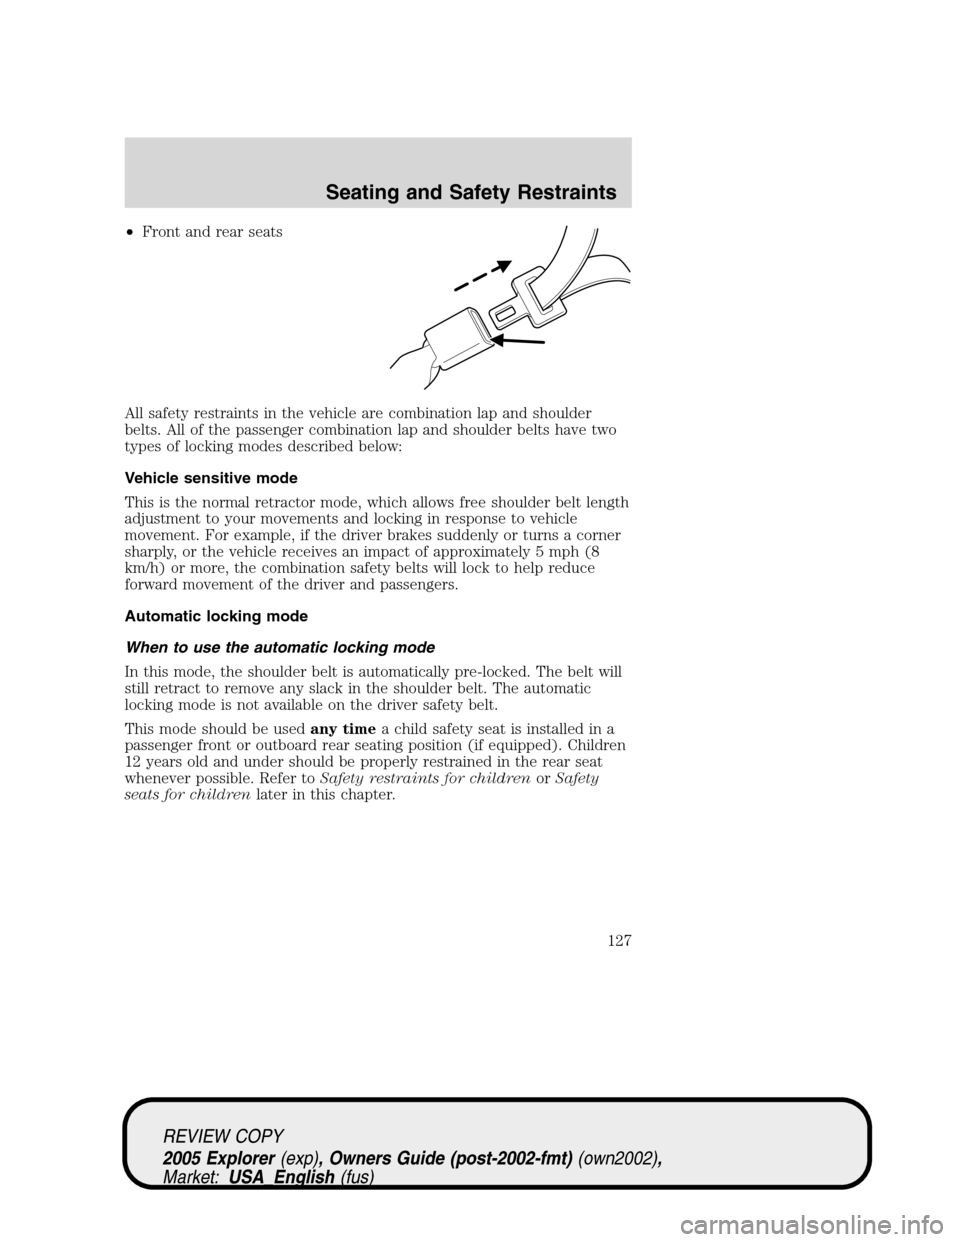
•Front and rear seats
All safety restraints in the vehicle are combination lap and shoulder
belts. All of the passenger combination lap and shoulder belts have two
types of locking modes described below:
Vehicle sensitive mode
This is the normal retractor mode, which allows free shoulder belt length
adjustment to your movements and locking in response to vehicle
movement. For example, if the driver brakes suddenly or turns a corner
sharply, or the vehicle receives an impact of approximately 5 mph (8
km/h) or more, the combination safety belts will lock to help reduce
forward movement of the driver and passengers.
Automatic locking mode
When to use the automatic locking mode
In this mode, the shoulder belt is automatically pre-locked. The belt will
still retract to remove any slack in the shoulder belt. The automatic
locking mode is not available on the driver safety belt.
This mode should be usedany timea child safety seat is installed in a
passenger front or outboard rear seating position (if equipped). Children
12 years old and under should be properly restrained in the rear seat
whenever possible. Refer toSafety restraints for childrenorSafety
seats for childrenlater in this chapter.
REVIEW COPY
2005 Explorer(exp), Owners Guide (post-2002-fmt)(own2002),
Market:USA_English(fus)
Seating and Safety Restraints
127
Page 133 of 320
Reasons given... Consider...
“I have an air bag” Air bags offer greater protection when
used with safety belts. Frontal airbags
are not designed to inflate in rear and
side crashes or rollovers.
“I’d rather be thrown clear” Not a good idea.Peoplewho are
ejected are 40 times more likely
to DIE.Safety belts help prevent
ejection, WE CAN’T “PICK OUR
CRASH”.
Do not sit on top of a buckled safety belt to avoid the Belt
Minder chime. Sitting on the safety belt will increase the risk of
injury in an accident. To disable (one-time) or deactivate the Belt
Minder feature please follow the directions stated below.
One time disable
Any time the safety belt is buckled and then unbuckled during an
ignition ON cycle, the BeltMinder will be disabled for that ignition cycle
only.
Deactivating/activating the BeltMinder feature
Before following the procedure, make sure that:
•the parking brake is set
•the gearshift is in P (Park)
•the ignition switch is in the OFF position
•all vehicle doors are closed
•the driver’s safety belt is unbuckled
•the parklamps/headlamps are in OFF position (If vehicle is equipped
with Autolamps, the Autolamps featureMUSTbe turned off.)
Read steps1-9thoroughly before proceeding with the
deactivation/activation programming procedure.
BeltMinder deactivation/activation procedure
To reduce the risk of injury, do not deactivate/activate the Belt
Minder feature while driving the vehicle.
REVIEW COPY
2005 Explorer(exp), Owners Guide (post-2002-fmt)(own2002),
Market:USA_English(fus)
Seating and Safety Restraints
133
Page 164 of 320

The installation of replacement tires with steel cord body plies in the tire
sidewall may cause malfunction of the Tire Pressure Monitoring System
(TPMS), and is not recommended (cord material information is molded
on the tire sidewall). Additionally, if your vehicle was originally equipped
with run-flat tires, replacing them with tires that are not identical to
those originally fitted may cause malfunction of the TPMS, and is not
recommended. Run-flat tires should not be used to replace regular tires.
Always check your TPMS indicator immediately after replacing one or
more tires on your vehicle. If the TPMS indicator is on, your TPMS is
malfunctioning. Your replacement tire might be incompatible with your
TPMS system, or some component of the TPMS system may be damaged.
You should replace the spare tire when you replace the other road tires
due to the aging of the spare tire.
CHANGING THE TIRES
If you get a flat tire while driving:
•do not brake heavily.
•gradually decrease the vehicle’s speed.
•hold the steering wheel firmly.
•slowly move to a safe place on the side of the road.
Note:If your vehicle is equipped with the tire pressure monitoring
system (TPMS), the system indicator light will illuminate when the spare
is in use. To restore the full functionality of the monitoring system, all
road wheels equipped with tire pressure monitoring sensors must be
mounted on the vehicle.
If your vehicle is equipped with TPMS, have a flat serviced by a dealer or
a qualified technician in order to prevent damage to the TPMS sensor,
refer toChanging tires with TPMSlater in this chapter. Replace the
spare tire with a road tire as soon as possible.
The use of tire sealants may damage your tires. The use of tire
sealants may also damage your Tire Pressure Monitoring System
(if equipped).
If your vehicle is equipped with a tire pressure monitoring
system, refer toTire Pressure Monitoring System (if
equipped)later in this chapter for important information. If the tire
pressure monitor sensor becomes damaged, it will no longer function.
REVIEW COPY
2005 Explorer(exp), Owners Guide (post-2002-fmt)(own2002),
Market:USA_English(fus)
Tires, Wheels and Loading
164
Page 166 of 320
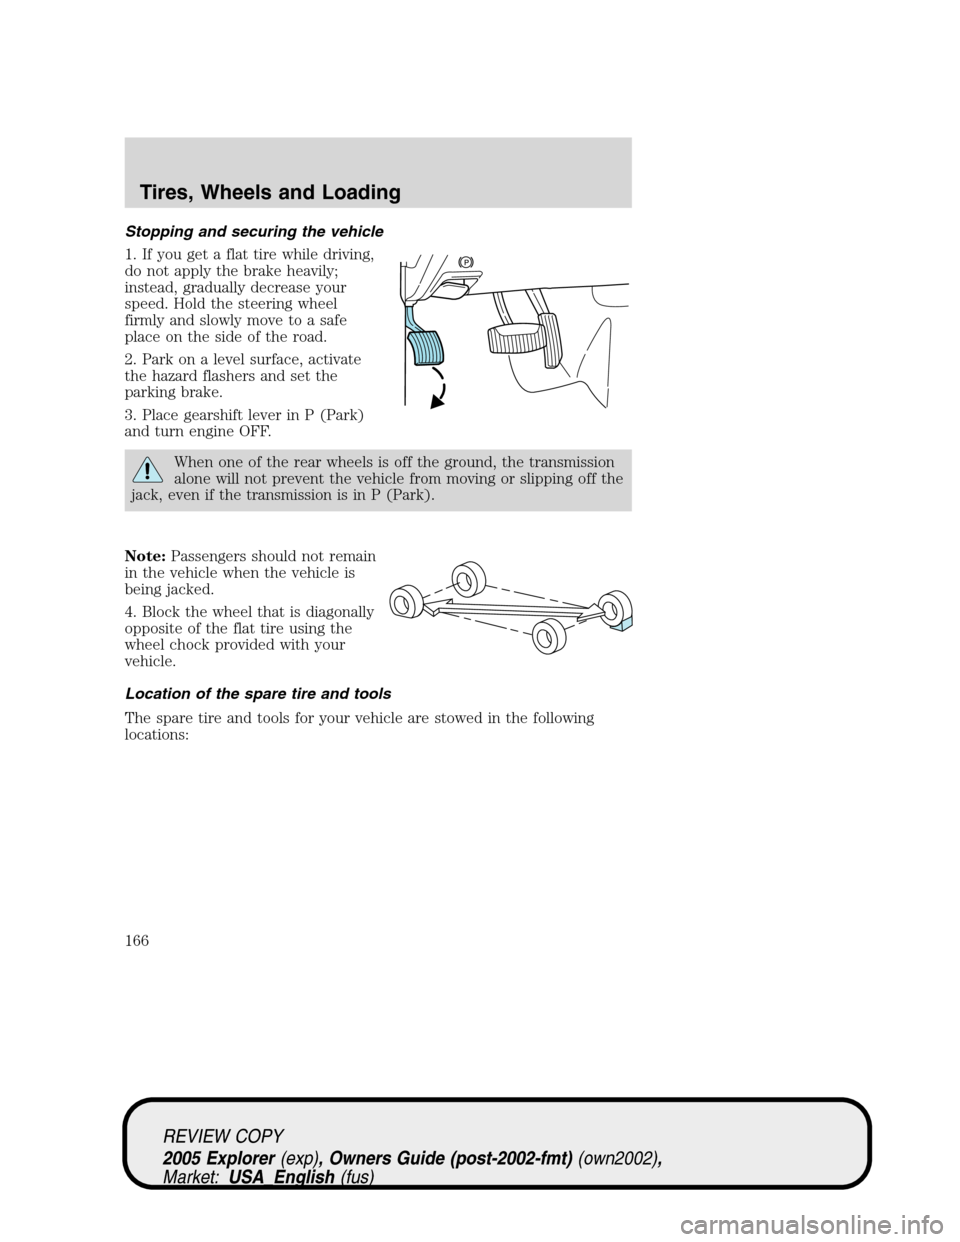
Stopping and securing the vehicle
1. If you get a flat tire while driving,
do not apply the brake heavily;
instead, gradually decrease your
speed. Hold the steering wheel
firmly and slowly move to a safe
place on the side of the road.
2. Park on a level surface, activate
the hazard flashers and set the
parking brake.
3. Place gearshift lever in P (Park)
and turn engine OFF.
When one of the rear wheels is off the ground, the transmission
alone will not prevent the vehicle from moving or slipping off the
jack, even if the transmission is in P (Park).
Note:Passengers should not remain
in the vehicle when the vehicle is
being jacked.
4. Block the wheel that is diagonally
opposite of the flat tire using the
wheel chock provided with your
vehicle.
Location of the spare tire and tools
The spare tire and tools for your vehicle are stowed in the following
locations:
REVIEW COPY
2005 Explorer(exp), Owners Guide (post-2002-fmt)(own2002),
Market:USA_English(fus)
Tires, Wheels and Loading
166
Page 169 of 320
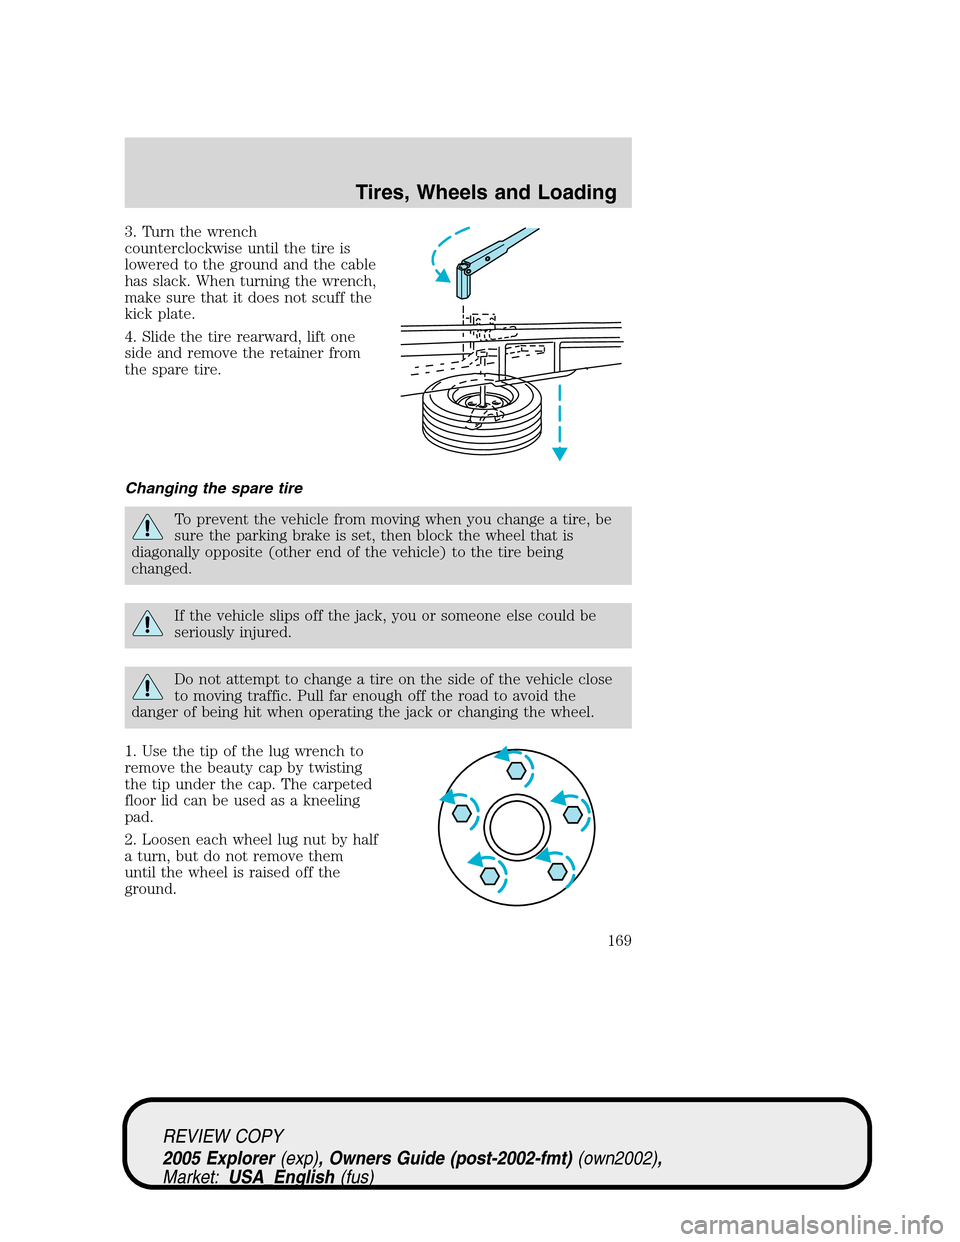
3. Turn the wrench
counterclockwise until the tire is
lowered to the ground and the cable
has slack. When turning the wrench,
make sure that it does not scuff the
kick plate.
4. Slide the tire rearward, lift one
side and remove the retainer from
the spare tire.
Changing the spare tire
To prevent the vehicle from moving when you change a tire, be
sure the parking brake is set, then block the wheel that is
diagonally opposite (other end of the vehicle) to the tire being
changed.
If the vehicle slips off the jack, you or someone else could be
seriously injured.
Do not attempt to change a tire on the side of the vehicle close
to moving traffic. Pull far enough off the road to avoid the
danger of being hit when operating the jack or changing the wheel.
1. Use the tip of the lug wrench to
remove the beauty cap by twisting
the tip under the cap. The carpeted
floor lid can be used as a kneeling
pad.
2. Loosen each wheel lug nut by half
a turn, but do not remove them
until the wheel is raised off the
ground.
REVIEW COPY
2005 Explorer(exp), Owners Guide (post-2002-fmt)(own2002),
Market:USA_English(fus)
Tires, Wheels and Loading
169
Page 173 of 320

When a wheel is installed, always remove any corrosion, dirt and
foreign materials present on the mounting surfaces of the wheel
and the surface of the front disc brake hub and rotor that contacts the
wheel. Installing wheels without correct metal-to-metal contact at the
wheel mounting surfaces can cause the wheel nuts to loosen and the
wheel to come off while the vehicle is in motion, resulting in loss of
control.
Note:If there is corrosion on the area where the wheel contacts the
hub, apply a thin film of grease or anti-seize compound on that area.
INFORMATION CONTAINED ON THE TIRE SIDEWALL
Federal law requires tire manufacturers to place standardized
information on the sidewall of all tires. This information identifies and
describes the fundamental characteristics of the tire and also provides a
U.S. DOT Tire Identification Number for safety standard certification and
in case of a recall.
Information on “P” type tires
P215/65R15 95H is an example of a
tire size, load index and speed
rating. The definitions of these
items are listed below. (Note that
the tire size, load index and speed
rating for your vehicle may be
different from this example.)
1.P:Indicates a tire, designated by
the Tire and Rim Association
(T&RA), that may be used for
service on cars, SUVs, minivans and
light trucks.
Note:If your tire size does not
begin with a letter this may mean it
is designated by either ETRTO
(European Tire and Rim Technical Organization) or JATMA (Japan Tire
Manufacturing Association).
2.215:Indicates the nominal width of the tire in millimeters from
sidewall edge to sidewall edge. In general, the larger the number, the
wider the tire.
3.65:Indicates the aspect ratio which gives the tire’s ratio of height to
width.
REVIEW COPY
2005 Explorer(exp), Owners Guide (post-2002-fmt)(own2002),
Market:USA_English(fus)
Tires, Wheels and Loading
173