Page 42 of 248
Daytime running lamps (DRL) (if equipped)
Turns the headlamps on with a reduced output.
To activate:
•the ignition must be in the ON position,
•the headlamp control is in the OFF or parking lamp position and
•the parking brake must be disengaged.
Always remember to turn on your headlamps at dusk or during
inclement weather. The Daytime Running Lamp (DRL) system
does not activate the tail lamps and generally may not provide
adequate lighting during these conditions. Failure to activate your
headlamps under these conditions may result in a collision.
High beams
Push the lever toward the
instrument panel to activate. Pull
the lever towards you to deactivate.
Flash to pass
Pull toward you slightly to activate
and release to deactivate.
2005 Econoline(eco)
Owners Guide (post-2002-fmt)
USA(fus)
Lights
42
ProCarManuals.com
Page 46 of 248

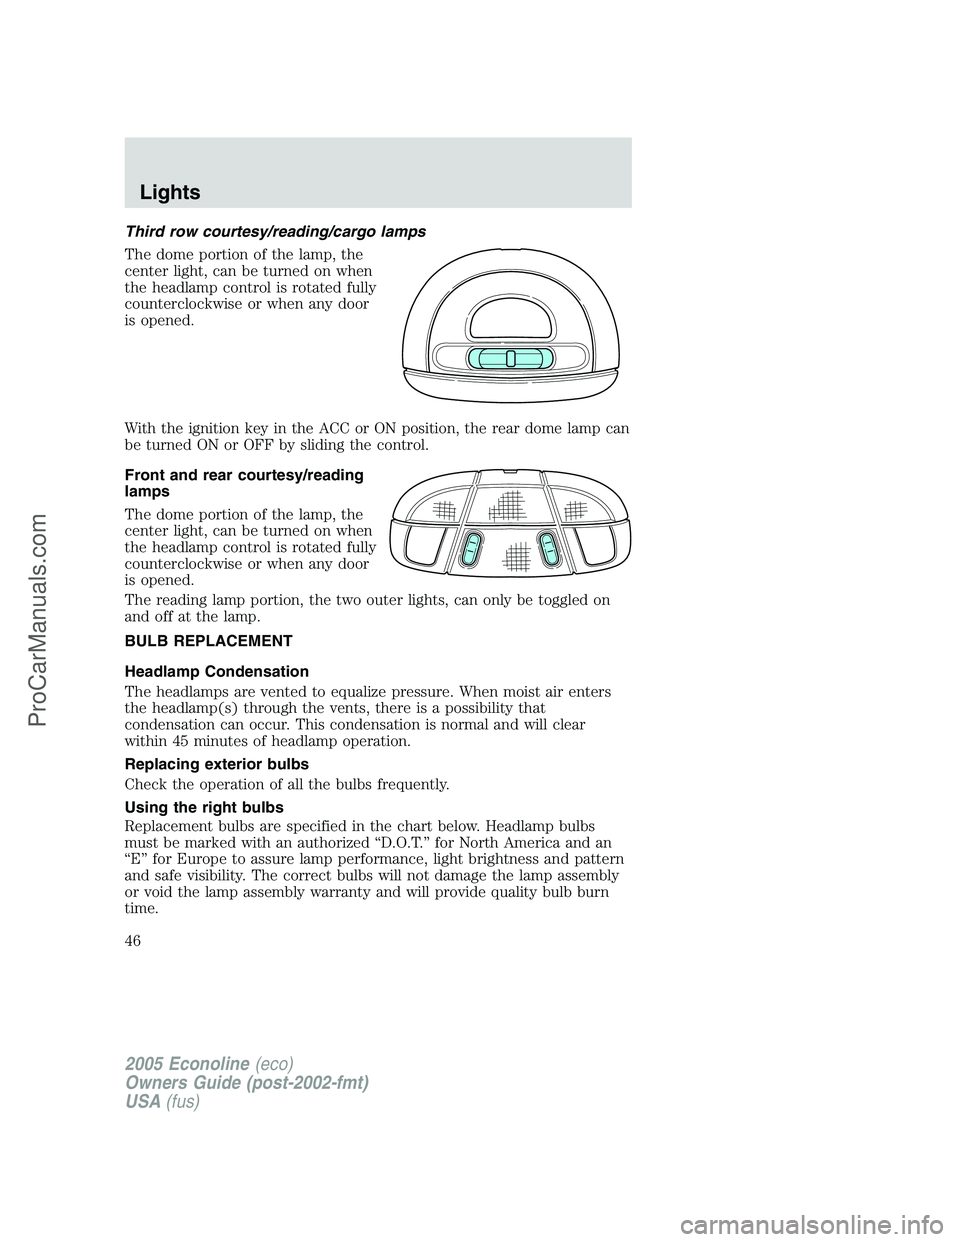
Third row courtesy/reading/cargo lamps
The dome portion of the lamp, the
center light, can be turned on when
the headlamp control is rotated fully
counterclockwise or when any door
is opened.
With the ignition key in the ACC or ON position, the rear dome lamp can
be turned ON or OFF by sliding the control.
Front and rear courtesy/reading
lamps
The dome portion of the lamp, the
center light, can be turned on when
the headlamp control is rotated fully
counterclockwise or when any door
is opened.
The reading lamp portion, the two outer lights, can only be toggled on
and off at the lamp.
BULB REPLACEMENT
Headlamp Condensation
The headlamps are vented to equalize pressure. When moist air enters
the headlamp(s) through the vents, there is a possibility that
condensation can occur. This condensation is normal and will clear
within 45 minutes of headlamp operation.
Replacing exterior bulbs
Check the operation of all the bulbs frequently.
Using the right bulbs
Replacement bulbs are specified in the chart below. Headlamp bulbs
must be marked with an authorized “D.O.T.” for North America and an
“E” for Europe to assure lamp performance, light brightness and pattern
and safe visibility. The correct bulbs will not damage the lamp assembly
or void the lamp assembly warranty and will provide quality bulb burn
time.
2005 Econoline(eco)
Owners Guide (post-2002-fmt)
USA(fus)
Lights
46
ProCarManuals.com
Page 54 of 248

Compass
The compass display is contained in the overhead console. The vehicle
heading is displayed as one of N, NE, E, SE, S, SW, W and NW.
The compass reading may be affected when you drive near large
buildings, bridges, power lines and powerful broadcast antenna. Magnetic
or metallic objects placed in or on the vehicle may also affect compass
accuracy. Adjustments may need to be made to the zone and calibration
of the compass.
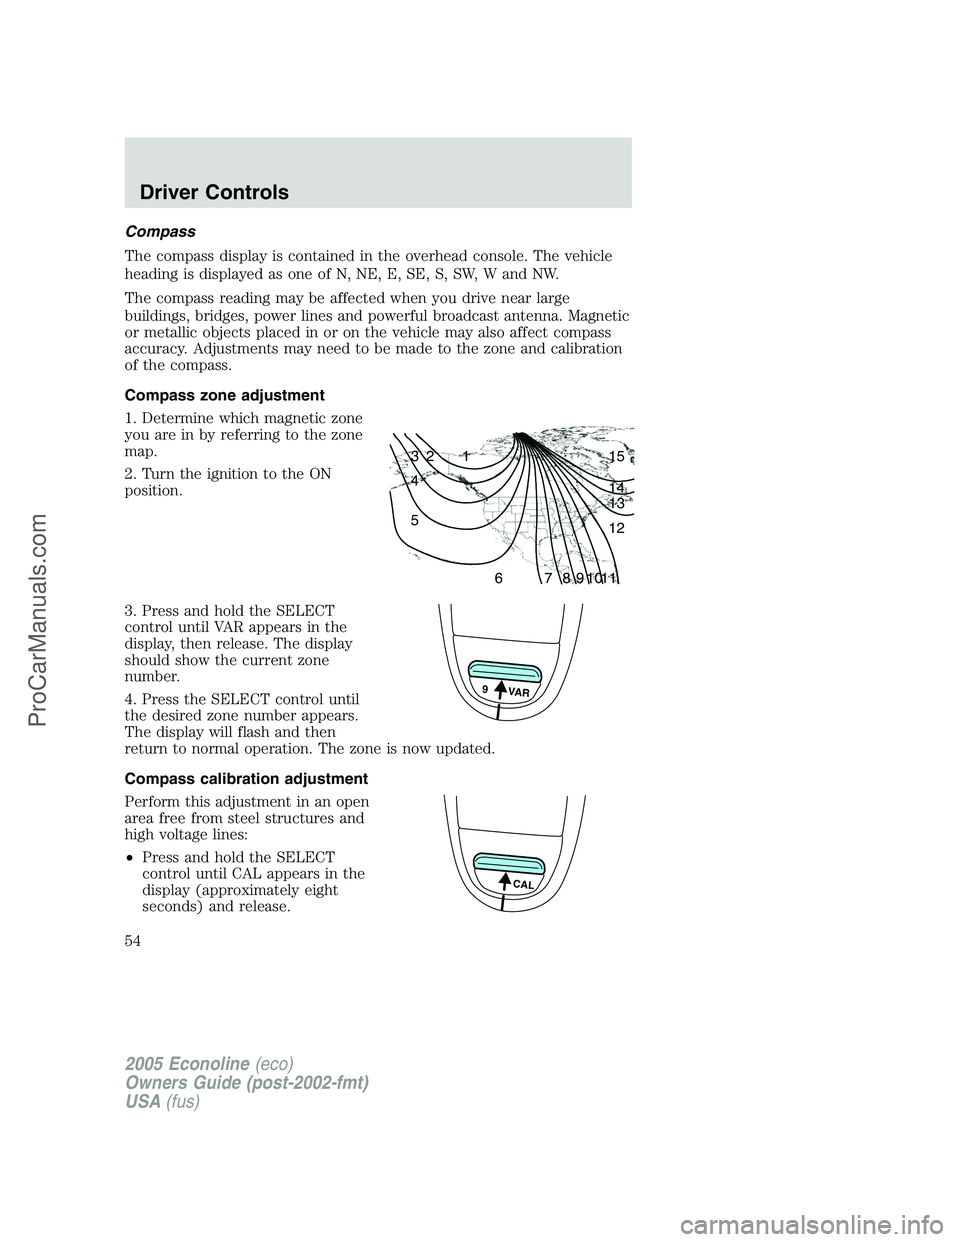
Compass zone adjustment
1. Determine which magnetic zone
you are in by referring to the zone
map.
2. Turn the ignition to the ON
position.
3. Press and hold the SELECT
control until VAR appears in the
display, then release. The display
should show the current zone
number.
4. Press the SELECT control until
the desired zone number appears.
The display will flash and then
return to normal operation. The zone is now updated.
Compass calibration adjustment
Perform this adjustment in an open
area free from steel structures and
high voltage lines:
•Press and hold the SELECT
control until CAL appears in the
display (approximately eight
seconds) and release.
1 2 3
4
5
6 7 8 9 101112 13 14 15
9 VAR
CAL
2005 Econoline(eco)
Owners Guide (post-2002-fmt)
USA(fus)
Driver Controls
54
ProCarManuals.com
Page 56 of 248

Always keep the power point caps closed when not being used.
POWER WINDOWS (IF EQUIPPED)
Do not leave children unattended in the vehicle and do not let
children play with the power windows. They may seriously injure
themselves.
When closing the power windows, you should verify they are free
of obstructions and ensure that children and/or pets are not in
the proximity of the window openings.
Press and hold the bottom part of
the rocker switch to open the
window. Press and hold the top part
of the rocker switch to close the
window.
ACCESSORY DELAY
With accessory delay, after the ignition switch is turned to the OFF
position, the window switches and radio may be used for up to ten
minutes or until any door is opened.
POWER SIDE VIEW MIRRORS (IF EQUIPPED)
To adjust your mirrors:
1. Select
to adjust the left
mirror or
to adjust the right
mirror.
2. Move the control in the direction
you wish to tilt the mirror.
3. Return to the center position to
disable the adjust function.
Spotter mirror
Note:New spotter mirrors may be stiff, requiring several cycles before
the spotter adjustment effort eases.
2005 Econoline(eco)
Owners Guide (post-2002-fmt)
USA(fus)
Driver Controls
56
ProCarManuals.com
Page 60 of 248
•Depress the brake pedal until the
desired vehicle speed is reached,
press the SET ACCEL control.
Turning off speed control
There are two ways to turn off the
speed control:
•Depress the brake pedal. This will
not erase your vehicle’s
previously set speed.
•Press the speed control OFF
control.
Note:When you turn off the speed control or the ignition, your speed
control set speed memory is erased.
R
E
S
S
E
T
A
C
C
E
L
C
O
A
S
T
2005 Econoline(eco)
Owners Guide (post-2002-fmt)
USA(fus)
Driver Controls
60
ProCarManuals.com
Page 62 of 248

Changes or modifications not expressly approved by the party
responsible for compliance could void the user’s authority to
operate the equipment.
The typical operating range for your remote entry transmitter is
approximately 33 feet (10 meters). A decrease in operating range could
be caused by:
•weather conditions,
•nearby radio towers,
•structures around the vehicle, or
•other vehicles parked next to your vehicle.
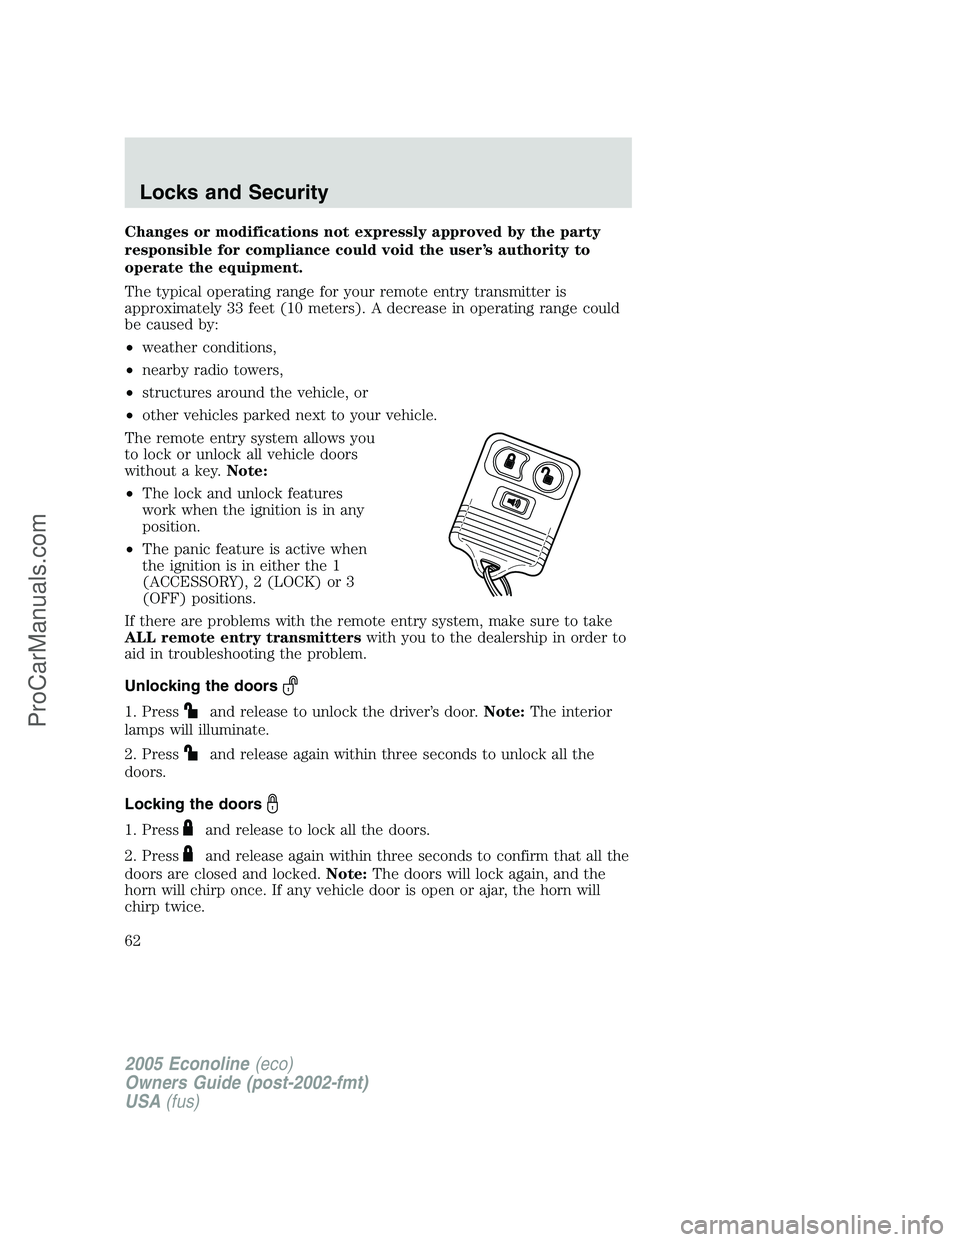
The remote entry system allows you
to lock or unlock all vehicle doors
without a key.Note:
•The lock and unlock features
work when the ignition is in any
position.
•The panic feature is active when
the ignition is in either the 1
(ACCESSORY), 2 (LOCK) or 3
(OFF) positions.
If there are problems with the remote entry system, make sure to take
ALL remote entry transmitterswith you to the dealership in order to
aid in troubleshooting the problem.
Unlocking the doors
1. Pressand release to unlock the driver’s door.Note:The interior
lamps will illuminate.
2. Press
and release again within three seconds to unlock all the
doors.
Locking the doors
1. Pressand release to lock all the doors.
2. Press
and release again within three seconds to confirm that all the
doors are closed and locked.Note:The doors will lock again, and the
horn will chirp once. If any vehicle door is open or ajar, the horn will
chirp twice.
2005 Econoline(eco)
Owners Guide (post-2002-fmt)
USA(fus)
Locks and Security
62
ProCarManuals.com
Page 63 of 248

Sounding a panic alarm
Press
to activate the alarm. Press the control again, or turn the
ignition to the 1 (ACCESSORY) or 4 (ON) position to deactivate the
alarm.
Note:The panic alarm will only operate when the ignition is in the 2
(LOCK) or 3 (OFF) position.
Replacing the battery
The remote entry transmitter uses one coin type three-volt lithium
battery CR2032 or equivalent.
To replace the battery:
1. Twist a thin coin between the two
halves of the remote entry
transmitter near the key ring. DO
NOT TAKE THE RUBBER COVER
AND CIRCUIT BOARD OFF THE
FRONT HOUSING OF THE
REMOTE ENTRY TRANSMITTER.
2. Do not wipe off any grease on the
battery terminals on the back
surface of the circuit board.
3. Remove the old battery.Note:Please refer to local regulations when
disposing of transmitter batteries.
4. Insert the new battery. Refer to the diagram inside the remote entry
transmitter for the correct orientation of the battery. Press the battery
down to ensure that the battery is fully seated in the battery housing
cavity.
5. Snap the two halves back together.
2005 Econoline(eco)
Owners Guide (post-2002-fmt)
USA(fus)
Locks and Security
63
ProCarManuals.com
Page 64 of 248

Note:Replacement of the battery willnotcause the remote transmitter
to become deprogrammed from your vehicle. The remote transmitter
should operate normally after battery replacement.
Replacing lost remote entry transmitters
If you would like to have your remote entry transmitter reprogrammed
because you lost one, or would like to buy additional remote entry
transmitters, you can either reprogram them yourself, or takeall
remote entry transmittersto your authorized dealer for
reprogramming.
How to reprogram your remote entry transmitters
You must haveall remote entry transmitters(maximum of four)
available before beginning this procedure. If all remote entry transmitters
are not present during programming procedure, the ones missing during
programming will no longer operate the vehicle.
To reprogram the remote entry
transmitters:
1. Place the key in the ignition and
turn from the (2) LOCK position to
(3) OFF.
2. Cycle eight times rapidly (within
10 seconds) between the (3) OFF
position and (4) ON.Note:The
eighth turn must end in the (4) ON
position.
3. The doors will lock, then unlock, to confirm that the programming
mode has been activated.
4. Within 20 seconds press any button on the remote entry transmitter.
Note:If more than 20 seconds have passed you will need to start the
procedure over again.
5. The doors will lock, then unlock, to confirm that this remote entry
transmitter has been programmed.
6. Repeat Steps 4 and 5 to program each additional remote entry
transmitter (up to four transmitters).
7. Turn the ignition to the (3) OFF position after you have finished
programming all of the remote entry transmitters.
8. The doors will lock, then unlock, to confirm that the programming
mode has been exited.
3
1
2
5
4
2005 Econoline(eco)
Owners Guide (post-2002-fmt)
USA(fus)
Locks and Security
64
ProCarManuals.com