Page 45 of 248

8.
•Aerodynamic:Locate the horizontal adjuster (1) for each headlamp.
Turn it clockwise or counterclockwise, to place the left edge of the
high intensity area even with the vertical line corresponding to the
headlamp under adjustment.
•Sealed beam:Locate the horizontal adjuster (2) for each headlamp.
Turn it clockwise or counterclockwise, to place the left edge of the
high intensity area even with the vertical line corresponding to the
headlamp under adjustment.
TURN SIGNAL CONTROL
•Push down to activate the left
turn signal.
•Push up to activate the right turn
signal.
INTERIOR LAMPS
Cargo and dome lamps with rear headliner
Rear cargo lamps equipped with an
ON/OFF/DOOR control will light
when:
•doors are closed and the control
is in the ON position
•control is in the DOOR position
and any door is open
•headlamp control is rotated fully counterclockwise
When the control is in the OFF position, it will not illuminate when you
open the doors or fully rotate the headlamp control.
2005 Econoline(eco)
Owners Guide (post-2002-fmt)
USA(fus)
Lights
45
ProCarManuals.com
Page 46 of 248

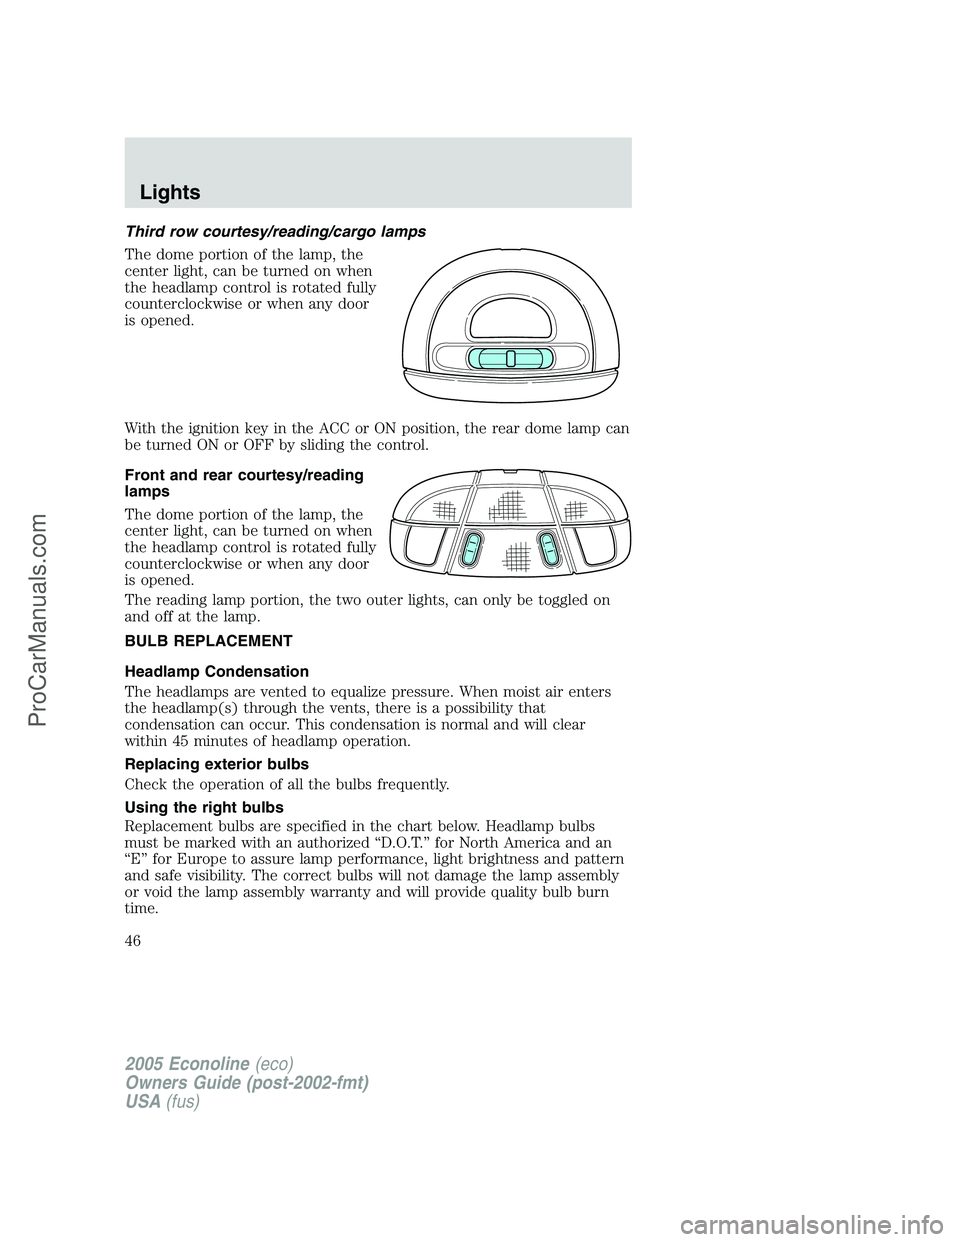
Third row courtesy/reading/cargo lamps
The dome portion of the lamp, the
center light, can be turned on when
the headlamp control is rotated fully
counterclockwise or when any door
is opened.
With the ignition key in the ACC or ON position, the rear dome lamp can
be turned ON or OFF by sliding the control.
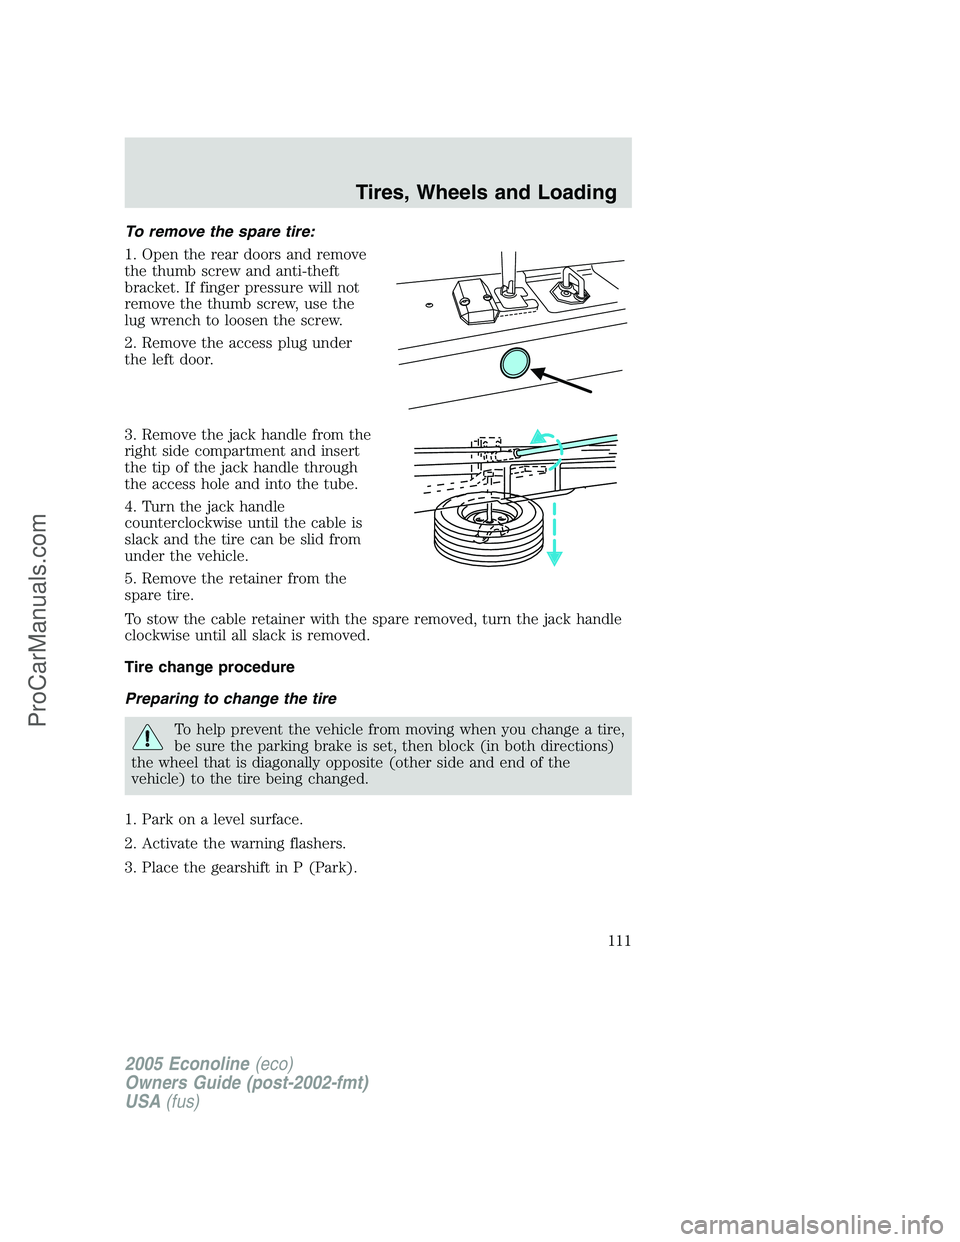
Front and rear courtesy/reading
lamps
The dome portion of the lamp, the
center light, can be turned on when
the headlamp control is rotated fully
counterclockwise or when any door
is opened.
The reading lamp portion, the two outer lights, can only be toggled on
and off at the lamp.
BULB REPLACEMENT
Headlamp Condensation
The headlamps are vented to equalize pressure. When moist air enters
the headlamp(s) through the vents, there is a possibility that
condensation can occur. This condensation is normal and will clear
within 45 minutes of headlamp operation.
Replacing exterior bulbs
Check the operation of all the bulbs frequently.
Using the right bulbs
Replacement bulbs are specified in the chart below. Headlamp bulbs
must be marked with an authorized “D.O.T.” for North America and an
“E” for Europe to assure lamp performance, light brightness and pattern
and safe visibility. The correct bulbs will not damage the lamp assembly
or void the lamp assembly warranty and will provide quality bulb burn
time.
2005 Econoline(eco)
Owners Guide (post-2002-fmt)
USA(fus)
Lights
46
ProCarManuals.com
Page 48 of 248
4. Remove the bulb retaining ring by
rotating it counterclockwise, and
slide the ring off the plastic base.
5. Pull the bulb straight out.
Handle a halogen headlamp bulb carefully and keep out of
children’s reach. Grasp the bulb only by its plastic base and do
not touch the glass. The oil from your hand could cause the bulb to
break the next time the headlamps are operated.
Note:If the bulb is accidentally touched, it should be cleaned with
alcohol before being used.
To install the new bulb, follow the removal procedures in reverse order.
Replacing headlamp bulbs (sealed beam)
1. Make sure headlamp switch is in the OFF position and open the hood.
2. Remove the two headlamp screws
and bezel from the headlamp
housing.
2005 Econoline(eco)
Owners Guide (post-2002-fmt)
USA(fus)
Lights
48
ProCarManuals.com
Page 49 of 248

3. Remove the four headlamp bulb
retaining screws and the retaining
ring.
4. Remove the headlamp.
5. Disconnect the electrical
connector from the bulb and remove
the bulb.
To install the new bulb, follow the removal procedures in reverse order.
Replacing front parking lamp/turn signal bulbs
1. Make sure the headlamp control is in the OFF position.
2. Remove two screws and pull lamp assembly away from the vehicle.
3. Rotate the bulb socket
counterclockwise and remove.
4. Carefully pull the bulb straight
out of the socket.
To complete installation, follow the
removal procedures in reverse order.
Replacing high-mount brakelamp bulbs
The interior cargo lamp (if equipped), on vehicles without a rear
headliner, will have to be removed from under the high-mount brakelamp
assembly located inside the vehicle. Then:
1. Remove the two screws from the
high-mount brakelamp assembly and
lift the lamp from the vehicle.
2. Remove the bulb socket from the
lamp assembly by turning
counterclockwise.
3. Carefully pull the bulb straight
out of the socket.
To install the new bulb, follow the removal procedure in reverse order.
2005 Econoline(eco)
Owners Guide (post-2002-fmt)
USA(fus)
Lights
49
ProCarManuals.com
Page 50 of 248
Replacing license plate lamp bulbs
1. Turn the headlamp switch to OFF
and then remove the two screws
and the license plate lamp assembly
from the rear door.
2. Remove bulb socket from lamp
assembly by turning
counterclockwise.
3. Pull the bulb out from socket and
push in the new bulb.
To install the new bulb, follow the removal procedures in reverse order.
Replacing tail lamp/turn/backup lamp bulbs
1. Turn the headlamp switch to the
OFF position and then remove the
four screws and the lamp assembly
from vehicle.
2. Rotate bulb socket
counterclockwise and remove from
lamp assembly.
3. Carefully pull the bulb straight
out of the socket and push in the
new bulb.
To install the lamp, follow the removal procedures in reverse order.
2005 Econoline(eco)
Owners Guide (post-2002-fmt)
USA(fus)
Lights
50
ProCarManuals.com
Page 67 of 248
Pull lever up to adjust seatback.
Using the manual lumbar support
The lumbar support control is
located on the inboard side of the
driver’s seat.
Turn the lumbar support control
clockwise to increase firmness.
Turn the lumbar support control
counterclockwise to increase
softness.
Adjusting the front power seat (if equipped)
The control is located on the outboard side of the seat cushion.
Press to raise or lower the front
portion of the seat cushion.
2005 Econoline(eco)
Owners Guide (post-2002-fmt)
USA(fus)
Seating and Safety Restraints
67
ProCarManuals.com
Page 111 of 248

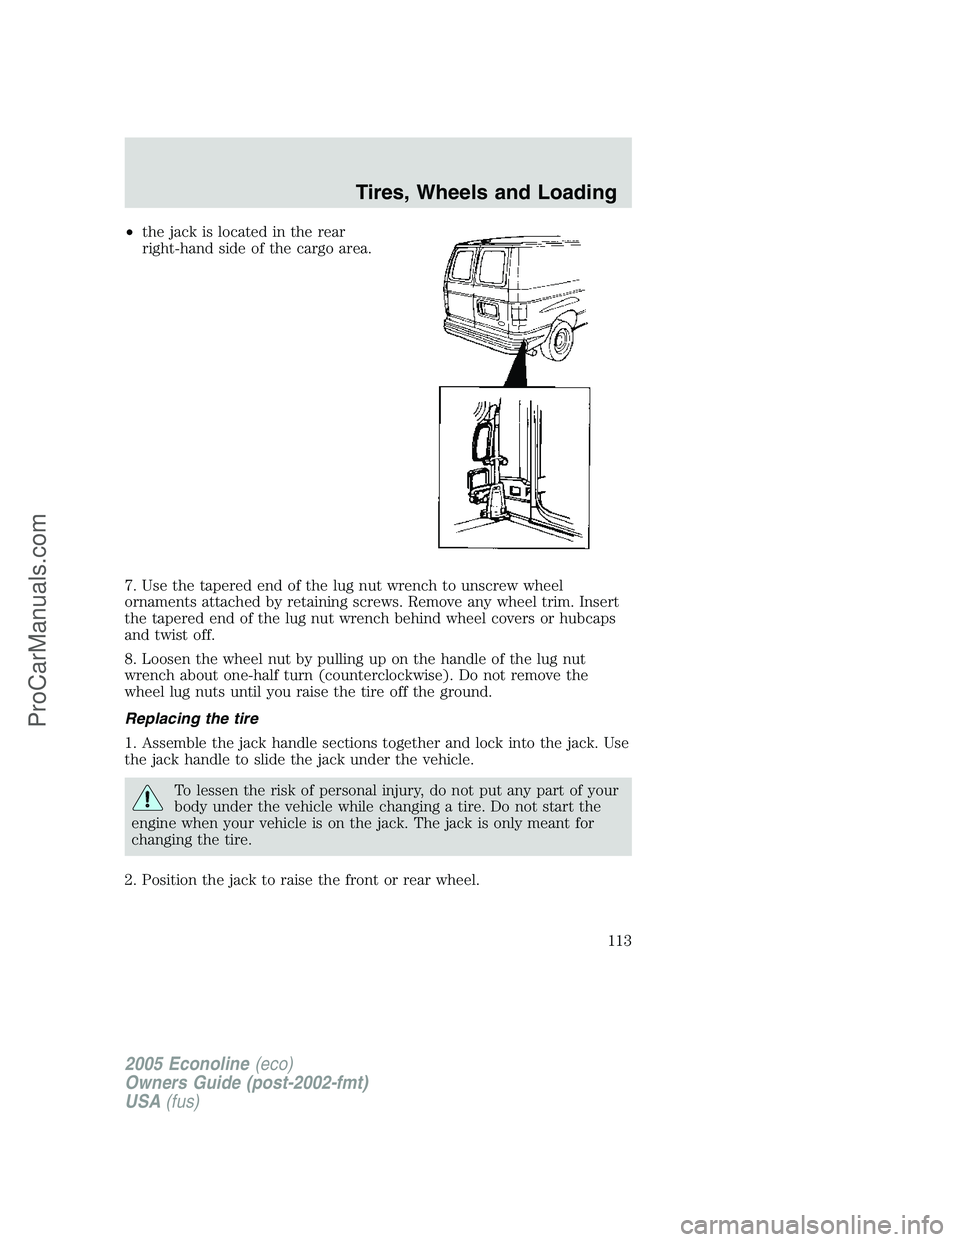
To remove the spare tire:
1. Open the rear doors and remove
the thumb screw and anti-theft
bracket. If finger pressure will not
remove the thumb screw, use the
lug wrench to loosen the screw.
2. Remove the access plug under
the left door.
3. Remove the jack handle from the
right side compartment and insert
the tip of the jack handle through
the access hole and into the tube.
4. Turn the jack handle
counterclockwise until the cable is
slack and the tire can be slid from
under the vehicle.
5. Remove the retainer from the
spare tire.
To stow the cable retainer with the spare removed, turn the jack handle
clockwise until all slack is removed.
Tire change procedure
Preparing to change the tire
To help prevent the vehicle from moving when you change a tire,
be sure the parking brake is set, then block (in both directions)
the wheel that is diagonally opposite (other side and end of the
vehicle) to the tire being changed.
1. Park on a level surface.
2. Activate the warning flashers.
3. Place the gearshift in P (Park).
2005 Econoline(eco)
Owners Guide (post-2002-fmt)
USA(fus)
Tires, Wheels and Loading
111
ProCarManuals.com
Page 113 of 248

•the jack is located in the rear
right-hand side of the cargo area.
7. Use the tapered end of the lug nut wrench to unscrew wheel
ornaments attached by retaining screws. Remove any wheel trim. Insert
the tapered end of the lug nut wrench behind wheel covers or hubcaps
and twist off.
8. Loosen the wheel nut by pulling up on the handle of the lug nut
wrench about one-half turn (counterclockwise). Do not remove the
wheel lug nuts until you raise the tire off the ground.
Replacing the tire
1. Assemble the jack handle sections together and lock into the jack. Use
the jack handle to slide the jack under the vehicle.
To lessen the risk of personal injury, do not put any part of your
body under the vehicle while changing a tire. Do not start the
engine when your vehicle is on the jack. The jack is only meant for
changing the tire.
2. Position the jack to raise the front or rear wheel.
2005 Econoline(eco)
Owners Guide (post-2002-fmt)
USA(fus)
Tires, Wheels and Loading
113
ProCarManuals.com