Page 51 of 264
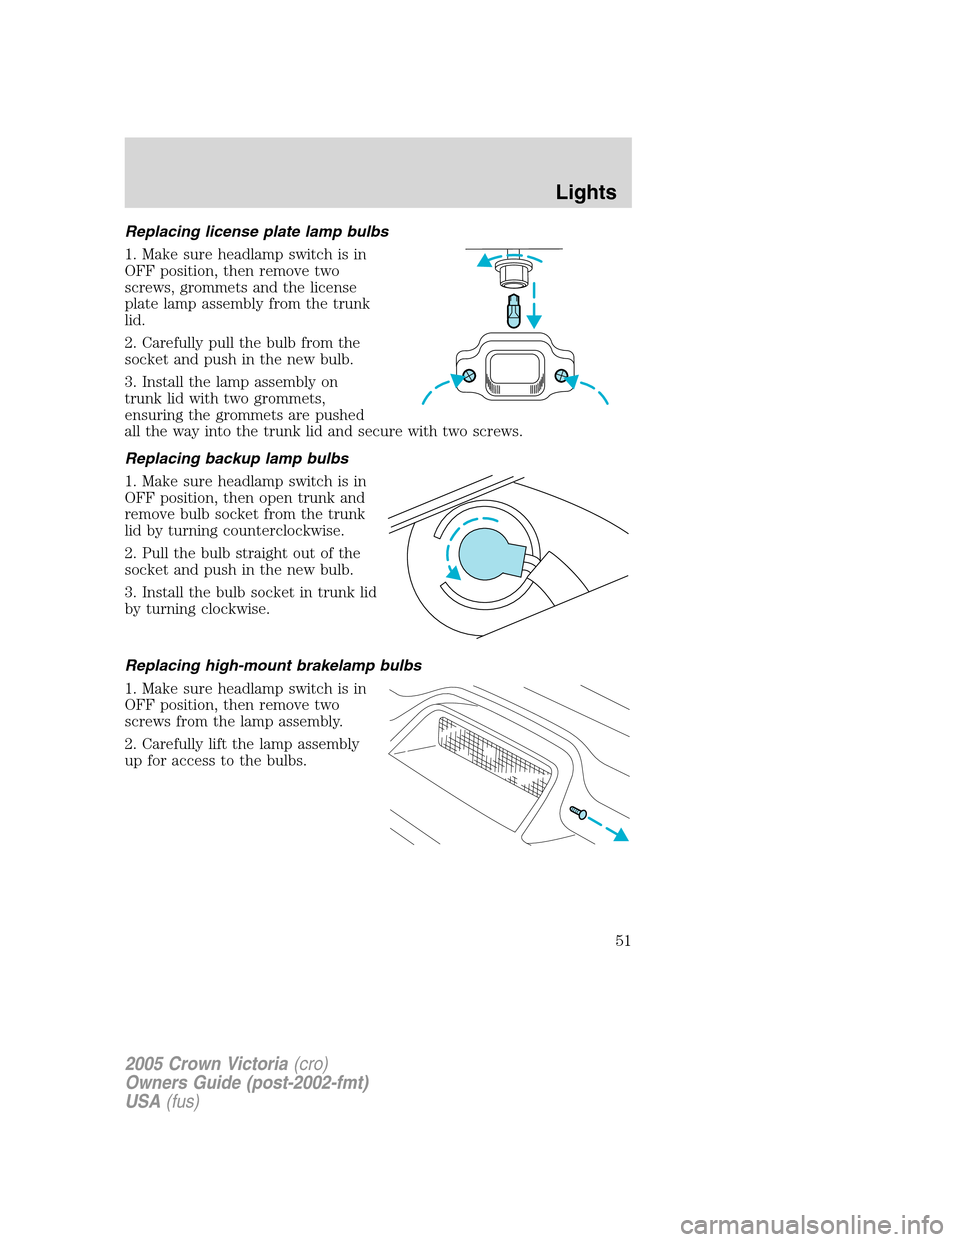
Replacing license plate lamp bulbs
1. Make sure headlamp switch is in
OFF position, then remove two
screws, grommets and the license
plate lamp assembly from the trunk
lid.
2. Carefully pull the bulb from the
socket and push in the new bulb.
3. Install the lamp assembly on
trunk lid with two grommets,
ensuring the grommets are pushed
all the way into the trunk lid and secure with two screws.
Replacing backup lamp bulbs
1. Make sure headlamp switch is in
OFF position, then open trunk and
remove bulb socket from the trunk
lid by turning counterclockwise.
2. Pull the bulb straight out of the
socket and push in the new bulb.
3. Install the bulb socket in trunk lid
by turning clockwise.
Replacing high-mount brakelamp bulbs
1. Make sure headlamp switch is in
OFF position, then remove two
screws from the lamp assembly.
2. Carefully lift the lamp assembly
up for access to the bulbs.
2005 Crown Victoria(cro)
Owners Guide (post-2002-fmt)
USA(fus)
Lights
51
Page 67 of 264
(darkened) state when bright lights (glare) reach the mirror. When the
mirror detects bright light from behind the vehicle, it will automatically
adjust (darken) to minimize glare.
The mirror will automatically return to the normal state whenever the
vehicle is placed in R (Reverse) to ensure a bright clear view when
backing up.
Do not block the sensor on the backside of the inside rear view mirror
since this may impair proper mirror performance.
POWER ADJUSTABLE FOOT PEDALS (IF EQUIPPED)
The accelerator and brake pedal
should only be adjusted when the
vehicle is stopped and the gearshift
lever is in the P (Park) position.
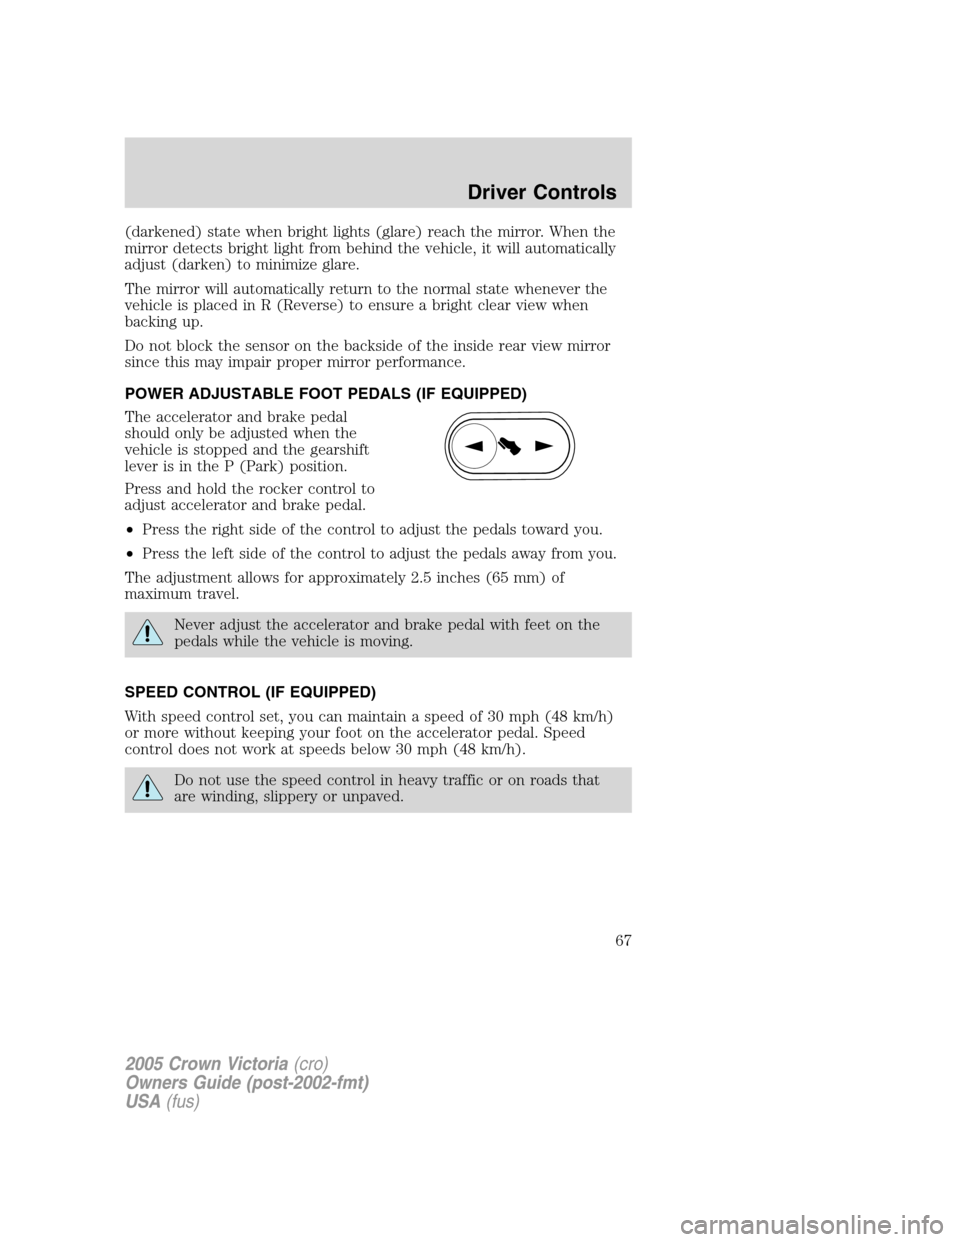
Press and hold the rocker control to
adjust accelerator and brake pedal.
•Press the right side of the control to adjust the pedals toward you.
•Press the left side of the control to adjust the pedals away from you.
The adjustment allows for approximately 2.5 inches (65 mm) of
maximum travel.
Never adjust the accelerator and brake pedal with feet on the
pedals while the vehicle is moving.
SPEED CONTROL (IF EQUIPPED)
With speed control set, you can maintain a speed of 30 mph (48 km/h)
or more without keeping your foot on the accelerator pedal. Speed
control does not work at speeds below 30 mph (48 km/h).
Do not use the speed control in heavy traffic or on roads that
are winding, slippery or unpaved.
2005 Crown Victoria(cro)
Owners Guide (post-2002-fmt)
USA(fus)
Driver Controls
67
Page 68 of 264
Setting speed control
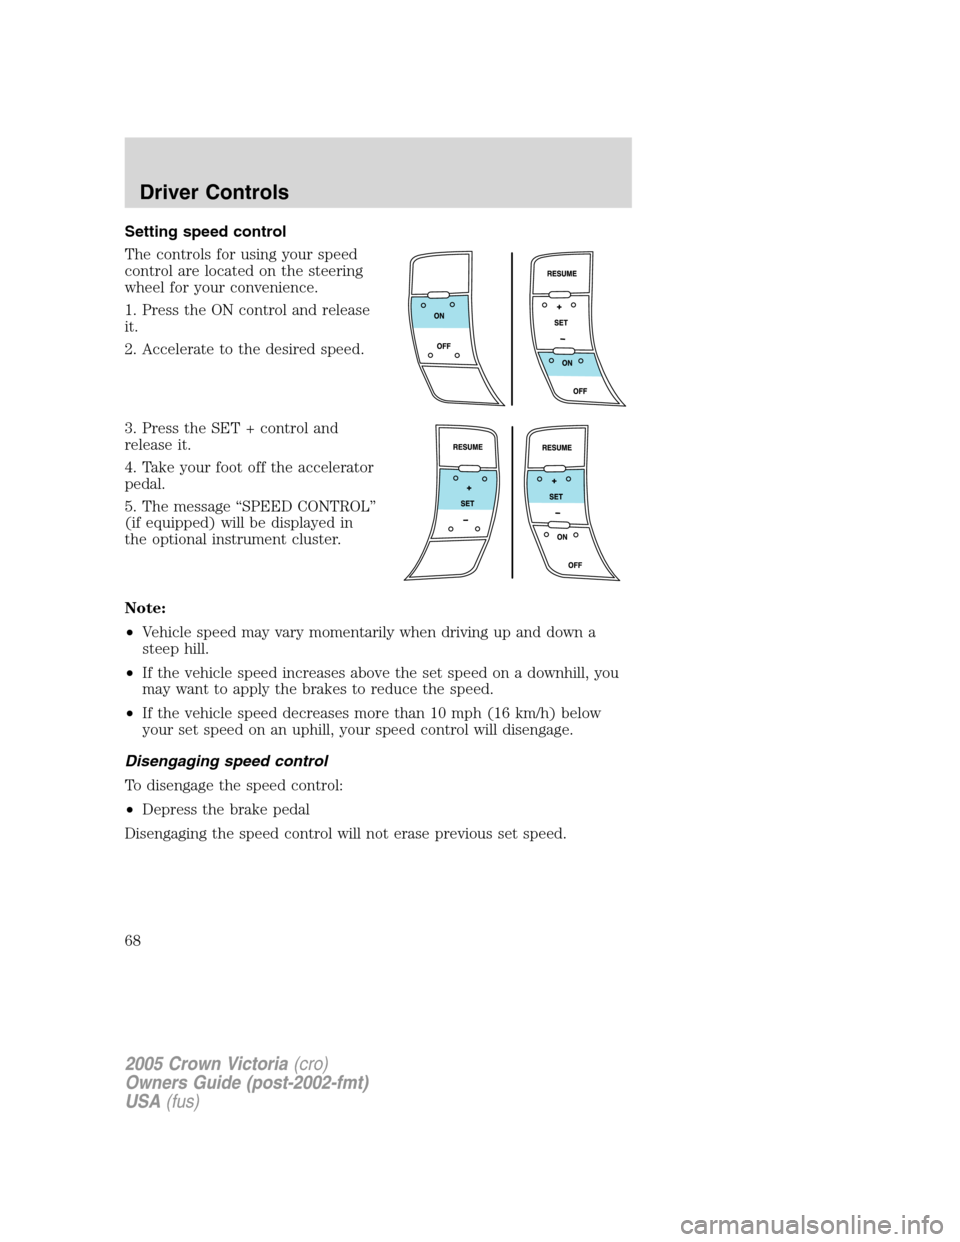
The controls for using your speed
control are located on the steering
wheel for your convenience.
1. Press the ON control and release
it.
2. Accelerate to the desired speed.
3. Press the SET + control and
release it.
4. Take your foot off the accelerator
pedal.
5. The message “SPEED CONTROL”
(if equipped) will be displayed in
the optional instrument cluster.
Note:
•Vehicle speed may vary momentarily when driving up and down a
steep hill.
•If the vehicle speed increases above the set speed on a downhill, you
may want to apply the brakes to reduce the speed.
•If the vehicle speed decreases more than 10 mph (16 km/h) below
your set speed on an uphill, your speed control will disengage.
Disengaging speed control
To disengage the speed control:
•Depress the brake pedal
Disengaging the speed control will not erase previous set speed.
2005 Crown Victoria(cro)
Owners Guide (post-2002-fmt)
USA(fus)
Driver Controls
68
Page 70 of 264
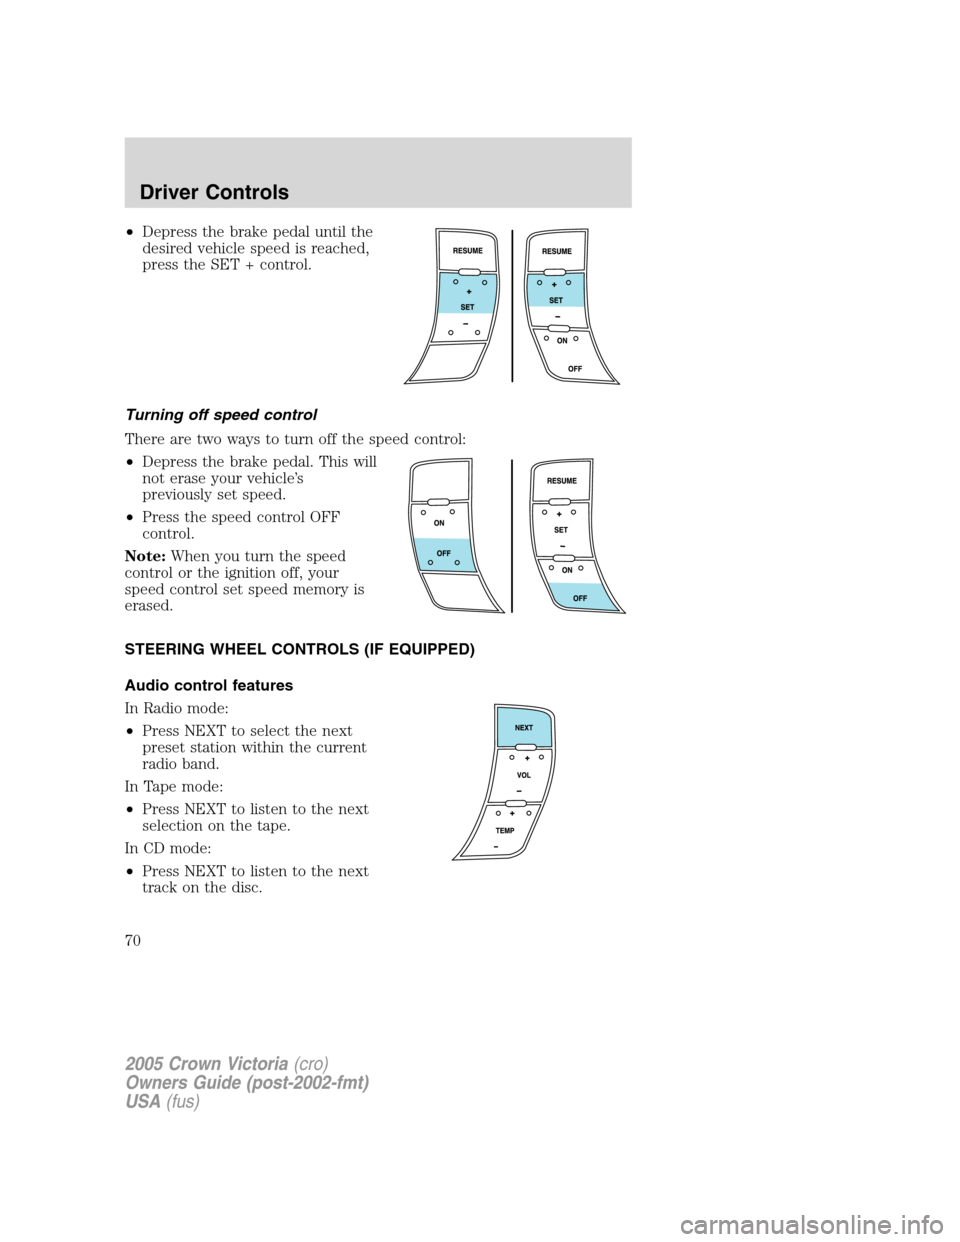
•Depress the brake pedal until the
desired vehicle speed is reached,
press the SET + control.
Turning off speed control
There are two ways to turn off the speed control:
•Depress the brake pedal. This will
not erase your vehicle’s
previously set speed.
•Press the speed control OFF
control.
Note:When you turn the speed
control or the ignition off, your
speed control set speed memory is
erased.
STEERING WHEEL CONTROLS (IF EQUIPPED)
Audio control features
In Radio mode:
•Press NEXT to select the next
preset station within the current
radio band.
In Tape mode:
•Press NEXT to listen to the next
selection on the tape.
In CD mode:
•Press NEXT to listen to the next
track on the disc.
2005 Crown Victoria(cro)
Owners Guide (post-2002-fmt)
USA(fus)
Driver Controls
70
Page 81 of 264
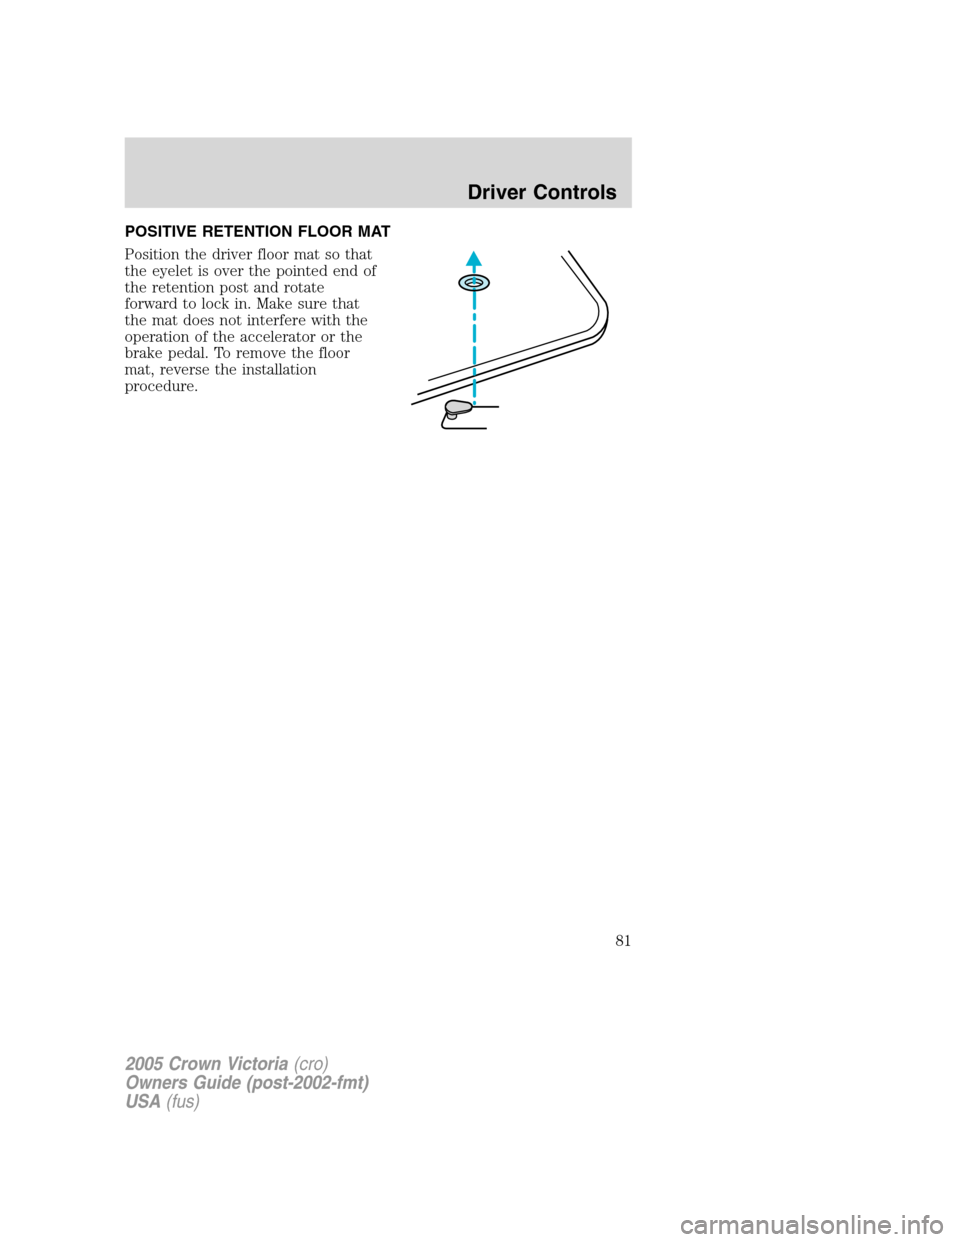
POSITIVE RETENTION FLOOR MAT
Position the driver floor mat so that
the eyelet is over the pointed end of
the retention post and rotate
forward to lock in. Make sure that
the mat does not interfere with the
operation of the accelerator or the
brake pedal. To remove the floor
mat, reverse the installation
procedure.
2005 Crown Victoria(cro)
Owners Guide (post-2002-fmt)
USA(fus)
Driver Controls
81
Page 89 of 264
Autolock (if equipped)
This feature automatically locks all vehicle doors when:
•all doors are closed,
•the ignition is in the 3 (ON) position,
•the brake pedal is depressed,
•you shift into any gear.
Relock
The autolock feature repeats when:
•the ignition is in the 3 (ON) position,
•a door is opened and closed,
•the transmission is placed in R (Reverse) or any drive gear, and then
•the brake pedal is depressed and then released.
Deactivating/activating the autolock feature
Before following the procedure, make sure that the ignition is in the 3
(OFF) position and all vehicle doors are closed.
Automatic door locks can also be turned on/off through the following
procedure:
You must complete Steps 1-7 within 30 seconds or the procedure will
have to be repeated. If the procedure needs to be repeated, you must
wait at least 30 seconds.
1. Turn the ignition to the 3 (ON) position.
2. Press the power door unlock control on the door panel three times.
3. Turn the ignition from the 3 (ON) to the 1 (OFF/LOCK) position.
4. Press the power door unlock control three times.
5. Turn the ignition back to the 3 (ON) position.
6. The door locks will lock/unlock to confirm programming mode is
entered/active.
7. With the ignition still in the 3 (ON) position, press the unlock control
once. After a five to ten second delay, the door will lock/unlock to
confirm successful programming.
8. After having waited the necessary time for the programming to
confirm, turn the ignition to the 1 (OFF/LOCK) position.
Once disabled, the autolock feature can be enabled by repeating the
procedure in Steps 1–8.
2005 Crown Victoria(cro)
Owners Guide (post-2002-fmt)
USA(fus)
Locks and Security
89
Page 105 of 264
Combination lap and shoulder belts
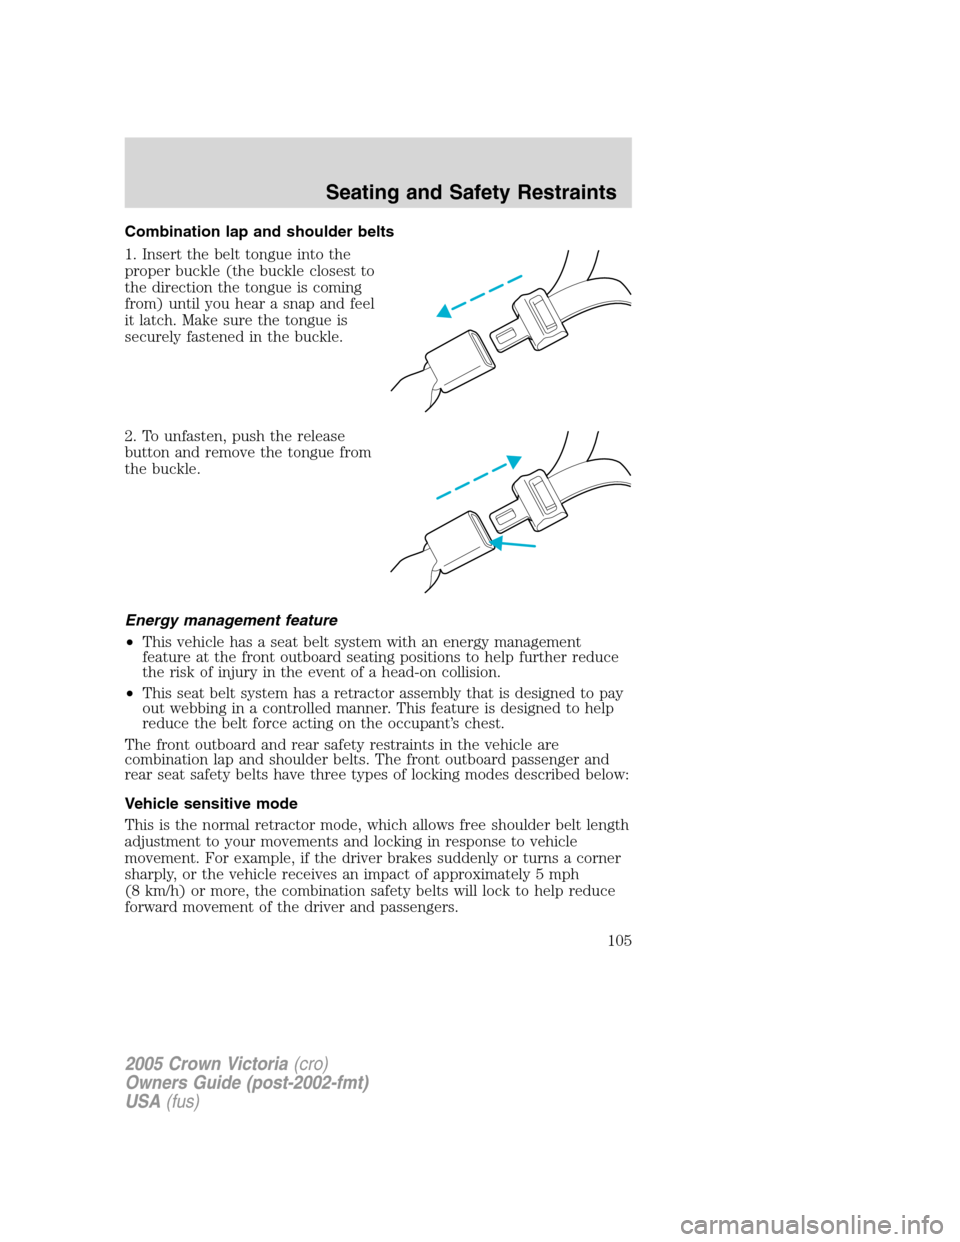
1. Insert the belt tongue into the
proper buckle (the buckle closest to
the direction the tongue is coming
from) until you hear a snap and feel
it latch. Make sure the tongue is
securely fastened in the buckle.
2. To unfasten, push the release
button and remove the tongue from
the buckle.
Energy management feature
•This vehicle has a seat belt system with an energy management
feature at the front outboard seating positions to help further reduce
the risk of injury in the event of a head-on collision.
•This seat belt system has a retractor assembly that is designed to pay
out webbing in a controlled manner. This feature is designed to help
reduce the belt force acting on the occupant’s chest.
The front outboard and rear safety restraints in the vehicle are
combination lap and shoulder belts. The front outboard passenger and
rear seat safety belts have three types of locking modes described below:
Vehicle sensitive mode
This is the normal retractor mode, which allows free shoulder belt length
adjustment to your movements and locking in response to vehicle
movement. For example, if the driver brakes suddenly or turns a corner
sharply, or the vehicle receives an impact of approximately 5 mph
(8 km/h) or more, the combination safety belts will lock to help reduce
forward movement of the driver and passengers.
2005 Crown Victoria(cro)
Owners Guide (post-2002-fmt)
USA(fus)
Seating and Safety Restraints
105
Page 112 of 264
Reasons given... Consider...
“I have an airbag” Airbags offer greater protection when
used with safety belts. Frontal airbags
are not designed to inflate in rear and
side crashes or rollovers.
“I’d rather be thrown clear” Not a good idea.Peoplewho are
ejected are 40 times more likely
to DIE.Safety belts help prevent
ejection, WE CAN’T “PICK OUR
CRASH”.
Do not sit on top of a buckled safety belt to avoid the
BeltMinder�chime. Sitting on the safety belt will increase the
risk of injury in an accident. To disable (one-time) or deactivate the
BeltMinder�feature please follow the directions stated below.
One time disable
If at any time the driver/front passenger quickly buckles then unbuckles
the BeltMinder�feature for that seating position, the BeltMinder�is
disabled for the current ignition cycle. The BeltMinder�feature will
re-enable during the same ignition cycle if the occupant buckles and
remains buckled for approximately 30 seconds. Confirmation is not given
for the one time disable.
Deactivating/activating the BeltMinder�feature
The driver and front passenger BeltMinder�are
deactivated/activated independently. When deactivating/activating
one seating position, do not buckle the other position as this will
terminate the process.
Read Steps1-4thoroughly before proceeding with the
deactivation/activation programming procedure.
Note: The driver and front passenger BeltMinder�features must be
disabled/enabled separately. Both cannot be disable/enabled during the
same key cycle.
The driver and front passenger BeltMinder�features can be
deactivated/activated by performing the following procedure:
Before following the procedure, make sure that:
•The parking brake is set
2005 Crown Victoria(cro)
Owners Guide (post-2002-fmt)
USA(fus)
Seating and Safety Restraints
112