2005 FIAT DUCATO 244 Maxi
[x] Cancel search: MaxiPage 111 of 258

110GETTING THE BEST OUT OF YOUR VEHICLE
STARTING
After starting the engine, with the en-
gine idling and keeping the brake ped-
al pressed, move the gearshift lever to
position D. Release the brake pedal
and gradually press the accelerator
pedal.
IMPORTANT Movement of the
lever from position Pis allowed only
with the ignition key at MARand the
button on the lever and the brake ped-
al pressed. STOPPING THE VEHICLE
To stop the vehicle, simply press the
brake pedal regardless of the position
of the gearshift lever.
IMPORTANTRemoving the igni-
tion key is only allowed with the
gearshift lever in position Pand for a
maximum time of 30 seconds from
when the engine is turned off P, when
the door is opened a buzzer will sound
for about 15 seconds to alert the dri-
ver.
In the case of an emergency (faults,
flat battery, etc.) the ignition key can
be removed from the switch fitting a
screwdriver in hole infig. 3set under
the ignition switch and pressing up-
wards Do not attempt to ob-
tain peak performance
until the engine has
reached normal operating tem-
perature.
fig. 3
F0D0236m
With the engine idling, also
on a level surface, and the
gearshift lever in position D or R,
the vehicle tends to move if the
brake pedal is not kept pressed.
WARNING
ELECTRONIC
AUTOMATIC
GEARBOX
(2.8 JTD versions
only)
The automatic gearbox fitted on Fi-
at Ducato features four speeds plus
reverse with self-adapting control (i.e.
capable of adapting to the driver’s dri-
ving style), which transmits power
continuously and with very fast elec-
tro-hydraulic gear engagement times.
STARTING THE ENGINE
The engine can be started only with
the gearshift lever in the P or Nposi-
tion.
For safety reasons, it is advisable to
start the engine with the brake pedal
pressed.
IMPORTANTWhen moving off af-
ter starting the engine, do not press
the accelerator pedal before and dur-
ing the movement of the gearshift
lever. This is particularly important
when the engine is cold.
Page 113 of 258
112GETTING THE BEST OUT OF YOUR VEHICLE
IMPORTANTRemoving the igni-
tion key is only allowed with the
gearshift lever in position Pand for a
maximum time of 30 seconds from
when the engine is turned off P, when
the door is opened a buzzer will sound
for about 15 seconds to alert the dri-
ver.
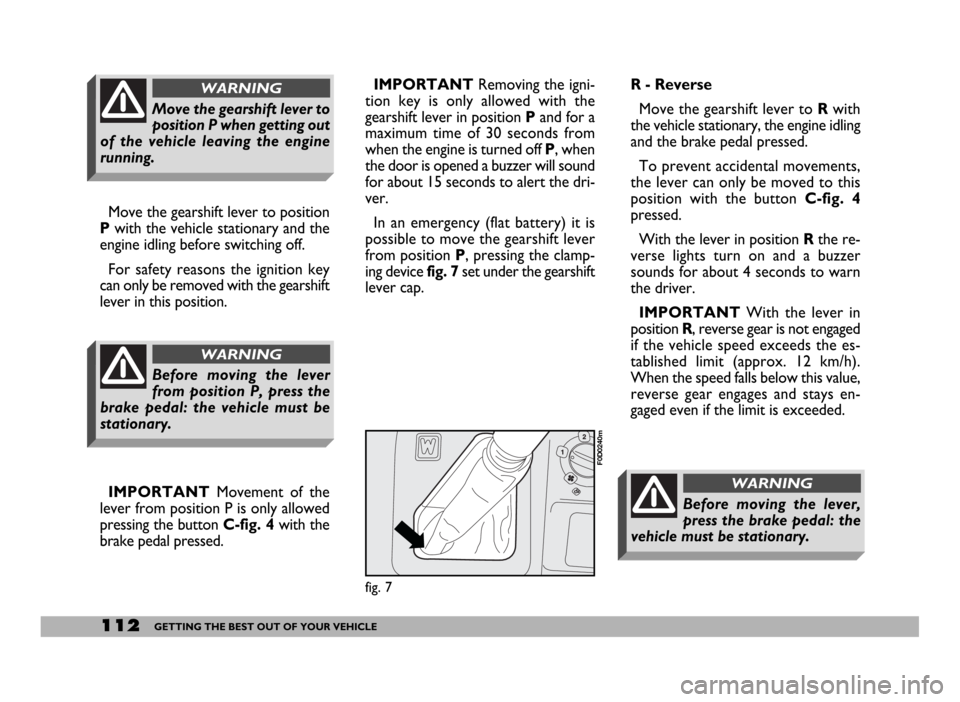
In an emergency (flat battery) it is
possible to move the gearshift lever
from position P, pressing the clamp-
ing device fig. 7set under the gearshift
lever cap.R - Reverse
Move the gearshift lever to Rwith
the vehicle stationary, the engine idling
and the brake pedal pressed.
To prevent accidental movements,
the lever can only be moved to this
position with the button C-fig. 4
pressed.
With the lever in position Rthe re-
verse lights turn on and a buzzer
sounds for about 4 seconds to warn
the driver.
IMPORTANTWith the lever in
position R, reverse gear is not engaged
if the vehicle speed exceeds the es-
tablished limit (approx. 12 km/h).
When the speed falls below this value,
reverse gear engages and stays en-
gaged even if the limit is exceeded.
fig. 7
F0D0240m
Before moving the lever,
press the brake pedal: the
vehicle must be stationary.
WARNING
Move the gearshift lever to position
Pwith the vehicle stationary and the
engine idling before switching off.
For safety reasons the ignition key
can only be removed with the gearshift
lever in this position.
IMPORTANTMovement of the
lever from position P is only allowed
pressing the button C-fig. 4with the
brake pedal pressed.
Move the gearshift lever to
position P when getting out
of the vehicle leaving the engine
running.
WARNING
Before moving the lever
from position P, press the
brake pedal: the vehicle must be
stationary.
WARNING
Page 114 of 258
113GETTING THE BEST OUT OF YOUR VEHICLE
N - Neutral
This corresponds to the neutral po-
sition of a standard manual gearbox.
This position is to be used if the ve-
hicle is to be pushed or towed.
With the engine idling and
the gearshift lever at N the
vehicle tends to move by inertia if
it is not on a level surface: keep the
brake pedal pressed when the lever
is at N.
WARNING
D - Forward gear
This is the position to be used when
driving forward normally. The elec-
tronic control unit controls automat-
ic engagement of the 4 gears depend-
ing on the position of the accelerator,
driving speed, engine rpm, longitudinal
and transversal acceleration and the
type of road.
The electronic gearbox can chose
between different operating pro-
grammes, which range between com-
fortable economy driving and sporty
driving coming into operation between
the lowest and the highest speed.
Pressing the accelerator pedal quick-
ly the gearbox will immediately select
the sportier programme to meet the
request for increased performance. To
disengage the function release the ac-
celerator by at least 1/4 of the stroke. In the same way, during braking a
lower gear is engaged to better exploit
the braking action of the engine. If
there is another bend the new ratio
will be engaged already when slowing
down before the bend, this way at the
end of the bend the gearbox will not
have to shift gear to cope with accel-
eration.
Kickdown
To obtain optimum acceleration, for
example when overtaking, the gearbox
will kickdown by two gears simply by
quickly pressing fully home the accel-
erator pedal (in 1/10 of a second).
Engagement of the next longer ratio
will take place when the maximum
rpm limit is reached.
With the engine at idle
speed and the gearshift
lever at D, the vehicle tends to move
also on a level surface: keep the
brake pedal pressed until moving off.
WARNING
Page 116 of 258
115GETTING THE BEST OUT OF YOUR VEHICLE
Moving the lever back to position D
the gearbox instantly resumes the au-
tomatic mode selecting the ratio ac-
cording to the driving characteristics.
IMPORTANTThe electronic con-
trol unit is programmed to change
gear one at a time, therefore repeat-
ed fast actuations will not result in re-
peated engagements of the gears. The
higher or lower gear is engaged mov-
ing the lever to the (+) or (–) position
when the previous request has been
performed.
In the event of a fault to the sequen-
tial manual system, the system will se-
lect the automatic mode.FAILURE INDICATIONS
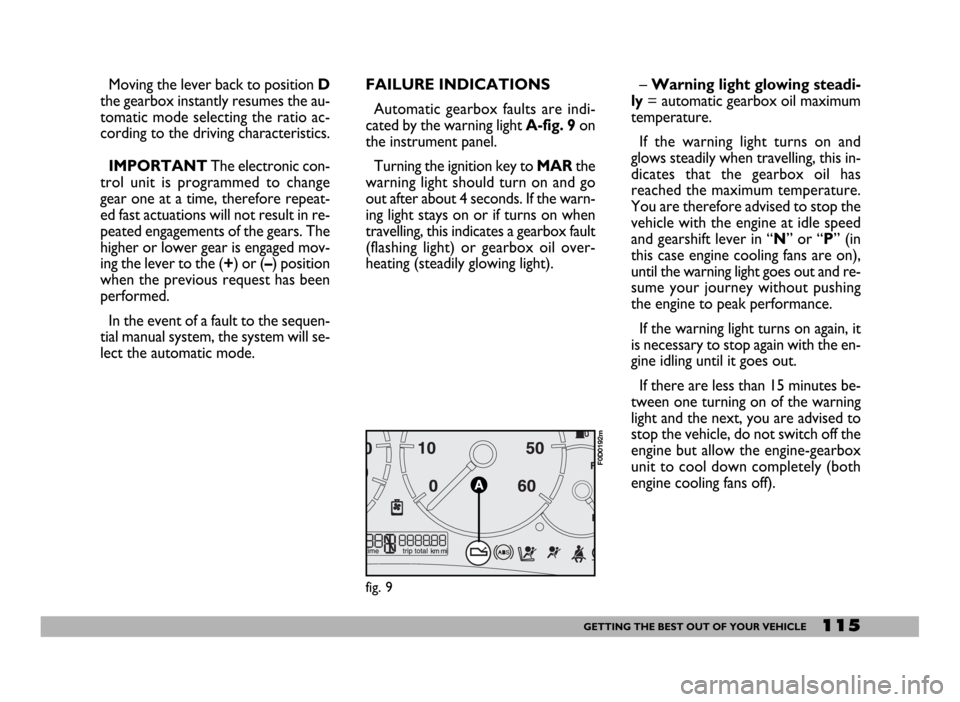
Automatic gearbox faults are indi-
cated by the warning light A-fig. 9 on
the instrument panel.
Turning the ignition key to MARthe
warning light should turn on and go
out after about 4 seconds. If the warn-
ing light stays on or if turns on when
travelling, this indicates a gearbox fault
(flashing light) or gearbox oil over-
heating (steadily glowing light).– Warning light glowing steadi-
ly= automatic gearbox oil maximum
temperature.
If the warning light turns on and
glows steadily when travelling, this in-
dicates that the gearbox oil has
reached the maximum temperature.
You are therefore advised to stop the
vehicle with the engine at idle speed
and gearshift lever in “N” or “P” (in
this case engine cooling fans are on),
until the warning light goes out and re-
sume your journey without pushing
the engine to peak performance.
If the warning light turns on again, it
is necessary to stop again with the en-
gine idling until it goes out.
If there are less than 15 minutes be-
tween one turning on of the warning
light and the next, you are advised to
stop the vehicle, do not switch off the
engine but allow the engine-gearbox
unit to cool down completely (both
engine cooling fans off).
fig. 9
F0D0192m
Page 126 of 258

125GETTING THE BEST OUT OF YOUR VEHICLE
Electric devices
Use electric devices for the neces-
sary time only. The heated rear win-
dow, fog lights, windscreen wipers,
heater fan require large amounts of
electricity and increasing the request
for power will also increase fuel con-
sumption (up to +25% when driving in
towns).
Climate control system
The climate control system is an ad-
ditional load which greatly affects the
engine leading to higher consumption.
When the temperature outside the
vehicle allows it, use the air vents
where possible.
DRIVING STYLE
Starting
Do not warm the engine when the
vehicle is stationary or at high or low
speed: in this way the engine will warm
up gradually increasing consumption
and emissions. You should drive off
slowly straight away avoiding high revs
so that the engine will warm up more
quickly.Unnecessary actions
Avoid revving the engine when
stopped at traffic lights or before
switching off the engine and avoid dou-
bling the clutch as these actions have
no purpose on modern vehicles and
serve only to increase consumption
and pollution.
Gear selections
As soon as the traffic and road con-
ditions allow it, shift to a higher gear.
Using a low gear to liven up accelera-
tion greatly increases consumption. In
the same way improper use of high
gears will increase consumption, emis-
sions and engine wear.
On passenger transportation versions
fitted with 2.3, 2.8 JTD and 2.8 JTD
POWER engines, fuel consumption can
be optimised by starting (on level road)
in 2nd gear instead of 1st gear.Top speeds
Fuel consumption increases consid-
erably as speed increases. Your speed
should be kept as even as possible and
superfluous braking and acceleration
avoided as this increases both con-
sumption and emissions.
Acceleration
Accelerating violently increasing the
revs will greatly affect consumption
and emissions; acceleration should be
gradual and should not exceed the
maximum torque.
Page 127 of 258
126GETTING THE BEST OUT OF YOUR VEHICLE
CONDITIONS OF USE
Cold starting
Frequent cold starting will not enable
the engine to reach optimal running
temperature. It follows, therefore,
that consumption will be higher (from
+15 to +30% in towns) as will the
production of toxic emissions.
Traffic and road conditions
Heavy traffic and higher consumption
are synonymous: for example, when
driving slowly with frequent use of low-
er gears or in towns where there are
numerous traffic lights.
Winding roads, mountain roads and
bumpy roads also have a negative effect
on consumption.
Enforced halts
During prolonged stops (traffic lights,
level crossings, etc.) the engine should
be switched off.LOAD
RECOMMENDATIONS
The version of the Ducato you are
driving has been designed and ap-
proved on the basis of several set
maximum weights (see the tables
“Weights” in section “Technical spec-
ifications”):
– kerb weight
– payload
– total weight
– total weight on the front axle
– total weight on the rear axle
– towable weight
fig. 10
F0D0047m
Each of these limits must be
borne in mind and MUST
NEVER BE EXCEEDED under any
circumstances. In particular, never
exceed the maximum weight per-
mitted on the front and rear axles
when arranging loads in vehicle (es-
pecially for special version vehicles).
WARNING
Chance knocks or sudden
braking can cause sudden
shifts of the load which could jeop-
ardise the safety of the driver and
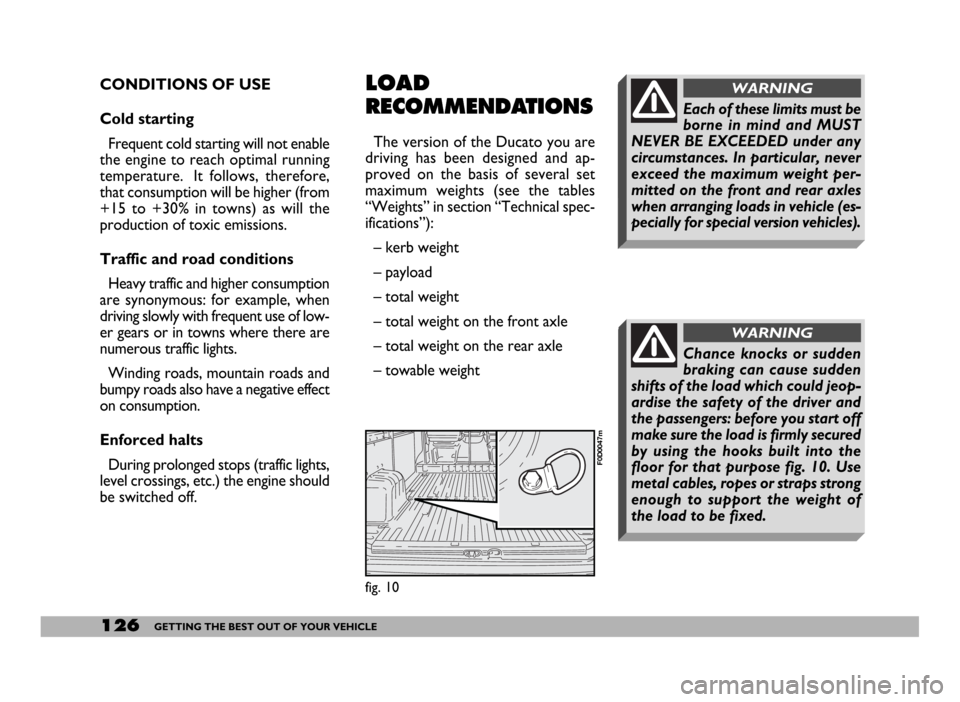
the passengers: before you start off
make sure the load is firmly secured
by using the hooks built into the
floor for that purpose fig. 10. Use
metal cables, ropes or straps strong
enough to support the weight of
the load to be fixed.
WARNING
Page 130 of 258
129GETTING THE BEST OUT OF YOUR VEHICLE
TOWING A TRAILER
IMPORTANT
The vehicle must be fitted with a ho-
mologated tow hitch and suitable elec-
trical system for towing a caravan or
trailer. Have the tow hitch fitted by an
expert who will issue specific docu-
mentation for use on roads.
Fit special wing mirrors in accor-
dance with the highway code.
Remember that towing a trailer
makes it harder for the vehicle to
climb the maximum gradients speci-
fied, increases braking and overtaking
distance, proportionally to the overall
weight of the trailer.
Engage a low gear when driving
downhill rather than constantly brak-
ing.
The weight the trailer exerts on the
vehicle’s tow hitch coupling reduces
the vehicle’s payload by the same
amount.In order to be sure you are not ex-
ceeding the maximum towing weight
(shown in the log book) you have to
take into account the trailer weight ful-
ly laden including the accessories and
personal luggage.
Do not exceed the speed limits for
towing a trailer in the country you are
driving in. In any case, do not exceed
the top speed of 100 km/h.TOW HITCH INSTALLATION
The tow hitch must be fixed to the
body by an expert in accordance with
the following instructions and re-
specting the additional and/or integra-
tive information provided by the tow
hitch manufacturer.
The tow hitch to be fitted must com-
ply with the current regulations in
force, with reference to Directive
94/20/CEE and subsequent modifica-
tions.
Use a tow hitch suited for the maxi-
mum towable load of the vehicle version
on which the tow hitch is to be fitted.
Use a unified coupling for the elec-
trical connections. The coupling is gen-
erally fitted on a specific mount fas-
tened to the tow hitch.
For the electrical connections, a 7 or
13 pole 12VDC coupling must be used
(CUNA/UNI and ISO/DIN standards).
Follow the instructions provided by
the manufacturer of the vehicle and/or
the tow hitch.
For the electric connections use the
proper trailer light control unit.
Under no circumstances
modify the vehicle’s braking
system for trailer braking control.
The trailer braking system must be
completely independent from the
vehicle hydraulic system.
WARNING
Where your vehicle is
equipped with ABS, re-
member that this has no effect over
the trailer braking system. Particu-
lar care must be taken on slippery
surfaces.
WARNING
Page 134 of 258

133GETTING THE BEST OUT OF YOUR VEHICLE
SNOW CHAINS
The use of snow chains is regulated
by the legislation in force in the coun-
try the vehicle is driven in.
The chains may only be applied to
the drive wheel tyres (front wheels).We recommend using Lineaccessori
Fiat snow chains.
Check the tautness of the chains af-
ter driving some twenty to thirty me-
tres.With chains
mounted keep
your speed down.
Do not exceed 50 kph. Avoid
holes in the road; do not mount
steps or kerbs. Do not drive long
stretches of snow-free road with
the chains mounted, as this can
damage the vehicle and the road
surface too.
Versions
11
15
MAXI
Tyres on which
chains can be fitted
195/70 R15C
205/70 R15C
215/70 R15 Camping
205/70 R15C
215/70 R15 Camping
215/75 R16C
205/75 R16C
215/75 R16 CampingTypes of snow chains
to be used
Snow chains with
reduced size with max.
protrusion beyond the
tyre profile of 15 mm
For rim size refer to “Wheels” in section “Technical Specifications”.
Refer to the following table
for information on the
wheels where snow chains can be
fitted. Follow the prescriptions.
WARNING