2005 FIAT DUCATO 244 Gearbox manual
[x] Cancel search: Gearbox manualPage 71 of 258

70GETTING TO KNOW YOUR VEHICLE
To increase the memorised
speed
The speed memorised can be in-
creased in two ways:
1 -pressing the accelerator and then
memorising the new speed reached
(pressing button + for more than
three seconds);
2 -pressing briefly button +: each
pressing will correspond to a slight in-
crease in speed (about 2.5 km/h) while
pressing continuously will correspond
to a continuous speed increase. Re-
leasing the button the new speed will
be memorised automatically.
To reduce the memorised
speed
The speed memorised can be re-
duced in two ways:
1 -disengaging the device (for in-
stance pressing the brake pedal) and
then memorising the new speed
(pressing button +for more than
three seconds);
2 -pressing button –until reaching
the new speed which will be memo-
rised automatically.To set to zero the memorised
speed
The memorised speed is automati-
cally reset:
– turning the engine off;
– pressing buttonOFF.Do not engage the device in town or
in busy flowing traffic conditions.
When travelling with the
cruise control on, do not
move the gearshift lever to neutral
and to not move the automatic
gearbox selector to N. We suggest
to engage the cruise control only
when the traffic and road condi-
tions allow doing it in complete
safety and so: straight and dry
roads, freeways or motorways,
smooth flowing traffic and even as-
phalt.
WARNING
The cruise control can be en-
gaged only with speeds high-
er than 40 km/h. The device may on-
ly be engaged in 4
thor 5thgear, de-
pending on the speed of the vehicle.
On vehicles with electronic automat-
ic gearbox it can only be engaged
with selector to D, in automatic mode
without then moving the selector
manually, or with 3
rdor 4thgear in se-
quential operation. Travelling down-
hill with the device engaged, the ve-
hicle speed may increase more than
the memorised one, due to the
change in the engine load.
WARNING
Page 110 of 258

109GETTING THE BEST OUT OF YOUR VEHICLE
To release the handbrake:
1)slightly lift the handbrake and press
release button A-fig. 1;
2)keep the button pressed and low-
er the lever. Warning light xwill go
out;
3)press the brake pedal when car-
rying out this operation to prevent the
vehicle moving accidentally.
IMPORTANTPull the handbrake
lever only when the vehicle is at a
standstill, or when the vehicle is run-
ning, but however only in case of a fail-
ure of the hydraulic system.
Should the handbrake be exception-
ally used when the vehicle is running, it
is suggested to keep a moderate trac-
tion to avoid causing the rear axle
block, entailing vehicle side skidding.USING THE
MANUAL GEARBOX
Press the clutch fully before shifting
the gear stick into one of the positions
shown in the diagram fig. 2(the dia-
gram is also on the gear lever knob).
To engage reverse, lift the sliding ring
Aunder the knob and shift the lever
to the left and forth.IMPORTANTOnly engage the re-
verse gear when the vehicle is com-
pletely stationary.
With the engine running, before en-
gaging reverse, wait for at least 2 sec-
onds with the clutch pedal pressed to
avoid damaging the gears and grating.
fig. 2
F0D0057m
You must press the clutch
fully down to change gear
properly. It is therefore essential
that there is nothing under the ped-
als. Make sure that mats are lying
flat and do not get in the way of
pedals.
WARNING
Page 112 of 258

111GETTING THE BEST OUT OF YOUR VEHICLE
SELECTING AUTOMATIC/
SEQUENTIAL MANUAL
OPERATION
The main feature of this gearbox is
the possibility of being used in the au-
tomatic or sequential manual mode.
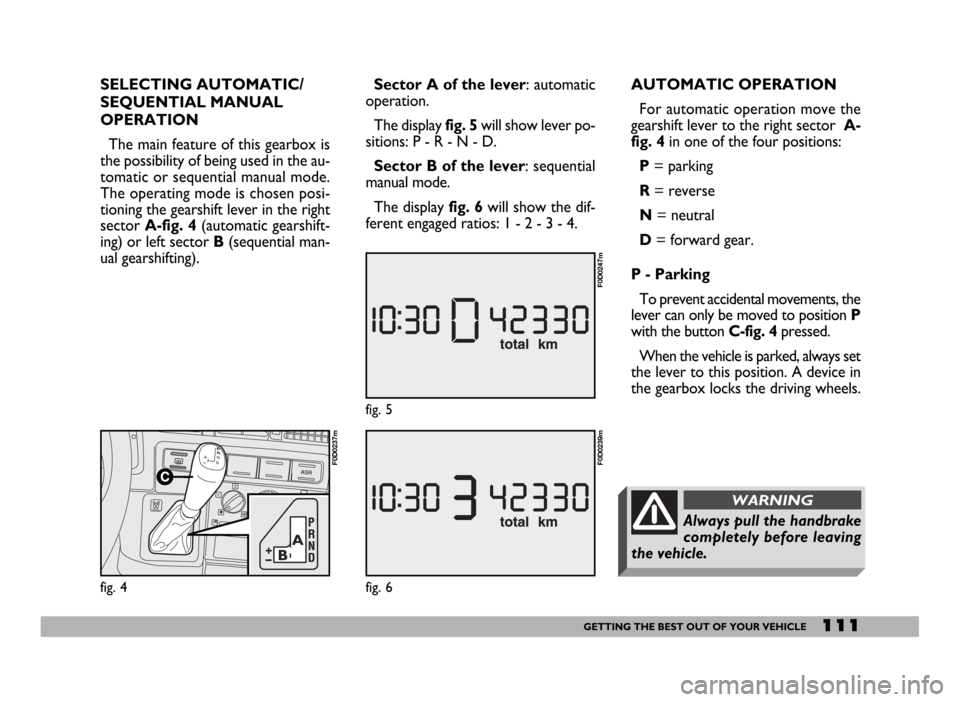
The operating mode is chosen posi-
tioning the gearshift lever in the right
sector A-fig. 4(automatic gearshift-
ing) or left sector B(sequential man-
ual gearshifting).
fig. 4
F0D0237m
Sector A of the lever: automatic
operation.
The display fig. 5will show lever po-
sitions: P - R - N - D.
Sector B of the lever: sequential
manual mode.
The display fig. 6will show the dif-
ferent engaged ratios: 1 - 2 - 3 - 4.AUTOMATIC OPERATION
For automatic operation move the
gearshift lever to the right sector A-
fig. 4in one of the four positions:
P= parking
R= reverse
N= neutral
D= forward gear.
P - Parking
To prevent accidental movements, the
lever can only be moved to position P
with the button C-fig. 4pressed.
When the vehicle is parked, always set
the lever to this position. A device in
the gearbox locks the driving wheels.
fig. 6
F0D0239m
fig. 5
F0D0247m
Always pull the handbrake
completely before leaving
the vehicle.
WARNING
Page 114 of 258

113GETTING THE BEST OUT OF YOUR VEHICLE
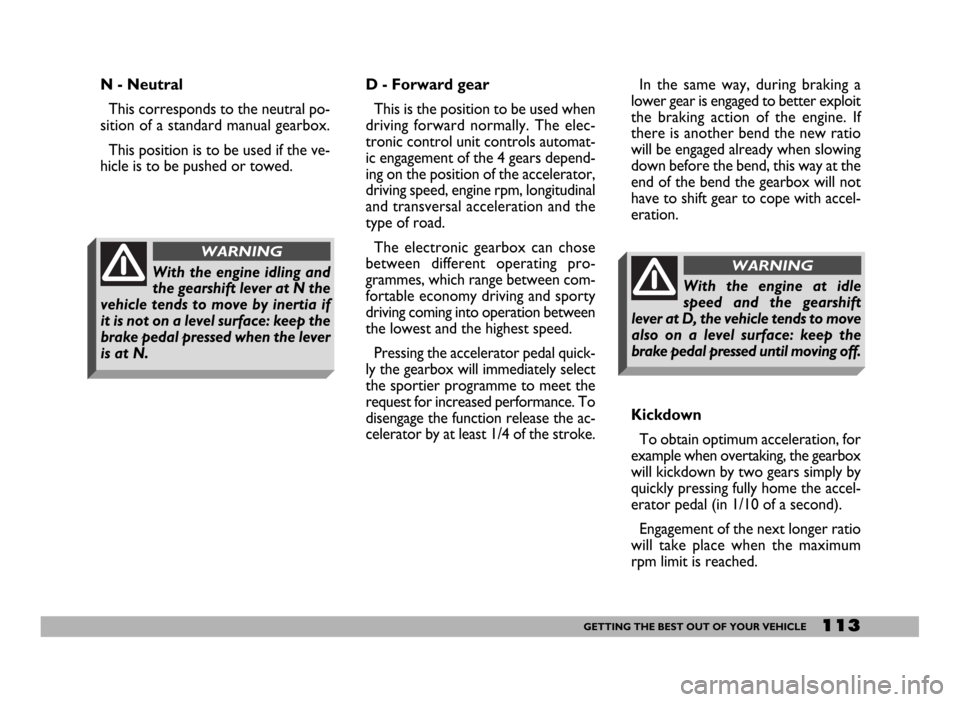
N - Neutral
This corresponds to the neutral po-
sition of a standard manual gearbox.
This position is to be used if the ve-
hicle is to be pushed or towed.
With the engine idling and
the gearshift lever at N the
vehicle tends to move by inertia if
it is not on a level surface: keep the
brake pedal pressed when the lever
is at N.
WARNING
D - Forward gear
This is the position to be used when
driving forward normally. The elec-
tronic control unit controls automat-
ic engagement of the 4 gears depend-
ing on the position of the accelerator,
driving speed, engine rpm, longitudinal
and transversal acceleration and the
type of road.
The electronic gearbox can chose
between different operating pro-
grammes, which range between com-
fortable economy driving and sporty
driving coming into operation between
the lowest and the highest speed.
Pressing the accelerator pedal quick-
ly the gearbox will immediately select
the sportier programme to meet the
request for increased performance. To
disengage the function release the ac-
celerator by at least 1/4 of the stroke. In the same way, during braking a
lower gear is engaged to better exploit
the braking action of the engine. If
there is another bend the new ratio
will be engaged already when slowing
down before the bend, this way at the
end of the bend the gearbox will not
have to shift gear to cope with accel-
eration.
Kickdown
To obtain optimum acceleration, for
example when overtaking, the gearbox
will kickdown by two gears simply by
quickly pressing fully home the accel-
erator pedal (in 1/10 of a second).
Engagement of the next longer ratio
will take place when the maximum
rpm limit is reached.
With the engine at idle
speed and the gearshift
lever at D, the vehicle tends to move
also on a level surface: keep the
brake pedal pressed until moving off.
WARNING
Page 115 of 258

114GETTING THE BEST OUT OF YOUR VEHICLE
SEQUENTIAL MANUAL
OPERATION
For the sequential manual operation
mode, move the lever to the left sec-
tor B-fig. 4with two positions:
(+) = engagement of the higher ra-
tio;
(–) = engagement of the lower ratio.
Moving the gearshift lever to the
manual sector is only possible from
position D: the ratio selected by the
automatic gearbox when the lever is
moved will remain engaged.
When the sequential manual mode is
selected, the display shows the en-
gaged gear fig. 6.
To select the higher ratio move the
lever in the (+) direction and to shift
down move the lever to (–).IMPORTANTIf the request to
downshift would cause engine
overevving, this is eliminated by the
electronic control unit. Moreover, if
the manually engaged gear causes en-
gine overevving, the electronic control
unit will shift gear automatically to the
most appropriate one (AUTO-UP).
When the sequential man-
ual mode has been set and
a high gear is engaged, to acceler-
ate rapidly, for example to over-
take, it is necessary to downshift
by hand: the kickdown feature
cannot be engaged!
WARNING
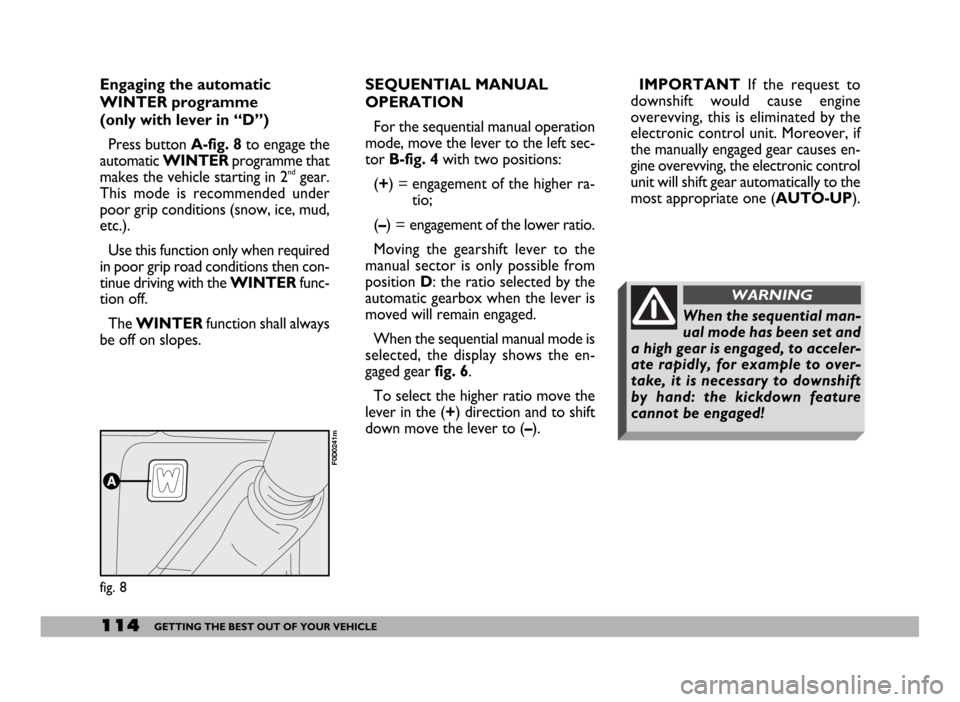
Engaging the automatic
WINTER programme
(only with lever in “D”)
Press button A-fig. 8to engage the
automatic WINTERprogramme that
makes the vehicle starting in 2
ndgear.
This mode is recommended under
poor grip conditions (snow, ice, mud,
etc.).
Use this function only when required
in poor grip road conditions then con-
tinue driving with the WINTERfunc-
tion off.
The WINTERfunction shall always
be off on slopes.
fig. 8
F0D0241m
Page 116 of 258

115GETTING THE BEST OUT OF YOUR VEHICLE
Moving the lever back to position D
the gearbox instantly resumes the au-
tomatic mode selecting the ratio ac-
cording to the driving characteristics.
IMPORTANTThe electronic con-
trol unit is programmed to change
gear one at a time, therefore repeat-
ed fast actuations will not result in re-
peated engagements of the gears. The
higher or lower gear is engaged mov-
ing the lever to the (+) or (–) position
when the previous request has been
performed.
In the event of a fault to the sequen-
tial manual system, the system will se-
lect the automatic mode.FAILURE INDICATIONS
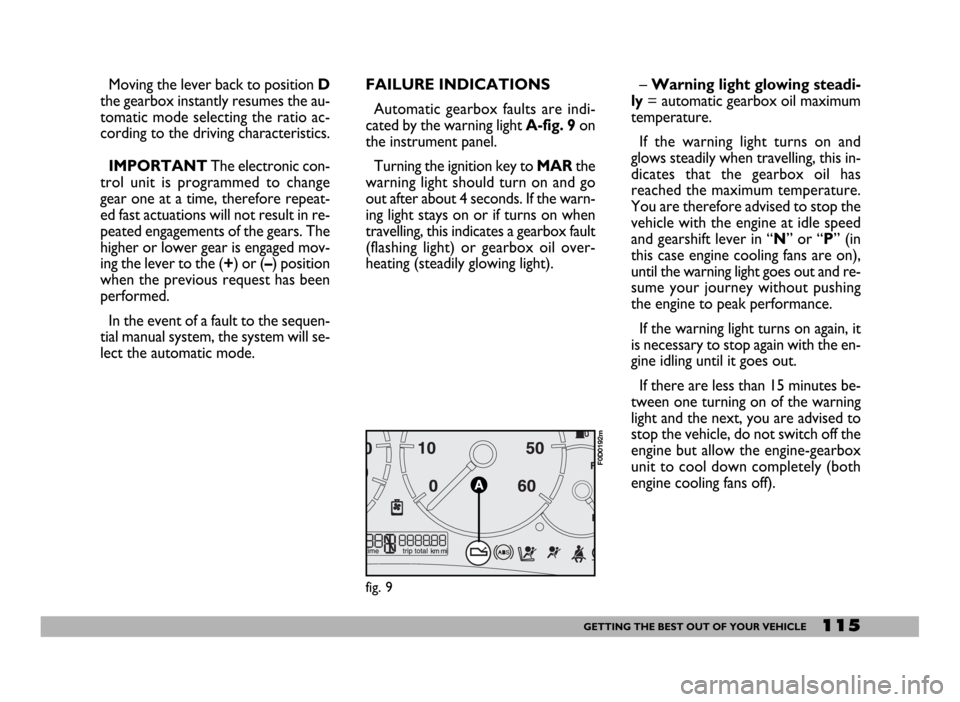
Automatic gearbox faults are indi-
cated by the warning light A-fig. 9 on
the instrument panel.
Turning the ignition key to MARthe
warning light should turn on and go
out after about 4 seconds. If the warn-
ing light stays on or if turns on when
travelling, this indicates a gearbox fault
(flashing light) or gearbox oil over-
heating (steadily glowing light).– Warning light glowing steadi-
ly= automatic gearbox oil maximum
temperature.
If the warning light turns on and
glows steadily when travelling, this in-
dicates that the gearbox oil has
reached the maximum temperature.
You are therefore advised to stop the
vehicle with the engine at idle speed
and gearshift lever in “N” or “P” (in
this case engine cooling fans are on),
until the warning light goes out and re-
sume your journey without pushing
the engine to peak performance.
If the warning light turns on again, it
is necessary to stop again with the en-
gine idling until it goes out.
If there are less than 15 minutes be-
tween one turning on of the warning
light and the next, you are advised to
stop the vehicle, do not switch off the
engine but allow the engine-gearbox
unit to cool down completely (both
engine cooling fans off).
fig. 9
F0D0192m
Page 118 of 258

117GETTING THE BEST OUT OF YOUR VEHICLE
CONSTRUCTION FEATURES
DUCATO automatic gearbox is con-
trolled electronically with four for-
ward gears and reverse.
It is controlled by an electronic con-
trol unit which handles:
– the torque distributor;
– gearshifting;
– specific programmes.
The gearbox is coupled with a flow
power torque distributor with piloted
antislip device which makes it possible
to obtain demultiplication ratios.
The characteristic of this gearbox
which works without idle gear enables:
– higher compactness and weight re-
duction;
– improved output due to less fric-
tion;
– lower stress of transmission com-
ponents.GENERAL FEATURES
Electronic gearbox control makes it
possible to obtain gearshifting suited
to momentary engine characteristics
with a certain elasticity.
The electronic control unit has the
following task:
– adapting the oil pressure for
gearshifting to the engine torque;
– activating safety functions;
– defining the manual gearshifting
programme;
– system diagnostics.
For controlling these operating log-
ics the control unit uses the follow-
ing signals:
– engine rpm;
– engine temperature;
– engine torque;
– vehicle speed;
– gearbox oil temperature;– gearshift lever position;
– accelerator pedal position;
– brake pedal position.
The control unit also communicates
with the injection system electronic
control unit.
Conditions of use analysed by
the control unit
The control unit analyses each single
condition of use of the vehicle, dis-
criminating it on the basis of the sig-
nals received from the various sensors.
Analysed conditions are the follow-
ing:
– starting (position/accelerator ped-
al changing speed);
– acceleration (accelerator pedal
completely pushing down speed);
– full load (number of engine full load
kickdown signals or position mainte-
nance time);
Page 119 of 258

118GETTING THE BEST OUT OF YOUR VEHICLE
– braking (accelerator pedal release
time and braking system operation);
– type of programme (gearshift se-
lector lever position);
– winter driving (driving wheel
torque reduction);
– driving with trailer or uphill (vehi-
cle speed in relation to transmitted
torque)
– driving downhill (vehicle accelera-
tion in relation to the position of the
accelerator pedal);
– driving in towns or queues (accel-
erator pedal position and vehicle
speed);
– gear required by the driver
(gearshift lever position);
– cold starting (engine temperature).Gearshift programme control
To optimise vehicle handling the
electronic control unit has the fol-
lowing memorised programmes:
– automatic operation;
– manual operation;
– winter driving (to be selected
through buttonWINTER);
– engine warming up;
– protection against excessive gear-
box oil temperature .Automatic programme
This comprises 16 gearshifting pro-
grammes.
In relation to the vehicle speed and
torque transmitted, the control unit
detects the slope of the road surface
and depending on the sporty features
chosen, it autonomously chooses the
programme most suited to the situa-
tion.
During gearshifting, the gearbox con-
trol unit asks the injection control unit
to momentarily reduce the torque.
The duration of torque reduction
varies depending on the travelling con-
ditions.