Page 212 of 480

Pinch Roller Release
If ignition power or the radio ON/OFF switch are turned
off, the pinch roller will automatically retract to protect
the tape from any damage. When power is restored to the
tape player, the pinch roller will automatically reengage
and the tape will resume play.
Noise Reduction
The Dolby Noise Reduction System* is on whenever the
tape player is on, but may be switched off.
To turn off the Dolby Noise reduction System: Press the
Dolby button (button 2) after you insert the tape. The NR
light in the display will go off when the Dolby System is
off. The Dolby System is automatically reactivated each
time a tape is inserted.
* ” Dolby ” noise reduction manufactured under license
from Dolby Laboratories Licensing Corporation. Dolby
and the double-D symbol are trademarks of Dolby Labo-
ratories Licensing Corporation. Operating Instructions — CD Player
NOTE: The ignition switch must be in the ON or ACC
position and the volume control ON before the CD player
will operate.
CAUTION!This CD player will accept 4 3
⁄ 4
inch (12 cm) discs
only. The use of other sized discs may damage the
CD player mechanism.
Inserting The Compact Disc
The CD player contained within the radio is not a
multi-disc changer, and will only accept one CD. Gently
insert one CD into the CD player with the CD label facing
up. The CD will automatically be pulled into the CD
Player.212 UNDERSTANDING YOUR INSTRUMENT PANEL
Page 222 of 480
Rewind — RW
Press the RW button down momentarily to reverse the
tape direction. The tape will rewind until the button is
pressed again or until the beginning of the tape is
reached. At the beginning of the tape, the tape will play
in the opposite direction.
EJT Tape
Press the EJT TAPE button and the cassette will disen-
gage and eject from the radio.
Metal Tape Selection (70µs)
If a standard 70 µ (metal) tape is inserted into the player,
the player will automatically select the correct equaliza-
tion.
Pinch Roller Release
If ignition power or the radio ON/OFF switch are turned
off, the pinch roller will automatically retract to protect the tape from any damage. When power is restored to the
tape player, the pinch roller will automatically reengage
and the tape will resume play.
Dolby Noise Reduction
The Dolby Noise Reduction System* is on when-
ever the tape player is on, but may be switched
on/off.
To turn the Dolby Noise Reduction System on/off: Press
the Dolby NR button (button 2) after you insert the tape.
The NR light in the display will go off when the Dolby
System is off.
* ” Dolby ” noise reduction manufactured under license
from Dolby Laboratories Licensing Corporation. Dolby
and the double-D symbol are trademarks of Dolby Labo-
ratories Licensing Corporation.222 UNDERSTANDING YOUR INSTRUMENT PANEL
Page 240 of 480
SALES CODE RB1 — AM/FM STEREO RADIO
WITH DVD/GPS NAVIGATION SYSTEM
The navigation system provides maps, turn identifica-
tion, selection menus and instructions for selecting a variety of destinations and routes. Refer to your “ Navi-
gation User ’ s Manual ” for detailed operating instruc-
tions.
NOTE: If your vehicle is not equipped with the CD
Changer option, you will not be able to use the Naviga-
tion system and the CD Player simultaneously. Always
remove the Navigation DVD before inserting another
disc.
6 DISC CD CHANGER — IF EQUIPPED
The CD changer is located below the radio in the
instrument panel. The changer plays only 4 3
� 4
inch (12
cm) discs. The changer holds up to 6 discs. Each disc is
loaded and ejected through a single slot in front of the
changer. Each disc has a numbered button with an amber
light above it which, when illuminated, indicates that a
disc is loaded in that particular chamber.RB1 Radio240 UNDERSTANDING YOUR INSTRUMENT PANEL
Page 241 of 480
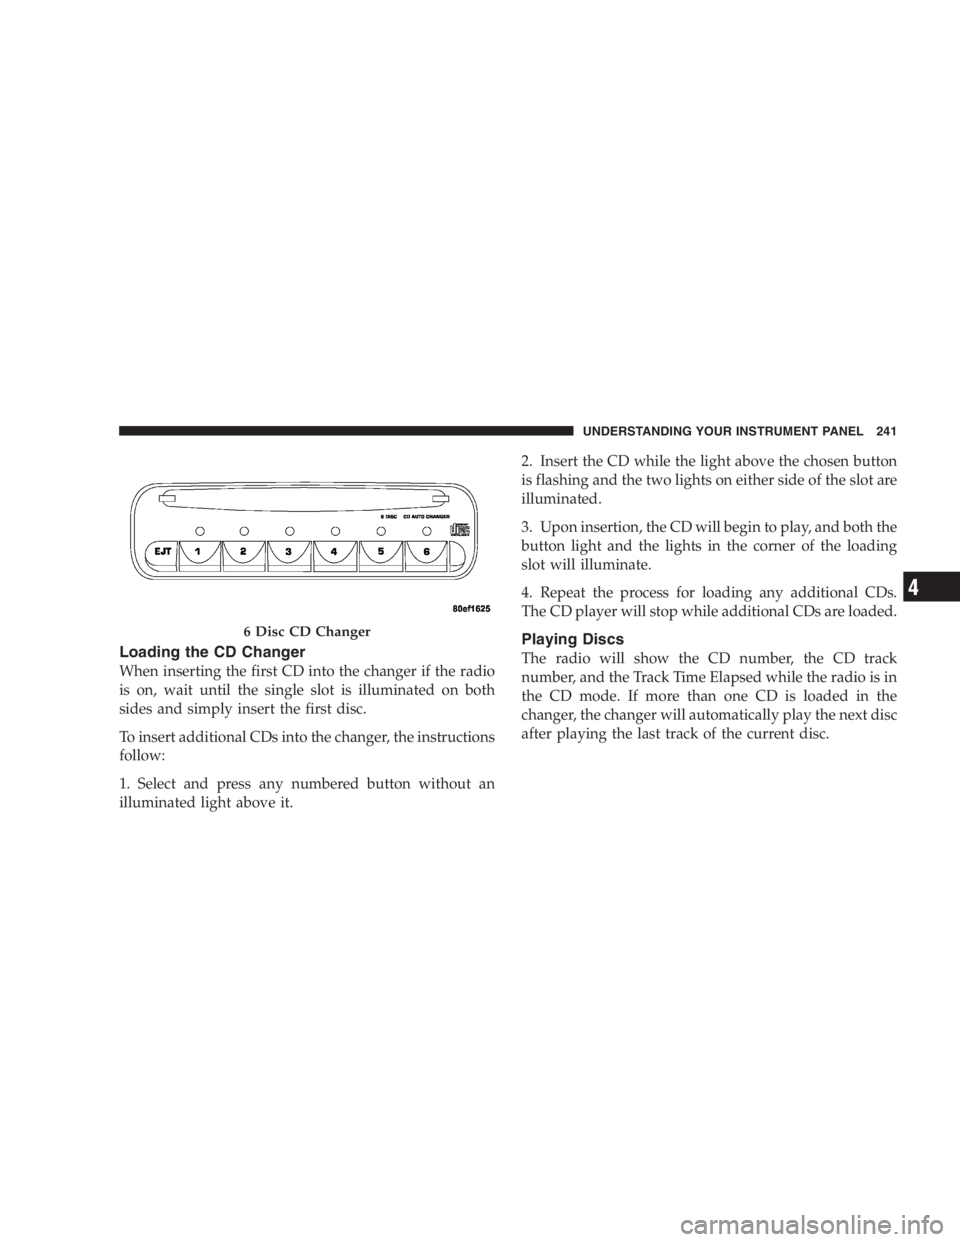
Loading the CD Changer
When inserting the first CD into the changer if the radio
is on, wait until the single slot is illuminated on both
sides and simply insert the first disc.
To insert additional CDs into the changer, the instructions
follow:
1. Select and press any numbered button without an
illuminated light above it. 2. Insert the CD while the light above the chosen button
is flashing and the two lights on either side of the slot are
illuminated.
3. Upon insertion, the CD will begin to play, and both the
button light and the lights in the corner of the loading
slot will illuminate.
4. Repeat the process for loading any additional CDs.
The CD player will stop while additional CDs are loaded.
Playing Discs
The radio will show the CD number, the CD track
number, and the Track Time Elapsed while the radio is in
the CD mode. If more than one CD is loaded in the
changer, the changer will automatically play the next disc
after playing the last track of the current disc.6 Disc CD Changer UNDERSTANDING YOUR INSTRUMENT PANEL 241
4
Page 245 of 480
To insert disc(s) into the changer, follow the instructions
shown:
1. On vehicles equipped with the premium version,
select and press any numbered button without an illumi-
nated light above it.
2. Gently insert the disc with the label facing up while
the light below the loading slot is illuminated. On
vehicles equipped with the premium version the light
above the chosen button will also be flashing, indicating
which numbered position the disc will be loaded into.
The disc will automatically be pulled into the CD/DVD
changer.
3. Upon insertion, the disc will begin to play, and the
light below the loading slot will turn off. On vehicles
equipped with the premium version the light above the
chosen button will remain illuminated. 4. Repeat the process for loading any additional CD/
DVDs into the premium version multi-disc changer. The
CD/DVD changer will stop while additional CD/DVDs
are loaded.
If the radio volume control is ON, the unit will switch
from radio to CD/DVD mode. If the DVD supports the
autoplay feature, play will begin automatically in ap-
proximately 10 seconds, after the DVD disc menu is
displayed. If the DVD does not play automatically, press
the ENTER button on the remote control or on the side of
the video screen to select play from the menu options.
The radio display will show the chapter number and
index time in hours and minutes of the DVD, or the track
number, minutes and second of the CD. UNDERSTANDING YOUR INSTRUMENT PANEL 245
4
Page 246 of 480
NOTE:
• You may eject a disc with the radio OFF.
• If you insert a disc with the ignition ON and the radio
OFF, the DVD will automatically be pulled into the
DVD changer and the display will show the time of
day.
• It is recommended to label home made burned discs
with a permanent marker instead of adhesive labels.
These types of labels may become loose and cause the
disc to be stuck in the DVD player. This may cause
permanent damage to the DVD mechanism.
EJECT (EJT) Button
If there is a disc in the changer, press the EJT button and
the disc will eject. If you do not remove the disc within 10
seconds, it will be reloaded and the display will show
PAUSE. The radio mode will continue to operate. To eject additional discs from the premium version
multi-disc changer, first select the numbered button
where the disc is located and then press the EJT button.
The disc can be ejected with the radio OFF.
Operating Instructions — Remote Control
NOTE: Aim the remote control at the DVD changer
located on the center of the instrument panel and press
the desired button. Direct sunlight or objects blocking the
line of sight may affect the function of the remote control.246 UNDERSTANDING YOUR INSTRUMENT PANEL
Page 248 of 480
Remote Control Buttons
17. Enter
18. Light
Headphone Transmitter Button (1)
After a disc is inserted into the DVD changer, both the
headphone transmitter button (1) on the remote control
and the power button on the headphones must be turned
ON before sound can be heard from the headphones. On
some radios the headphone symbol will flash for ap-
proximately 5 seconds in the radio display, indicating the
headphones are in use.
ARROW Buttons (2, 3, 15, 16)
These buttons only function in DVD video mode. Use the
arrow buttons to toggle through the DVD disc menu
screen options. RTN Button (4)
This button only functions in DVD video mode. Press this
button to return to the previous menu when in the DVD
disc menu mode.
SETUP Button (5)
This button only functions in DVD video mode. Press the
button after pressing the STOP button to access the DVD
changer set up menu. Use the right and left arrows to
move between tabs for language, rating, mark, audio and
aspect. Use the up and down arrows to move between
options within each tab.
To change an item highlighted in blue, press ENTER. This
should cause the highlight to turn yellow. Again, using
the up and down arrows will cause the arrow to move up
or down. Once the arrow is on the desired selection, press
ENTER. When finished, press setup or play to return to
playing the DVD or Menu to return to the DVD disc
menu.248 UNDERSTANDING YOUR INSTRUMENT PANEL
Page 250 of 480
FF/RW Buttons (3, 16)
Press and hold FF (Fast Forward) once and the CD/DVD
changer will begin to fast forward until the FF button is
released. The RW (Reverse) button works in a similar
manner.
ENTER Button (17)
This button only functions in DVD video mode. Use the
ENTER button to enter selections from the menu screens.
Use the arrow buttons to toggle through the menu screen
options.
Light Button (18)
Pressing this button illuminates the buttons on the re-
mote control.
Remote Control Battery Service
• To replace the batteries for the remote control slide the
cover rearward. The replacement batteries for the remote control are two
AAA batteries.
Operating Instructions — Video Screen
Push up on the release button to lower the video screen.
Lowering Video Screen250 UNDERSTANDING YOUR INSTRUMENT PANEL