Page 123 of 480
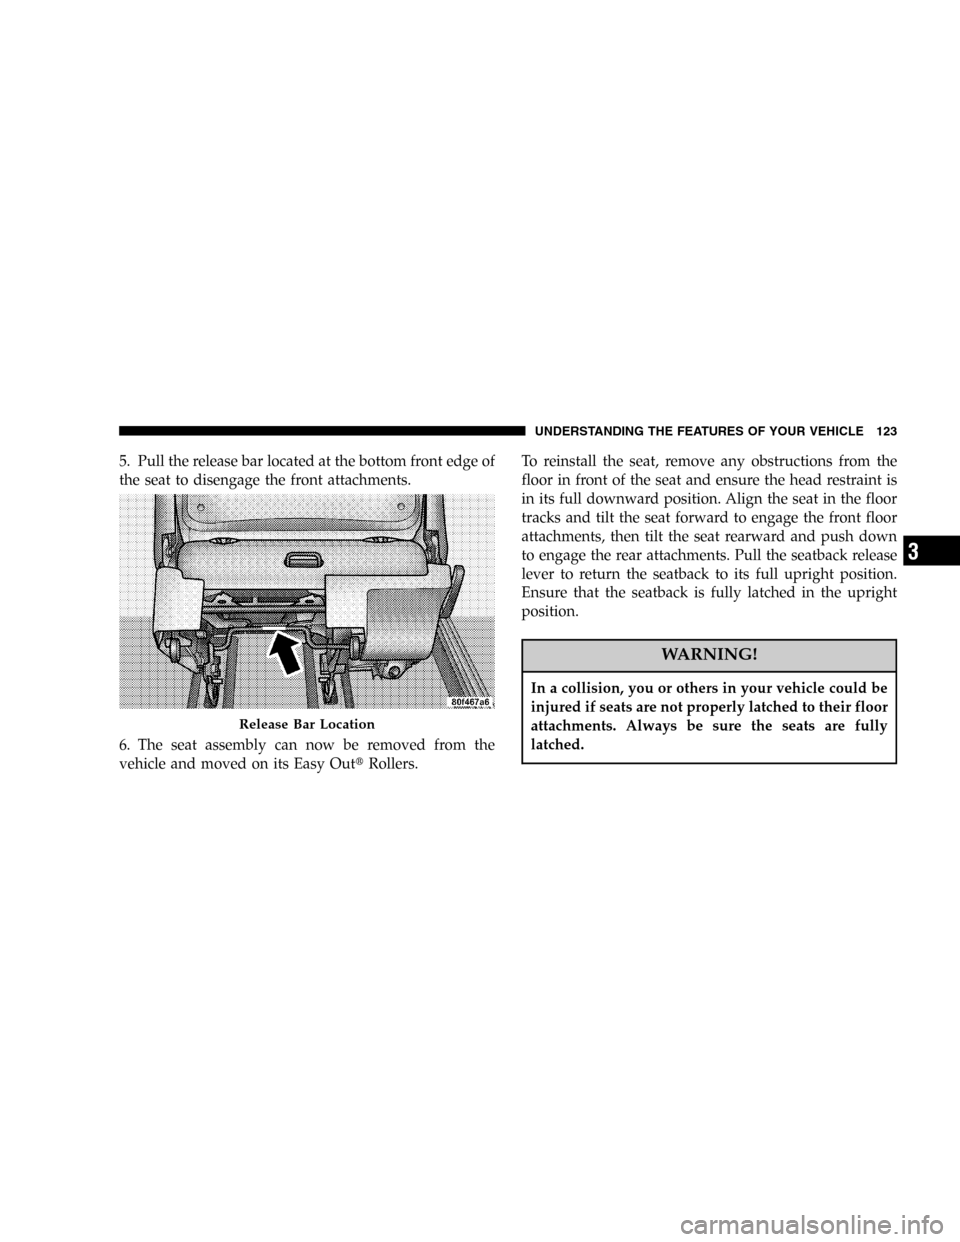
5. Pull the release bar located at the bottom front edge of
the seat to disengage the front attachments.
6. The seat assembly can now be removed from the
vehicle and moved on its Easy Out�Rollers.To reinstall the seat, remove any obstructions from the
floor in front of the seat and ensure the head restraint is
in its full downward position. Align the seat in the floor
tracks and tilt the seat forward to engage the front floor
attachments, then tilt the seat rearward and push down
to engage the rear attachments. Pull the seatback release
lever to return the seatback to its full upright position.
Ensure that the seatback is fully latched in the upright
position.
WARNING!
In a collision, you or others in your vehicle could be
injured if seats are not properly latched to their floor
attachments. Always be sure the seats are fully
latched.
Release Bar Location
UNDERSTANDING THE FEATURES OF YOUR VEHICLE 123
3
Page 125 of 480
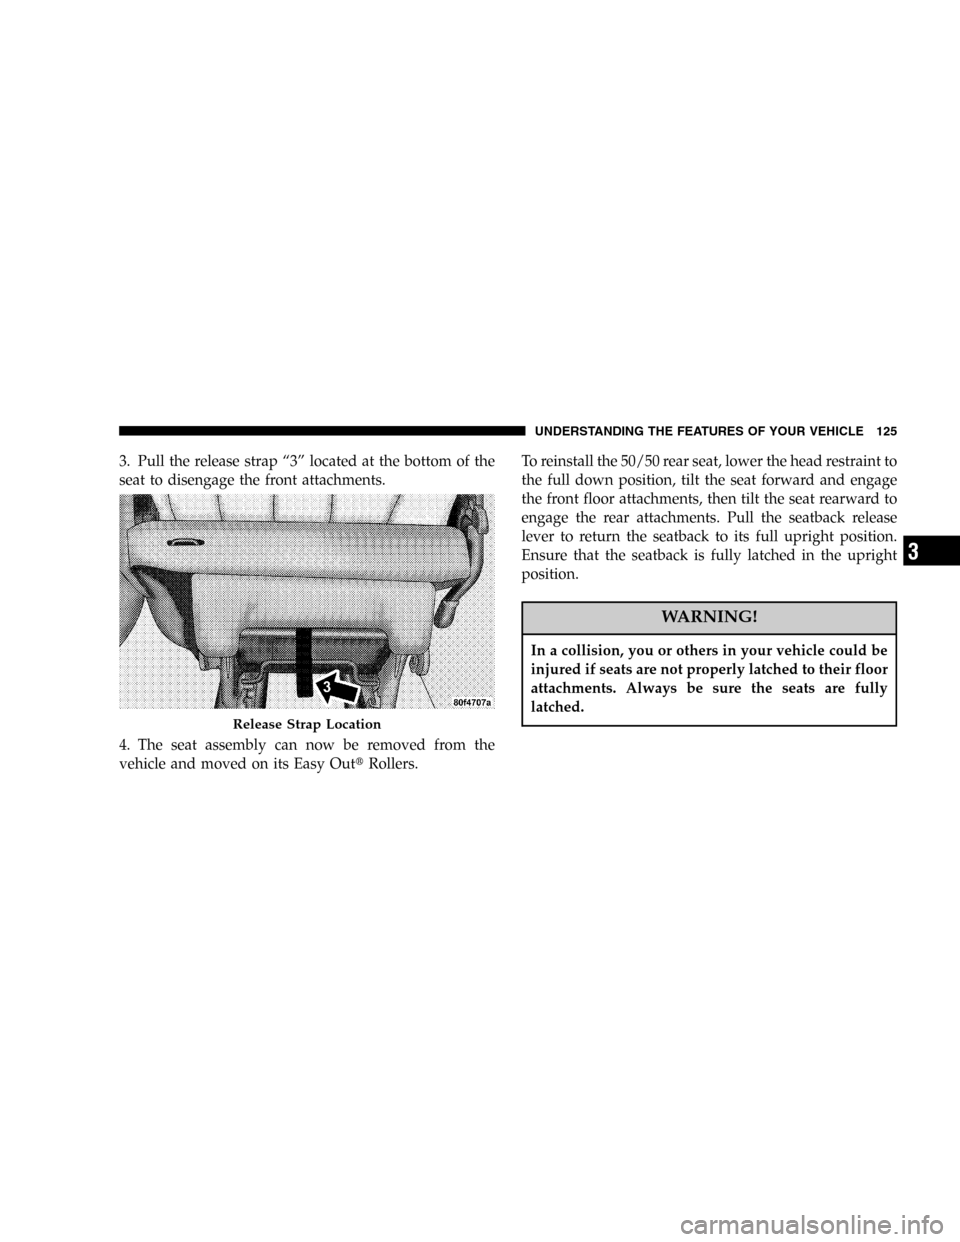
3. Pull the release strap“3”located at the bottom of the
seat to disengage the front attachments.
4. The seat assembly can now be removed from the
vehicle and moved on its Easy Out�Rollers.To reinstall the 50/50 rear seat, lower the head restraint to
the full down position, tilt the seat forward and engage
the front floor attachments, then tilt the seat rearward to
engage the rear attachments. Pull the seatback release
lever to return the seatback to its full upright position.
Ensure that the seatback is fully latched in the upright
position.
WARNING!
In a collision, you or others in your vehicle could be
injured if seats are not properly latched to their floor
attachments. Always be sure the seats are fully
latched.
Release Strap Location
UNDERSTANDING THE FEATURES OF YOUR VEHICLE 125
3
Page 126 of 480
2–Passenger and 3–Passenger Bench Seats
Release levers are located on the rear leg assemblies, near
the floor. To remove the seat, squeeze each release handle
and rotate downwards to deploy the wheels. A lock
indicator button pops up when the seat is unlocked. The
seat assembly can now be removed from the vehicle and
moved on its Easy Out�Rollers.
To reinstall the seat, align the seat into the detent posi-
tions on the floor. Squeeze the release handle and rotate
upward until the lock indicator button returns into the
handle.
Release Levers
126 UNDERSTANDING THE FEATURES OF YOUR VEHICLE
Page 128 of 480
Rear-Most Bench Seat
The seat position can be adjusted fore and aft to any of
three positions - normal (rearward), intermediate, and
full forward. In this way varying needs for legroom and
cargo space behind the seat can be accommodated.The release lever is below the seat and is accessible from
the front and back of the seat.
Rear Seat Descriptions
7 Passenger Model—2–passenger bench or bucket seats
in the second position and 3–passenger bench seat or
50/50 bench seat in the third position. All rear seats are
removable.
Rear Bench Seating Flexibility
The 3–passenger bench seat may be adjusted to any of 3
positions on its tracks while installed in the vehicle. The
bench seat may also be moved to the second seating
position or removed from the vehicle.
Release Lever Location
128 UNDERSTANDING THE FEATURES OF YOUR VEHICLE
Page 130 of 480

4. Auxiliary Seating—
The middle quad seats are removed from the vehicle. The
3–passenger bench seat can be installed in either the
second or third row.
Rear Quad and 50/50 Seating Flexibility
The seats may be used with either or both seatbacks
folded forward for additional storage space, or with
either or both seats removed from the vehicle. Both 50/50
seats may also be moved to the 2nd row seating position
when the middle quad seats are removed.
1. Normal Seating—
The 2nd and 3rd row seats are installed. Both seatbacks
are in the upright position.2. Increased Storage—
Increased storage area is provided by folding either or
both seatbacks. With one seatback folded forward, rear
seating for another occupant is still provided. Either or
both seats may Fold and Tumble forward for more
storage space. For maximum storage, remove the head
restraint and place on the seat cushion, then fold the
seatback over the head restraint by lifting lever“1”and
tumble the seat forward by lifting lever“2”.
NOTE:
Driving with the 2nd-row seats in the tumbled position is
not recommended when passengers occupy the 3rd row
130 UNDERSTANDING THE FEATURES OF YOUR VEHICLE
Page 131 of 480

seats. This position is intended only to increase available
cargo area without requiring removal of the seats.
Do not leave the head restraint stored between the
cushions for extended periods of time or inadvertent
damage to the seat cover or head restraint may occur.
3. Additional Storage—
The 2nd row seats are installed in the middle seating
position. Either or both of the rear seats are removed
from the vehicle.
4. Auxiliary Seating—
The 2nd row seats are removed from the vehicle. Then
the third row seats can be installed in either the rear or
middle seat position.If the seat is not occupied, the seatback can be folded
forward to obtain additional cargo space. To fold the
seatback forward, pull the handle labeled“1”located
behind the seat on the passenger side.
The seatback will latch in the folded position. To assure
the seatback is latched in the folded position, additional
downward pressure on the seatback may be required
when folding.
The same lever is used to return the seatback to the
upright position.
NOTE:The head restraints are removable, if needed. To
remove them, press the release tab on the right side of the
base of the head restraint.
UNDERSTANDING THE FEATURES OF YOUR VEHICLE 131
3
Page 132 of 480

WARNING!
•Not all head restraints in this vehicle are the same.
Head restraints from one seating position should not
be removed and installed in any other seating posi-
tion. In a collision, serious injury or death may result
if the proper head restraint is not installed on each
seat.
•The cargo area in the rear of the vehicle should not
be used as a play area by children. They could be
seriously injured in a collision. Children should be
seated and using the proper restraint system.
•It is extremely dangerous to ride in a cargo area,
inside or outside of a vehicle. In a collision, people
riding in these areas are more likely to be seriously
injured or killed.
•Do not allow people to ride in any area of your
vehicle that is not equipped with seats and seat belts.
•Be sure everyone in your vehicle is in a seat and
using a seat belt properly.
TO OPEN AND CLOSE THE HOOD
To open the hood, two latches must be released. First pull
the hood release lever located under the left side of the
instrument panel.
Hood Release Lever
132 UNDERSTANDING THE FEATURES OF YOUR VEHICLE
Page 178 of 480
Removable Floor Console Without Fold-in-Floor
Seating—If Equipped
The removable floor console has a power outlet, storage
tray, light, cell phone holder, tissue holder, and a map
holder. It can be placed between either the front seats or
middle seats.
NOTE:When the console is located between the front
seats the outlet is protected by an automatic circuit
breaker and is powered directly from the battery, items
plugged into this outlet may discharge the battery
and/or prevent engine starting.
To remove the console use the following procedure:
1. Open the rear lid and remove the storage tray.
2. Pull up on the release handle located inside the floor
console to disengage the floor console, reinstall the
storage tray and close the rear lid.
Removable Floor Console
178 UNDERSTANDING THE FEATURES OF YOUR VEHICLE

, intermediate, and
full forward. In this way varying needs for legroom and
cargo space")
