2005 CHRYSLER 300 LX reset
[x] Cancel search: resetPage 27 of 374

NOTE:If the window runs into any obstacle during
auto-closure it will reverse direction and then stop.
Remove the obstacle and use the window switch again to
close the window.
NOTE:Any impact due to rough road conditions may
trigger the auto reverse function unexpectedly during
auto closure. If this happens pull the switch lightly to the
first detent and hold to close window manually.
WARNING!
There is no anti-pinch protection when the window
is almost closed. Be sure to clear all objects from the
window before closing.
Reset
Any time the vehicle battery is disconnected or goes dead
the auto-up function will be disabled. To reactivate the
auto-up feature perform the following steps after vehicle
power is restored:
²Pull the window switch up to close window com-
pletely, then hold the switch for a second.
²Push the window switch firmly down to second detent
to open the window automatically until the window is
fully open.
Wind Buffeting
Wind buffeting can be described as the perception of
pressure on the ears or a helicopter type sound in the
ears. Your vehicle may exhibit wind buffeting with the
windows down, or the sunroof (if equipped) in certain
open or partially open positions. This is a normal occur-
rence and can be minimized. If the buffeting occurs with
the rear windows open, open the front and rear windows
together to minimize the buffeting. If the buffeting occurs
with the sunroof open, adjust the sunroof opening to
minimize the buffeting.
THINGS TO KNOW BEFORE STARTING YOUR VEHICLE 27
2
ProCarManuals.com
Page 84 of 374

Bluetooth Communication Link
Cellular phones have been found to occasionally loose
connection to the UConnectŸ system. When this hap-
pens, the connection can generally be re-established by
switching the phone off/on. Your cell phone is recom-
mended to remain in Bluetooth9on9mode.
Reset
In rare instances, it may be necessary to reset the UCon-
nectŸ system. The reset feature is exercised by pressingand holding the 'UConnectŸ ' and 'Voice Recognition'
buttons simultaneously for 15 seconds. Normally, you do
not need to exercise this feature.
Power-Up
After switching ignition key from LOCK to either ON or
ACC position, or after a reset, you must wait at least five
(5) seconds prior to using the system.
84 UNDERSTANDING THE FEATURES OF YOUR VEHICLE
ProCarManuals.com
Page 93 of 374

When high-temperature heating is selected, the heaters
provide a boosted heat level during the first four minutes
of operation after heating is activated. The heat output
then drops to the normal high-temperature level. If
high-level heating is selected, the system will automati-
cally switch to the low level after two hours of continu-
ous operation. At that time, the number of illuminated
LEDs changes from two to one, indicating the change.
Operation on the low setting also turns off automatically
after two hours.
NOTE:Once a heat setting is selected, heat will be felt
within two to five minutes.
Memory FeatureÐIf Equipped
This feature allows the driver to store up to two memory
profiles. Each memory profile will include the seat, side
mirror, adjustable pedal (if equipped), power tilt and
telescopic steering column (if equipped) settings as well
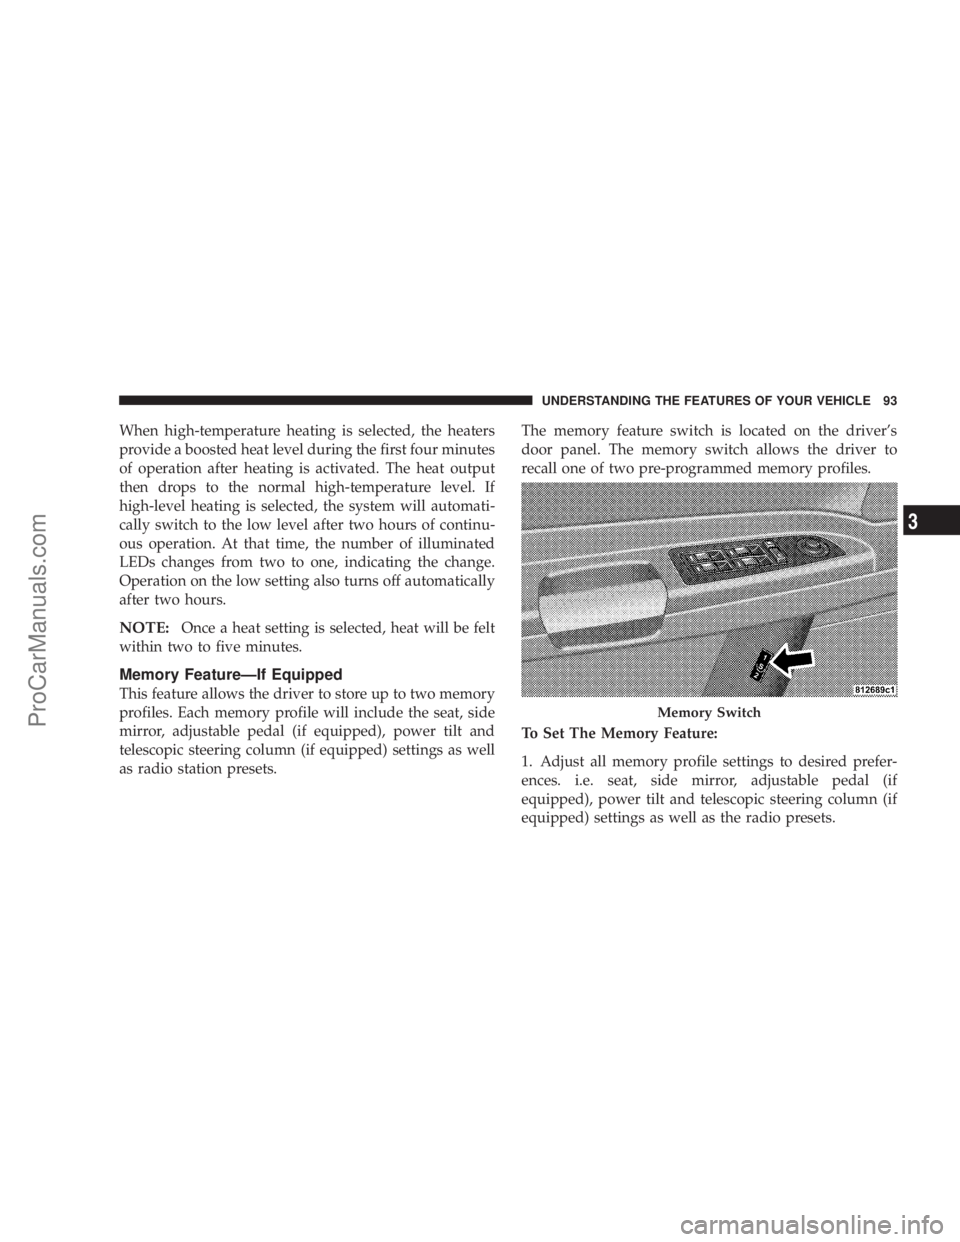
as radio station presets.The memory feature switch is located on the driver's
door panel. The memory switch allows the driver to
recall one of two pre-programmed memory profiles.
To Set The Memory Feature:
1. Adjust all memory profile settings to desired prefer-
ences. i.e. seat, side mirror, adjustable pedal (if
equipped), power tilt and telescopic steering column (if
equipped) settings as well as the radio presets.
Memory Switch
UNDERSTANDING THE FEATURES OF YOUR VEHICLE 93
3
ProCarManuals.com
Page 127 of 374

ELECTRICAL POWER OUTLETS
There are two 12-volt electrical outlets on this vehicle.
Both of the outlets are protected by an automatic reset
circuit breaker. The automatic circuit breaker restores
power when the overload is removed.
The 12 volt power outlet next to the ash receiver tray (if
equipped with an optional Smoker's Package) has power
available only when the ignition is on. This outlet will
also operate a conventional cigar lighter unit.
WARNING!
Do not place ashes inside the cubby bin located on
the center console on vehicles not equipped with the
ash receiver tray. A fire leading to bodily injury
could result.
NOTE:If desired, the power outlet next to the ash tray
receiver (if equipped) can be converted by your autho-
rized dealer to provide power with the ignition switch in
the LOCK position.
UNDERSTANDING THE FEATURES OF YOUR VEHICLE 127
3
ProCarManuals.com
Page 132 of 374

LOAD LEVELING SYSTEM Ð IF EQUIPPED
The automatic load leveling system will provide a level
riding vehicle under most passenger and cargo loading
conditions.
A hydraulic pump contained within the shock absorbers
raises the rear of the vehicle to the correct height. It takes
approximately 1 mile (1.6 km) of driving for the leveling
to complete depending on road surface conditions.If the leveled vehicle is not moved for approximately 15
hours, the leveling system will bleed itself down. The
vehicle must be driven to reset the system.
132 UNDERSTANDING THE FEATURES OF YOUR VEHICLE
ProCarManuals.com
Page 144 of 374

CAUTION!
Driving with a hot engine cooling system could
damage your vehicle. If temperature gauge reads (H),
pull over and stop the vehicle. Idle the vehicle with
the air conditioner turned off until the pointer drops
back into the normal range. If the pointer remains on
the ªHº, and you hear continuous chimes, turn the
engine off immediately, and call for service.
WARNING!
A hot engine cooling system is dangerous. You or
others could be badly burned by steam or boiling
coolant. You may want to call a service center if your
vehicle overheats. If you decide to look under the
hood yourself, see Section 7 of this manual. Follow
the warnings under the Cooling System Pressure
Cap paragraph.
15. Trip Odometer Button
Trip Odometer Button Ð Standard Cluster
The word9TRIP9will appear when this button is pressed.
Push in and hold the button for two seconds when the
trip odometer is displayed to reset it to 0 miles or
kilometers. A second press of the button will display the
outside temperature in the odometer.
Trip Odometer Button Ð Premium Cluster
Press this button to change the display from odometer to
either of the two trip odometer settings. The letter ªAº or
ªBº will appear when in the trip odometer mode. Push in
and hold the button for two seconds to reset the trip
odometer to 0 miles or kilometers. The odometer must be
in trip mode to reset.
16. High Beam Light
This light shows that the headlights are on high
beam. Push the Multi-Function lever away from
the steering wheel to switch the headlights to high
beam.
144 UNDERSTANDING YOUR INSTRUMENT PANEL
ProCarManuals.com
Page 146 of 374

reset. The light will remain on or flashing until the tire
pressure is properly set or the problem with the sensor
is corrected.
This light will turn on momentarily as a bulb check when
the engine is started.
When the tire pressure monitoring system warning light
is lit, one or more of your tires is significantly underin-
flated. You should stop and check your tires as soon as
possible, and inflate them to the proper pressure as
indicated on the tire and loading information placard.
Driving on a significantly underinflated tire causes the
tire to overheat and can lead to tire failure. Underinfla-
tion also reduces fuel efficiency and tire tread life, and
may affect the vehicle's handling and stopping ability.
Each tire, including the spare, should be checked
monthly when cold and set to the recommended inflation
pressure as specified in the tire and loading information
placard.
22. Voltage Light
This light monitors the electrical system volt-
age. The light should turn on momentarily as
the engine is started. If the light stays on or turns onwhile driving, it indicates a problem with the charging
system. Immediate service should be obtained.
23. Malfunction Indicator Light
This light is part of an onboard diagnostic
system called OBD that monitors engine and
automatic transmission control systems. The
light will illuminate when the key is in the ON
position before engine start. If the bulb does not come
on when turning the key from OFF to ON, have the
condition checked promptly.
Certain conditions such as a loose or missing gas cap,
poor fuel quality, etc. may illuminate the light after
engine start. The vehicle should be serviced if the light
stays on through several of your typical driving cycles. In
most situations the vehicle will drive normally and will
not require towing.
The Malfunction Indicator Light flashes to alert you to
serious conditions that could lead to immediate loss of
power or severe catalytic converter damage. The vehicle
should be serviced as soon as possible if this occurs.
146 UNDERSTANDING YOUR INSTRUMENT PANEL
ProCarManuals.com
Page 148 of 374

Pressing the FUNCTION SELECT button ac-
cepts a selected choice. The Function Select
button also advances the radio preset when the
EVIC is in the Compass/Temp/Audio screen.
Use the SCROLL buttons to scroll through Trip
Functions, Navigation (If Equipped), System
Status Messages, and Personal Settings (Cus-
tomer Programmable Features). The SCROLL
buttons also seek up and down (radio station or CD track
number).
The AUDIO MODE SELECT button is used to
select the Compass/Temp/Audio screen. If
Compass/Temp/Audio is already being dis-
played when the AUDIO MODE SELECT but-
ton is pressed, the radio mode will change from AM to
FM to Tape to CD, or to Satellite (SAT) depending on
which radio is in the vehicle. This button can also be used
to return to a previous navigation menu selection.
When the appropriate conditions exist, the Electronic
Vehicle Information Center (EVIC) displays the following
messages.²Turn Signal On (with a continuous warning chime)
²Left Front Turn Signal Lamp Out (with a single chime)
²Left Rear Turn Signal Lamp Out (with a single chime)
²Right Front Turn Signal Lamp Out (with a single
chime)
²Right Rear Turn Signal Lamp Out (with a single
chime)
²RKE Battery Low (with a single chime)
²Memory #1/#2 Profile Set
²Memory #1/#2 Profile Recall
²Memory System Disabled ± Vehicle Not In Park (with
a single chime)
²Memory System Disabled ± Seat Belt Buckled (with a
single chime)
²Personal Settings Not Available ± Vehicle Not in Park
²Left/Right Front Door Ajar (one or more, with a single
chime if speed is above 1 mph)
148 UNDERSTANDING YOUR INSTRUMENT PANEL
ProCarManuals.com