2005 CHRYSLER 300 LX manual radio set
[x] Cancel search: manual radio setPage 11 of 374

A WORD ABOUT YOUR KEYS
You can insert the double sided keys into the locks with
either side up.
The dealer that sold you your new vehicle has the key
code numbers for your vehicle locks. These numbers can
be used to order duplicate keys from your dealer. Ask
your dealer for these numbers and keep them in a safe
place.
Ignition Key Removal
The shift lever must be in PARK. Turn the key to the
LOCK position, then remove the key.
NOTE:The power window switches, radio, power
sunroof, and power outlets will remain active for 10
minutes after the ignition switch has been turned off.
Opening either front door will cancel this feature. The
time is programmable through the electronic vehicle
information center (EVIC)Ðif equipped. Refer to Per-
sonal Settings in the Electronic Vehicle Information Cen-
ter (EVIC) Section for details.
THINGS TO KNOW BEFORE STARTING YOUR VEHICLE 11
2
ProCarManuals.com
Page 22 of 374

To unlock the trunk:
Press the trunk button on the transmitter two times to
unlatch the trunk.
NOTE:The transmitter can be programmed to unlatch
the trunk by pressing the trunk button only one time by
performing the following procedure:
1. Press and hold the Unlock button on the transmit-
ter.
2. Continue to hold the Unlock button, wait at least 4
but no longer than 10 seconds, then press the trunk
button.
3. Release both buttons.
Using The Panic Alarm:
To turn the panic alarm feature ON or OFF, press and
hold the PANIC button on the transmitter for at least one
second and release. When the panic alarm is on, the
headlights and park lights will flash, the horn will pulse
on and off and the interior lights will turn on.The panic alarm will stay on for 3 minutes unless you
turn it off by pressing the PANIC button a second time or
if the vehicle speed is 15 mph (24 km/h) or greater.
NOTE:The interior lights will turn off when the
ignition is switched to the ACC or ON position after the
panic alarm is activated. However, the exterior lights and
horn will remain on.
NOTE:When you turn off the panic alarm by pressing
the PANIC button a second time, you may have to be
closer to the vehicle due to the radio frequency noises of
the system.
To Turn Off ªFlash Lights On Lock/Unlockº
NOTE:
The ªFlash Lights On Lock/Unlockº feature can
be turned on and off by referring to ªPersonal Settingsº
in the Electronic Vehicle Information Center (EVIC) sec-
tion of this manual, or by following these steps:
1. Press the LOCK button for 4 to 10 seconds.
2. While the LOCK button is pressed, (after 4 seconds)
press the UNLOCK button. Release both buttons.
22 THINGS TO KNOW BEFORE STARTING YOUR VEHICLE
ProCarManuals.com
Page 70 of 374

The UConnectŸ system is fully integrated with the
vehicle's audio system. The volume of the UConnectŸ
system can either be adjusted from the radio volume
control knob, or from the steering wheel radio control
(right switch), if so equipped.
The radio display will be used for visual prompts from
the UConnectŸ system such as9CELL9or caller ID on
certain radios.
Operation
Voice commands can be used to operate the UConnectŸ
system and to navigate through the UConnectŸ menu
structure. Voice commands are required after most
UConnectŸ system prompts. You will be prompted for a
specific command and then guided through the available
options.
²Prior to giving a voice command, one must wait for
the voice on beep, which follows the9Ready9prompt
or another prompt.
²For certain operations, compound commands can be
used. For example, instead of saying9Setup9and then
9Phone Pairing,9the following compound command
can be said:9Setup Phone Pairing.9
²For each of the feature explanation in this section, only
the combined form of the voice command is given.
You can also break the commands into parts and say
each part of the command, when you are asked for it.
For example, you can either use the combined form
voice command9Phonebook New Entry,9or you can
break the combined form command into two voice
commands:9Phonebook9and9New Entry.9Please re-
member, the UConnectŸ system works best when you
talk in a normal conversational tone, as if speaking to
some one sitting eight feet away from you.
Help Command
If you need assistance at any prompt or if you want to
know what your options are at any prompt, say9Help9
following the voice on beep. The UConnectŸ system will
play all the options at any prompt if you ask for help.
70 UNDERSTANDING THE FEATURES OF YOUR VEHICLE
ProCarManuals.com
Page 89 of 374

NOTE:The Rear Park Assist System displays the outer
most yellow LED's at a slightly dimmer level to indicate
that the system is ON.
NOTE:When an audio tone is indicated by the Rear
Park Assist display the system will MUTE the radio if it
is turned on.
The system can be turned on or off through the Electronic
Vehicle Information Center (EVIC) when the vehicle is in
PARK. Refer to ªPersonal Settingsº in the Electronic
Vehicle Information Center section of this manual for
details.
NOTE:
²
Ensure that the rear bumper is free of dirt and debris
to keep the system operating properly.
²Jackhammers, large trucks, and other vibrations could
affect the performance of the system.
If ªService Park Assist Systemº appears in the EVIC after
making sure the rear bumper is clean please see your
authorized dealer.
SEATS
Power Seats
The power seat switch is on the outboard side of the seat
near the floor. Use this switch to move the driver's seat
up or down, forward or rearward, or to tilt the seat. The
passenger's seat will move up or down, forward or
rearward.
Power Seat Switch
UNDERSTANDING THE FEATURES OF YOUR VEHICLE 89
3
ProCarManuals.com
Page 93 of 374

When high-temperature heating is selected, the heaters
provide a boosted heat level during the first four minutes
of operation after heating is activated. The heat output
then drops to the normal high-temperature level. If
high-level heating is selected, the system will automati-
cally switch to the low level after two hours of continu-
ous operation. At that time, the number of illuminated
LEDs changes from two to one, indicating the change.
Operation on the low setting also turns off automatically
after two hours.
NOTE:Once a heat setting is selected, heat will be felt
within two to five minutes.
Memory FeatureÐIf Equipped
This feature allows the driver to store up to two memory
profiles. Each memory profile will include the seat, side
mirror, adjustable pedal (if equipped), power tilt and
telescopic steering column (if equipped) settings as well
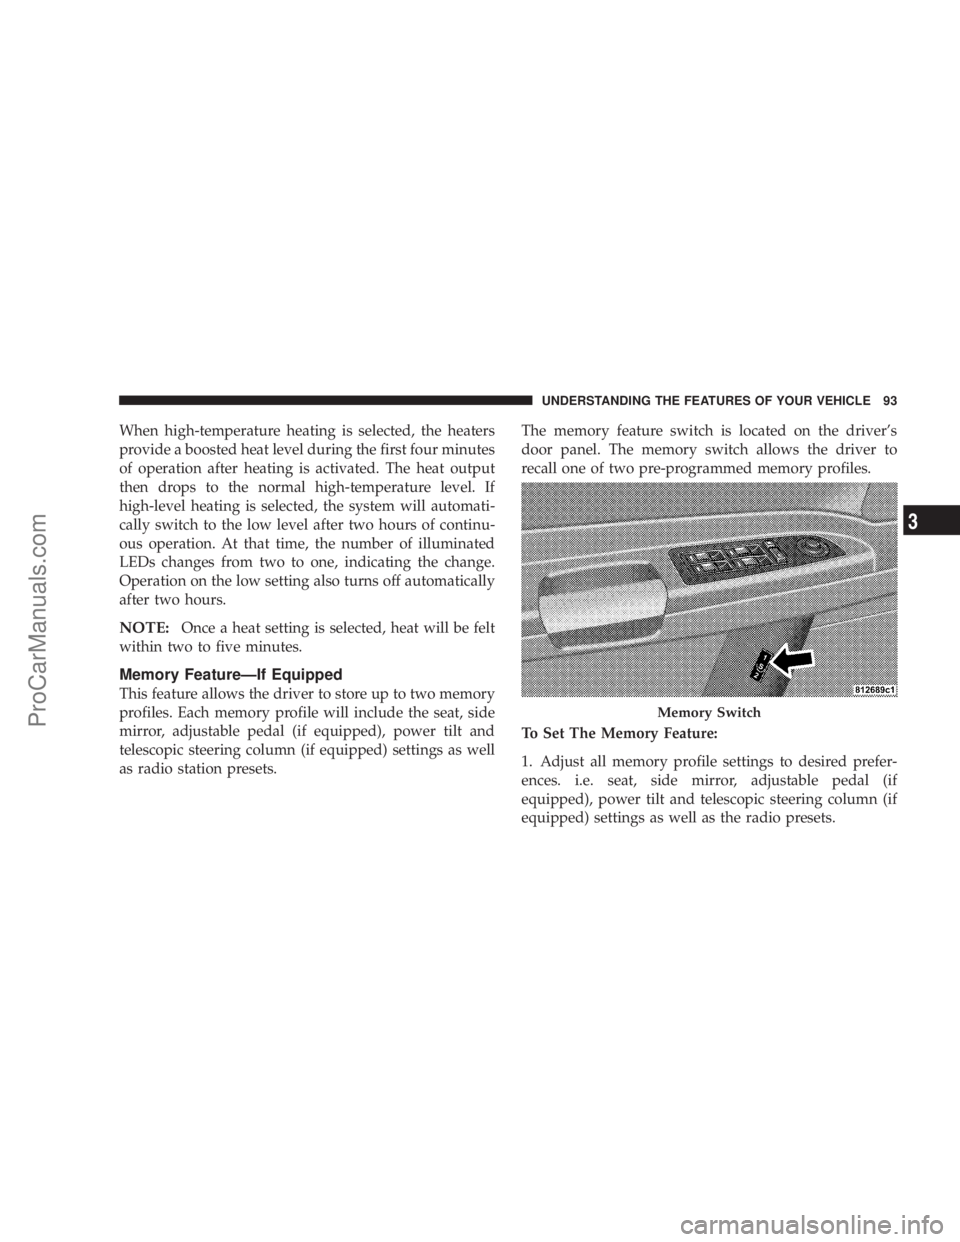
as radio station presets.The memory feature switch is located on the driver's
door panel. The memory switch allows the driver to
recall one of two pre-programmed memory profiles.
To Set The Memory Feature:
1. Adjust all memory profile settings to desired prefer-
ences. i.e. seat, side mirror, adjustable pedal (if
equipped), power tilt and telescopic steering column (if
equipped) settings as well as the radio presets.
Memory Switch
UNDERSTANDING THE FEATURES OF YOUR VEHICLE 93
3
ProCarManuals.com
Page 94 of 374

2. Press and release the Set (S) button on the memory
seat switch, then press button 1 within 5 seconds. The
radio display will show which memory position is being
set.
3. A second memory profile can also be stored in the
vehicle memory. Begin by pressing 2 on the memory
switch for driver 2. Adjust settings to desired positions,
press Set (S) button, then press button 2 within 5 seconds.
Each time the Set and a numbered button are pressed, the
old memory is erased, and a new one is stored.
NOTE:Memory positions can be set without the ve-
hicle in Park, but the vehicle must be in Park to recall a
memory position. The Recall Memory with Remote Key
Unlock feature must be turned on using the Electronic
Vehicle Information Center (EVIC). Refer to Electronic
Vehicle Information Center in this manual for details.
Programming the Remote Keyless Transmitter for
the Memory Feature
Your remote transmitter can be programmed to return to
a memory profile when the Unlock button is pressed and
released.To program your transmitters, perform the following:
1. Insert the key into the ignition and turn the key to the
Run position.
2. Select desired memory profile 1 or 2.
3. Press and release the Set (S) button on the memory
seat switch, then press and release button 1 or 2.
9Memory Profile Setº (1or 2) will be displayed in the
instrument cluster on vehicles equipped with the Elec-
tronic Vehicle Information Center.
4. Press and release the Lock button on the transmitter
within 10 seconds.
NOTE:Your transmitters may be unlinked to your
memory settings by pressing the Unlock button on the
transmitter in step 4 above. On vehicles equipped with an
Electronic Vehicle Information Center (Optional), these
functions can be selected at the EVIC using the Personal
Settings (Customer Programmable Features). Refer to
Electronic Vehicle Information Center Ð ªPersonal Set-
tingsº for details. When newly purchased (or replace-
ment) transmitters are programmed into the vehicle, the
first transmitter trained will be associated with memory
94 UNDERSTANDING THE FEATURES OF YOUR VEHICLE
ProCarManuals.com
Page 122 of 374

complete the programming of a rolling code equipped
device (most common garage door openers require this
step.
6. At the garage door opener receiver (motor-head unit)
in the garage, locate the9learn9or9smart9button. This
can usually be found where the hanging antenna wire is
attached to the motor-head unit.
7. Firmly press and release the9learn9or9smart9button.
(The name and color of the button may vary by manu-
facturer.)
NOTE:There are 30 seconds in which to initiate step
eight.
8. Return to the vehicle and firmlypress, hold for two
seconds and releasethe programmed HomeLink button.
Repeat the(press/hold/release(sequence a second time,
and, depending on the brand of the garage door opener
(or other rolling code equipped device), repeat this
sequence a third time to complete the programming.
HomeLink should now activate your rolling code
equipped device.
NOTE:To program the remaining two HomeLink but-
tons, begin with9Programming9step two. Do not repeat
step one. For questions or comments, please contact
HomeLink atwww.homelink.com or 1-800-355-3515.
Canadian Programming/Gate Programming
Canadian radio-frequency laws require transmitter sig-
nals to9time-out9(or quit) after several seconds of
transmission which may not be long enough for
HomeLink to pick up the signal during programming.
Similar to this Canadian law, some U.S. gate operators are
designed to9time-out9in the same manner.
If you live in Canada or you are having difficulties
programming a gate operator by using the9Program-
ming9procedures (regardless of where you live),replace
(Programming HomeLink(step 3with the following:
NOTE:If programming a garage door opener or gate
operator, it is advised to unplug the device during the
9cycling9process to prevent possible overheating.
122 UNDERSTANDING THE FEATURES OF YOUR VEHICLE
ProCarManuals.com
Page 133 of 374

UNDERSTANDING YOUR INSTRUMENT PANEL
CONTENTS
mInstruments And Controls................137
mStandard Instrument Cluster..............138
mPremium Instrument Cluster..............139
mInstrument Cluster Descriptions...........140
mElectronic Vehicle Information Center (EVIC)±
If Equipped
..........................147
NTrip Functions.......................149
NCompass Display.....................150
NTelephone Ð If Equipped...............152
NNavigation Ð If Equipped...............154NPersonal Settings (Customer Programmable
Features)...........................154
mSetting The Analog Clock................158
mSales Code REF Ð AM/FM/CD (Single Disc)
Radio With Optional Satellite Radio And
Hands Free Phone Capability
.............159
NOperating Instructions - Radio Mode.......159
NOperation Instructions - CD Mode.........162
NOperating Instructions - Hands Free Phone Ð
If Equipped.........................164
NOperating Instructions - Satellite Radio Ð
If Equipped.........................164
4
ProCarManuals.com