2005 CHEVROLET VENTURE oil temperature
[x] Cancel search: oil temperaturePage 128 of 470

Engine Coolant Heater
Your vehicle may have an engine coolant heater. In
very cold weather, 0°F (−18°C) or colder, the engine
coolant heater can help. You will get easier starting and
better fuel economy during engine warm-up. Usually,
the coolant heater should be plugged in a minimum
of four hours prior to starting your vehicle. At
temperatures above 32°F (0°C), use of the coolant
heater is not required.
To Use the Engine Coolant Heater
1. Turn off the engine.
2. Open the hood and unwrap the electrical cord. The
electrical cord is located on the driver’s side of the
engine compartment.
3. Plug it into a normal, grounded 110-volt AC outlet.
{CAUTION:
Plugging the cord into an ungrounded outlet
could cause an electrical shock. Also, the
wrong kind of extension cord could overheat
and cause a �re. You could be seriously
injured. Plug the cord into a properly grounded
three-prong 110-volt AC outlet. If the cord will
not reach, use a heavy-duty three-prong
extension cord rated for at least 15 amps.
4. Before starting the engine, be sure to unplug and
store the cord as it was before to keep it away
from moving engine parts. If you do not, it could be
damaged.
How long should you keep the coolant heater plugged
in? The answer depends on the outside temperature, the
kind of oil you have, and some other things. Instead
of trying to list everything here, we ask that you contact
your dealer in the area where you will be parking
your vehicle. The dealer can give you the best advice
for that particular area.
2-32
Page 162 of 470

Message Center.............................................3-46
Service Traction System Warning Message......3-46
Traction Active Message................................3-47
Engine Coolant Temperature Warning
Message..................................................3-48
Charging System Indicator Message................3-48
Low Oil Pressure Message............................3-49
Change Engine Oil Message..........................3-50
Power Sliding Door Warning Message.............3-50
Door Ajar Warning Message...........................3-51
Rear Hatch Ajar Warning Message..................3-51
PASS-Key
®III Security Message....................3-52
Low Fuel Warning Message...........................3-52
Driver Information Center (DIC).......................3-53
Audio System(s).............................................3-56
Setting the Time for Radios without
Radio Data Systems (RDS)........................3-56
Setting the Time for Radios with Radio
Data Systems (RDS)..................................3-56
AM-FM Radio...............................................3-57Radio with CD (Base Level)...........................3-59
Radio with CD (MP3)....................................3-69
Radio with Cassette and CD..........................3-84
Radio with Six-Disc CD.................................3-94
Entertainment System..................................3-108
Rear Seat Audio (RSA) (Without
Entertainment System)..............................3-114
Rear Seat Audio (RSA) (With
Entertainment System)..............................3-116
Theft-Deterrent Feature
(Non-RDS Radios)...................................3-118
Theft-Deterrent Feature
(RDS Radios)..........................................3-118
Audio Steering Wheel Controls......................3-118
Radio Reception.........................................3-119
Care of Your Cassette Tape Player...............3-120
Care of Your CDs and DVDs........................3-121
Care of Your CD and DVD Player.................3-121
Fixed Mast Antenna....................................3-121
XM™ Satellite Radio Antenna System............3-121
Section 3 Instrument Panel
3-2
Page 195 of 470
Speedometer and Odometer
Your speedometer lets you see your speed in both
miles per hour (mph) and kilometers per hour (km/h).
Your odometer shows how far your vehicle has
been driven, in either miles (used in the United States)
or kilometers (used in Canada).
Your vehicle has a tamper-resistant odometer.
You may wonder what happens if your vehicle needs a
new odometer installed. If the new one can be set to
the mileage total of the old odometer, then that will
be done. If it cannot be, it will be set at zero and a label
must be put on the driver’s door to show the old
mileage reading when the new odometer was installed.
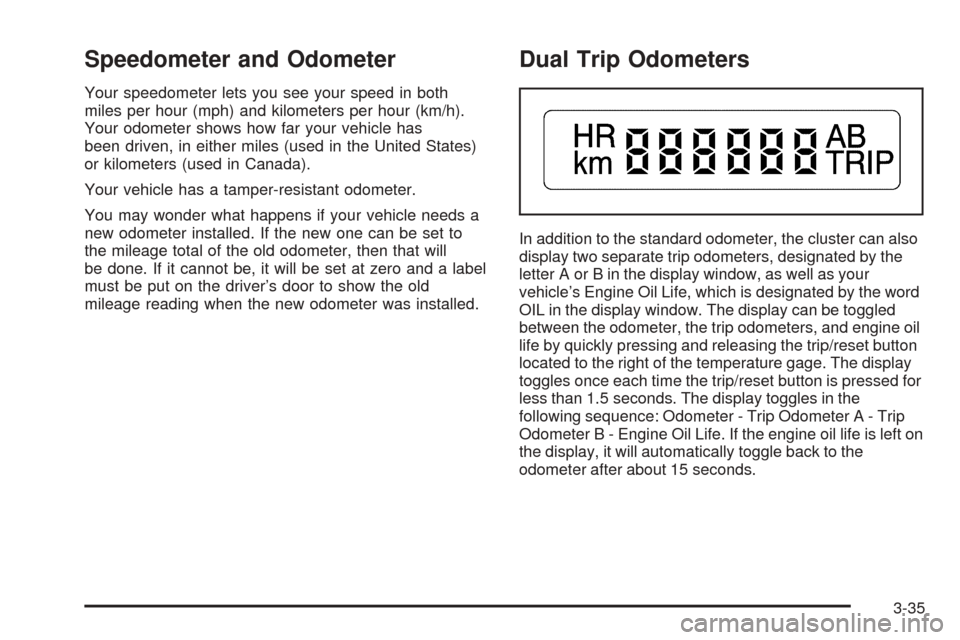
Dual Trip Odometers
In addition to the standard odometer, the cluster can also
display two separate trip odometers, designated by the
letter A or B in the display window, as well as your
vehicle’s Engine Oil Life, which is designated by the word
OIL in the display window. The display can be toggled
between the odometer, the trip odometers, and engine oil
life by quickly pressing and releasing the trip/reset button
located to the right of the temperature gage. The display
toggles once each time the trip/reset button is pressed for
less than 1.5 seconds. The display toggles in the
following sequence: Odometer - Trip Odometer A - Trip
Odometer B - Engine Oil Life. If the engine oil life is left on
the display, it will automatically toggle back to the
odometer after about 15 seconds.
3-35
Page 342 of 470
Notice:Use only engine oil identi�ed as meeting
GM Standard GM6094M and showing the American
Petroleum Institute Certi�ed For Gasoline Engines
starburst symbol. Failure to use the recommended
oil can result in engine damage not covered by
your warranty.
GM Goodwrench
®oil meets all the requirements for
your vehicle.
If you are in an area of extreme cold, where the
temperature falls below−20°F (−29°C), it is
recommended that you use either an SAE 5W-30
synthetic oil or an SAE 0W-30 oil. Both will provide
easier cold starting and better protection for your engine
at extremely low temperatures.
Engine Oil Additives
Do not add anything to your oil. The recommended oils
with the starburst symbol meet GM Standard GM6094M
are all you will need for good performance and engine
protection.
Engine Oil Life System
When to Change Engine Oil
Your vehicle has a computer system that lets you know
when to change the engine oil and �lter. This is based on
engine revolutions and engine temperature, and not on
mileage. Based on driving conditions, the mileage at
which an oil change will be indicated can vary
considerably. For the oil life system to work properly, you
must reset the system every time the oil is changed.
When the system has calculated that oil life has been
diminished, it will indicate that an oil change is necessary.
A CHANGE ENGINE OIL message will come on. See
Change Engine Oil Message on page 3-50. Change your
oil as soon as possible within the next 600 miles
(1 000 km). It is possible that, if you are driving under the
best conditions, the oil life system may not indicate that
an oil change is necessary for over a year. However, your
engine oil and �lter must be changed at least once a year
and at this time the system must be reset. Your dealer
has GM-trained people who will perform this work using
genuine GM parts and reset the system. It is also
important to check your oil regularly and keep it at the
proper level.
If the system is ever reset accidentally, you must
change your oil at 3,000 miles (5 000 km) since your
last oil change. Remember to reset the oil life system
whenever the oil is changed.
5-16
Page 345 of 470
Automatic Transaxle Fluid
When to Check and Change Automatic
Transaxle Fluid
A good time to check your automatic transaxle �uid
level is when the engine oil is changed.
Change both the �uid and �lter every 50,000 miles
(83 000 km) if the vehicle is mainly driven under one or
more of these conditions:
In heavy city traffic where the outside temperature
regularly reaches 90°F (32°C) or higher.
In hilly or mountainous terrain.
When doing frequent trailer towing.
Uses such as found in taxi, police or delivery
service.
If you do not use your vehicle under any of these
conditions, change the �uid and �lter at 100,000 miles
(166 000 km).
SeeScheduled Maintenance on page 6-4for more
information.
How to Check Automatic Transaxle
Fluid
Because this operation can be a little difficult, you may
choose to have this done at the dealership service
department.
If you do it yourself, be sure to follow all the instructions
here, or you could get a false reading on the dipstick.
Notice:Too much or too little �uid can damage the
transaxle. Too much can mean that some of the �uid
could come out and fall on hot engine or exhaust
system parts, starting a �re. Too little �uid could
cause the transaxle to overheat. Be sure to get an
accurate reading if you check the transaxle �uid.
Wait at least 30 minutes before checking the transaxle
�uid level if you have been driving:
When outside temperatures are above 90°F (32°C).
At high speed for quite a while.
In heavy traffic — especially in hot weather.
While pulling a trailer.
5-19
Page 348 of 470
Engine Coolant
The cooling system in your vehicle is �lled with
DEX-COOL®engine coolant. This coolant is designed
to remain in your vehicle for �ve years or 150,000 miles
(240 000 km), whichever occurs �rst, if you add only
DEX-COOL
®extended life coolant.
The following explains your cooling system and how to
add coolant when it is low. If you have a problem
with engine overheating, seeEngine Overheating on
page 5-25.
A 50/50 mixture of clean, drinkable water and
DEX-COOL
®coolant will:
Give freezing protection down to−34°F (−37°C).
Give boiling protection up to 265°F (129°C).
Protect against rust and corrosion.
Help keep the proper engine temperature.
Let the warning messages and gages work as
they should.
Notice:Using coolant other than DEX-COOL
®may
cause premature engine, heater core or radiator
corrosion. In addition, the engine coolant may
require changing sooner, at 30,000 miles (50 000 km)
or 24 months, whichever occurs �rst. Any repairs
would not be covered by your warranty. Always use
DEX-COOL
®(silicate-free) coolant in your vehicle.
5-22
Page 353 of 470
If you no longer have the overheat warning, you can
drive. Just to be safe, drive slower for about 10 minutes.
If the warning does not come back on, you can drive
normally.
If the warning continues, pull over, stop, and park your
vehicle right away.
If there is still no sign of steam, idle the engine for
three minutes while you are parked. If you still have the
warning,turn off the engine and get everyone out of
the vehicleuntil it cools down. Also, see “Overheated
Engine Protection Operating Mode” later in this section.
You may decide not to lift the hood but to get service
help right away.Overheated Engine Protection
Operating Mode
This emergency operating mode allows your vehicle to
be driven to a safe place in an emergency situation.
If an overheated engine condition exists, an overheat
protection mode which alternates �ring groups of
cylinders helps prevent engine damage. In this mode,
you will notice a signi�cant loss in power and engine
performance. The temperature gage will indicate
an overheat condition exists. Driving extended miles
(km) and/or towing a trailer in the overheat protection
mode should be avoided.
Notice:After driving in the overheated engine
protection operating mode, to avoid engine damage,
allow the engine to cool before attempting any
repair. The engine oil will be severely degraded.
Repair the cause of coolant loss, change the oil and
reset the oil life system. SeeEngine Oil on
page 5-13.
5-27
Page 434 of 470
(c)Visually inspect hoses and have them replaced if they
are cracked, swollen or deteriorated. Inspect all pipes,
�ttings and clamps; replace with genuine GM parts as
needed. To help ensure proper operation, a pressure test
of the cooling system and pressure cap and cleaning the
outside of the radiator and air conditioning condenser is
recommended at least once a year.
(d)Visually inspect wiper blades for wear or cracking.
Replace blade inserts that appear worn or damaged
or that streak or miss areas of the windshield.
(e)Make sure the safety belt reminder light and all your
belts, buckles, latch plates, retractors and anchorages
are working properly. If your vehicle has a built-in
child restraint, make sure the harness straps, latch
plates, buckle, clip, child head restraint and anchorages
are working properly. Look for any other loose or
damaged safety belt system parts. If you see anything
that might keep a safety belt system from doing its
job, have it repaired. Have any torn or frayed safety belts
replaced. Also look for any opened or broken airbag
coverings, and have them repaired or replaced.
(The airbag system does not need regular maintenance.)
(f)Lubricate all key lock cylinders, hood latch assemblies,
secondary latches, pivots, spring anchor and release
pawl, hood and door hinges, rear folding seats, liftgate
hinges, fuel door hinge, power sliding door cable and
sliding door track(s). More frequent lubrication may be
required when exposed to a corrosive environment.Applying silicone grease on weatherstrips with a clean
cloth will make them last longer, seal better and not stick
or squeak.
(g)If you drive regularly under dusty conditions, the
�lter may require replacement more often.
(h)Change automatic transaxle �uid and �lter if the
vehicle is mainly driven under one or more of these
conditions:
�In heavy city traffic where the outside temperature
regularly reaches 90°F (32°C) or higher.
�In hilly or mountainous terrain.
�When doing frequent trailer towing.
�Uses such as found in taxi, police or delivery
service.
(i)Drain, �ush and re�ll cooling system. See Engine
Coolant on page 5-22for what to use. Inspect hoses.
Clean radiator, condenser, pressure cap and �ller neck.
Pressure test the cooling system and pressure cap.
(j)Check system for interference or binding and for
damaged or missing parts. Replace parts as needed.
Replace any components that have high effort or
excessive wear. Do not lubricate accelerator or cruise
control cables.
(k)A �uid loss in any vehicle system could indicate a
problem. Have the system inspected and repaired
and the �uid level checked. Add �uid if needed.
(l)If you drive regularly under dusty conditions, inspect
the �lter at each engine oil change.
6-8