Page 390 of 460
5. Attach the folding wrench (A) to the jack (B), and
turn the wrench clockwise to raise the jack head
approximately 3 inches (7.6 cm).6. Raise the vehicle by turning the folding wrench
clockwise in the jack. Raise the vehicle far enough
off the ground so there is enough room for the
compact spare tire to �t under the wheel well.
5-74
Page 391 of 460
7. Remove all the wheel nuts and take off the �at tire.
{CAUTION:
Rust or dirt on the wheel, or on the parts to
which it is fastened, can make the wheel nuts
become loose after a time. The wheel could
come off and cause an accident. When you
change a wheel, remove any rust or dirt from
the places where the wheel attaches to the
vehicle. In an emergency, you can use a cloth
or a paper towel to do this; but be sure to use
a scraper or wire brush later, if you need to, to
get all the rust or dirt off.8. Remove any rust or dirt
from the wheel bolts,
mounting surfaces
and spare wheel.
{CAUTION:
Never use oil or grease on studs or nuts. If
you do, the nuts might come loose. Your wheel
could fall off, causing a serious accident.
5-75
Page 392 of 460
9. Install the compact spare tire and put the wheel
nuts back on with the rounded end of the nuts
toward the wheel. Tighten each nut by hand until
the wheel is held against the hub.10. Lower the vehicle by attaching the folding wheel
wrench to the jack and turning the wrench
counterclockwise. Lower the jack completely.
5-76
Page 393 of 460

{CAUTION:
Incorrect wheel nuts or improperly tightened
wheel nuts can cause the wheel to come loose
and even come off. This could lead to an
accident. Be sure to use the correct wheel
nuts. If you have to replace them, be sure to
get new GM original equipment wheel nuts.
Stop somewhere as soon as you can and have
the nuts tightened with a torque wrench to the
proper torque speci�cation. SeeCapacities
and Specifications on page 5-101for wheel nut
torque speci�cation.
Notice:Improperly tightened wheel nuts can lead
to brake pulsation and rotor damage. To avoid
expensive brake repairs, evenly tighten the wheel
nuts in the proper sequence and to the proper
torque speci�cation. SeeCapacities and
Specifications on page 5-101for the wheel nut
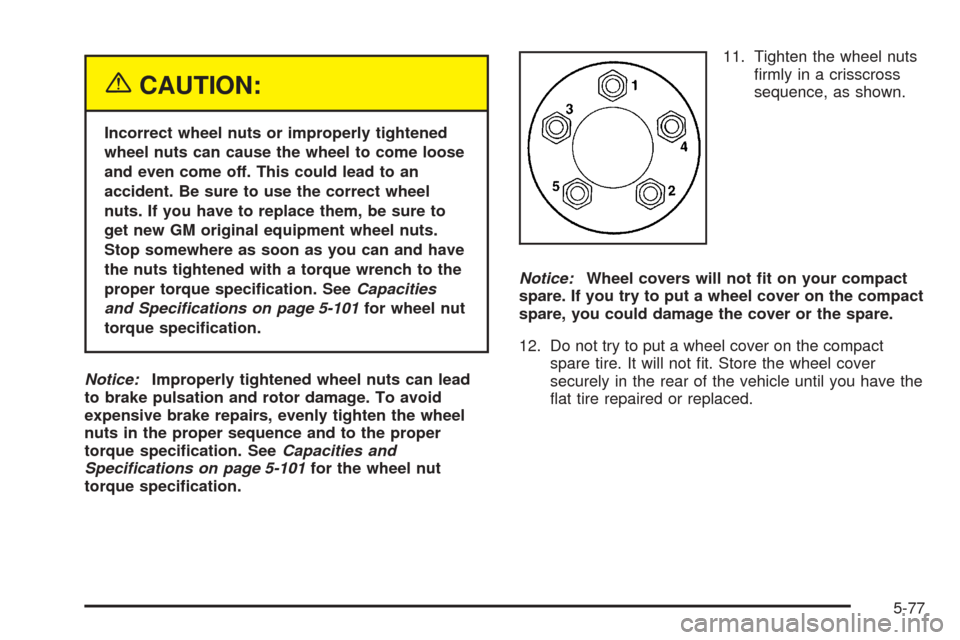
torque speci�cation.11. Tighten the wheel nuts
�rmly in a crisscross
sequence, as shown.
Notice:Wheel covers will not �t on your compact
spare. If you try to put a wheel cover on the compact
spare, you could damage the cover or the spare.
12. Do not try to put a wheel cover on the compact
spare tire. It will not �t. Store the wheel cover
securely in the rear of the vehicle until you have the
�at tire repaired or replaced.
5-77
Page 395 of 460
To release the spare tire from the secondary latch, do
the following:
1. Place the jack under the vehicle, ahead of the rear
bumper. Position the center lift point of the jack
under the center of the compact spare tire.
2. Turn the folding wrench clockwise to raise the jack
until it lifts the secondary latch device under the
wheel plate.
3. Keep raising the jack until the compact spare tire
stops moving upward and is held �rmly in place.
This lets you know that the secondary latch
has released.4. Lower the jack by turning the folding wrench
counterclockwise. Keep lowering the jack until
the compact spare tire is resting on the folding
wrench.
5. Grasp the compact spare tire with both hands and
pull it out from under the vehicle.
6. Reach under the vehicle and remove the folding
wrench and jack.
Have the hoist assembly inspected as soon as you can.
You will not be able to store a spare or �at tire using
the hoist assembly until it has been repaired or replaced.
5-79
Page 397 of 460

To store the spare tire, do the following:
1. Lay the tire near the rear of the vehicle with the
valve stem down.
2. Remove the small center cap by tapping the back
of the cap with the extension of the shaft, if the
vehicle has aluminum wheels.
3. Slide the cable retainer through the center of the
wheel and start to raise the tire.
Make sure the retainer is fully seated across the
underside of the wheel.
4. When the tire is almost in the stored position, turn
the tire so the valve is towards the rear of the
vehicle.
This will help when you check and maintain tire
pressure in the spare.
5. Raise the tire fully against the underside of the
vehicle. Continue turning the folding wrench until
you feel more than two clicks. This indicates that the
compact spare tire is secure and the cable is
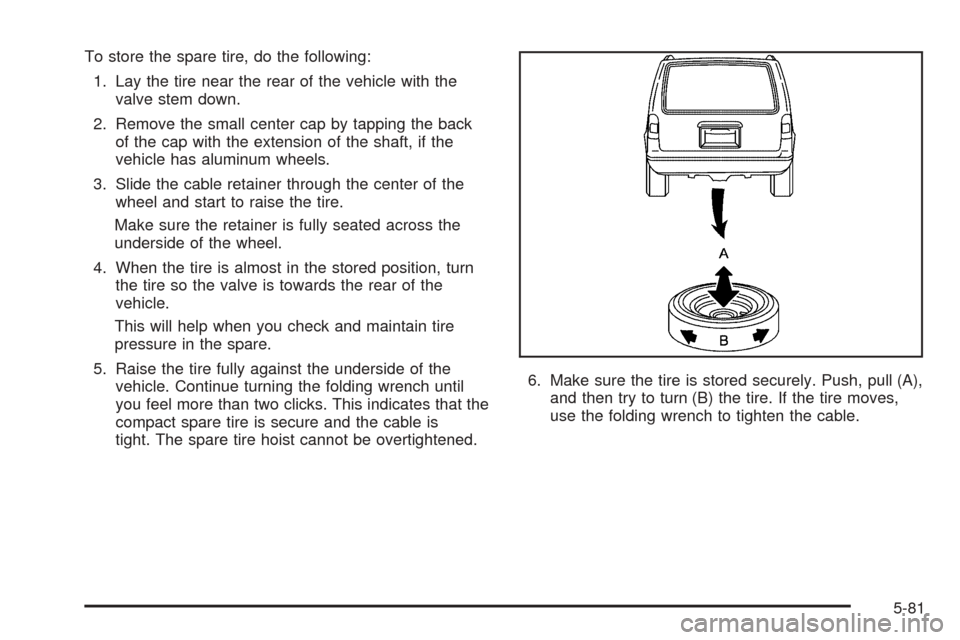
tight. The spare tire hoist cannot be overtightened.6. Make sure the tire is stored securely. Push, pull (A),
and then try to turn (B) the tire. If the tire moves,
use the folding wrench to tighten the cable.
5-81
Page 398 of 460
Storing the Flat Tire on a
Front-Wheel-Drive Vehicle
The �at tire is stored the same as the spare tire for
front-wheel-drive vehicles. Refer to “Storing the Spare
Tire” listed previously.
Storing the Flat Tire on an
All-Wheel-Drive Vehicle
1. Remove the tire storage bag and cable package
from the jack storage area.
2. Remove the small center cap by tapping the back
of the cap with the extension of the shaft, if the
vehicle has aluminum wheels.
3. Put the �at tire in the tire storage bag and place it
in the rear storage area with the valve stem
pointing toward the front of the vehicle.A. Cable
B. Liftgate Hinges
C. Door Striker
4. Pull the cable through the door striker and the
center of the wheel.
5-82
Page 400 of 460

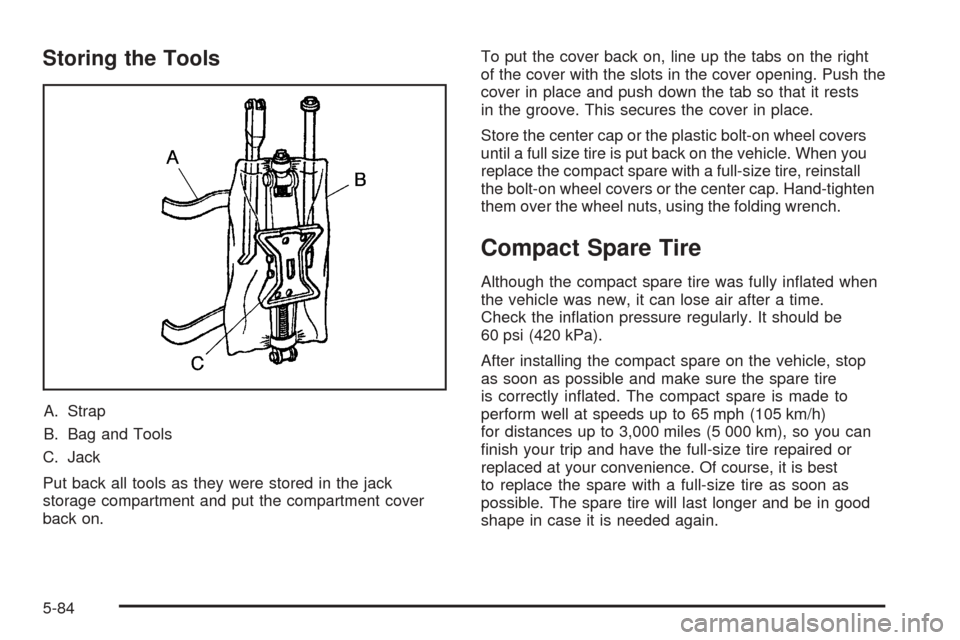
Storing the Tools
A. Strap
B. Bag and Tools
C. Jack
Put back all tools as they were stored in the jack
storage compartment and put the compartment cover
back on.To put the cover back on, line up the tabs on the right
of the cover with the slots in the cover opening. Push the
cover in place and push down the tab so that it rests
in the groove. This secures the cover in place.
Store the center cap or the plastic bolt-on wheel covers
until a full size tire is put back on the vehicle. When you
replace the compact spare with a full-size tire, reinstall
the bolt-on wheel covers or the center cap. Hand-tighten
them over the wheel nuts, using the folding wrench.
Compact Spare Tire
Although the compact spare tire was fully in�ated when
the vehicle was new, it can lose air after a time.
Check the in�ation pressure regularly. It should be
60 psi (420 kPa).
After installing the compact spare on the vehicle, stop
as soon as possible and make sure the spare tire
is correctly in�ated. The compact spare is made to
perform well at speeds up to 65 mph (105 km/h)
for distances up to 3,000 miles (5 000 km), so you can
�nish your trip and have the full-size tire repaired or
replaced at your convenience. Of course, it is best
to replace the spare with a full-size tire as soon as
possible. The spare tire will last longer and be in good
shape in case it is needed again.
5-84