2005 CHEVROLET TAHOE roof
[x] Cancel search: roofPage 1 of 536

Seats and Restraint Systems........................... 1-1
Front Seats
............................................... 1-3
Rear Seats
............................................... 1-8
Safety Belts
.............................................1-23
Child Restraints
.......................................1-44
Airbag System
.........................................1-68
Restraint System Check
............................1-83
Features and Controls..................................... 2-1
Keys
........................................................ 2-3
Doors and Locks
....................................... 2-8
Windows
.................................................2-15
Theft-Deterrent Systems
............................2-17
Starting and Operating Your Vehicle
...........2-19
Mirrors
....................................................2-41
OnStar
®System
......................................2-50
HomeLink®Wireless Control System
...........2-52
Storage Areas
.........................................2-56
Sunroof
..................................................2-60
Vehicle Personalization
.............................2-61
Instrument Panel............................................. 3-1
Instrument Panel Overview
.......................... 3-4
Climate Controls
......................................3-21
Warning Lights, Gages, and Indicators
........3-36
Driver Information Center (DIC)
..................3-56
Audio System(s)
.......................................3-78Driving Your Vehicle....................................... 4-1
Your Driving, the Road, and Your Vehicle
..... 4-2
Towing
...................................................4-62
Service and Appearance Care.......................... 5-1
Service
..................................................... 5-3
Fuel
......................................................... 5-5
Checking Things Under the Hood
...............5-10
All-Wheel Drive
........................................5-47
Rear Axle
...............................................5-48
Four-Wheel Drive
.....................................5-49
Front Axle
...............................................5-50
Bulb Replacement
....................................5-52
Windshield Wiper Blade Replacement
.........5-59
Tires
......................................................5-60
Appearance Care
.....................................5-97
Vehicle Identi�cation
...............................5-106
Electrical System
....................................5-107
Capacities and Speci�cations
...................5-116
Maintenance Schedule..................................... 6-1
Maintenance Schedule
................................ 6-2
Customer Assistance and Information.............. 7-1
Customer Assistance and Information
........... 7-2
Reporting Safety Defects
...........................7-10
Index................................................................ 1
2005 Chevrolet Tahoe/Suburban Owner ManualM
Page 92 of 536

Mirrors...........................................................2-41
Manual Rearview Mirror.................................2-41
Automatic Dimming Rearview Mirror with
OnStar
®, Compass and Temperature
Display....................................................2-41
Automatic Dimming Rearview Mirror with
Compass and Temperature Display..............2-43
Outside Manual Mirrors..................................2-46
Outside Camper-Type Mirrors.........................2-46
Outside Power Mirrors...................................2-47
Outside Power Camper-Type Mirror.................2-47
Outside Power Foldaway Mirrors.....................2-48
Outside Automatic Dimming Mirror..................2-48
Outside Curb View Assist Mirrors....................2-49
Outside Convex Mirror...................................2-49
Outside Heated Mirrors..................................2-49OnStar
®System.............................................2-50
HomeLink®Wireless Control System...............2-52
HomeLink®Wireless Control System
Operation.................................................2-53
Storage Areas................................................2-56
Glove Box...................................................2-56
Cupholder(s)................................................2-56
Front Storage Area.......................................2-56
Center Console Storage Area.........................2-57
Luggage Carrier...........................................2-57
Rear Storage Area........................................2-58
Convenience Net..........................................2-58
Cargo Cover................................................2-59
Sunroof.........................................................2-60
Vehicle Personalization...................................2-61
Memory Seat...............................................2-61
Section 2 Features and Controls
2-2
Page 111 of 536

Retained Accessory Power (RAP)
Your vehicle may be equipped with a Retained
Accessory Power (RAP) feature which will allow certain
features on your vehicle to continue to work up to
10 minutes after the ignition key is turned to OFF.
Your radio, power windows, sunroof (if equipped), and
OnStar
®System (if equipped) will work when the ignition
key is in RUN or ACCESSORY. Once the key is
turned from RUN to LOCK, these features will continue
to work for up to 10 minutes or until a door is opened.
Starting the Engine
Your vehicle is equipped with Starter Motor Control.
This feature assists in starting the engine and protects
the electrical system. This feature may cause the
engine to crank even after the ignition key is not
in START.
Move your shift lever to PARK (P) or NEUTRAL (N).
Your engine will not start in any other position — that
is a safety feature. To restart when you are already
moving, use NEUTRAL (N) only.Notice:Do not try to shift to PARK (P) if your
vehicle is moving. If you do, you could damage the
transmission. Shift to PARK (P) only when your
vehicle is stopped.
1. With your foot off the accelerator pedal, turn the
ignition key to START. When the engine starts,
let go of the key. The idle speed will go down as
your engine gets warm.
Notice:Holding your key in START for longer than
15 seconds at a time will disengage the starter
motor, cause your battery to be drained much
sooner, and add excessive heat that can damage
your starter motor. Try not to hold the key in
START for longer than 15 seconds and wait about
15 seconds between each try to help avoid draining
your battery or damaging your starter.
2. If it does not start within 10 seconds, push the
accelerator pedal all the way to the �oor, while
you hold the ignition key in START. When
the engine starts, let go of the key and let up
on the accelerator pedal. Wait about 15 seconds
between each try.
2-21
Page 147 of 536

Center Console Storage Area
Your vehicle may have a console compartment with
cupholders between the bucket seats.
To open it, press the button and swing the console
lid open.
The rear of the console has a cupholder that swings
down for the rear seat passenger to use.
Luggage Carrier
If you have the luggage carrier, you can load things on
top of your vehicle.
The luggage carrier has slats and siderails attached to
the roof and crossrails which can be moved back
and forth to help secure cargo. Tie the load to the
siderails or siderail supports.
Notice:Loading cargo on the luggage carrier that
weighs more than 200 lbs (91 kg) or hangs over
the rear or sides of the vehicle may damage your
vehicle. Load cargo so that it rests on the slats
as far forward as possible and against the side rails,
making sure to fasten it securely.
Don’t exceed the maximum vehicle capacity when
loading your vehicle. For more information on vehicle
capacity and loading, seeLoading Your Vehicle
on page 4-52.To prevent damage or loss of cargo as you’re leaving,
check now and then to make sure the luggage and
cargo are still securely fastened.
Be sure the cargo is properly loaded.
If small heavy objects are placed on the roof, place
the load in the area over the rear wheels (behind
the rear side door on extended models). If you
need to, cut a piece of 3/8 inch plywood to �t inside
the crossrails and siderails to spread the load.
If plywood is used, tie it to the siderail supports.
Tie the load to the crossrails or the siderail supports.
Use the crossrails only to keep the load from sliding.
To move the crossrails, pull out on the latch release
handle at each end. Slide the crossrail to the desired
position balancing the force side to side. Push the
release handle back into the latched position and
slide the crossrail back and forth slightly to be sure
the latch snaps securely into place.
If you need to carry long items, move the crossrails
as far apart as they will go. Tie the load to the
crossrails and the siderails or siderail supports. Also
tie the load to the bumpers. Do not tie the load so
tightly that the crossrails or siderails are damaged.
After moving a crossrail, be sure it is securely locked
into the siderail.
2-57
Page 148 of 536

Your vehicle has a Center High-Mounted Stoplamp
(CHMSL) located above the glass or above the rear
load doors.
If items are loaded on the roof of the vehicle, care
should be taken not to block or damage the CHMSL unit.
If your vehicle has the Z71 option, your vehicle’s
luggage carrier has a roller crossrail at the rear of
the vehicle.
To load cargo, place cargo on the roller and roll the
cargo forward onto the two front crossrails.
To move the crossrails do the following:
1. Loosen the thumbscrew at each end.
2. Move crossrail to desired position.
3. Tighten the thumbscrews.
Make sure the crossrail is secured.Rear Storage Area
Your vehicle may have a storage compartment located
in the rear cargo area of the vehicle in the driver’s
side trim panel.
To open the utility compartment, press in on the release
latch and swing the compartment door open.
To open the compartment on extended models, pull the
latch to access.
Convenience Net
The convenience net (if equipped) in the rear of your
vehicle helps to keep small loads in place during sharp
turns or quick stops and starts.
The net is not designed for larger, heavier items.
To install the net, attach the hooks to the raised cargo
tie downs. Then, attach the cord loops to the button
retainers in the side trim.
You can unhook the net so that it will lie �at when
you’re not using it.
2-58
Page 150 of 536

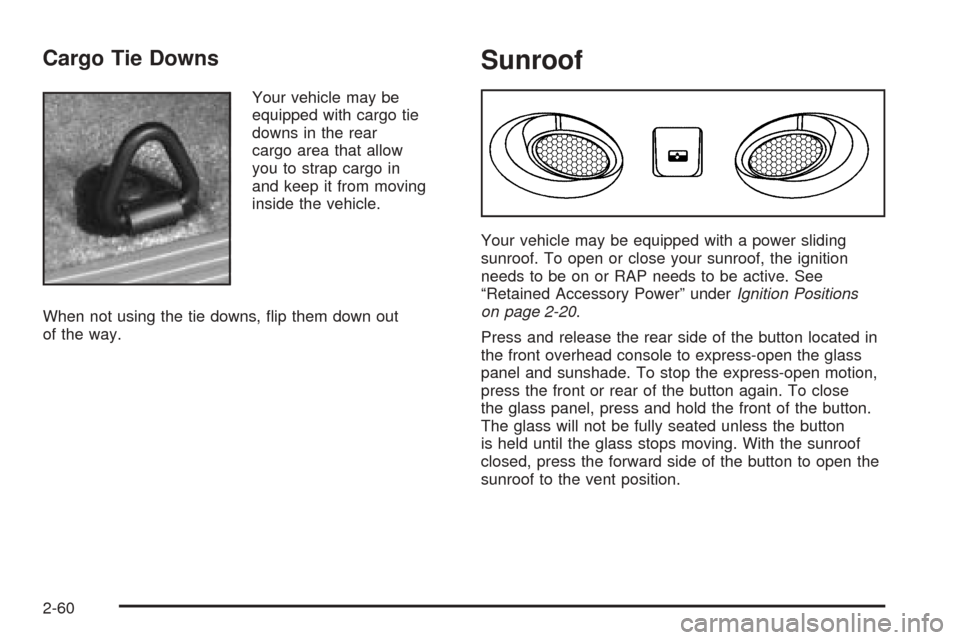
Cargo Tie Downs
Your vehicle may be
equipped with cargo tie
downs in the rear
cargo area that allow
you to strap cargo in
and keep it from moving
inside the vehicle.
When not using the tie downs, �ip them down out
of the way.
Sunroof
Your vehicle may be equipped with a power sliding
sunroof. To open or close your sunroof, the ignition
needs to be on or RAP needs to be active. See
“Retained Accessory Power” underIgnition Positions
on page 2-20.
Press and release the rear side of the button located in
the front overhead console to express-open the glass
panel and sunshade. To stop the express-open motion,
press the front or rear of the button again. To close
the glass panel, press and hold the front of the button.
The glass will not be fully seated unless the button
is held until the glass stops moving. With the sunroof
closed, press the forward side of the button to open the
sunroof to the vent position.
2-60
Page 151 of 536

The sunroof is also equipped with a sunshade which
you can pull forward to block sun rays.
If a hand, arm, or other object is blocking the sunroof
glass panel as it is closing, the glass panel will stop
at the obstruction. After the obstruction is removed,
the glass panel can be closed or opened.
Use care not to leave the sunroof open for long periods
of time as debris may collect in the tracks.
If the battery has been recharged, disconnected or is
not working, you may need to reprogram the sunroof.
To do this, start the vehicle and press the forward
side of the sunroof button until the glass panel moves
to a fully closed position. Release, and press again
to move to the vent position, which occurs when
the sunroof is fully tilted upward and the button is held
for an additional twenty seconds. This will reset the
memory and enable the sunroof to function properly.Vehicle Personalization
Memory Seat
If your vehicle has this
feature, the controls for
the memory function
are located on the
driver’s door.
These buttons are used to program and recall memory
settings for the driver’s seat, throttle and brake
pedals and both the driver’s and passenger’s outside
mirrors. The settings for these features can be saved
for up to two drivers.
2-61
Page 153 of 536

Instrument Panel Overview...............................3-4
Hazard Warning Flashers................................3-6
Other Warning Devices...................................3-6
Horn.............................................................3-6
Tilt Wheel.....................................................3-6
Turn Signal/Multifunction Lever.........................3-7
Turn and Lane-Change Signals........................3-8
Headlamp High/Low-Beam Changer..................3-8
Flash-to-Pass.................................................3-9
Windshield Wipers..........................................3-9
Windshield Washer.......................................3-10
Cruise Control..............................................3-11
Headlamps..................................................3-14
Headlamps on Reminder................................3-15
Daytime Running Lamps (DRL).......................3-15
Automatic Headlamp System..........................3-16
Fog Lamps..................................................3-17
Auxiliary Roof Mounted Lamp.........................3-18
Instrument Panel Brightness...........................3-18
Dome Lamps...............................................3-18
Dome Lamp Override....................................3-19
Entry Lighting...............................................3-19
Exit Lighting.................................................3-19Front Reading Lamps....................................3-19
Battery Run-Down Protection..........................3-20
Accessory Power Outlets...............................3-20
Ashtrays and Cigarette Lighter........................3-21
Climate Controls............................................3-21
Climate Control System.................................3-21
Dual Climate Control System..........................3-22
Dual Automatic Climate Control System...........3-25
Outlet Adjustment.........................................3-30
Rear Air Conditioning System.........................3-30
Rear Air Conditioning and Heating System.......3-31
Rear Air Conditioning and Heating System
and Electronic Climate Controls...................3-34
Warning Lights, Gages, and Indicators............3-36
Instrument Panel Cluster................................3-37
Speedometer and Odometer...........................3-38
Trip Odometer..............................................3-38
Tachometer.................................................3-38
Safety Belt Reminder Light.............................3-39
Airbag Readiness Light..................................3-39
Passenger Airbag Status Indicator...................3-40
Battery Warning Light....................................3-42
Section 3 Instrument Panel
3-1