2005 CHEVROLET TAHOE lock
[x] Cancel search: lockPage 342 of 536

Loading Your Vehicle
It is very important to know how much weight your
vehicle can carry. This weight is called the vehicle
capacity weight and includes the weight of all occupants,
cargo and all nonfactory-installed options. Two labels
on your vehicle show how much weight it was designed
to carry, the Tire and Loading Information label and
the Certi�cation/Tire label.
{CAUTION:
Do not load your vehicle any heavier than the
Gross Vehicle Weight Rating (GVWR), or either
the maximum front or rear Gross Axle Weight
Rating (GAWR). If you do, parts on your
vehicle can break, and it can change the way
your vehicle handles. These could cause you
to lose control and crash. Also, overloading
can shorten the life of your vehicle.
Tire and Loading Information Label
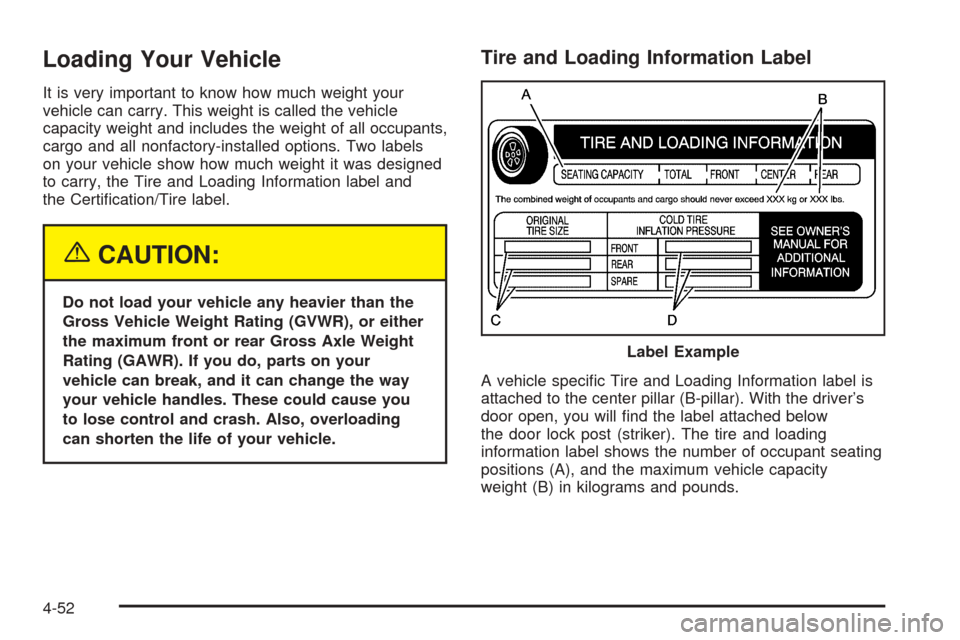
A vehicle speci�c Tire and Loading Information label is
attached to the center pillar (B-pillar). With the driver’s
door open, you will �nd the label attached below
the door lock post (striker). The tire and loading
information label shows the number of occupant seating
positions (A), and the maximum vehicle capacity
weight (B) in kilograms and pounds.Label Example
4-52
Page 354 of 536

Dolly Towing
Two-Wheel-Drive Vehicles
Notice:If you tow a two-wheel-drive vehicle with
the rear wheels on the ground, the transmission
could be damaged. The repairs would not be
covered by your warranty. Never tow your vehicle
with the rear wheels on the ground.
Two-wheel-drive vehicles should not be towed with the
rear wheels on the ground. Two-wheel-drive
transmissions have no provisions for internal lubrication
while being towed.
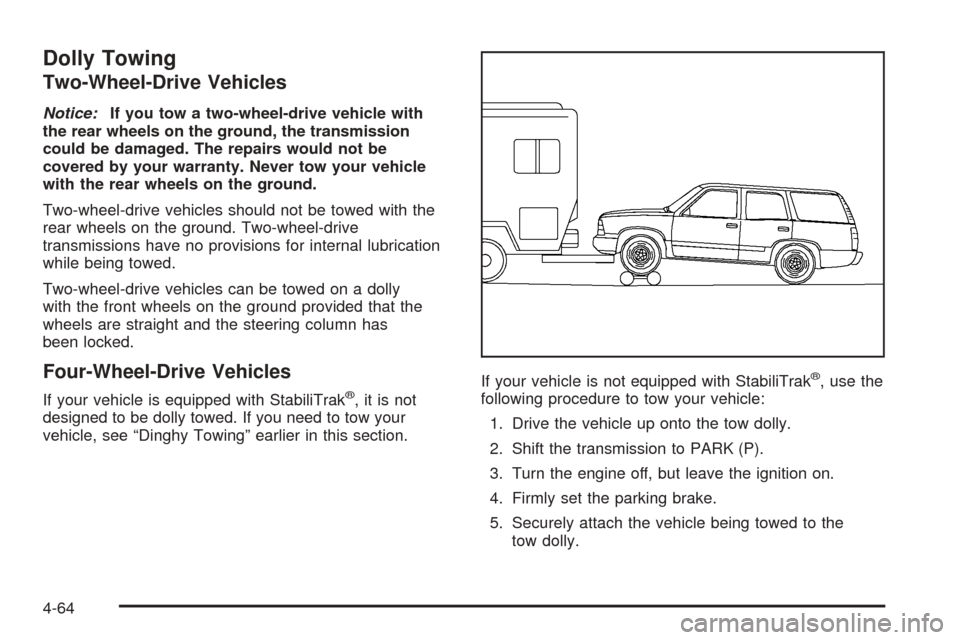
Two-wheel-drive vehicles can be towed on a dolly
with the front wheels on the ground provided that the
wheels are straight and the steering column has
been locked.
Four-Wheel-Drive Vehicles
If your vehicle is equipped with StabiliTrak®,itisnot
designed to be dolly towed. If you need to tow your
vehicle, see “Dinghy Towing” earlier in this section.If your vehicle is not equipped with StabiliTrak
®, use the
following procedure to tow your vehicle:
1. Drive the vehicle up onto the tow dolly.
2. Shift the transmission to PARK (P).
3. Turn the engine off, but leave the ignition on.
4. Firmly set the parking brake.
5. Securely attach the vehicle being towed to the
tow dolly.
4-64
Page 355 of 536

{CAUTION:
Shifting a four-wheel-drive vehicle’s transfer
case into NEUTRAL can cause your vehicle to
roll even if the transmission is in PARK (P).
You or others could be injured. Make sure the
parking brake is �rmly set before you shift the
transfer case to NEUTRAL.
6. Shift the transfer case to NEUTRAL. See
Four-Wheel Drive on page 2-28orAll-Wheel Drive
with StabiliTrak
®on page 2-32for the proper
procedure to select the NEUTRAL position for
your vehicle.
7. Release the parking brake only after the
vehicle being towed is �rmly attached to the
towing vehicle.
8. Turn the ignition off and lock the steering column.
Level Control
Automatic Level Control
The automatic level control rear suspension is available
on C/K 1500 vehicles and comes as a part of the
Autoride
®suspension, if equipped.
This type of level control is fully automatic and will
provide a better leveled riding position as well as better
handling under a variety of passenger and loading
conditions. An air compressor connected to the rear
shocks will raise or lower the rear of the vehicle
to maintain proper vehicle height. The system is
activated when the ignition key is turned to RUN and
will automatically adjust vehicle height thereafter.
The system may exhaust (lower vehicle height) for up to
ten minutes after the ignition key has been turned off.
You may hear the air compressor operating when
the height is being adjusted.
If a self-equalizing hitch is being used, it is
recommended to allow the shocks to in�ate, thereby
leveling the vehicle prior to adjusting the hitch.
4-65
Page 372 of 536

Four-Wire Harness Adapter
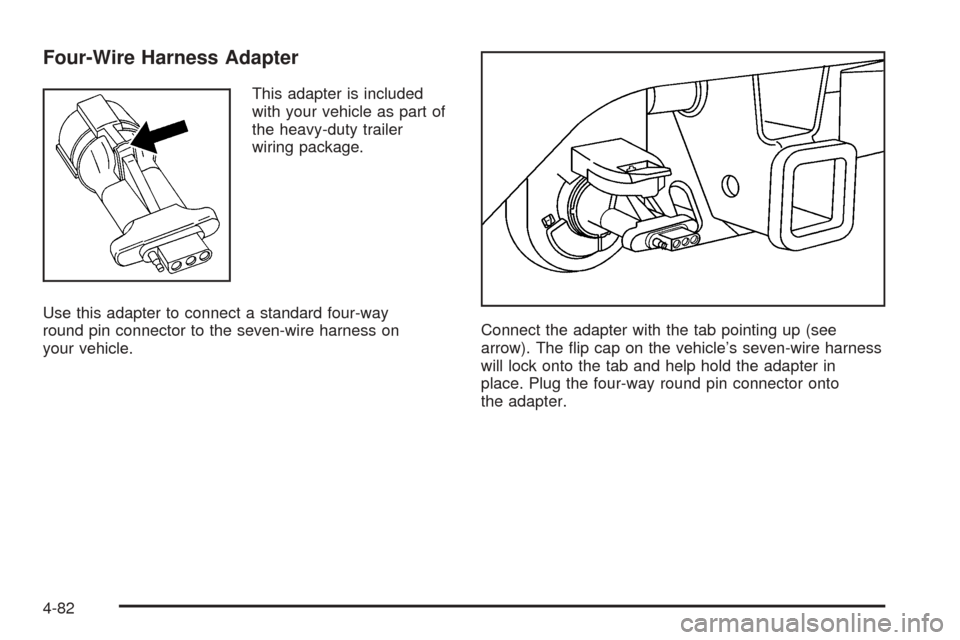
This adapter is included
with your vehicle as part of
the heavy-duty trailer
wiring package.
Use this adapter to connect a standard four-way
round pin connector to the seven-wire harness on
your vehicle.Connect the adapter with the tab pointing up (see
arrow). The �ip cap on the vehicle’s seven-wire harness
will lock onto the tab and help hold the adapter in
place. Plug the four-way round pin connector onto
the adapter.
4-82
Page 376 of 536

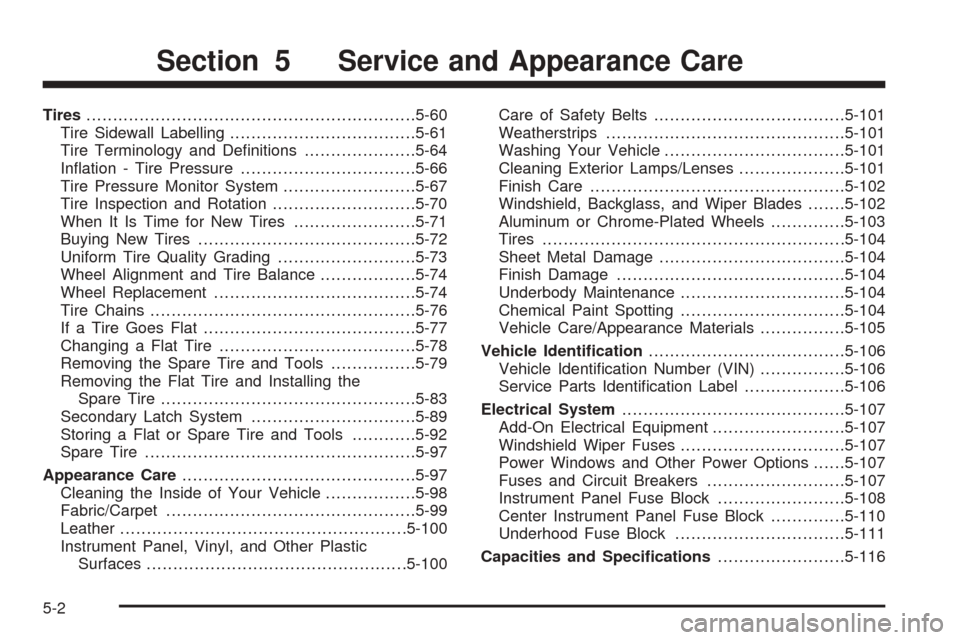
Tires..............................................................5-60
Tire Sidewall Labelling...................................5-61
Tire Terminology and De�nitions.....................5-64
In�ation - Tire Pressure.................................5-66
Tire Pressure Monitor System.........................5-67
Tire Inspection and Rotation...........................5-70
When It Is Time for New Tires.......................5-71
Buying New Tires.........................................5-72
Uniform Tire Quality Grading..........................5-73
Wheel Alignment and Tire Balance..................5-74
Wheel Replacement......................................5-74
Tire Chains..................................................5-76
If a Tire Goes Flat........................................5-77
Changing a Flat Tire.....................................5-78
Removing the Spare Tire and Tools................5-79
Removing the Flat Tire and Installing the
Spare Tire................................................5-83
Secondary Latch System...............................5-89
Storing a Flat or Spare Tire and Tools............5-92
Spare Tire...................................................5-97
Appearance Care............................................5-97
Cleaning the Inside of Your Vehicle.................5-98
Fabric/Carpet...............................................5-99
Leather......................................................5-100
Instrument Panel, Vinyl, and Other Plastic
Surfaces.................................................5-100Care of Safety Belts....................................5-101
Weatherstrips.............................................5-101
Washing Your Vehicle..................................5-101
Cleaning Exterior Lamps/Lenses....................5-101
Finish Care................................................5-102
Windshield, Backglass, and Wiper Blades.......5-102
Aluminum or Chrome-Plated Wheels..............5-103
Tires.........................................................5-104
Sheet Metal Damage...................................5-104
Finish Damage...........................................5-104
Underbody Maintenance...............................5-104
Chemical Paint Spotting...............................5-104
Vehicle Care/Appearance Materials................5-105
Vehicle Identi�cation.....................................5-106
Vehicle Identi�cation Number (VIN)................5-106
Service Parts Identi�cation Label...................5-106
Electrical System..........................................5-107
Add-On Electrical Equipment.........................5-107
Windshield Wiper Fuses...............................5-107
Power Windows and Other Power Options......5-107
Fuses and Circuit Breakers..........................5-107
Instrument Panel Fuse Block........................5-108
Center Instrument Panel Fuse Block..............5-110
Underhood Fuse Block................................5-111
Capacities and Speci�cations........................5-116
Section 5 Service and Appearance Care
5-2
Page 383 of 536

To remove the fuel cap, turn it slowly counterclockwise.
It will require more effort to turn the fuel cap on the
last turn as you loosen it.
{CAUTION:
If you spill fuel and then something ignites it,
you could be badly burned. Fuel can spray out
on you if you open the fuel cap too quickly.
This spray can happen if your tank is nearly
full, and is more likely in hot weather. Open
the fuel cap slowly and wait for any hiss noise
to stop. Then unscrew the cap all the way.
Be careful not to spill fuel. Do not top off or over�ll the
tank and wait a few seconds after you have �nished
pumping before removing the nozzle. Clean fuel
from painted surfaces as soon as possible. See
Washing Your Vehicle on page 5-101.When replacing the fuel cap, turn it clockwise until it
clicks. It will require more effort to turn the fuel cap on
the last turn as you tighten it. Make sure the cap is
fully installed. The diagnostic system can determine if
the fuel cap has been left off or improperly installed. This
would allow fuel to evaporate into the atmosphere.
SeeMalfunction Indicator Lamp on page 3-48.
The TIGHTEN FUEL CAP message will be displayed on
the Driver Information Center (DIC) if the fuel cap is
not properly installed. SeeDIC Warnings and Messages
on page 3-60for more information.
{CAUTION:
If a �re starts while you are refueling, do not
remove the nozzle. Shut off the �ow of fuel by
shutting off the pump or by notifying the
station attendant. Leave the area immediately.
Notice:If you need a new fuel cap, be sure to get
the right type. Your dealer can get one for you.
If you get the wrong type, it may not �t properly.
This may cause your malfunction indicator lamp to
light and may damage your fuel tank and emissions
system. SeeMalfunction Indicator Lamp on
page 3-48.
5-9
Page 387 of 536

A. Engine Air Cleaner/Filter. SeeEngine Air
Cleaner/Filter on page 5-21.
B. Coolant Surge Tank and Pressure Cap. SeeCooling
System on page 5-30andCoolant Surge Tank
Pressure Cap on page 5-28.
C. Air Filter Restriction Indicator (If Equipped). See
Engine Air Cleaner/Filter on page 5-21.
D. Engine Oil Dipstick. See “Checking Engine Oil”
underEngine Oil on page 5-16.
E. Automatic Transmission Dipstick. See “Checking the
Fluid Level” underAutomatic Transmission Fluid
on page 5-23.
F. Engine Oil Fill Cap. See “When to Add Engine Oil”
underEngine Oil on page 5-16.
G. Engine Cooling Fan. SeeCooling System on
page 5-30.H. Remote Negative (−) Terminal (GND). SeeJump
Starting on page 5-42.
I. Power Steering Fluid Reservoir. SeePower Steering
Fluid on page 5-36.
J. Remote Positive (+) Terminal. SeeJump Starting on
page 5-42.
K. Brake Master Cylinder Reservoir. See “Brake Fluid”
underBrakes on page 5-38.
L. Underhood Fuse Block. SeeUnderhood Fuse Block
on page 5-111.
M. Battery. SeeBattery on page 5-41.
N. Windshield Washer Fluid Reservoir. See “Adding
Washer Fluid” underWindshield Washer Fluid
on page 5-37.
5-13
Page 389 of 536

A. Engine Air Cleaner/Filter. SeeEngine Air
Cleaner/Filter on page 5-21.
B. Coolant Surge Tank and Pressure Cap. SeeCooling
System on page 5-30andCoolant Surge Tank
Pressure Cap on page 5-28.
C. Air Filter Restriction Indicator (If Equipped). See
Engine Air Cleaner/Filter on page 5-21.
D. Engine Oil Dipstick. See “Checking Engine Oil”
underEngine Oil on page 5-16.
E. Automatic Transmission Dipstick. See “Checking the
Fluid Level” underAutomatic Transmission Fluid
on page 5-23.
F. Engine Oil Fill Cap. See “When to Add Engine Oil”
underEngine Oil on page 5-16.
G. Engine Cooling Fan. SeeCooling System on
page 5-30.H. Remote Negative (−) Terminal (GND). SeeJump
Starting on page 5-42.
I. Remote Positive (+) Terminal. SeeJump Starting on
page 5-42.
J. Power Steering Fluid Reservoir. SeePower Steering
Fluid on page 5-36.
K. Brake Master Fluid Reservoir. See “Brake Fluid”
underBrakes on page 5-38.
L. Underhood Fuse Block. SeeUnderhood Fuse Block
on page 5-111.
M. Battery. SeeBattery on page 5-41.
N. Windshield Washer Fluid Reservoir. See “Adding
Washer Fluid” underWindshield Washer Fluid
on page 5-37.
5-15