2005 CHEVROLET SUBURBAN tow
[x] Cancel search: towPage 101 of 536
Programmable Automatic
Door Locks
Your vehicle is equipped with an automatic lock/unlock
feature which enables you to program your vehicle’s
power door locks. You can program this feature through
the Driver Information Center (DIC), or by the following
method.
Programmable Locking Feature
Following are the two available programming options:
Mode 1:All doors lock when the transmission is shifted
into gear.
Mode 2:All doors lock when the vehicle speed is
greater than 8 mph (13 km/h).
The automatic door locks were pre-programmed at the
factory to lock all the doors when the transmission
is shifted into gear. The following instructions detail how
to program your door locks differently than the factory
setting. Choose one of the two programming options
listed above before entering the program mode.To enter the program mode, do the following:
1. Begin with the ignition off. Then pull the turn
signal/multifunction lever toward you and hold
it there while you perform the next step.
2. Turn the key to RUN and LOCK twice. Then, with the
key in LOCK, release the turn signal/multifunction
lever. Once you do this, you will hear the lock switch
lock and unlock, the horn will chirp twice, and a
30 second program timer will begin. You are now
ready to program the automatic door locks.
3. Select one of the two programming options listed
previously, and press the lock side of the power
door lock switch to cycle through the lock options.
You will have 30 seconds to begin programming.
If you exceed the 30 second limit, the locks will
automatically lock and unlock and the horn will chirp
twice to indicate that you have left the program
mode. If this occurs, repeat the procedure beginning
with Step 1 to re-enter the programming mode.
You can exit the program mode any time by turning the
ignition to RUN (the locks will automatically lock and
unlock and the horn will chirp twice to indicate that you
are leaving the program mode). If the lock/unlock
switches are not pressed while in the programming
mode, the current auto lock/unlock setting will not
be modied.
See your dealer for more information.
2-11
Page 102 of 536
Programmable Unlocking Feature
The following is the list of available programming
options:
Mode 1:Driver’s door unlocks when the transmission is
shifted into PARK (P).
Mode 2:All doors unlock when the transmission is
shifted into PARK (P).
Mode 3:All doors unlock when the key is removed
from the ignition.
Mode 4:No automatic door unlock.
The automatic door locks were pre-programmed
at the factory to unlock the driver’s door once the
transmission is shifted to PARK (P). The following
instructions detail how to program your door locks
differently than the factory setting. Choose one of the
four programming options listed above before entering
the program mode.
To enter the program mode, do the following:
1. Begin with the ignition off. Then pull the turn
signal/multifunction lever toward you and hold
it there while you perform the next step.2. Turn the key to RUN and LOCK twice. Then, with the
key in LOCK, release the turn signal/multifunction
lever. Once you do this, you will hear the lock switch
lock and unlock, the horn will chirp twice, and a
30-second program timer will begin.
3. You are now ready to program the automatic door
locks. Select one of the four programming options
listed previously, and press the unlock side of
the power door lock switch to cycle through the
unlocking options. You will have 30 seconds
to begin programming. If you exceed the 30-second
limit, the locks will automatically lock and unlock
and the horn will chirp twice to indicate that
you have left the program mode. If this occurs,
repeat the procedure beginning with Step 1
to re-enter the programming mode.
You can exit the program mode any time by turning the
ignition to RUN. The locks will automatically lock and
unlock and the horn will chirp twice to indicate that you
are leaving the program mode. If the lock/unlock
switches are not pressed while in the programming
mode, the current auto lock/unlock setting will not be
modied.
See your dealer for more information.
2-12
Page 109 of 536
Passlock®
Your vehicle is equipped with the Passlock®
theft-deterrent system.
Passlock
®is a passive theft-deterrent system.
Passlock®enables fuel if the ignition lock cylinder is
turned with a valid key. If a correct key is not used or the
ignition lock cylinder is tampered with, fuel is disabled.
If the engine stalls and the security light ashes,
wait until the light stops ashing before trying to restart
the engine. Remember to release the key from
START as soon as the engine starts.
If the engine is running and the security light comes on,
you will be able to restart the engine if you turn the
engine off. However, your Passlock
®system is
not working properly and must be serviced by your
dealer. Your vehicle is not protected by Passlock
®
at this time. You may also want to check the fuse.
SeeFuses and Circuit Breakers on page 5-107.
See your dealer for service.
In an emergency, call the GM Roadside Assistance
Center. SeeRoadside Assistance Program on page 7-6.
Starting and Operating
Your Vehicle
New Vehicle Break-In
Notice:Your vehicle does not need an elaborate
break-in. But it will perform better in the long run
if you follow these guidelines:
Keep your speed at 55 mph (88 km/h) or less
for the rst 500 miles (805 km).
Do not drive at any one speed, fast or slow,
for the rst 500 miles (805 km). Do not make
full-throttle starts.
Avoid making hard stops for the rst 200 miles
(322 km) or so. During this time your new
brake linings are not yet broken in. Hard stops
with new linings can mean premature wear
and earlier replacement. Follow this breaking-in
guideline every time you get new brake
linings.
Do not tow a trailer during break-in. SeeTowing
a Trailer on page 4-67for more information.
2-19
Page 112 of 536
When starting your engine in very cold weather
(below 0°F or−18°C), do this:
1. With your foot off the accelerator pedal, turn
the ignition key to START and hold it there up
to 15 seconds. When the engine starts, let go
of the key.
2. If your engine still will not start, or starts but then
stops, it could be ooded with too much gasoline.
Try pushing your accelerator pedal all the way to the
oor and holding it there as you hold the key in
START for about three seconds. When the engine
starts, let go of the key and accelerator. If the
vehicle starts briey but then stops again, do the
same thing, but this time keep the pedal down
for ve or six seconds. This clears the extra
gasoline from the engine.
Notice:Your engine is designed to work with the
electronics in your vehicle. If you add electrical
parts or accessories, you could change the way the
engine operates. Before adding electrical equipment,
check with your dealer. If you do not, your engine
might not perform properly. Any resulting damage
would not be covered by your vehicle’s warranty.Adjustable Throttle and Brake Pedal
If your vehicle is equipped with this feature, you can
change the position of the throttle and brake pedals.
This feature is designed for shorter drivers, since
the pedals can not move farther away from the standard
position, but can move toward the driver for better
pedal reach.
The vehicle must be in PARK (P) for this feature to
operate.
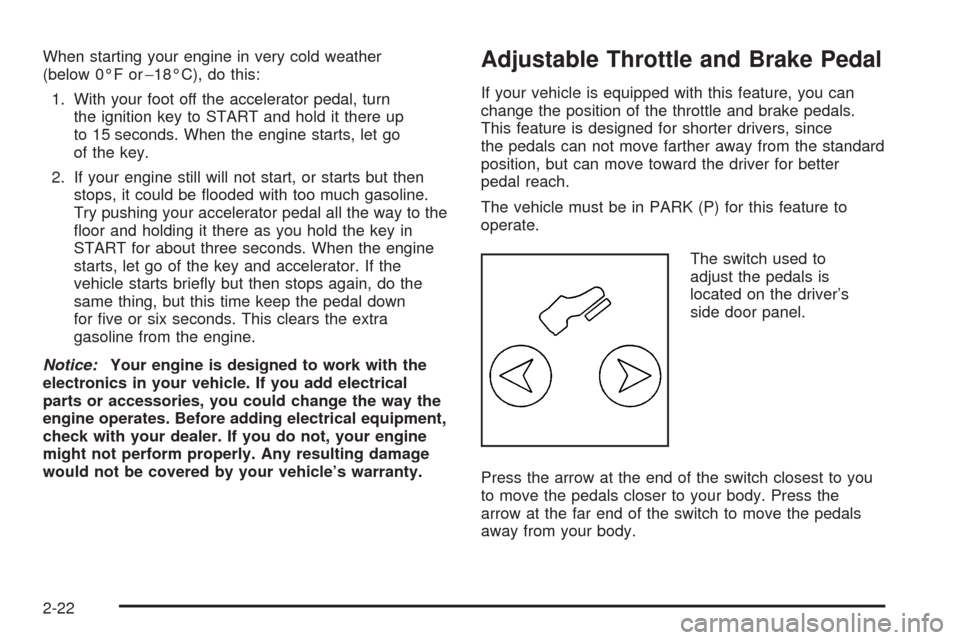
The switch used to
adjust the pedals is
located on the driver’s
side door panel.
Press the arrow at the end of the switch closest to you
to move the pedals closer to your body. Press the
arrow at the far end of the switch to move the pedals
away from your body.
2-22
Page 114 of 536
Automatic Transmission Operation
There are several different positions for your shift lever.
Your vehicle is equipped with an automatic transmission
and features an electronic shift position indicator
within the instrument panel cluster. This display must
be powered anytime the shift lever is capable of
being moved out of PARK (P).
PARK (P):This position locks your rear wheels.
It is the best position to use when you start your
engine because your vehicle cannot move easily.{CAUTION:
It is dangerous to get out of your vehicle if
the shift lever is not fully in PARK (P) with the
parking brake rmly set. Your vehicle can roll.
Do not leave your vehicle when the engine
is running unless you have to. If you have
left the engine running, the vehicle can move
suddenly. You or others could be injured.
To be sure your vehicle will not move, even
when you are on fairly level ground, always
set your parking brake and move the shift
lever to PARK (P). SeeShifting Into Park (P)
on page 2-36. If you are pulling a trailer, see
Towing a Trailer on page 4-67.
2-24
Page 115 of 536
{CAUTION:
If you have four-wheel drive, your vehicle
will be free to roll — even if your shift lever
is in PARK (P) — if your transfer case is in
NEUTRAL. So, be sure the transfer case is in a
drive gear, two-wheel high (2H) or four-wheel
high (4H) or four-wheel low (4L) — not in
NEUTRAL. SeeShifting Into Park (P) on
page 2-36.
REVERSE (R):Use this gear to back up.
Notice:Shifting to REVERSE (R) while your vehicle
is moving forward could damage the transmission.
The repairs would not be covered by your warranty.
Shift to REVERSE (R) only after your vehicle is
stopped.
To rock your vehicle back and forth to get out of snow,
ice or sand without damaging your transmission,
seeIf Your Vehicle is Stuck in Sand, Mud, Ice or
Snow on page 4-50.NEUTRAL (N):In this position, your engine does not
connect with the wheels. To restart when you are
already moving, use NEUTRAL (N) only. Also, use
NEUTRAL (N) when your two-wheel drive vehicle
is being towed.
{CAUTION:
Shifting into a drive gear while your engine is
running at high speed is dangerous. Unless
your foot is rmly on the brake pedal, your
vehicle could move very rapidly. You could
lose control and hit people or objects. Do not
shift into a drive gear while your engine is
running at high speed.
Notice:Shifting out of PARK (P) or NEUTRAL (N)
with the engine running at high speed may damage
the transmission. The repairs would not be covered
by your warranty. Be sure the engine is not running
at high speed when shifting your vehicle.
2-25
Page 116 of 536
DRIVE (D):This position is for normal driving. If you
need more power for passing, and you are:
Going less than about 35 mph (56 km/h), push your
accelerator pedal about halfway down.
Going about 35 mph (56 km/h) or more, push the
accelerator all the way down.
You will shift down to the next gear and have more
power.
DRIVE (D) can be used when towing a trailer, carrying
a heavy load, driving on steep hills or for off-road
driving. You may want to shift the transmission to
THIRD (3) or, if necessary, a lower gear selection if the
transmission shifts too often.
THIRD (3):This position is also used for normal driving,
however it offers more power and lower fuel economy
than DRIVE (D).
SECOND (2):This position gives you more power but
lower fuel economy. You can use SECOND (2) on
hills. It can help control your speed as you go down
steep mountain roads, but then you would also want to
use your brakes off and on.If you manually select SECOND (2) in a light duty
automatic transmission, the transmission will drive in
second gear. You may use this feature for reducing the
speed of the rear wheels when you are trying to start
your vehicle from a stop on slippery road surfaces.
FIRST (1):This position gives you even more power
(but lower fuel economy) than SECOND (2). You
can use it on very steep hills, or in deep snow or mud.
If the shift lever is put in FIRST (1) while the vehicle
is moving forward, the transmission will not shift into rst
gear until the vehicle is going slowly enough.
Notice:Spinning the tires or holding the vehicle
in one place on a hill using only the accelerator
pedal may damage the transmission. If you
are stuck, do not spin the tires. When stopping on
a hill, use the brakes to hold the vehicle in place.
On cold days, approximately 32°F (0°C) or colder, your
transmission is designed to shift differently until the
engine reaches normal operating temperature. This is
intended to improve heater performance.
2-26
Page 117 of 536
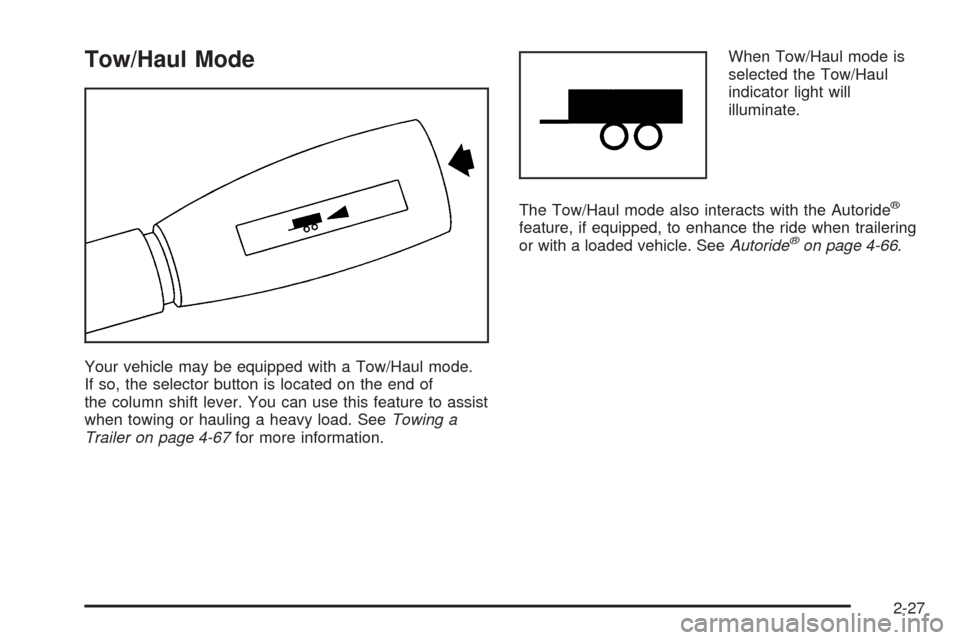
Tow/Haul Mode
Your vehicle may be equipped with a Tow/Haul mode.
If so, the selector button is located on the end of
the column shift lever. You can use this feature to assist
when towing or hauling a heavy load. SeeTowing a
Trailer on page 4-67for more information.When Tow/Haul mode is
selected the Tow/Haul
indicator light will
illuminate.
The Tow/Haul mode also interacts with the Autoride
®
feature, if equipped, to enhance the ride when trailering
or with a loaded vehicle. SeeAutoride®on page 4-66.
2-27