2005 CHEVROLET SILVERADO hood release
[x] Cancel search: hood releasePage 171 of 580

The main components of your instrument panel are the following:
A. Dome Lamp Button. SeeDome Lamps on page 3-17.
B. Headlamp Controls. SeeHeadlamps on page 3-13.
C. Air Outlets. SeeOutlet Adjustment on page 3-30.
D. Automatic Transfer Case/Electronic Transfer Case/
Traction Assist System (TAS). SeeFour-Wheel Drive
on page 2-37andTraction Assist System (TAS)
on page 4-8.
E. Multifunction Lever. SeeTurn Signal/Multifunction
Lever on page 3-7.
F. Instrument Panel Cluster. SeeInstrument Panel
Cluster on page 3-32.
G. Gearshift Lever (Automatic Transmission).
SeeAutomatic Transmission Operation on page 2-26
orManual Transmission Operation on page 2-32
for manual transmissions.
H. Tow/Haul Selector and Overdrive Disable
(Allison Transmission
®Only) Button (If Equipped).
SeeTow/Haul Mode on page 2-30.
I. Audio System. SeeAudio System(s) on page 3-69.
J. Climate Control System. SeeClimate Control
System on page 3-20,Dual Climate Control System
on page 3-22andDual Automatic Climate Control
System on page 3-24.
K. Instrument Panel Fuse Block.Instrument Panel Fuse
Block on page 5-124.
L. Cargo Lamp Button. SeeCargo Lamp on page 3-19.M. Hood Release. SeeHood Release on page 5-13.
N. Steering Wheel Control Buttons (If Equipped).
SeeDriver Information Center (DIC) on page 3-50
orAudio Steering Wheel Controls on page 3-124.
O. Center Instrument Panel Block. SeeCenter
Instrument Panel Fuse Block on page 5-126.
P. Parking Brake Release. SeeParking Brake on
page 2-51.
Q. Tilt Wheel Lever. SeeTilt Wheel on page 3-6.
R. Lighter and Accessory Power Outlet. SeeAccessory
Power Outlet(s) on page 3-19, andAshtray(s) and
Cigarette Lighter on page 3-20.
S. Storage Area. SeeFront Storage Area on page 2-75.
T. Ashtray. SeeAshtray(s) and Cigarette Lighter on
page 3-20.
U. Manual Selectable Ride Control (If Equipped).
SeeManual Selectable Ride on page 4-11.
V. 4-Wheel Steer Button (If Equipped).
SeeQUADRASTEER™ on page 4-14.
W. Passenger Airbag Off Switch (If Equipped).
SeeAirbag Off Switch on page 1-70.
X. Auxiliary Roof Mounted Lamp Button (If Equipped).
SeeAuxiliary Roof Mounted Lamp on page 3-17.
Y. Glove Box. SeeGlove Box on page 2-75.
3-5
Page 325 of 580
Q:Am I likely to stall when going downhill?
A:It is much more likely to happen going uphill. But if
it happens going downhill, here is what to do.
1. Stop your vehicle by applying the regular brakes.
Apply the parking brake.
2. Shift to PARK (P), or to NEUTRAL with the manual
transmission, and, while still braking, restart the
engine.
3. Shift back to a low gear, release the parking brake,
and drive straight down.
4. If the engine will not start, get out and get help.
Driving Across an Incline
Sooner or later, an off-road trail will probably go across
the incline of a hill. If this happens, you have to decide
whether to try to drive across the incline. Here are some
things to consider:
A hill that can be driven straight up or down may be
too steep to drive across. When you go straight up or
down a hill, the length of the wheel base — the
distance from the front wheels to the rear
wheels — reduces the likelihood the vehicle will
tumble end over end. But when you drive across an
incline, the much more narrow track width — the
distance between the left and right wheels — may
not prevent the vehicle from tilting and rolling over.Also, driving across an incline puts more weight on
the downhill wheels. This could cause a downhill
slide or a rollover.
Surface conditions can be a problem when you drive
across a hill. Loose gravel, muddy spots, or even wet
grass can cause your tires to slip sideways, downhill.
If the vehicle slips sideways, it can hit something that
will trip it — a rock, a rut, etc. — and roll over.
Hidden obstacles can make the steepness of the
incline even worse. If you drive across a rock with the
uphill wheels, or if the downhill wheels drop into a rut
or depression, your vehicle can tilt even more.
For reasons like these, you need to decide carefully
whether to try to drive across an incline. Just because the
trail goes across the incline does not mean you have to
drive it. The last vehicle to try it might have rolled over.
{CAUTION:
Driving across an incline that is too steep will
make your vehicle roll over. You could be
seriously injured or killed. If you have any
doubt about the steepness of the incline, do
not drive across it. Find another route instead.
4-31
Page 399 of 580

Service............................................................5-4
Doing Your Own Service Work.........................5-4
Adding Equipment to the Outside of
Your Vehicle..............................................5-5
Fuel................................................................5-5
Gasoline Octane............................................5-6
Gasoline Speci�cations....................................5-6
California Fuel...............................................5-6
Additives.......................................................5-7
Fuel E85 (85% Ethanol)..................................5-8
Fuels in Foreign Countries...............................5-9
Filling the Tank............................................5-10
Filling a Portable Fuel Container.....................5-12
Checking Things Under the Hood....................5-12
Hood Release..............................................5-13
Engine Compartment Overview.......................5-14
Engine Oil (Gasoline Engine)..........................5-20
Engine Oil Life System
(Gasoline Engine)......................................5-23
Engine Air Cleaner/Filter................................5-25
Automatic Transmission Fluid
(Except Allison Transmission
®) ....................5-27
Automatic Transmission Fluid
(Allison Transmission
®) ...............................5-30Manual Transmission Fluid.............................5-33
Hydraulic Clutch...........................................5-34
Engine Coolant.............................................5-35
Coolant Surge Tank Pressure Cap..................5-38
Engine Overheating.......................................5-38
Overheated Engine Protection Operating Mode
(V8 Engines Only)......................................5-40
Cooling System............................................5-40
Engine Fan Noise.........................................5-45
Power Steering Fluid.....................................5-46
Windshield Washer Fluid................................5-47
Brakes........................................................5-48
Battery........................................................5-51
Jump Starting...............................................5-52
All-Wheel Drive..............................................5-57
Rear Axle.......................................................5-58
Four-Wheel Drive............................................5-59
Front Axle......................................................5-60
Noise Control System.....................................5-61
Tampering with Noise Control System
Prohibited.................................................5-61
Section 5 Service and Appearance Care
5-1
Page 411 of 580
Hood Release
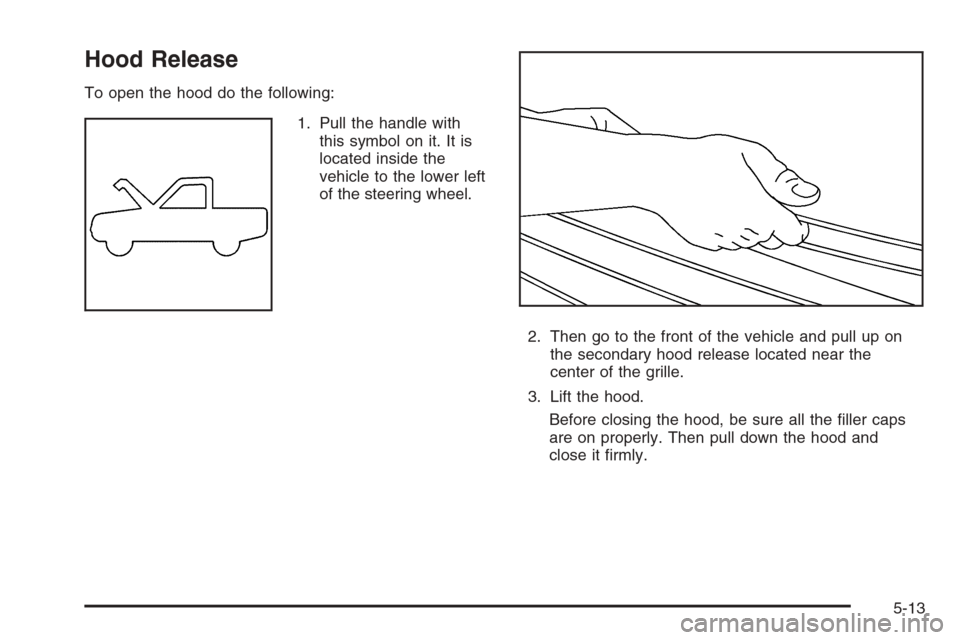
To open the hood do the following:
1. Pull the handle with
this symbol on it. It is
located inside the
vehicle to the lower left
of the steering wheel.
2. Then go to the front of the vehicle and pull up on
the secondary hood release located near the
center of the grille.
3. Lift the hood.
Before closing the hood, be sure all the �ller caps
are on properly. Then pull down the hood and
close it �rmly.
5-13
Page 461 of 580
Headlamps
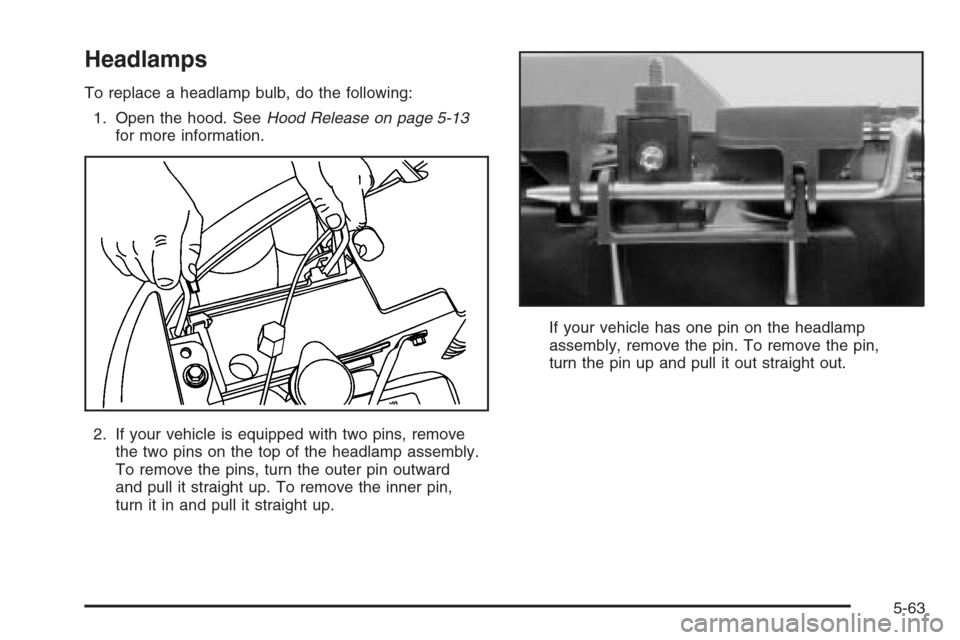
To replace a headlamp bulb, do the following:
1. Open the hood. SeeHood Release on page 5-13
for more information.
2. If your vehicle is equipped with two pins, remove
the two pins on the top of the headlamp assembly.
To remove the pins, turn the outer pin outward
and pull it straight up. To remove the inner pin,
turn it in and pull it straight up.If your vehicle has one pin on the headlamp
assembly, remove the pin. To remove the pin,
turn the pin up and pull it out straight out.
5-63
Page 463 of 580
To replace a front turn signal, sidemarker or DRL bulb,
do the following:
1. Open the hood. SeeHood Release on page 5-13
for more information.
2. Remove the headlamp assembly as described
previously. SeeHeadlamps on page 5-63for
more information.
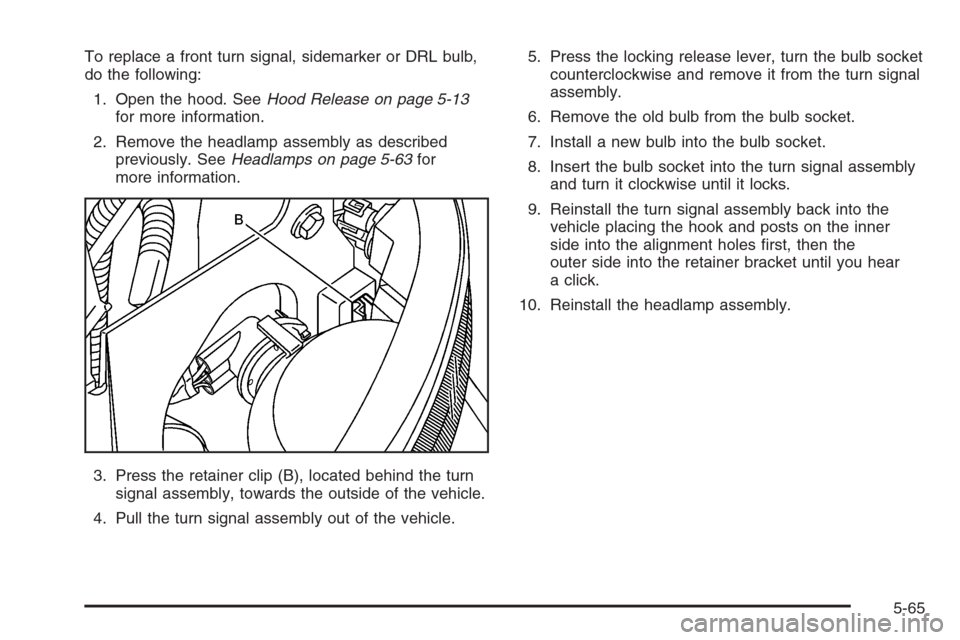
3. Press the retainer clip (B), located behind the turn
signal assembly, towards the outside of the vehicle.
4. Pull the turn signal assembly out of the vehicle.5. Press the locking release lever, turn the bulb socket
counterclockwise and remove it from the turn signal
assembly.
6. Remove the old bulb from the bulb socket.
7. Install a new bulb into the bulb socket.
8. Insert the bulb socket into the turn signal assembly
and turn it clockwise until it locks.
9. Reinstall the turn signal assembly back into the
vehicle placing the hook and posts on the inner
side into the alignment holes �rst, then the
outer side into the retainer bracket until you hear
a click.
10. Reinstall the headlamp assembly.
5-65
Page 544 of 580
(f)Lubricate all key lock cylinders, body door hinges,
hood latch assembly, secondary latch, pivots, spring
anchor, release pawl, tailgate hinges, tailgate linkage,
tailgate handle pivot points, latch bolt, fuel door
hinge, locks, and folding seat hardware. More frequent
lubrication may be required when exposed to a
corrosive environment. Applying silicone grease on
weatherstrips with a clean cloth will make them
last longer, seal better and not stick or squeak.
(g)Check vent hose at transfer case for kinks and
proper installation.
(h)Change automatic transmission �uid and �lter if the
vehicle Gross Vehicle Weight Rating (GVWR) is
over 8600 lbs or if the vehicle is mainly driven under
one or more of these conditions:
�In heavy city traffic where the outside temperature
regularly reaches 90°F (32°C) or higher.
�In hilly or mountainous terrain.
�When doing frequent trailer towing.
�Uses such as found in taxi, police or delivery
service.
(i)Drain, �ush, and re�ll cooling system. This service
can be complex; you should have your dealer perform
this service. See Engine Coolant on page 5-35 for
what to use. Inspect hoses. Clean radiator, condenser,
pressure cap, and �ller neck. Pressure test the
cooling system and pressure cap.(j)A �uid loss in any vehicle system could indicate a
problem. Have the system inspected and repaired and
the �uid level checked. Add �uid if needed.
(k)Inspect system. Check all fuel and vapor lines and
hoses for proper hook-up, routing, and condition.
Check that the purge valve works properly, if equipped.
Replace as needed.
(l)Change clutch �uid (or every 24 months, whichever
occurs �rst).
(m)Change automatic transmission �uid and �lter if the
vehicle is mainly driven under one or more of these
conditions:
�In heavy city traffic where the outside temperature
regularly reaches 90°F (32°C) or higher.
�In hilly or mountainous terrain.
�When doing frequent trailer towing.
�Uses such as found in taxi, police, or delivery
service.
(n)Vehicles with diesel engine or with GVWR above
10,000 lbs (4 536 kg) only: Inspect shields for damage or
looseness. Adjust or replace as required. This is a
Noise Emission Control Service. Applicable to vehicles
sold in the United States and recommended for
vehicles sold in Canada.
(p)If you drive regularly under dusty conditions, inspect
the �lter or change indicator (if equipped) at each
engine oil change.
(q)Visually inspect belt for fraying, excessive cracks, or
obvious damage. Replace belt if necessary.
6-10
Page 573 of 580
Hill and Mountain Roads..................................4-42
HomeLink®Wireless Control System..................2-70
HomeLink®Wireless Control System Operation.....2-71
Hood
Checking Things Under................................5-12
Release.....................................................5-13
Horn ............................................................... 3-6
How to Use This Manual...................................... ii
How to Wear Safety Belts Properly...................1-15
Hydraulic Clutch.............................................5-34
I
Ignition Positions.............................................2-22
Infants and Young Children, Restraints...............1-32
In�ation -- Tire Pressure..................................5-80
Instrument Panel
Overview..................................................... 3-4
Instrument Panel (I/P)
Brightness..................................................3-17
Cluster.......................................................3-32
J
Jump Starting.................................................5-52
K
Keyless Entry System....................................... 2-5
Keys............................................................... 2-3
L
Labelling, Tire Sidewall....................................5-74
Lamps
Auxiliary Roof Mounted Lamp........................3-17
Cargo........................................................3-19
Dome ........................................................3-17
Dome Lamp Override...................................3-18
Fog ...........................................................3-16
Front Reading.............................................3-18
LATCH System
Child Restraints...........................................1-45
Securing a Child Restraint Designed for
the LATCH System...................................1-47
Latches, Seatback............................................ 1-8
Light
Airbag Off..................................................3-34
Airbag Readiness........................................3-34
Anti-Lock Brake System Warning...................3-41
Battery Warning..........................................3-38
Brake System Warning.................................3-40
Cruise Control.............................................3-47
Four-Wheel-Drive.........................................3-48
7