2005 CHEVROLET SILVERADO tow
[x] Cancel search: towPage 152 of 580
Outside Power Camper-Type Mirror
If your vehicle is equipped with outside power
camper-type mirrors, they can be adjusted so you can
have a clear view of objects behind you.
To extend the mirrors move the selector switch,
located above the mirror control, to the middle position.
The mirror control will illuminate. Press the left side
of the mirror control to slide the mirror heads away from
the body of the vehicle. Press the right side of the
mirror control to slide the mirror heads toward the body
of the vehicle.
Outside Power Foldaway Mirrors
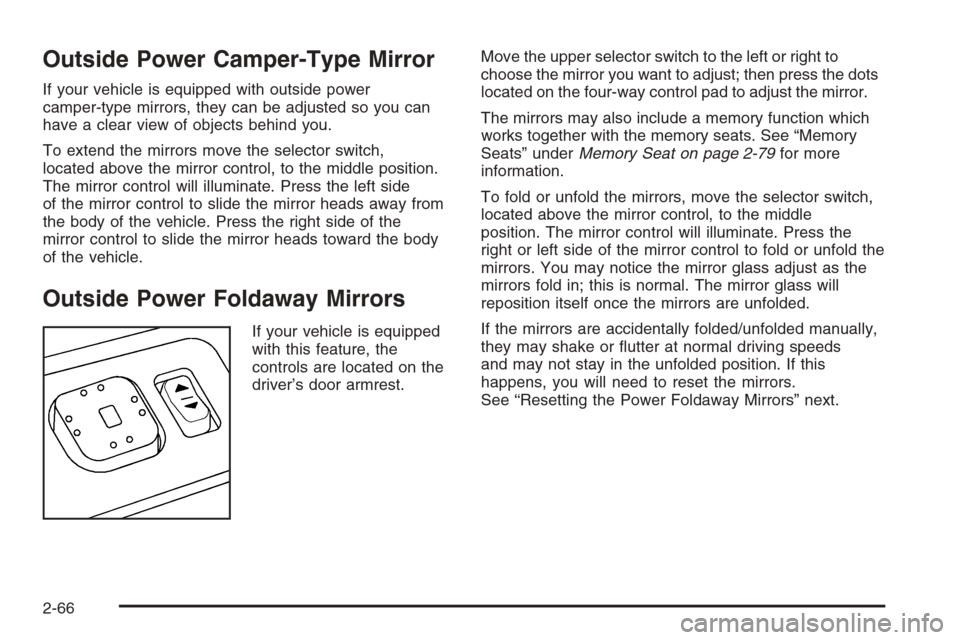
If your vehicle is equipped
with this feature, the
controls are located on the
driver’s door armrest.Move the upper selector switch to the left or right to
choose the mirror you want to adjust; then press the dots
located on the four-way control pad to adjust the mirror.
The mirrors may also include a memory function which
works together with the memory seats. See “Memory
Seats” underMemory Seat on page 2-79for more
information.
To fold or unfold the mirrors, move the selector switch,
located above the mirror control, to the middle
position. The mirror control will illuminate. Press the
right or left side of the mirror control to fold or unfold the
mirrors. You may notice the mirror glass adjust as the
mirrors fold in; this is normal. The mirror glass will
reposition itself once the mirrors are unfolded.
If the mirrors are accidentally folded/unfolded manually,
they may shake or �utter at normal driving speeds
and may not stay in the unfolded position. If this
happens, you will need to reset the mirrors.
See “Resetting the Power Foldaway Mirrors” next.
2-66
Page 162 of 580
Tonneau Cover
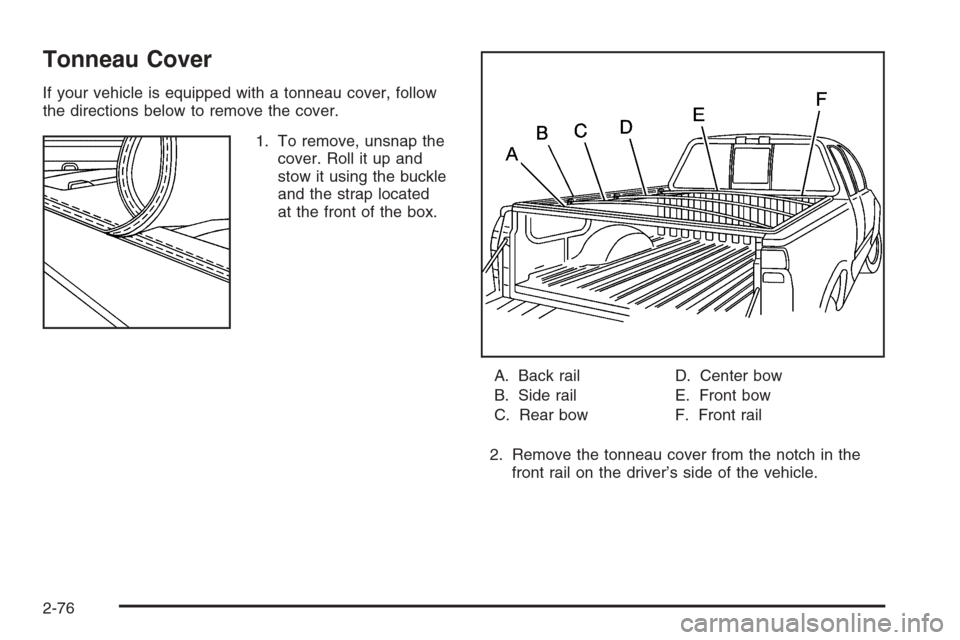
If your vehicle is equipped with a tonneau cover, follow
the directions below to remove the cover.
1. To remove, unsnap the
cover. Roll it up and
stow it using the buckle
and the strap located
at the front of the box.
A. Back rail
B. Side rail
C. Rear bowD. Center bow
E. Front bow
F. Front rail
2. Remove the tonneau cover from the notch in the
front rail on the driver’s side of the vehicle.
2-76
Page 163 of 580
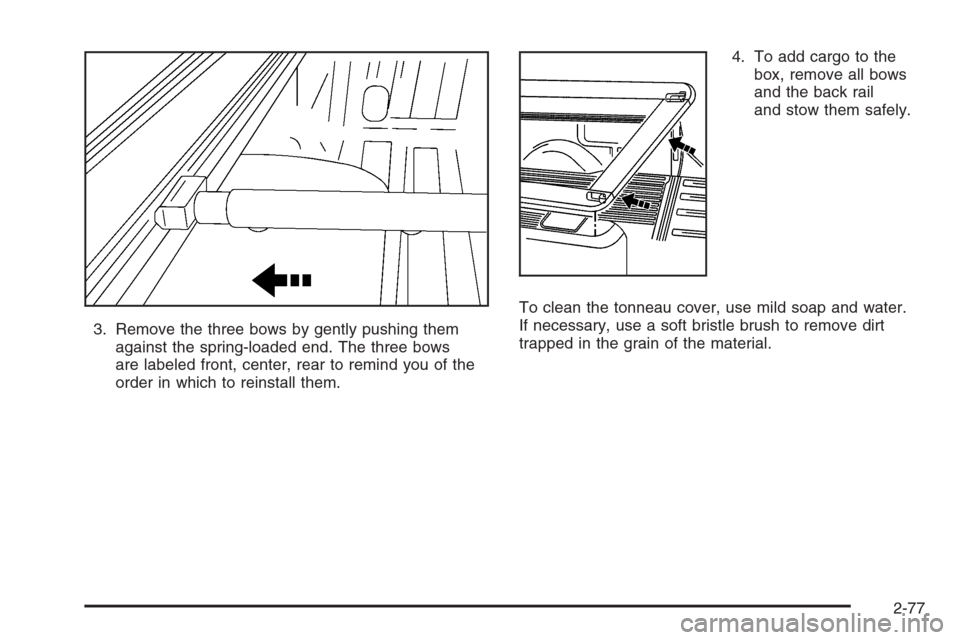
3. Remove the three bows by gently pushing them
against the spring-loaded end. The three bows
are labeled front, center, rear to remind you of the
order in which to reinstall them.4. To add cargo to the
box, remove all bows
and the back rail
and stow them safely.
To clean the tonneau cover, use mild soap and water.
If necessary, use a soft bristle brush to remove dirt
trapped in the grain of the material.
2-77
Page 168 of 580
Anti-Lock Brake System Warning Light.............3-41
Traction Off Light..........................................3-41
Engine Coolant Temperature Gage..................3-42
Transmission Temperature Gage.....................3-42
Malfunction Indicator Lamp.............................3-44
Oil Pressure Gage........................................3-46
Security Light...............................................3-47
Cruise Control Light......................................3-47
Highbeam On Light.......................................3-48
Four-Wheel-Drive Light..................................3-48
Tow/Haul Mode Light....................................3-48
Overdrive Disable
(Allison Transmission
®Only)........................3-48
Fuel Gage...................................................3-49
Low Fuel Warning Light.................................3-49
Driver Information Center (DIC).......................3-50
DIC Operation and Displays...........................3-51
DIC Warnings and Messages.........................3-54
DIC Vehicle Customization.............................3-63Audio System(s).............................................3-69
Setting the Time for Radios without Radio
Data Systems (RDS)..................................3-69
Setting the Time for Radios with Radio
Data Systems (RDS)..................................3-70
AM-FM Radio...............................................3-70
Radio with CD..............................................3-73
Radio with Cassette and CD..........................3-83
Radio with Six-Disc CD.................................3-98
Rear Seat Entertainment System...................3-112
Rear Seat Audio (RSA)................................3-122
Theft-Deterrent Feature................................3-124
Audio Steering Wheel Controls......................3-124
Radio Reception.........................................3-125
Care of the Cassette Tape Player.................3-125
Care of Your CDs and DVDs........................3-126
Care of the CD and DVD Player...................3-127
Fixed Mast Antenna....................................3-127
XM™ Satellite Radio Antenna System............3-127
Chime Level Adjustment...............................3-127
Section 3 Instrument Panel
3-2
Page 171 of 580

The main components of your instrument panel are the following:
A. Dome Lamp Button. SeeDome Lamps on page 3-17.
B. Headlamp Controls. SeeHeadlamps on page 3-13.
C. Air Outlets. SeeOutlet Adjustment on page 3-30.
D. Automatic Transfer Case/Electronic Transfer Case/
Traction Assist System (TAS). SeeFour-Wheel Drive
on page 2-37andTraction Assist System (TAS)
on page 4-8.
E. Multifunction Lever. SeeTurn Signal/Multifunction
Lever on page 3-7.
F. Instrument Panel Cluster. SeeInstrument Panel
Cluster on page 3-32.
G. Gearshift Lever (Automatic Transmission).
SeeAutomatic Transmission Operation on page 2-26
orManual Transmission Operation on page 2-32
for manual transmissions.
H. Tow/Haul Selector and Overdrive Disable
(Allison Transmission
®Only) Button (If Equipped).
SeeTow/Haul Mode on page 2-30.
I. Audio System. SeeAudio System(s) on page 3-69.
J. Climate Control System. SeeClimate Control
System on page 3-20,Dual Climate Control System
on page 3-22andDual Automatic Climate Control
System on page 3-24.
K. Instrument Panel Fuse Block.Instrument Panel Fuse
Block on page 5-124.
L. Cargo Lamp Button. SeeCargo Lamp on page 3-19.M. Hood Release. SeeHood Release on page 5-13.
N. Steering Wheel Control Buttons (If Equipped).
SeeDriver Information Center (DIC) on page 3-50
orAudio Steering Wheel Controls on page 3-124.
O. Center Instrument Panel Block. SeeCenter
Instrument Panel Fuse Block on page 5-126.
P. Parking Brake Release. SeeParking Brake on
page 2-51.
Q. Tilt Wheel Lever. SeeTilt Wheel on page 3-6.
R. Lighter and Accessory Power Outlet. SeeAccessory
Power Outlet(s) on page 3-19, andAshtray(s) and
Cigarette Lighter on page 3-20.
S. Storage Area. SeeFront Storage Area on page 2-75.
T. Ashtray. SeeAshtray(s) and Cigarette Lighter on
page 3-20.
U. Manual Selectable Ride Control (If Equipped).
SeeManual Selectable Ride on page 4-11.
V. 4-Wheel Steer Button (If Equipped).
SeeQUADRASTEER™ on page 4-14.
W. Passenger Airbag Off Switch (If Equipped).
SeeAirbag Off Switch on page 1-70.
X. Auxiliary Roof Mounted Lamp Button (If Equipped).
SeeAuxiliary Roof Mounted Lamp on page 3-17.
Y. Glove Box. SeeGlove Box on page 2-75.
3-5
Page 174 of 580
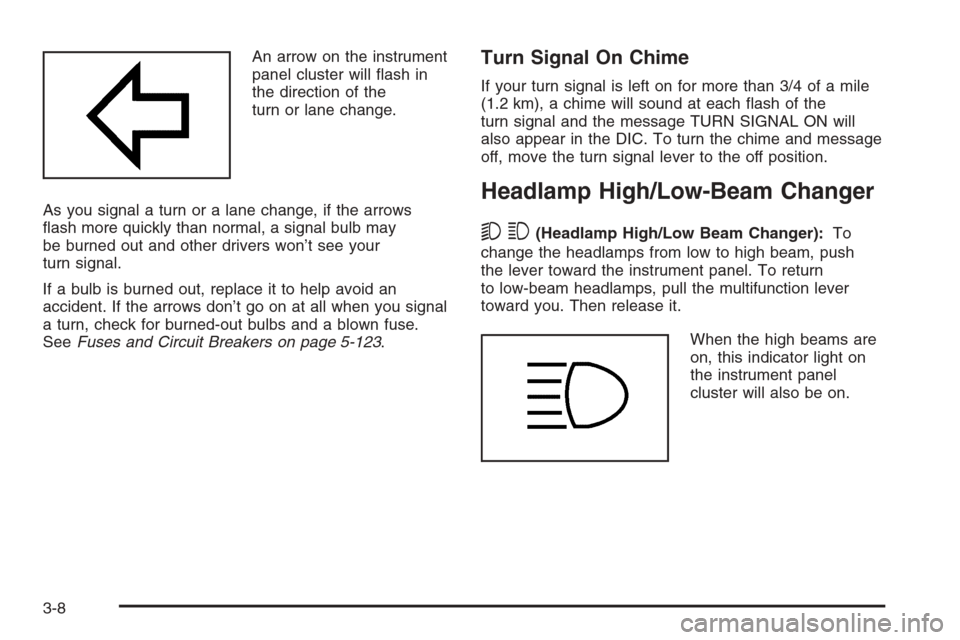
An arrow on the instrument
panel cluster will �ash in
the direction of the
turn or lane change.
As you signal a turn or a lane change, if the arrows
�ash more quickly than normal, a signal bulb may
be burned out and other drivers won’t see your
turn signal.
If a bulb is burned out, replace it to help avoid an
accident. If the arrows don’t go on at all when you signal
a turn, check for burned-out bulbs and a blown fuse.
SeeFuses and Circuit Breakers on page 5-123.Turn Signal On Chime
If your turn signal is left on for more than 3/4 of a mile
(1.2 km), a chime will sound at each �ash of the
turn signal and the message TURN SIGNAL ON will
also appear in the DIC. To turn the chime and message
off, move the turn signal lever to the off position.
Headlamp High/Low-Beam Changer
53(Headlamp High/Low Beam Changer):To
change the headlamps from low to high beam, push
the lever toward the instrument panel. To return
to low-beam headlamps, pull the multifunction lever
toward you. Then release it.
When the high beams are
on, this indicator light on
the instrument panel
cluster will also be on.
3-8
Page 175 of 580
Flash-to-Pass
This feature lets you use your high-beam headlamps to
signal a driver in front of you that you want to pass.
It works even if your headlamps are in the automatic
position.
To use it, pull the turn signal lever toward you, then
release it.
If your headlamps are in the automatic position or on
low beam, your high-beam headlamps will turn on.
They’ll stay on as long as you hold the lever toward you.
The high-beam indicator on the instrument panel
cluster will come on. Release the lever to return to
normal operation.
Windshield Wipers
Be sure to clear ice and snow from the wiper blades
before using them. If they are frozen to the windshield,
gently loosen or thaw them. Damaged wiper blades
may not clear the windshield well, making it harder to
see and drive safely. If the blades do become damaged,
install new blades or blade inserts. For more information,
seeWindshield Wiper Blade Replacement on page 5-72
Heavy snow or ice can overload the wiper motor.
A circuit breaker will stop the motor until it cools down.
Clear away snow or ice to prevent an overload.You control the windshield wipers by turning the band
with the wiper symbol on it.
8(Mist):For a single wiping cycle, turn the band to
mist. Hold it there until the wipers start. Then let go.
The wipers will stop after one wipe. If you want
more wipes, hold the band on mist longer.
N(Delay):You can set the wiper speed for a long or
short delay between wipes. This can be very useful
in light rain or snow. Turn the band to choose the delay
time. The closer to the top of the lever, the shorter
the delay.
6(Low Speed):For steady wiping at low speed,
turn the band away from you to the �rst solid band past
the delay settings. For high-speed wiping, turn the
band further, to the second solid band past the delay
settings. To stop the wipers, move the band to off.
1(High Speed):For high-speed wiping, turn
the band further, to the second solid band past the
delay settings.
9(Off):To stop the wipers, move the band to off.
3-9
Page 180 of 580

AUTO (Automatic):Turning the control to this position
puts the system into automatic headlamp mode.
;(Parking Lamps):Turning the control to this
position turns on the parking lamps, together with the
following:
Sidemarker Lamps
Taillamps
License Plate Lamps
Instrument Panel Lights
Roof Marker Lamps (If Equipped)
5(Headlamps):Turning the control to this position
turns on the headlamps, together with the previously
listed lamps and lights.
You can switch your headlamps from high to low-beam
by pushing the turn signal/high-beam lever towards
the instrument panel.
A circuit breaker protects your headlamps. If you have
an electrical overload, your headlamps will �icker on and
off. Have your headlamp wiring checked right away if
this happens.
Headlamps on Reminder
A reminder chime will sound when your headlamps or
parking lamps are manually turned on and your ignition is
off, in LOCK, ACCESSORY, or a door is open. To disable
the chime, turn the light off then back on.
Daytime Running Lamps (DRL)
Daytime Running Lamps (DRL) can make it easier for
others to see the front of your vehicle during the
day. DRL can be helpful in many different driving
conditions, but they can be especially helpful in the short
periods after dawn and before sunset. Fully functional
daytime running lamps are required on all vehicles
�rst sold in Canada.
The DRL system will come on when the following
conditions are met:
The ignition is on
The exterior lamps control is in AUTO
The automatic transmission is not in PARK (P)
The light sensor determines it is daytime
3-14