2005 CHEVROLET SILVERADO brake light
[x] Cancel search: brake lightPage 324 of 580
Driving Downhill
When off-roading takes you downhill, you will want to
consider a number of things:
How steep is the downhill? Will I be able to maintain
vehicle control?
What is the surface like? Smooth? Rough?
Slippery? Hard-packed dirt? Gravel?
Are there hidden surface obstacles? Ruts? Logs?
Boulders?
What is at the bottom of the hill? Is there a hidden
creek bank or even a river bottom with large rocks?
If you decide you can go down a hill safely, then try to
keep your vehicle headed straight down, and use a
low gear. This way, engine drag can help your brakes
and they will not have to do all the work. Descend
slowly, keeping your vehicle under control at all times.
{CAUTION:
Heavy braking when going down a hill can
cause your brakes to overheat and fade. This
could cause loss of control and a serious
accident. Apply the brakes lightly when
descending a hill and use a low gear to keep
vehicle speed under control.
Q:Are there some things I should not do when
driving down a hill?
A:Yes! These are important because if you ignore them
you could lose control and have a serious accident.
When driving downhill, avoid turns that take you
across the incline of the hill. A hill that is not too steep
to drive down may be too steep to drive across.
You could roll over if you do not drive straight down.
Never go downhill with the transmission in
NEUTRAL (N), or with the clutch pedal pressed
down with a manual transmission. This is called
“free-wheeling.” Your brakes will have to do all the
work and could overheat and fade.
4-30
Page 331 of 580
The heavier the rain, the harder it is to see. Even if your
windshield wiper blades are in good shape, a heavy rain
can make it harder to see road signs and traffic signals,
pavement markings, the edge of the road, and even
people walking.
It is wise to keep your wiping equipment in good shape
and keep your windshield washer �uid reservoir �lled with
washer �uid. Replace your windshield wiper inserts when
they show signs of streaking or missing areas on the
windshield, or when strips of rubber start to separate from
the inserts.
{CAUTION:
Wet brakes can cause accidents. They will not
work as well in a quick stop and may cause
pulling to one side. You could lose control of
the vehicle.
After driving through a large puddle of water or
a car wash, apply your brake pedal lightly until
your brakes work normally.
Driving too fast through large water puddles or even
going through some car washes can cause problems,
too. The water may affect your brakes. Try to avoid
puddles. But if you cannot, try to slow down before you
hit them.
Hydroplaning
Hydroplaning is dangerous. So much water can build up
under your tires that they can actually ride on the
water. This can happen if the road is wet enough and
you are going fast enough. When your vehicle is
hydroplaning, it has little or no contact with the road.
Hydroplaning does not happen often. But it can if your
tires do not have much tread or if the pressure in
one or more is low. It can happen if a lot of water is
standing on the road. If you can see re�ections
from trees, telephone poles, or other vehicles, and
raindrops dimple the water’s surface, there could be
hydroplaning.
Hydroplaning usually happens at higher speeds. There
just is not a hard and fast rule about hydroplaning.
The best advice is to slow down when it is raining.
Driving Through Deep Standing Water
Notice:If you drive too quickly through deep
puddles or standing water, water can come in
through your engine’s air intake and badly damage
your engine. Never drive through water that is
slightly lower than the underbody of your vehicle.
If you cannot avoid deep puddles or standing water,
drive through them very slowly.
4-37
Page 386 of 580
Driving On Grades
Reduce speed and shift to a lower gearbeforeyou start
down a long or steep downgrade. If you don’t shift
down, you might have to use your brakes so much that
they would get hot and no longer work well.
If you have an automatic transmission, you can tow in
DRIVE (D). You may want to shift the transmission
to lower gear selection if the transmission shifts too often
(e.g., under heavy loads and/or hilly conditions).
You may also want to activate the tow/haul mode if the
transmission shifts too often. SeeTow/Haul Mode
Light on page 3-48.
If you have a 5-speed manual transmission and you are
towing a trailer, it’s better not to use FIFTH (5) gear.
Just drive in FOURTH (4) gear (or, as you need
to, a lower gear).If you have a 6-speed manual transmission and you are
towing a trailer, it’s better not to use SIXTH (6) gear.
Drive in FIFTH (5) gear (or, as you need to, a lower gear).
When towing at high altitude on steep uphill grades,
consider the following: Engine coolant will boil at a lower
temperature than at normal altitudes. If you turn your
engine off immediately after towing at high altitude
on steep uphill grades, your vehicle may show signs
similar to engine overheating. To avoid this, let the
engine run while parked, preferably on level ground, with
the automatic transmission in PARK (P) for a few
minutes before turning the engine off. For manual
transmissions, let the engine run while parked,
preferably on level ground, with the transmission out of
gear and the parking brake applied, for a few minutes
before turning the engine off. If you do get the overheat
warning, seeEngine Overheating on page 5-38.
4-92
Page 389 of 580
Basic Trailer Wiring
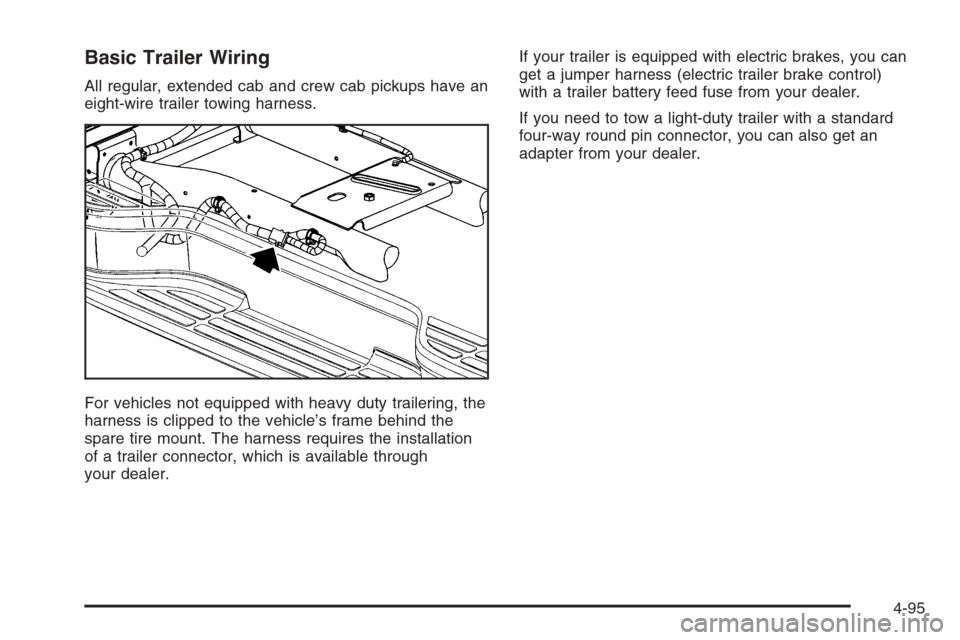
All regular, extended cab and crew cab pickups have an
eight-wire trailer towing harness.
For vehicles not equipped with heavy duty trailering, the
harness is clipped to the vehicle’s frame behind the
spare tire mount. The harness requires the installation
of a trailer connector, which is available through
your dealer.If your trailer is equipped with electric brakes, you can
get a jumper harness (electric trailer brake control)
with a trailer battery feed fuse from your dealer.
If you need to tow a light-duty trailer with a standard
four-way round pin connector, you can also get an
adapter from your dealer.
4-95
Page 390 of 580
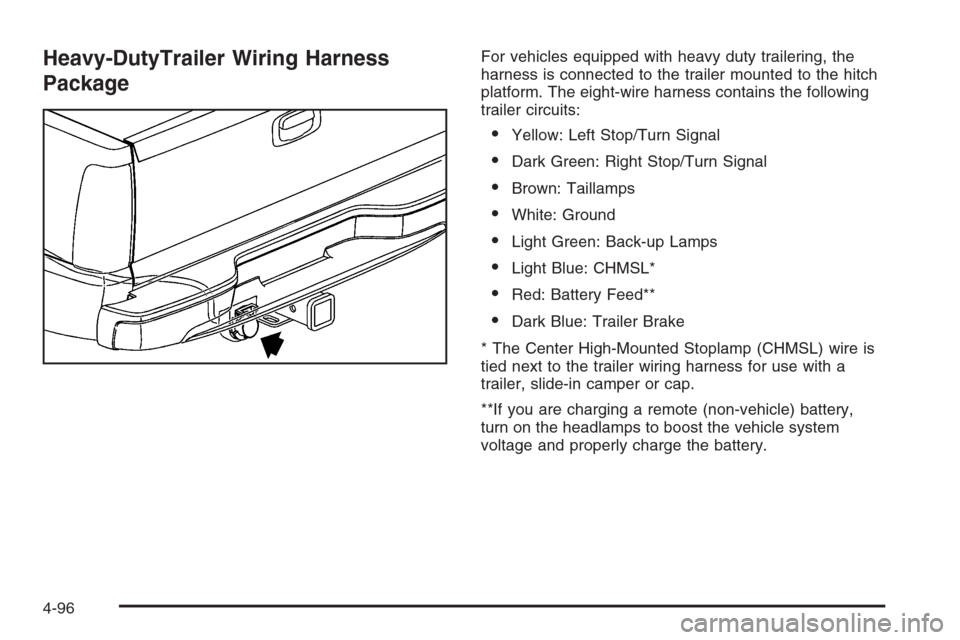
Heavy-DutyTrailer Wiring Harness
PackageFor vehicles equipped with heavy duty trailering, the
harness is connected to the trailer mounted to the hitch
platform. The eight-wire harness contains the following
trailer circuits:
Yellow: Left Stop/Turn Signal
Dark Green: Right Stop/Turn Signal
Brown: Taillamps
White: Ground
Light Green: Back-up Lamps
Light Blue: CHMSL*
Red: Battery Feed**
Dark Blue: Trailer Brake
* The Center High-Mounted Stoplamp (CHMSL) wire is
tied next to the trailer wiring harness for use with a
trailer, slide-in camper or cap.
**If you are charging a remote (non-vehicle) battery,
turn on the headlamps to boost the vehicle system
voltage and properly charge the battery.
4-96
Page 391 of 580
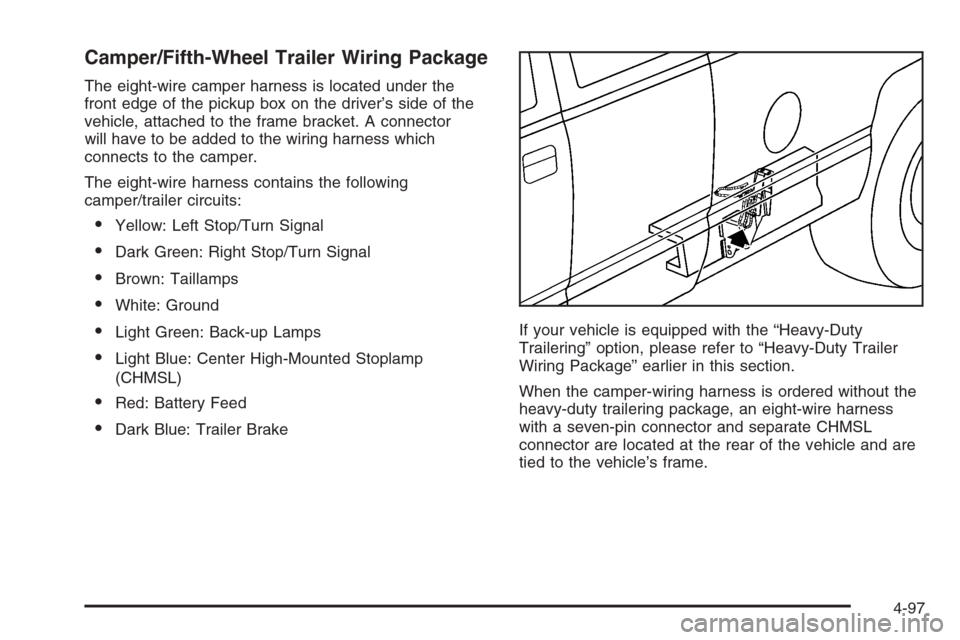
Camper/Fifth-Wheel Trailer Wiring Package
The eight-wire camper harness is located under the
front edge of the pickup box on the driver’s side of the
vehicle, attached to the frame bracket. A connector
will have to be added to the wiring harness which
connects to the camper.
The eight-wire harness contains the following
camper/trailer circuits:
Yellow: Left Stop/Turn Signal
Dark Green: Right Stop/Turn Signal
Brown: Taillamps
White: Ground
Light Green: Back-up Lamps
Light Blue: Center High-Mounted Stoplamp
(CHMSL)
Red: Battery Feed
Dark Blue: Trailer BrakeIf your vehicle is equipped with the “Heavy-Duty
Trailering” option, please refer to “Heavy-Duty Trailer
Wiring Package” earlier in this section.
When the camper-wiring harness is ordered without the
heavy-duty trailering package, an eight-wire harness
with a seven-pin connector and separate CHMSL
connector are located at the rear of the vehicle and are
tied to the vehicle’s frame.
4-97
Page 395 of 580
Power Take-Off (PTO)
Before using a Power Take-Off (PTO), if equipped,
refer to the manufacturer’s or installer’s instructions.
To engage a PTO on a vehicle with a manual
transmission do the following:
1. Hold the clutch pedal down.
2. Set the parking brake.
3. Shift the transmission into NEUTRAL.
4. Engage the PTO. Refer to the manufacturer’s
or installer’s for instructions on electrically
engaged PTOs.
5. For mobile operations, shift the transmission into
the gear you want, apply the regular brakes and
release the parking brake. For stationary operations,
leave the parking brake applied.
6. Release the clutch and regular brakes as you
normally would. When the clutch is released,
the PTO will start.
7. Turn the PTO rotary switch to ON.To engage a PTO on a vehicle with an automatic
transmission do the following:
1. For stationary use shift the transmission into
PARK (P).
2. Turn the PTO rotary switch ON.
3. If the engine speed is below the PTO engage
speed limit, the PTO will start. The blinking LED
on the PTO control switch indicates PTO engage is
requested. When PTO engages the LED will
switch from blinking to a steady light.
To use PTO speed control in Preset Mode (Factory
Setting) do the following:
1. Engage the PTO.
2. Select PARK (P) or NEUTRAL (N) range. Apply the
parking brake if NEUTRAL (N) is selected. Torque
Converter Clutch (TCC) is not available in
NEUTRAL (N) and is available only in PARK (P)
when engine speed is above 1,100 rpm.
3. Make sure your foot is off the brake pedal (and off
the clutch on vehicles equipped with a manual
transmission).
4. Select the desired engine speed for PTO operation.
Read the following preset mode information
regarding operation.
4-101
Page 448 of 580
Brake Wear
Your vehicle has front disc brakes and may have rear
drum brakes or rear disc brakes.
Disc brake pads have built-in wear indicators that make
a high-pitched warning sound when the brake pads
are worn and new pads are needed. The sound
may come and go or be heard all the time your vehicle
is moving, except when you are pushing on the
brake pedal �rmly.
{CAUTION:
The brake wear warning sound means that soon
your brakes will not work well. That could lead
to an accident. When you hear the brake wear
warning sound, have your vehicle serviced.
Notice:Continuing to drive with worn-out brake
pads could result in costly brake repair.
Some driving conditions or climates may cause a brake
squeal when the brakes are �rst applied or lightly
applied. This does not mean something is wrong with
your brakes.Properly torqued wheel nuts are necessary to help
prevent brake pulsation. When tires are rotated, inspect
brake pads for wear and evenly tighten wheel nuts in
the proper sequence to GM torque speci�cations.
If you have rear drum brakes, they do not have wear
indicators, but if you ever hear a rear brake rubbing
noise, have the rear brake linings inspected immediately.
Rear brake drums should be removed and inspected
each time the tires are removed for rotation or changing.
Drum brakes have an inspection hole to inspect lining
wear during scheduled maintenance. When you
have the front brake pads replaced, have the rear
brakes inspected, too.
Brake linings should always be replaced as complete
axle sets.
Brake Pedal Travel
See your dealer if the brake pedal does not return to
normal height, or if there is a rapid increase in
pedal travel. This could be a sign of brake trouble.
Brake Adjustment
Every time you make a brake stop, your brakes adjust
for wear.
5-50