2005 CHEVROLET MALIBU trunk
[x] Cancel search: trunkPage 14 of 434
Rear Seats
Rear Seat Operation
Folding the Seatback
Your vehicle may have a split folding rear seatback.
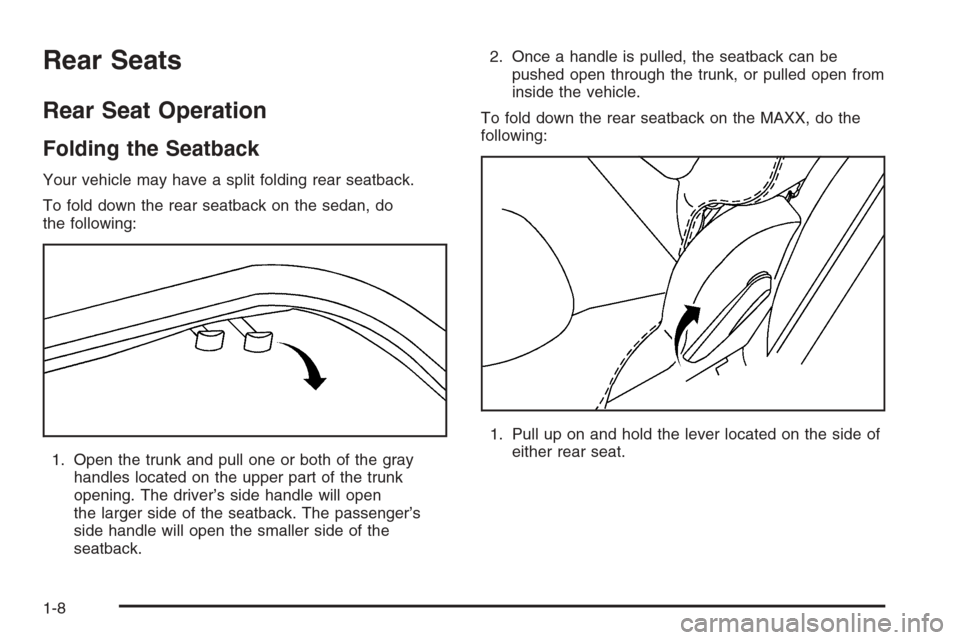
To fold down the rear seatback on the sedan, do
the following:
1. Open the trunk and pull one or both of the gray
handles located on the upper part of the trunk
opening. The driver’s side handle will open
the larger side of the seatback. The passenger’s
side handle will open the smaller side of the
seatback.2. Once a handle is pulled, the seatback can be
pushed open through the trunk, or pulled open from
inside the vehicle.
To fold down the rear seatback on the MAXX, do the
following:
1. Pull up on and hold the lever located on the side of
either rear seat.
1-8
Page 83 of 434
Keys...............................................................2-3
Remote Keyless Entry System.........................2-4
Remote Keyless Entry System Operation...........2-5
Doors and Locks............................................2-11
Door Locks..................................................2-11
Power Door Locks........................................2-12
Door Ajar Reminder......................................2-12
Delayed Locking...........................................2-12
Programmable Automatic Door Locks..............2-13
Lockout Protection........................................2-13
Trunk (Sedan)..............................................2-14
Liftgate (MAXX)............................................2-15
Windows........................................................2-16
Power Windows............................................2-17
Sun Visors...................................................2-17
Theft-Deterrent Systems..................................2-17
Content Theft-Deterrent.................................2-18
PASS-Key
®III+............................................2-19
PASS-Key®III+ Operation..............................2-20Starting and Operating Your Vehicle................2-21
New Vehicle Break-In....................................2-21
Ignition Positions..........................................2-22
Retained Accessory Power (RAP)...................2-22
Starting the Engine.......................................2-23
Adjustable Throttle and Brake Pedal................2-24
Engine Coolant Heater..................................2-24
Automatic Transaxle Operation (Base Model). . . .2-26
Parking Brake..............................................2-29
Shifting Into Park (P).....................................2-29
Shifting Out of Park (P).................................2-31
Parking Over Things That Burn.......................2-31
Engine Exhaust............................................2-32
Running the Engine While Parked...................2-32
Mirrors...........................................................2-33
Manual Rearview Mirror.................................2-33
Manual Rearview Mirror with OnStar
®..............2-33
Automatic Dimming Rearview Mirror with
OnStar
®and Compass...............................2-34
Automatic Dimming Rearview Mirror with
Compass.................................................2-35
Outside Power Mirrors...................................2-37
Outside Power Heated Mirrors........................2-38
Outside Convex Mirror...................................2-38
Section 2 Features and Controls
2-1
Page 87 of 434
At times you may notice a decrease in range. This is
normal for any remote keyless entry system. If the
transmitter does not work or if you have to stand closer
to your vehicle for the transmitter to work, try this:
Check the distance. You may be too far from your
vehicle. You may need to stand closer during
rainy or snowy weather.
Check the location. Other vehicles or objects may
be blocking the signal. Take a few steps to the
left or right, hold the transmitter higher, and
try again.
Check to determine if battery replacement is
necessary. See “Battery Replacement” under
Remote Keyless Entry System Operation on
page 2-5.
If you are still having trouble, see your dealer or a
quali�ed technician for service.
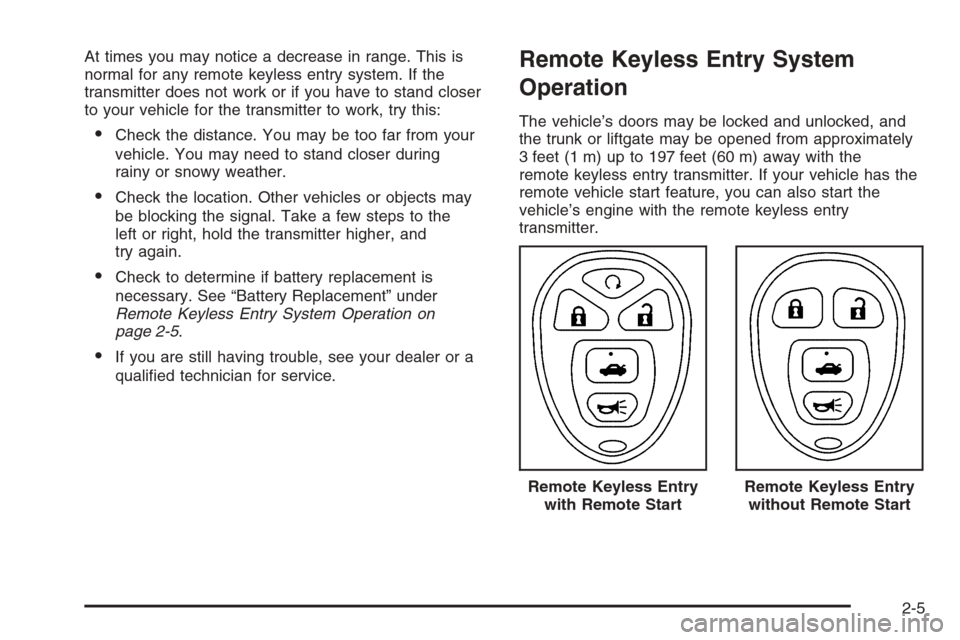
Remote Keyless Entry System
Operation
The vehicle’s doors may be locked and unlocked, and
the trunk or liftgate may be opened from approximately
3 feet (1 m) up to 197 feet (60 m) away with the
remote keyless entry transmitter. If your vehicle has the
remote vehicle start feature, you can also start the
vehicle’s engine with the remote keyless entry
transmitter.
Remote Keyless Entry
with Remote Start
Remote Keyless Entry
without Remote Start
2-5
Page 89 of 434
V(Remote Trunk/Liftgate Release):The trunk or
liftgate will open when this button on the transmitter
is pressed and held for approximately one second. You
can open the sedan trunk with the transmitter when
the vehicle is stationary. You can open the liftgate on the
MAXX only when the vehicle is in PARK (P).
L(Vehicle Locator/Panic Alarm):This button may
be used to locate your vehicle. Press and release
this button to initiate vehicle locate. The horn will sound
three times and the headlamps and parking lamps
will �ash three times. Press and hold the button
for approximately three seconds to initiate the panic
alarm. The horn will sound and the headlamps
and parking lamps will �ash for 30 seconds. Press the
button again to cancel the panic alarm.
Matching Transmitter(s) to Your
Vehicle
Each remote keyless entry transmitter is coded to
prevent another transmitter from unlocking your vehicle.
If a transmitter is lost or stolen, a replacement can
be purchased through your GM dealer. Remember to
bring any remaining transmitters with you when you go
to your dealer. Each vehicle can have a maximum of
four transmitters matched to it.
Battery Replacement
Under normal use, the battery in your remote keyless
entry transmitter should last about four years.
You can tell the battery is weak if the transmitter will not
work at the normal range in any location. If you have
to get close to your vehicle before the transmitter works,
it is probably time to change the battery.
The KEY FOB BATT LOW message in the vehicle’s
DIC will display if the remote keyless entry transmitter
battery is low.
2-7
Page 96 of 434
Trunk (Sedan)
To unlock the trunk from the outside, use the key or the
remote keyless entry transmitter. When closing the
trunk, close from the center to ensure it fully latches.
{CAUTION:
It can be dangerous to drive with the trunk lid
open because carbon monoxide (CO) gas can
come into your vehicle. You cannot see or
smell CO. It can cause unconsciousness and
even death. If you must drive with the trunk lid
open or if electrical wiring or other cable
connections must pass through the seal
between the body and the trunk lid:
Make sure all other windows are shut.
Turn the fan on your heating or cooling
system to its highest speed and select the
control setting that will force outside air
into your vehicle. See Climate Control
System.
If you have air outlets on or under the
instrument panel, open them all the way.
SeeEngine Exhaust on page 2-32.
Remote Trunk/Liftgate Release
Press the remote release
button, located on the
lower edge of the driver’s
door, to open the trunk
lid or the liftgate.
You can open the trunk lid on the sedan while the
vehicle is stationary.
You can open the liftgate on the MAXX only while the
vehicle is in PARK (P).
2-14
Page 97 of 434
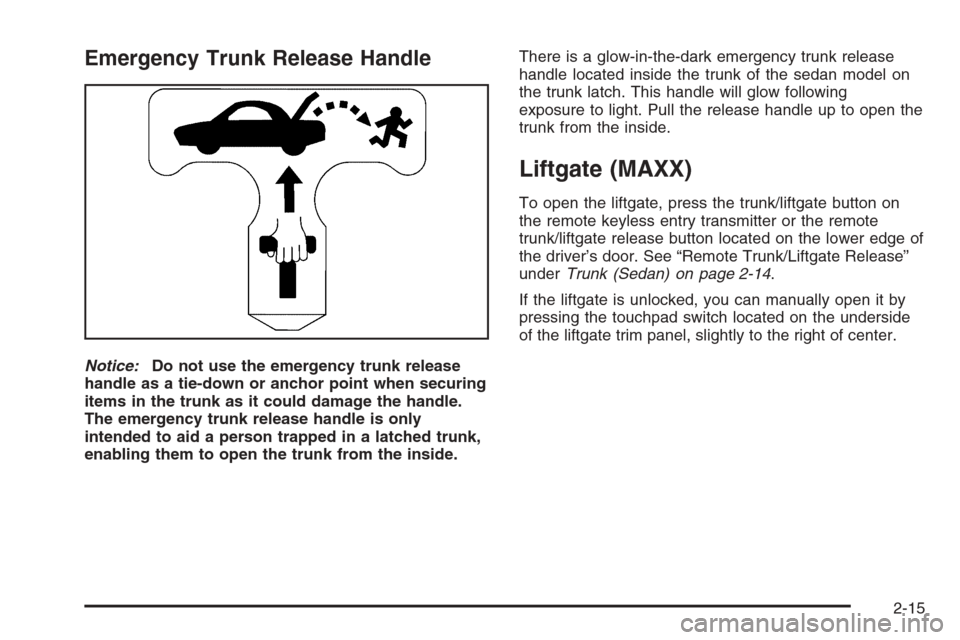
Emergency Trunk Release Handle
Notice:Do not use the emergency trunk release
handle as a tie-down or anchor point when securing
items in the trunk as it could damage the handle.
The emergency trunk release handle is only
intended to aid a person trapped in a latched trunk,
enabling them to open the trunk from the inside.There is a glow-in-the-dark emergency trunk release
handle located inside the trunk of the sedan model on
the trunk latch. This handle will glow following
exposure to light. Pull the release handle up to open the
trunk from the inside.
Liftgate (MAXX)
To open the liftgate, press the trunk/liftgate button on
the remote keyless entry transmitter or the remote
trunk/liftgate release button located on the lower edge of
the driver’s door. See “Remote Trunk/Liftgate Release”
underTrunk (Sedan) on page 2-14.
If the liftgate is unlocked, you can manually open it by
pressing the touchpad switch located on the underside
of the liftgate trim panel, slightly to the right of center.
2-15
Page 131 of 434
Instrument Panel Overview...............................3-4
Hazard Warning Flashers................................3-6
Other Warning Devices...................................3-6
Horn .............................................................3-6
Tilt Wheel.....................................................3-7
Turn Signal/Multifunction Lever.........................3-7
Turn and Lane-Change Signals........................3-8
Headlamp High/Low-Beam Changer..................3-8
Flash-to-Pass.................................................3-8
Windshield Wipers..........................................3-9
Windshield Washer.......................................3-10
Cruise Control..............................................3-10
Exterior Lamps.............................................3-13
Headlamps on Reminder................................3-16
Headlamps Off in PARK (P)...........................3-16
Delayed Headlamps......................................3-16
Daytime Running Lamps (DRL).......................3-16
Automatic Headlamp System..........................3-17
Fog Lamps ..................................................3-18
Instrument Panel Brightness...........................3-18
Dome Lamp .................................................3-18
Entry/Exit Lighting.........................................3-19
Front Reading Lamps....................................3-19
Rear Reading Lamps....................................3-19
Trunk Lamp.................................................3-19Cargo Lamp.................................................3-19
Battery Run-Down Protection..........................3-20
Accessory Power Outlet(s).............................3-20
Climate Controls............................................3-21
Climate Control System.................................3-21
Automatic Climate Control System...................3-25
Outlet Adjustment.........................................3-29
Warning Lights, Gages, and Indicators............3-30
Instrument Panel Cluster................................3-31
Speedometer and Odometer...........................3-32
Trip Odometer..............................................3-32
Tachometer.................................................3-32
Safety Belt Reminder Light.............................3-33
Passenger Safety Belt Reminder Light.............3-33
Airbag Readiness Light..................................3-34
Passenger Airbag Status Indicator...................3-35
Charging System Light..................................3-37
Brake System Warning Light..........................3-37
Anti-Lock Brake System Warning Light.............3-38
Enhanced Traction System Warning Light.........3-39
Enhanced Traction System Active Light............3-39
Engine Coolant Temperature Warning Light......3-40
Engine Coolant Temperature Gage..................3-40
Malfunction Indicator Lamp.............................3-41
Section 3 Instrument Panel
3-1
Page 149 of 434
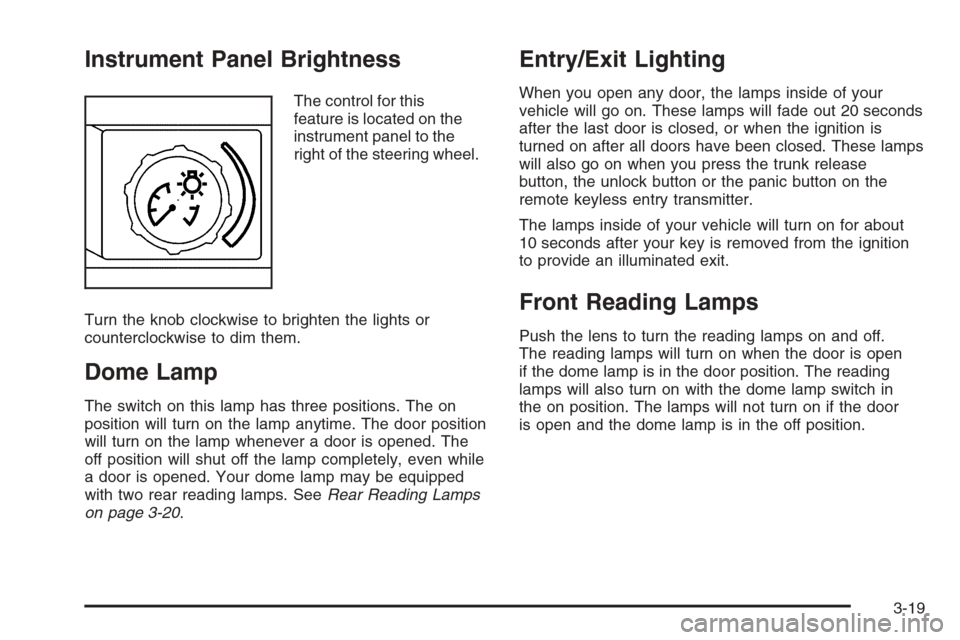
Instrument Panel Brightness
The control for this
feature is located on the
instrument panel to the
right of the steering wheel.
Turn the knob clockwise to brighten the lights or
counterclockwise to dim them.
Dome Lamp
The switch on this lamp has three positions. The on
position will turn on the lamp anytime. The door position
will turn on the lamp whenever a door is opened. The
off position will shut off the lamp completely, even while
a door is opened. Your dome lamp may be equipped
with two rear reading lamps. SeeRear Reading Lamps
on page 3-20.
Entry/Exit Lighting
When you open any door, the lamps inside of your
vehicle will go on. These lamps will fade out 20 seconds
after the last door is closed, or when the ignition is
turned on after all doors have been closed. These lamps
will also go on when you press the trunk release
button, the unlock button or the panic button on the
remote keyless entry transmitter.
The lamps inside of your vehicle will turn on for about
10 seconds after your key is removed from the ignition
to provide an illuminated exit.
Front Reading Lamps
Push the lens to turn the reading lamps on and off.
The reading lamps will turn on when the door is open
if the dome lamp is in the door position. The reading
lamps will also turn on with the dome lamp switch in
the on position. The lamps will not turn on if the door
is open and the dome lamp is in the off position.
3-19