Page 125 of 388

Delay:You can set the wiper speed for a long or short
delay between wipes. This can be very useful in light rain
or snow. Turn the band to choose the delay time. The
closer to the top of the lever, the shorter the delay.
d(Low Speed):For steady wiping at low speed,
turn the band away from you to the �rst solid band past
the delay settings. position. For high-speed wiping,
turn the band further, to the second solid band past the
delay settings. To stop the wipers, move the band to
off position.
a(High Speed):For high-speed wiping, turn the
band further, to the second solid band past the
delay settings.
9(Off):To stop the wipers, move the band to off.
Be sure to clear ice and snow from the wiper blades
before using them. If they’re frozen to the windshield,
carefully loosen or thaw them. If your blades do become
worn or damaged, get new blades or blade inserts.
Windshield Washer
L(Washer Fluid):There is a paddle marked with the
windshield washer symbol at the top of the multifunction
lever. To spray washer �uid on the windshield, push
the paddle. The wipers will clear the window and then
either stop or return to your preset speed.
{CAUTION:
In freezing weather, do not use your washer
until the windshield is warmed. Otherwise the
washer �uid can form ice on the windshield,
blocking your vision.
3-9
Page 127 of 388

Setting Cruise Control
{CAUTION:
If you leave your cruise control on when you
are not using cruise, you might hit a button
and go into cruise when you do not want to.
You could be startled and even lose control.
Keep the cruise control switch off until you
want to use cruise control.
1. Move the cruise control switch to on.
2. Get up to the speed you want.
3. Press in the set button at the end of the lever and
release it.
4. Take your foot off the accelerator pedal.
The CRUISE light on the instrument panel will illuminate
when the cruise control is engaged.
Resuming a Set Speed
Suppose you set your cruise control at a desired speed
and then you apply the brake. This, of course,
disengages the cruise control. But you don’t need
to reset it.
Once you’re going about 25 mph (40 km/h) or more,
you can move the cruise control switch from on to
resume/accelerate brie�y.
You’ll go right back up to your chosen speed and stay
there.
If you hold the switch at resume/accelerate brie�y, the
vehicle will keep going faster until you release the switch
or apply the brake. So unless you want to go faster,
don’t hold the switch at resume/accelerate.
3-11
Page 129 of 388

Using Cruise Control on Hills
How well your cruise control will work on hills depends
upon your speed, load and the steepness of the
hills. When going up steep hills, you may want to step
on the accelerator pedal to maintain your speed.
When going downhill, you may have to brake or shift to
a lower gear to keep your speed down. Of course,
applying the brake takes you out of cruise control. Many
drivers �nd this to be too much trouble and don’t use
cruise control on steep hills.
Ending Cruise Control
There are three ways to turn off the cruise control:
Step lightly on the brake pedal.
Move the cruise control switch to off.
If your vehicle has the StabiliTrak®feature, cruise
control will deactivate if road conditions cause
StabiliTrak
®to activate.
Erasing Speed Memory
When you turn off the cruise control or the ignition, your
cruise control set speed memory is erased.
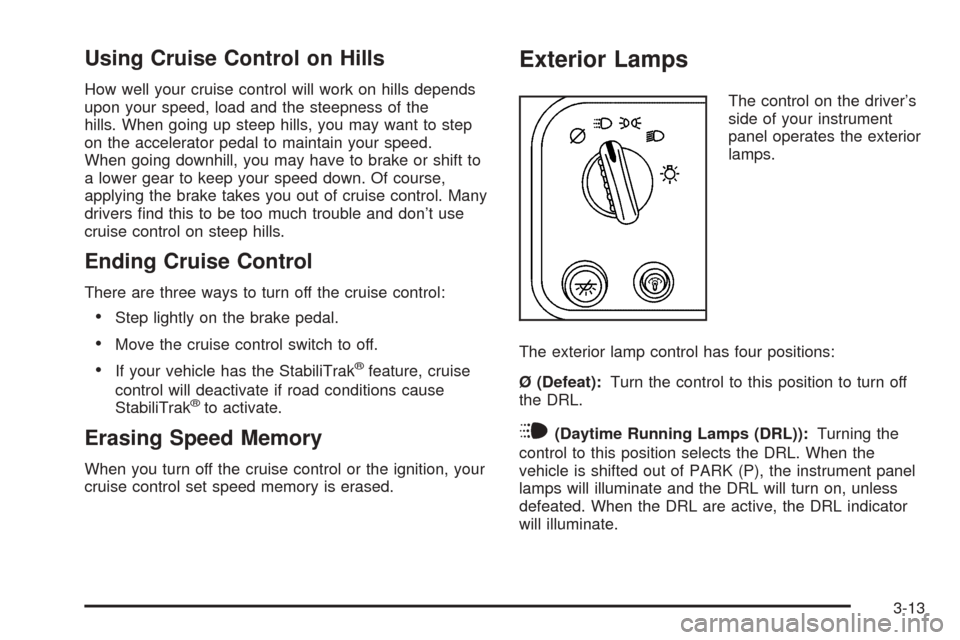
Exterior Lamps
The control on the driver’s
side of your instrument
panel operates the exterior
lamps.
The exterior lamp control has four positions:
Ø (Defeat):Turn the control to this position to turn off
the DRL.
i(Daytime Running Lamps (DRL)):Turning the
control to this position selects the DRL. When the
vehicle is shifted out of PARK (P), the instrument panel
lamps will illuminate and the DRL will turn on, unless
defeated. When the DRL are active, the DRL indicator
will illuminate.
3-13
Page 130 of 388

;(Parking Lamps):Turn the control to this position
to turn on the parking lamps, together with the
following:
Instrument Panel Lights
Daytime Running Lamps (DRL) (Canada)
Sidemarker Lamps
Taillamps
License Plate Lamps
If the DRL are active when the control is turned to this
position, the DRL will turn off.
For vehicles �rst sold in Canada, the DRL will remain
active along with the lamps mentioned above.
5(Headlamps):Turn the control to this position to
turn on the headlamps together with the parking
lamps and turn off the daytime running lamps.
You can switch your headlamps from high to low-beam
by pulling the turn signal/high-beam lever toward you.
A circuit breaker protects your headlamps. If you have
an electrical overload, your headlamps will �icker on
and off. Have your headlamp wiring checked right away
if this happens.
Headlamps on Reminder
A reminder chime will sound when your control is turned
to the headlamps or parking lamps position, your key
is out of the ignition, and your driver’s door is open. To
disable the chime, turn the control to the Daytime
Running Lamp (DRL) position and then back to the
parking lamps or headlamps position.
Daytime Running Lamps (DRL)
Daytime Running Lamps (DRL) can make it easier for
others to see the front of your vehicle during the
day. DRL can be helpful in many different driving
conditions, but they can be especially helpful in the short
periods after dawn and before sunset. Fully functional
daytime running lamps are required on all vehicles
�rst sold in Canada.
The DRL system will come on when the following
conditions are met:
the ignition is on,
the exterior lamps control is in DRL mode and not
in the defeat position.
When the DRL are on, only your headlamps will be on.
The taillamps, sidemarker and other lamps won’t be
on. The instrument panel will be lit.
3-14
Page 132 of 388

Entry Lighting
Your vehicle is equipped with an illuminated entry
feature.
When a door is opened, the dome lamps will come on if
the dome override button is in the out position. If the
dome override button is pressed in, the lamps will
not come on. When the door is closed, the interior lamps
will remain on for a period of 15 seconds or until the
vehicle is started.
Exit Lighting
With exit lighting, the interior lamps will come on for a
period of 40 seconds when you remove the key from the
ignition. The lamps will not come on if the dome
override button is pressed in.
Reading Lamps
To turn on the reading lamps, press the button located
next to each lamp. To turn them off, press the button
again.
Battery Run-Down Protection
This feature shuts off the exterior and interior lamps if
they are left on after the ignition is turned off. All exterior
lamps will shut off after 10 minutes. Interior cargo
lamps will shut down after 20 minutes and all other
interior lamps after 10 minutes.
Accessory Power Outlets
With accessory power outlets you can plug in auxiliary
electrical equipment such as a cellular telephone or
CB radio.
Your vehicle may have two accessory power outlets.
If your vehicle has a cigarette lighter/accessory
power outlet, it is located on the driver’s side of the front
storage compartment. The other accessory power
outlet is located on the passenger’s side of the front
storage compartment.
To use the outlet, lift the cover. When not using it,
always close the cover.
3-16
Page 133 of 388

Certain power accessory plugs may not be compatible
to the accessory power outlet and could result in
blown vehicle or adapter fuses. If you experience a
problem, see your dealer for additional information on
the accessory power plugs.
Notice:Adding any electrical equipment to your
vehicle may damage it or keep other components
from working as they should. The repairs would not
be covered by your warranty. Do not use equipment
exceeding maximum amperage rating. Check
with your dealer before adding electrical equipment.
When adding electrical equipment, be sure to follow
the proper installation instructions included with
the equipment.
Notice:Improper use of the power outlet can cause
damage not covered by your warranty. Do not
hang any type of accessory or accessory bracket
from the plug because the power outlets are
designed for accessory power plugs only.Ashtrays and Cigarette Lighter
Your vehicle may have this feature. The front ashtray
can be placed in the instrument panel extension at
the center of the instrument panel. Lift up on the ashtray
door to open it.
Notice:If you put papers, pins, or other �ammable
items in the ashtray, hot cigarettes or other
smoking materials could ignite them and possibly
damage your vehicle. Never put �ammable items in
the ashtray.
To use the cigarette lighter, push it in all the way and let
go. When it’s ready, it will pop back out by itself.
Notice:Holding a cigarette lighter in while it is
heating will not allow the lighter to back away from
the heating element when it is hot. Damage from
overheating may occur to the lighter or heating
element, or a fuse could be blown. Do not hold a
cigarette lighter in while it is heating.
3-17
Page 140 of 388

Warning Lights, Gages, and
Indicators
This part describes the warning lights and gages that
may be on your vehicle. The pictures will help you
locate them.
Warning lights and gages can signal that something is
wrong before it becomes serious enough to cause
an expensive repair or replacement. Paying attention to
your warning lights and gages could also save you
or others from injury.
Warning lights come on when there may be or is a
problem with one of your vehicle’s functions. As you will
see in the details on the next few pages, some
warning lights come on brie�y when you start the
engine just to let you know they’re working. If you are
familiar with this section, you should not be alarmed
when this happens.Gages can indicate when there may be or is a problem
with one of your vehicle’s functions. Often gages
and warning lights work together to let you know when
there’s a problem with your vehicle.
When one of the warning lights comes on and stays on
when you are driving, or when one of the gages shows
there may be a problem, check the section that tells you
what to do about it. Please follow this manual’s advice.
Waiting to do repairs can be costly – and even
dangerous. So please get to know your warning lights
and gages. They’re a big help.
3-24
Page 143 of 388

Safety Belt Reminder Light
When the key is turned to RUN or START, a chime will
be provided for several seconds to remind people to
buckle their safety belts. The driver safety belt light will
also be provided and stay on for several seconds,
then it will �ash for several more. You should buckle
your seat belt.
This chime and light will be
repeated if the driver
remains unbuckled and the
vehicle is in motion.
If the driver’s belt is buckled, neither the chime nor the
light will be provided.
Airbag Readiness Light
There is an airbag readiness light on the instrument
panel, which shows the airbag symbol. The system
checks the airbag’s electrical system for malfunctions.
The light tells you if there is an electrical problem.
The system check includes the airbag sensor, the airbag
modules, the wiring and the crash sensing and
diagnostic module. For more information on the airbag
system, seeAirbag System on page 1-61.
This light will come on
when you start your
vehicle, and it will �ash for
a few seconds. Then the
light should go out. This
means the system is ready.
3-27