Page 317 of 388
Removing the Flat Tire and
Installing the Spare Tire
If your vehicle has plastic wheel nut caps, loosen them
by turning the wheel wrench counterclockwise. The
wheel nut caps are designed to remain with the center
cap. Remove the center cap.
If the wheel has a smooth center piece, place the chisel
end of the wheel wrench in the slot on the wheel and
gently pry it out.
1. With the DOWN side facing you, use the ratchet
and wheel wrench to loosen all the wheel nuts.
Do not remove them yet.2. Assemble the jack and tools for a front or rear �at
as follows:
Front Flat:Assemble the jack (A) together with the
jack handle (B) and ratchet (C) as shown. Be
sure that the ratchet has the UP mark facing you.Front Position
5-75
Page 320 of 388
{CAUTION:
Raising your vehicle with the jack improperly
positioned can damage the vehicle and even
make the vehicle fall. To help avoid personal
injury and vehicle damage, be sure to �t the
jack lift head into the proper location before
raising the vehicle.4. Raise the vehicle by turning the ratchet clockwise.
Make sure the UP mark faces you. Raise the
vehicle far enough off the ground so there is enough
room for the spare tire to �t.
5. Remove all the
wheel nuts.
6. Take �at tire off of the mounting surface.
5-78
Page 322 of 388

9. Lower the vehicle by turning the jack handle
counterclockwise. Lower the jack completely.
{CAUTION:
Incorrect wheel nuts or improperly tightened
wheel nuts can cause the wheel to come loose
and even come off. This could lead to an
accident. Be sure to use the correct wheel
nuts. If you have to replace them, be sure to
get new GM original equipment wheel nuts.
Stop somewhere as soon as you can and have
the nuts tightened with a torque wrench to the
proper torque speci�cation. SeeCapacities
and Specifications on page 5-100for wheel nut
torque speci�cation.
Notice:Improperly tightened wheel nuts can lead
to brake pulsation and rotor damage. To avoid
expensive brake repairs, evenly tighten the wheel
nuts in the proper sequence and to the proper
torque speci�cation. SeeCapacities and
Specifications on page 5-100for the wheel nut
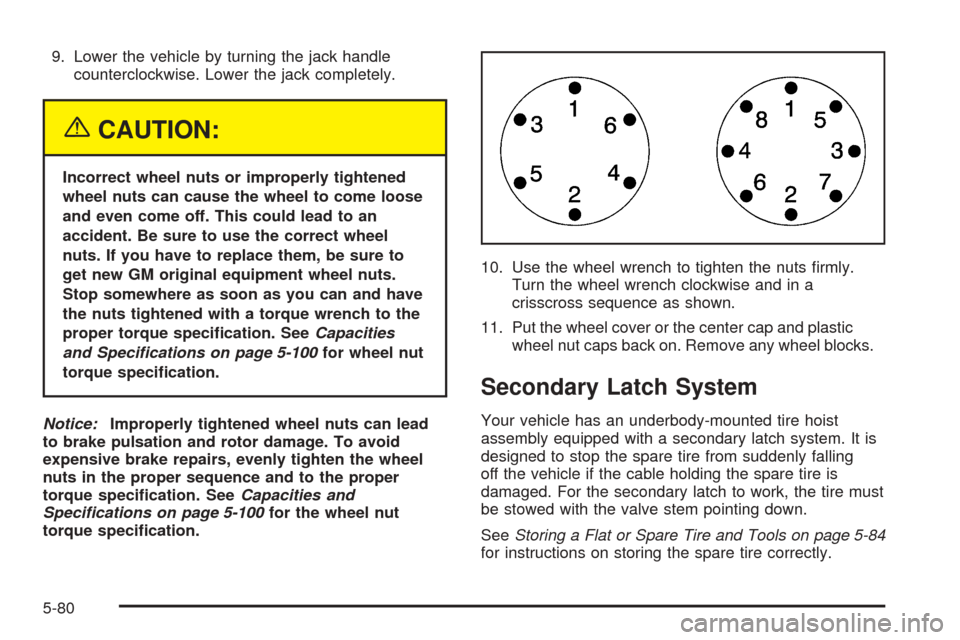
torque speci�cation.10. Use the wheel wrench to tighten the nuts �rmly.
Turn the wheel wrench clockwise and in a
crisscross sequence as shown.
11. Put the wheel cover or the center cap and plastic
wheel nut caps back on. Remove any wheel blocks.
Secondary Latch System
Your vehicle has an underbody-mounted tire hoist
assembly equipped with a secondary latch system. It is
designed to stop the spare tire from suddenly falling
off the vehicle if the cable holding the spare tire is
damaged. For the secondary latch to work, the tire must
be stowed with the valve stem pointing down.
SeeStoring a Flat or Spare Tire and Tools on page 5-84
for instructions on storing the spare tire correctly.
5-80
Page 323 of 388
{CAUTION:
Before beginning this procedure read all the
instructions. Failure to read and follow the
instructions could damage the hoist assembly
and you and others could get hurt. Read and
follow the instructions listed below.
To release the spare tire from the secondary latch, do
the following:
{CAUTION:
Someone standing too close during the
procedure could be injured by the jack. If the
spare tire does not slide off the jack
completely, make sure no one is behind you or
on either side of you as you pull the jack out
from the spare.1. Check under the
vehicle to see if the
cable end is visible.
If the cable is not visible,
start this procedure at
Step 6.
2. Turn the wrench counterclockwise until
approximately 6 inches (15 cm) of cable is exposed.
5-81
Page 324 of 388
3. Connect the jack handle (C) and jack handle
extension (B) together and press the retention
clip (arrow) so it engages.
4. Attach the jack handle/jack handle extension to the
jack. With the UP mark facing you, slide the ratchet
onto the end of the jack handle extension. The
set-up should look like the picture above.5. Place the jack under the vehicle, ahead of the rear
bumper. Position the center lift point of the jack
under the center of the spare tire and turn the
handle clockwise to raise the jack until it lifts the
secondary latch spring.
5-82
Page 325 of 388

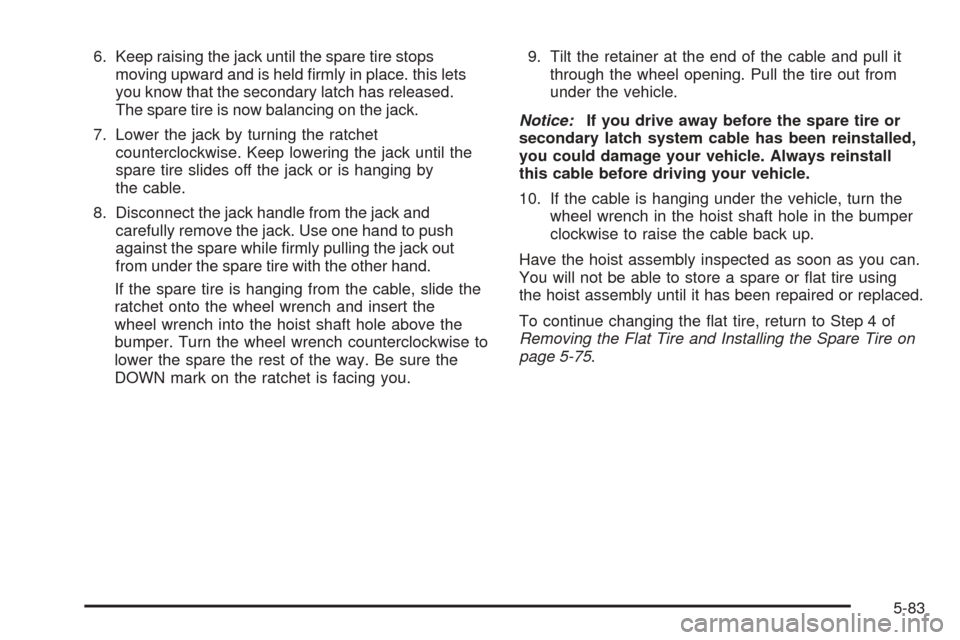
6. Keep raising the jack until the spare tire stops
moving upward and is held �rmly in place. this lets
you know that the secondary latch has released.
The spare tire is now balancing on the jack.
7. Lower the jack by turning the ratchet
counterclockwise. Keep lowering the jack until the
spare tire slides off the jack or is hanging by
the cable.
8. Disconnect the jack handle from the jack and
carefully remove the jack. Use one hand to push
against the spare while �rmly pulling the jack out
from under the spare tire with the other hand.
If the spare tire is hanging from the cable, slide the
ratchet onto the wheel wrench and insert the
wheel wrench into the hoist shaft hole above the
bumper. Turn the wheel wrench counterclockwise to
lower the spare the rest of the way. Be sure the
DOWN mark on the ratchet is facing you.9. Tilt the retainer at the end of the cable and pull it
through the wheel opening. Pull the tire out from
under the vehicle.
Notice:If you drive away before the spare tire or
secondary latch system cable has been reinstalled,
you could damage your vehicle. Always reinstall
this cable before driving your vehicle.
10. If the cable is hanging under the vehicle, turn the
wheel wrench in the hoist shaft hole in the bumper
clockwise to raise the cable back up.
Have the hoist assembly inspected as soon as you can.
You will not be able to store a spare or �at tire using
the hoist assembly until it has been repaired or replaced.
To continue changing the �at tire, return to Step 4 of
Removing the Flat Tire and Installing the Spare Tire on
page 5-75.
5-83
Page 326 of 388
Storing a Flat or Spare Tire and
Tools
{CAUTION:
Storing a jack, a tire, or other equipment in the
passenger compartment of the vehicle could
cause injury. In a sudden stop or collision,
loose equipment could strike someone. Store
all these in the proper place.
1. Put the tire on the ground at the rear of the vehicle
with the valve stem pointed down.2. Pull the retaining bar through the center of the
wheel, making sure it is properly attached.
5-84
Page 327 of 388
3. Pull the wheel toward the rear of the vehicle,
keeping the cable tight.
4. With the UP side facing you, attach the ratchet to
the wheel wrench.5. Put the �at end of the wheel wrench on an angle
through the hole in the rear door frame, above the
bumper.
6. Raise the tire fully against the underside of the
vehicle. Continue turning the ratchet until the tire
is secure and the cable is tight. The spare tire hoist
cannot be overtightened.
7. Make sure the tire is stored securely. Push, pull,
and then try to rotate or turn the tire. If the tire
moves, use the ratchet to tighten the cable.
You will hear two clicks when the tire is up all the way.
Return the jacking equipment to the proper location.
Secure the items and replace the jack cover.
5-85