2005 CHEVROLET EPICA belt
[x] Cancel search: beltPage 70 of 340
Replacing Restraint System Parts
After a Crash
{CAUTION:
A crash can damage the restraint systems in
your vehicle. A damaged restraint system may
not properly protect the person using it,
resulting in serious injury or even death in a
crash. To help make sure your restraint
systems are working properly after a crash,
have them inspected and any necessary
replacements made as soon as possible.
If you have had a crash, do you need new belts or
LATCH system parts?
After a very minor collision, nothing may be necessary.
But if the belts were stretched, as they would be if
worn during a more severe crash, then you need
new parts.
If the LATCH system was being used during a more
severe crash, you may need new LATCH system parts.If belts are cut or damaged, replace them. Collision
damage also may mean you will need to have LATCH
system, safety belt or seat parts repaired or replaced.
New parts and repairs may be necessary even if the belt
or LATCH system wasn’t being used at the time of
the collision.
If the frontal airbags inflate, you will also need to
replace the driver’s and right front passenger’s safety
belt pretentioners and safety belt. Be sure to do
so. Then the new pretensioner and safety belt will be
there to help protect you in a collision.
After a crash you may need to replace the driver and
right front passenger’s safety belt retractor assemblies,
even if the frontal airbags have not deployed. The
driver and right front passenger’s safety belt retractor
assemblies contain the safety belt pretensioners.
Have your safety belt pretensioners checked if your
vehicle has been in a collision, or if your airbag
readiness light stays on after you start your vehicle or
while you are driving. SeeAirbag Readiness Light
on page 3-33.
If your vehicle is equipped with side airbags, the front
seat assembly must be replaced after the side
airbag has been deployed.
If an airbag inflates, you will need to replace airbag
system parts. See the part on the airbag system earlier
in this section.
1-64
Page 77 of 340
Doors and Locks
Door Locks
{CAUTION:
Unlocked doors can be dangerous.
Passengers — especially children — can
easily open the doors and fall out of a
moving vehicle. When a door is locked, the
handle will not open it. You increase the
chance of being thrown out of the vehicle
in a crash if the doors are not locked. So,
wear safety belts properly and lock the
doors whenever you drive.
Young children who get into unlocked
vehicles may be unable to get out. A child
can be overcome by extreme heat and can
suffer permanent injuries or even death
from heat stroke. Always lock your vehicle
whenever you leave it.
Outsiders can easily enter through an
unlocked door when you slow down or
stop your vehicle. Locking your doors can
help prevent this from happening.There are several ways to lock and unlock your vehicle.
From the outside, use your key or the remote keyless
entry transmitter. SeeRemote Keyless Entry System
Operation on page 2-5.
To manually unlock the doors from the outside, insert
the key and turn it toward the front of the vehicle.
To manually lock the doors from the outside, insert the
key and turn it toward the rear of the vehicle.
All doors, except the driver’s door, can be locked from
the outside by pushing down the manual door lock
and then closing the door. The driver’s door lock cannot
be pushed in while the door is opened.
Upon leaving the vehicle, the driver’s door can only be
locked from the outside by using the key or the
remote keyless entry transmitter.
2-7
Page 105 of 340
Instrument Panel Overview...............................3-4
Hazard Warning Flashers................................3-5
Other Warning Devices...................................3-5
Horn.............................................................3-6
Tilt Wheel.....................................................3-6
Turn Signal/Multifunction Lever.........................3-6
Turn and Lane-Change Signals........................3-7
Headlamp High/Low-Beam Changer..................3-7
Flash-to-Pass.................................................3-7
Windshield Wipers..........................................3-8
Windshield Washer.........................................3-9
Cruise Control..............................................3-10
Exterior Lamps.............................................3-13
Headlamps on Reminder................................3-13
Daytime Running Lamps (DRL).......................3-14
Fog Lamps..................................................3-15
Exterior Lighting Battery Saver........................3-15
Instrument Panel Brightness...........................3-15
Dome Lamp.................................................3-16
Entry Lighting...............................................3-16
Map Lamps.................................................3-16
Accessory Power Outlets...............................3-17
Ashtrays and Cigarette Lighter........................3-18
Clock..........................................................3-18Climate Controls............................................3-19
Climate Control System.................................3-19
Automatic Climate Control System...................3-22
Outlet Adjustment.........................................3-28
Passenger Compartment Air Filter...................3-29
Warning Lights, Gages, and Indicators............3-30
Instrument Panel Cluster................................3-30
Speedometer and Odometer...........................3-32
Trip Odometer..............................................3-32
Tachometer.................................................3-32
Safety Belt Reminder Light.............................3-32
Safety Belt Reminder Tone............................3-33
Airbag Readiness Light..................................3-33
Passenger Airbag Status Indicator...................3-34
Charging System Light..................................3-35
Brake System Warning Light..........................3-36
Anti-Lock Brake System Warning Light.............3-37
Speed Sensitive Power Steering (SSPS)
Warning Light...........................................3-37
Traction Control System (TCS)
Warning Light...........................................3-38
Traction Control System Active Light...............3-38
Traction Off Light..........................................3-39
Section 3 Instrument Panel
3-1
Page 136 of 340
Speedometer and Odometer
Your speedometer lets you see your speed in both
miles per hour (mph) and kilometers per hour (km/h).
Your odometer shows how far your vehicle has
been driven in kilometers.
Trip Odometer
The trip odometer can record the number of kilometers
traveled for up to two trips.
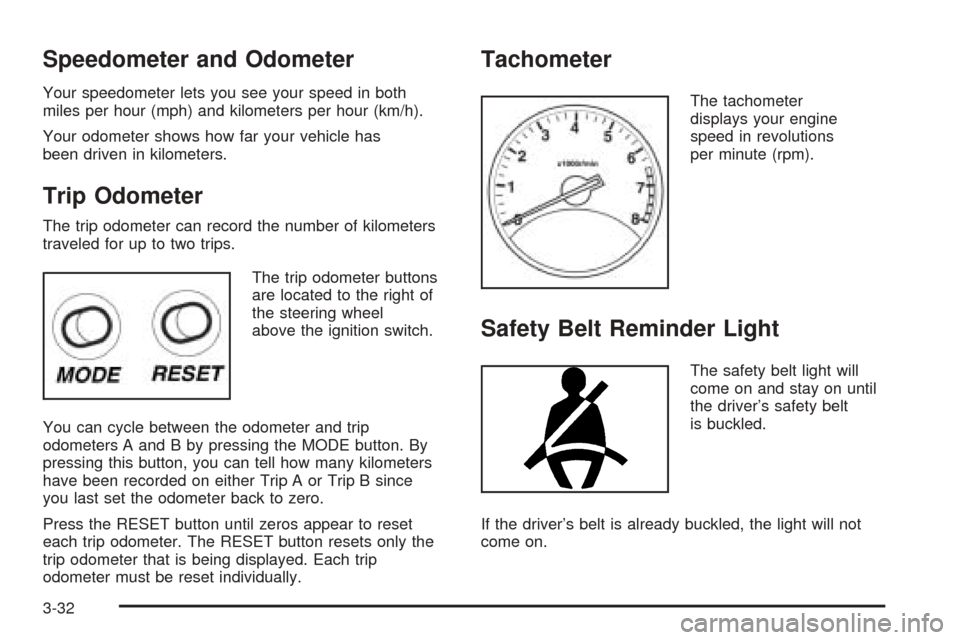
The trip odometer buttons
are located to the right of
the steering wheel
above the ignition switch.
You can cycle between the odometer and trip
odometers A and B by pressing the MODE button. By
pressing this button, you can tell how many kilometers
have been recorded on either Trip A or Trip B since
you last set the odometer back to zero.
Press the RESET button until zeros appear to reset
each trip odometer. The RESET button resets only the
trip odometer that is being displayed. Each trip
odometer must be reset individually.
Tachometer
The tachometer
displays your engine
speed in revolutions
per minute (rpm).
Safety Belt Reminder Light
The safety belt light will
come on and stay on until
the driver’s safety belt
is buckled.
If the driver’s belt is already buckled, the light will not
come on.
3-32
Page 137 of 340
Safety Belt Reminder Tone
If your vehicle has this feature, a tone will sound for
several seconds when the ignition is turned to ON
to remind people to fasten their safety belts. The tone
will not sound if the driver’s safety belt is already
buckled.
Airbag Readiness Light
There is an airbag readiness light on the instrument
panel, which shows the airbag symbol. The system
checks the airbag’s electrical system for malfunctions.
The light tells you if there is an electrical problem.
The system check includes the airbag sensors, the
airbag modules, the wiring and the diagnostic module.
For more information on the airbag system, see
Airbag System on page 1-49.
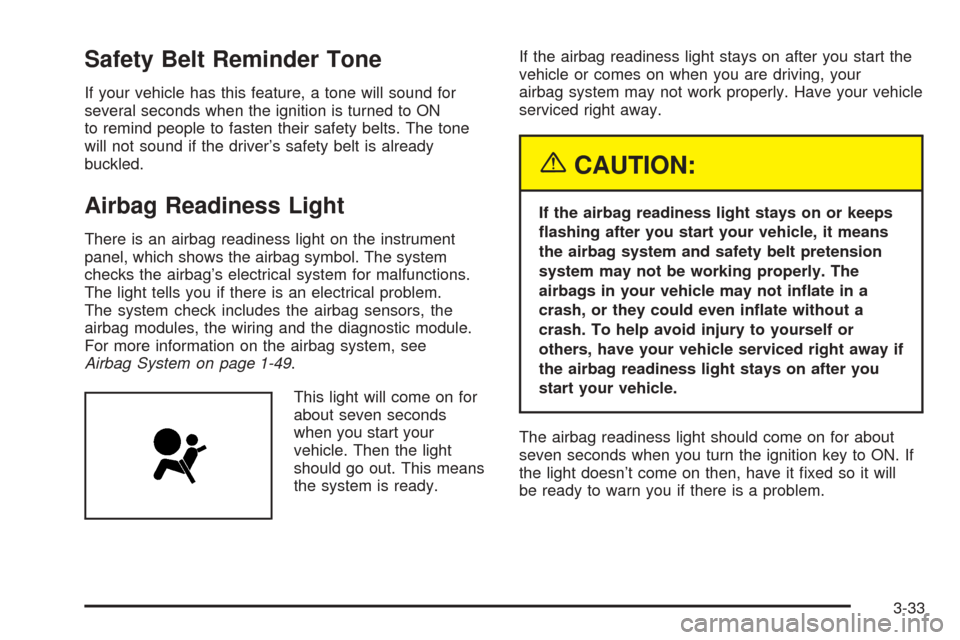
This light will come on for
about seven seconds
when you start your
vehicle. Then the light
should go out. This means
the system is ready.If the airbag readiness light stays on after you start the
vehicle or comes on when you are driving, your
airbag system may not work properly. Have your vehicle
serviced right away.
{CAUTION:
If the airbag readiness light stays on or keeps
�ashing after you start your vehicle, it means
the airbag system and safety belt pretension
system may not be working properly. The
airbags in your vehicle may not in�ate in a
crash, or they could even in�ate without a
crash. To help avoid injury to yourself or
others, have your vehicle serviced right away if
the airbag readiness light stays on after you
start your vehicle.
The airbag readiness light should come on for about
seven seconds when you turn the ignition key to ON. If
the light doesn’t come on then, have it fixed so it will
be ready to warn you if there is a problem.
3-33
Page 168 of 340
Your Driving, the Road, and
Your Vehicle
Defensive Driving
The best advice anyone can give about driving is: Drive
defensively.
Please start with a very important safety device in your
vehicle: Buckle up. SeeSafety Belts: They Are for
Everyone on page 1-10.
Defensive driving really means “be ready for anything.”
On city streets, rural roads, or freeways, it means
“always expect the unexpected.”
Assume that pedestrians or other drivers are going to
be careless and make mistakes. Anticipate what
they might do. Be ready for their mistakes.
Rear-end collisions are about the most preventable of
accidents. Yet they are common. Allow enough following
distance. It is the best defensive driving maneuver, in
both city and rural driving. You never know when the
vehicle in front of you is going to brake or turn suddenly.
Defensive driving requires that a driver concentrate on
the driving task. Anything that distracts from the driving
task — such as concentrating on a cellular telephone call,
reading, or reaching for something on the floor — makesproper defensive driving more difficult and can even
cause a collision, with resulting injury. Ask a passenger to
help do things like this, or pull off the road in a safe place
to do them yourself. These simple defensive driving
techniques could save your life.Drunken Driving
Death and injury associated with drinking and driving is
a national tragedy. It is the number one contributor
to the highway death toll, claiming thousands of victims
every year.
Alcohol affects four things that anyone needs to drive
a vehicle:
•Judgment
•Muscular Coordination
•Vision
•Attentiveness
Police records show that almost half of all motor
vehicle-related deaths involve alcohol. In most cases,
these deaths are the result of someone who was
drinking and driving. In recent years, more than
16,000 annual motor vehicle-related deaths have been
associated with the use of alcohol, with more than
300,000 people injured.
4-2
Page 177 of 340
It is better to remove as much speed as you can from a
possible collision. Then steer around the problem, to the
left or right depending on the space available.
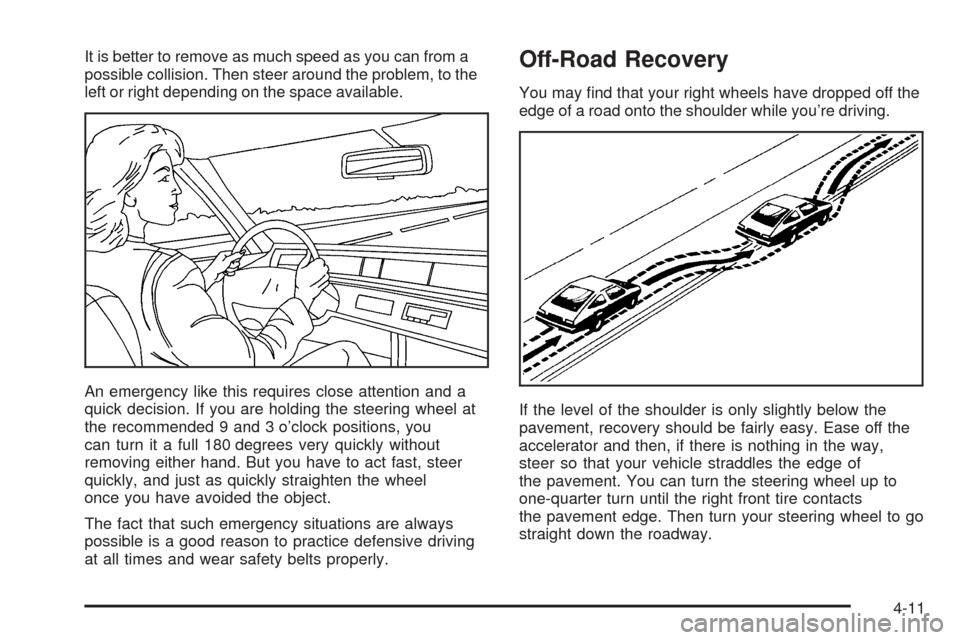
An emergency like this requires close attention and a
quick decision. If you are holding the steering wheel at
the recommended 9 and 3 o’clock positions, you
can turn it a full 180 degrees very quickly without
removing either hand. But you have to act fast, steer
quickly, and just as quickly straighten the wheel
once you have avoided the object.
The fact that such emergency situations are always
possible is a good reason to practice defensive driving
at all times and wear safety belts properly.Off-Road Recovery
You may find that your right wheels have dropped off the
edge of a road onto the shoulder while you’re driving.
If the level of the shoulder is only slightly below the
pavement, recovery should be fairly easy. Ease off the
accelerator and then, if there is nothing in the way,
steer so that your vehicle straddles the edge of
the pavement. You can turn the steering wheel up to
one-quarter turn until the right front tire contacts
the pavement edge. Then turn your steering wheel to go
straight down the roadway.
4-11
Page 251 of 340
Tire Size
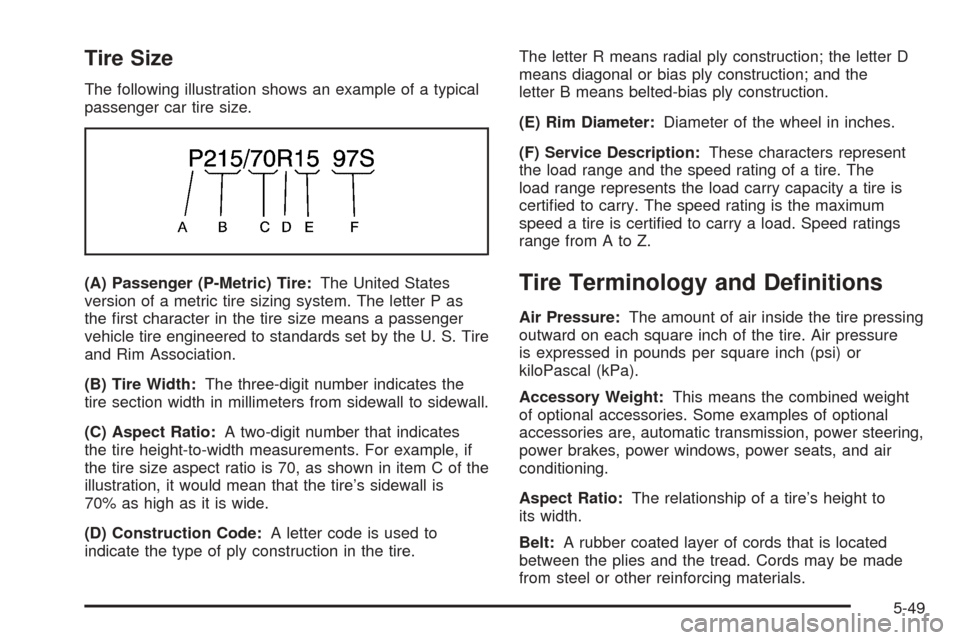
The following illustration shows an example of a typical
passenger car tire size.
(A) Passenger (P-Metric) Tire:The United States
version of a metric tire sizing system. The letter P as
the first character in the tire size means a passenger
vehicle tire engineered to standards set by the U. S. Tire
and Rim Association.
(B) Tire Width:The three-digit number indicates the
tire section width in millimeters from sidewall to sidewall.
(C) Aspect Ratio:A two-digit number that indicates
the tire height-to-width measurements. For example, if
the tire size aspect ratio is 70, as shown in item C of the
illustration, it would mean that the tire’s sidewall is
70% as high as it is wide.
(D) Construction Code:A letter code is used to
indicate the type of ply construction in the tire.The letter R means radial ply construction; the letter D
means diagonal or bias ply construction; and the
letter B means belted-bias ply construction.
(E) Rim Diameter:Diameter of the wheel in inches.
(F) Service Description:These characters represent
the load range and the speed rating of a tire. The
load range represents the load carry capacity a tire is
certified to carry. The speed rating is the maximum
speed a tire is certified to carry a load. Speed ratings
range from A to Z.
Tire Terminology and De�nitions
Air Pressure:The amount of air inside the tire pressing
outward on each square inch of the tire. Air pressure
is expressed in pounds per square inch (psi) or
kiloPascal (kPa).
Accessory Weight:This means the combined weight
of optional accessories. Some examples of optional
accessories are, automatic transmission, power steering,
power brakes, power windows, power seats, and air
conditioning.
Aspect Ratio:The relationship of a tire’s height to
its width.
Belt:A rubber coated layer of cords that is located
between the plies and the tread. Cords may be made
from steel or other reinforcing materials.
5-49