2005 CHEVROLET CLASSIC heating
[x] Cancel search: heatingPage 71 of 320

Lockout Protection
Lockout protection is intended to provide additional
security and convenience. While any door is open and
the key is in the ignition, the doors cannot be locked
by using the power door locks.
To override this feature, while the key is in the ignition
and any door is open, press and hold down the
power door lock switch for three seconds.
This feature cannot guarantee that you will never be
locked out of your vehicle. If the key is not in the ignition,
or if you use the manual door lock or the remote
keyless entry transmitter, you could still lock your key
inside your vehicle. Always remember to take your
key with you.
Trunk
To unlock the trunk from the outside, insert the key
and turn the trunk lock cylinder. When closing the trunk
lid, push the truck lid in the center to ensure that the
lock fully latches.
{CAUTION:
It can be dangerous to drive with the trunk lid
open because carbon monoxide (CO) gas can
come into your vehicle. You cannot see or
smell CO. It can cause unconsciousness and
even death. If you must drive with the trunk lid
open or if electrical wiring or other cable
connections must pass through the seal
between the body and the trunk lid:
Make sure all other windows are shut.
Turn the fan on your heating or cooling
system to its highest speed and select the
control setting that will force outside air
into your vehicle. See Climate Control
System in the Index.
If you have air outlets on or under the
instrument panel, open them all the way.
SeeEngine Exhaust on page 2-25.
2-11
Page 106 of 320
Ashtrays and Cigarette Lighter
The ashtray is located at the lower part of the center
of the instrument panel. To remove the ashtray for
cleaning, pull up on the metal tab and pull the bin out.
Notice:If you put papers, pins, or other �ammable
items in the ashtray, hot cigarettes or other
smoking materials could ignite them and possibly
damage your vehicle. Never put �ammable items in
the ashtray.
The cigarette lighter is located above the ashtray.
To use it, just push it in all the way and let go. When
it’s ready, it will pop back out by itself.
Notice:Holding a cigarette lighter in while it is
heating will not allow the lighter to back away from
the heating element when it is hot. Damage from
overheating may occur to the lighter or heating
element. Do not hold a cigarette lighter in while it
is heating.
Climate Controls
Climate Control System
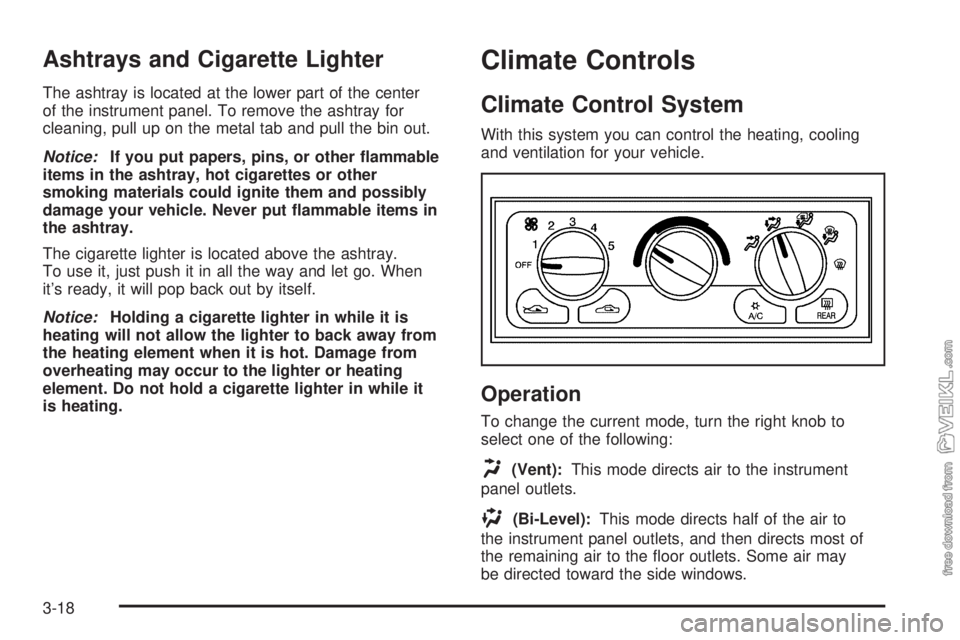
With this system you can control the heating, cooling
and ventilation for your vehicle.
Operation
To change the current mode, turn the right knob to
select one of the following:
H(Vent):This mode directs air to the instrument
panel outlets.
)(Bi-Level):This mode directs half of the air to
the instrument panel outlets, and then directs most of
the remaining air to the floor outlets. Some air may
be directed toward the side windows.
3-18
Page 117 of 320
Engine Coolant Temperature Gage
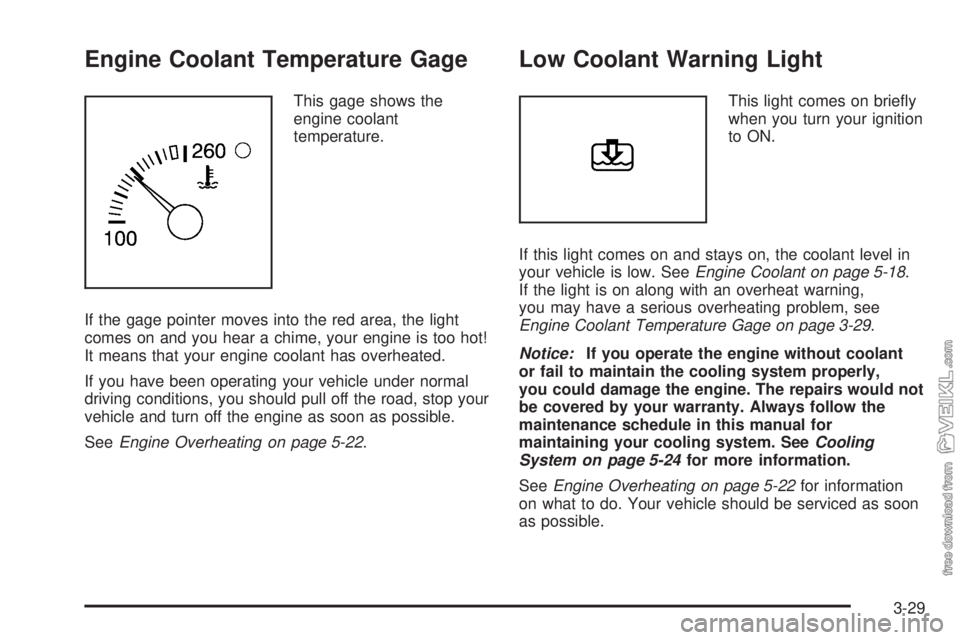
This gage shows the
engine coolant
temperature.
If the gage pointer moves into the red area, the light
comes on and you hear a chime, your engine is too hot!
It means that your engine coolant has overheated.
If you have been operating your vehicle under normal
driving conditions, you should pull off the road, stop your
vehicle and turn off the engine as soon as possible.
SeeEngine Overheating on page 5-22.
Low Coolant Warning Light
This light comes on briefly
when you turn your ignition
to ON.
If this light comes on and stays on, the coolant level in
your vehicle is low. SeeEngine Coolant on page 5-18.
If the light is on along with an overheat warning,
you may have a serious overheating problem, see
Engine Coolant Temperature Gage on page 3-29.
Notice:If you operate the engine without coolant
or fail to maintain the cooling system properly,
you could damage the engine. The repairs would not
be covered by your warranty. Always follow the
maintenance schedule in this manual for
maintaining your cooling system. SeeCooling
System on page 5-24for more information.
SeeEngine Overheating on page 5-22for information
on what to do. Your vehicle should be serviced as soon
as possible.
3-29
Page 182 of 320
When towing a trailer, the arrows on your instrument
panel will flash for turns even if the bulbs on the trailer
are burned out. Thus, you may think drivers behind
you are seeing your signal when they are not. It
is important to check occasionally to be sure the trailer
bulbs are still working.
Driving On Grades
Notice:Do not tow on steep continuous grades
exceeding 6 miles (9.6 km). Extended, higher
than normal engine and transaxle temperatures
may result and damage your vehicle. Frequent stops
are very important to allow the engine and transaxle
to cool.
Reduce speed and shift to a lower gearbeforeyou start
down a long or steep downgrade. If you do not shift
down, you might have to use your brakes so much that
they would get hot and no longer work well.
Pay attention to the engine coolant gage. If the indicator
is in the red area, turn off the air conditioning to
reduce engine load. SeeEngine Overheating on
page 5-22.
Parking on Hills
{CAUTION:
You really should not park your vehicle, with a
trailer attached, on a hill. If something goes
wrong, your rig could start to move. People
can be injured, and both your vehicle and the
trailer can be damaged.
But if you ever have to park your rig on a hill, here is
how to do it:
1. Apply your regular brakes, but do not shift into
PARK (P) yet.
2. Have someone place chocks under the trailer
wheels.
3. When the wheel chocks are in place, release the
regular brakes until the chocks absorb the load.
4. Reapply the regular brakes. Then apply your
parking brake and shift into PARK (P).
5. Release the regular brakes.
4-40
Page 183 of 320
When You Are Ready to Leave After
Parking on a Hill
1. Apply your regular brakes and hold the pedal down
while you:
•start your engine,
•shift into a gear, and
•release the parking brake.
2. Let up on the brake pedal.
3. Drive slowly until the trailer is clear of the chocks.
4. Stop and have someone pick up and store the
chocks.
Maintenance When Trailer Towing
Your vehicle will need service more often when you
are pulling a trailer. SeePart A: Scheduled Maintenance
Services on page 6-4for more on this. Things that
are especially important in trailer operation are
automatic transaxle fluid (do not overfill), engine oil,
drive belt, cooling system and brake system.
Each of these is covered in this manual, and the Index
will help you find them quickly. If you’re trailering, it
is a good idea to review this information before you
start your trip.
Check periodically to see that all hitch nuts and bolts
are tight.
Engine Cooling When Trailer Towing
Your cooling system may temporarily overheat during
severe operating conditions. SeeEngine Overheating
on page 5-22.
4-41
Page 185 of 320
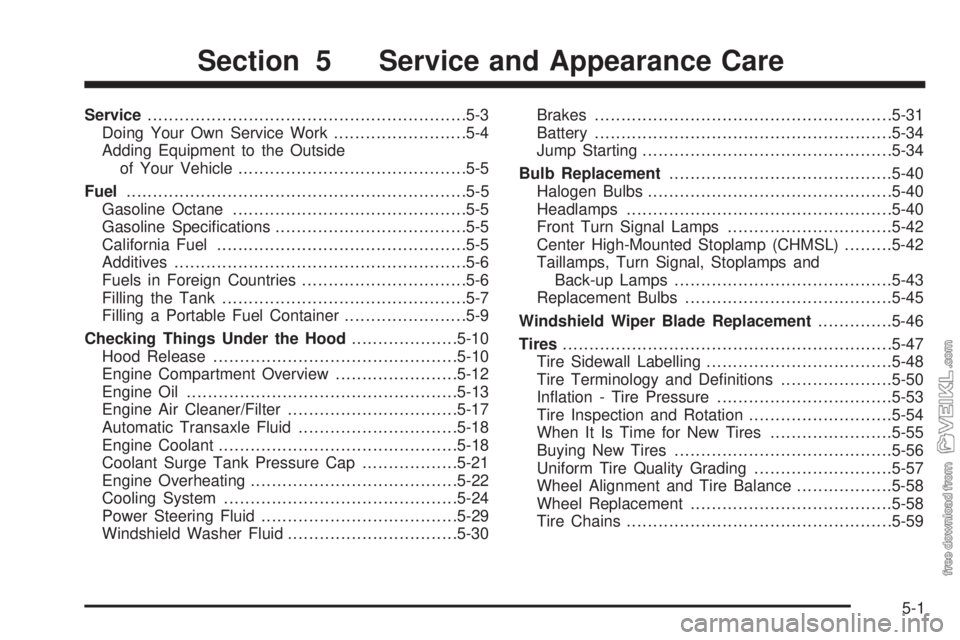
Service............................................................5-3
Doing Your Own Service Work.........................5-4
Adding Equipment to the Outside
of Your Vehicle...........................................5-5
Fuel................................................................5-5
Gasoline Octane............................................5-5
Gasoline Specifications....................................5-5
California Fuel...............................................5-5
Additives.......................................................5-6
Fuels in Foreign Countries...............................5-6
Filling the Tank..............................................5-7
Filling a Portable Fuel Container.......................5-9
Checking Things Under the Hood....................5-10
Hood Release..............................................5-10
Engine Compartment Overview.......................5-12
Engine Oil...................................................5-13
Engine Air Cleaner/Filter................................5-17
Automatic Transaxle Fluid..............................5-18
Engine Coolant.............................................5-18
Coolant Surge Tank Pressure Cap..................5-21
Engine Overheating.......................................5-22
Cooling System............................................5-24
Power Steering Fluid.....................................5-29
Windshield Washer Fluid................................5-30Brakes........................................................5-31
Battery........................................................5-34
Jump Starting...............................................5-34
Bulb Replacement..........................................5-40
Halogen Bulbs..............................................5-40
Headlamps..................................................5-40
Front Turn Signal Lamps...............................5-42
Center High-Mounted Stoplamp (CHMSL).........5-42
Taillamps, Turn Signal, Stoplamps and
Back-up Lamps.........................................5-43
Replacement Bulbs.......................................5-45
Windshield Wiper Blade Replacement..............5-46
Tires..............................................................5-47
Tire Sidewall Labelling...................................5-48
Tire Terminology and Definitions.....................5-50
Inflation - Tire Pressure.................................5-53
Tire Inspection and Rotation...........................5-54
When It Is Time for New Tires.......................5-55
Buying New Tires.........................................5-56
Uniform Tire Quality Grading..........................5-57
Wheel Alignment and Tire Balance..................5-58
Wheel Replacement......................................5-58
Tire Chains..................................................5-59
Section 5 Service and Appearance Care
5-1
Page 203 of 320
The following explains your cooling system and how to
add coolant when it is low. If you have a problem
with engine overheating, seeEngine Overheating on
page 5-22.
A 50/50 mixture of clean, drinkable water and
DEX-COOL
®coolant will:
•Give freezing protection down to−34°F (−37°C).
•Give boiling protection up to 265°F (129°C).
•Protect against rust and corrosion.
•Help keep the proper engine temperature.
•Let the warning lights and gages work as they
should.
Notice:Using coolant other than DEX-COOL
®may
cause premature engine, heater core or radiator
corrosion. In addition, the engine coolant may
require changing sooner, at 30,000 miles (50 000 km)
or 24 months, whichever occurs �rst. Any repairs
would not be covered by your warranty. Always use
DEX-COOL
®(silicate-free) coolant in your vehicle.
What to Use
Use a mixture of one-half clean, drinkable water and
one-half DEX-COOL®coolant which will not damage
aluminum parts. If you use this coolant mixture, you do
not need to add anything else.
{CAUTION:
Adding only plain water to your cooling
system can be dangerous. Plain water, or
some other liquid such as alcohol, can boil
before the proper coolant mixture will. Your
vehicle’s coolant warning system is set for the
proper coolant mixture. With plain water or the
wrong mixture, your engine could get too hot
but you would not get the overheat warning.
Your engine could catch �re and you or others
could be burned. Use a 50/50 mixture of clean,
drinkable water and DEX-COOL
®coolant.
Notice:If you use an improper coolant mixture,
your engine could overheat and be badly damaged.
The repair cost would not be covered by your
warranty. Too much water in the mixture can freeze
and crack the engine, radiator, heater core and
other parts.
If you have to add coolant more than four times a year,
have your dealer check your cooling system.
Notice:If you use the proper coolant, you do not
have to add extra inhibitors or additives which claim
to improve the system. These can be harmful.
5-19
Page 205 of 320
Adding Coolant
If you need more coolant, add the proper DEX-COOL®
coolant mixture at the coolant surge tank, but only
when the engine is cool. If the coolant surge tank is
empty, a special fill procedure is necessary. SeeEngine
Overheating on page 5-22andCooling System on
page 5-24.
{CAUTION:
Turning the surge tank pressure cap when the
engine and radiator are hot can allow steam
and scalding liquids to blow out and burn you
badly. Never turn the surge tank pressure
cap — even a little — when the engine and
radiator are hot.
{CAUTION:
You can be burned if you spill coolant on hot
engine parts. Coolant contains ethylene glycol,
and it will burn if the engine parts are hot
enough. Do not spill coolant on a hot engine.
When replacing the pressure cap, make sure it is
hand-tight.
Coolant Surge Tank Pressure Cap
Notice:If the pressure cap is not tightly installed,
coolant loss and possible engine damage may
occur. Be sure the cap is properly and tightly
secured.
The coolant surge tank pressure cap must be fully
installed on the coolant surge tank. SeeEngine
Compartment Overview on page 5-12for more
information on location.
5-21