2005 CHEVROLET BLAZER ignition
[x] Cancel search: ignitionPage 126 of 436
Vehicle Personalization
Memory Seat
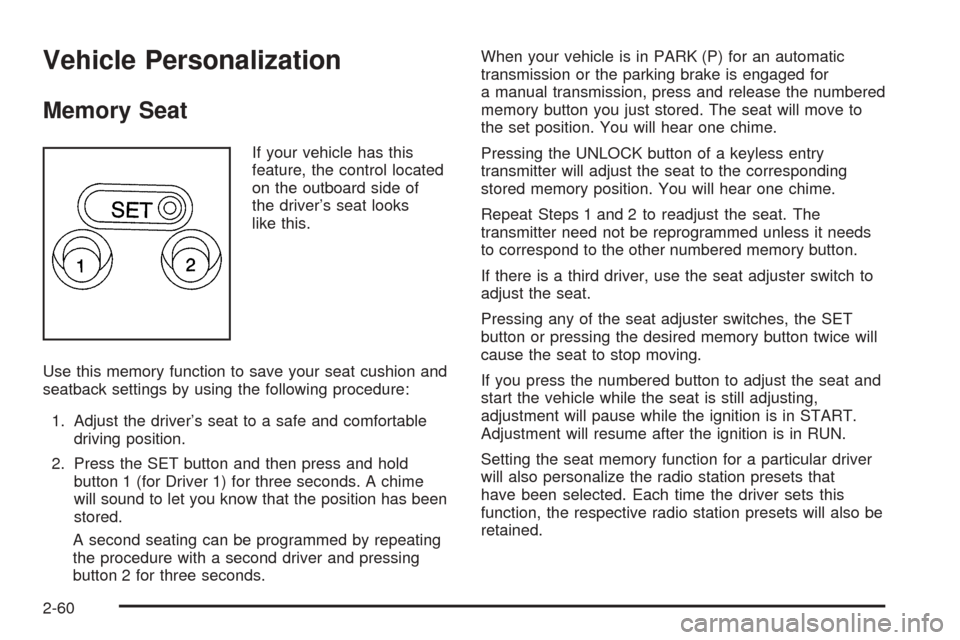
If your vehicle has this
feature, the control located
on the outboard side of
the driver’s seat looks
like this.
Use this memory function to save your seat cushion and
seatback settings by using the following procedure:
1. Adjust the driver’s seat to a safe and comfortable
driving position.
2. Press the SET button and then press and hold
button 1 (for Driver 1) for three seconds. A chime
will sound to let you know that the position has been
stored.
A second seating can be programmed by repeating
the procedure with a second driver and pressing
button 2 for three seconds.When your vehicle is in PARK (P) for an automatic
transmission or the parking brake is engaged for
a manual transmission, press and release the numbered
memory button you just stored. The seat will move to
the set position. You will hear one chime.
Pressing the UNLOCK button of a keyless entry
transmitter will adjust the seat to the corresponding
stored memory position. You will hear one chime.
Repeat Steps 1 and 2 to readjust the seat. The
transmitter need not be reprogrammed unless it needs
to correspond to the other numbered memory button.
If there is a third driver, use the seat adjuster switch to
adjust the seat.
Pressing any of the seat adjuster switches, the SET
button or pressing the desired memory button twice will
cause the seat to stop moving.
If you press the numbered button to adjust the seat and
start the vehicle while the seat is still adjusting,
adjustment will pause while the ignition is in START.
Adjustment will resume after the ignition is in RUN.
Setting the seat memory function for a particular driver
will also personalize the radio station presets that
have been selected. Each time the driver sets this
function, the respective radio station presets will also be
retained.
2-60
Page 131 of 436
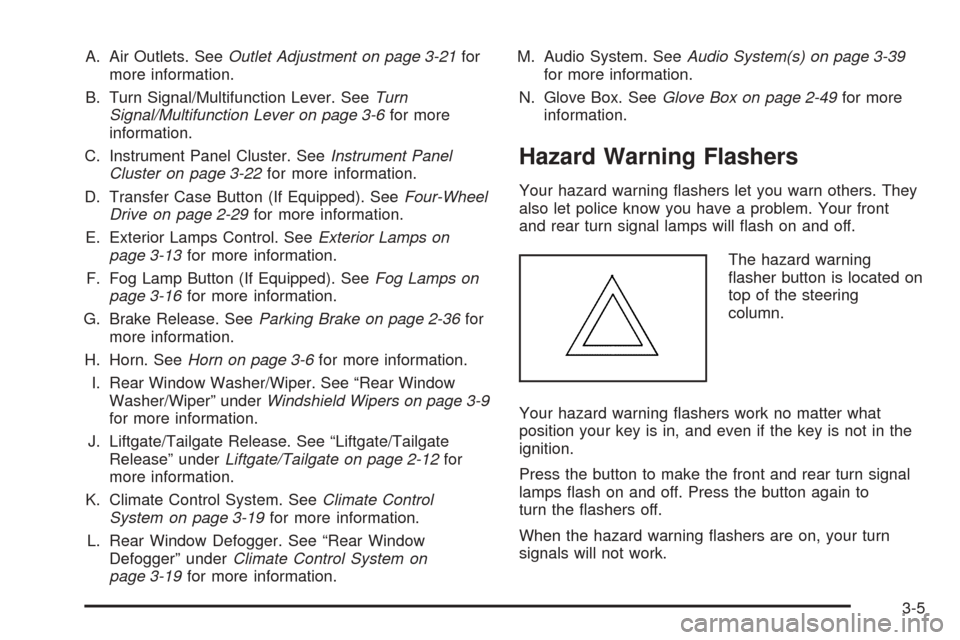
A. Air Outlets. SeeOutlet Adjustment on page 3-21for
more information.
B. Turn Signal/Multifunction Lever. SeeTurn
Signal/Multifunction Lever on page 3-6for more
information.
C. Instrument Panel Cluster. SeeInstrument Panel
Cluster on page 3-22for more information.
D. Transfer Case Button (If Equipped). SeeFour-Wheel
Drive on page 2-29for more information.
E. Exterior Lamps Control. SeeExterior Lamps on
page 3-13for more information.
F. Fog Lamp Button (If Equipped). SeeFog Lamps on
page 3-16for more information.
G. Brake Release. SeeParking Brake on page 2-36for
more information.
H. Horn. SeeHorn on page 3-6for more information.
I. Rear Window Washer/Wiper. See “Rear Window
Washer/Wiper” underWindshield Wipers on page 3-9
for more information.
J. Liftgate/Tailgate Release. See “Liftgate/Tailgate
Release” underLiftgate/Tailgate on page 2-12for
more information.
K. Climate Control System. SeeClimate Control
System on page 3-19for more information.
L. Rear Window Defogger. See “Rear Window
Defogger” underClimate Control System on
page 3-19for more information.M. Audio System. SeeAudio System(s) on page 3-39
for more information.
N. Glove Box. SeeGlove Box on page 2-49for more
information.
Hazard Warning Flashers
Your hazard warning �ashers let you warn others. They
also let police know you have a problem. Your front
and rear turn signal lamps will �ash on and off.
The hazard warning
�asher button is located on
top of the steering
column.
Your hazard warning �ashers work no matter what
position your key is in, and even if the key is not in the
ignition.
Press the button to make the front and rear turn signal
lamps �ash on and off. Press the button again to
turn the �ashers off.
When the hazard warning �ashers are on, your turn
signals will not work.
3-5
Page 138 of 436
Increasing Speed While Using Cruise
Control
There are two ways to go to a higher speed:
Use the accelerator pedal to get to the higher
speed. Press the button at the end of the lever, then
release the button and the accelerator pedal.
You’ll now cruise at the higher speed.
Move the cruise switch from ON to R/A. Hold it
there until you get up to the speed you want,
and then release the switch. To increase your speed
in very small amounts, move the switch brie�y to
R/A. Each time you do this, your vehicle will
go about 1 mph (1.6 km/h) faster.
Reducing Speed While Using Cruise
Control
Press in the SET button at the end of the lever until
you reach the lower speed you want, then
release it.
To slow down in very small amounts, press the
SET button brie�y. Each time you do this, you’ll
go about 1 mph (1.6 km/h) slower.
Passing Another Vehicle While Using
Cruise Control
Use the accelerator pedal to increase your speed.
When you take your foot off the pedal, your vehicle will
slow down to the cruise control speed you set earlier.
Using Cruise Control on Hills
How well your cruise control will work on hills depends
upon your speed, load and the steepness of the
hills. When going up steep hills, you may want to step
on the accelerator pedal to maintain your speed.
When going downhill, you may have to brake or shift to
a lower gear to keep your speed down. Of course,
applying the brake takes you out of cruise control. Many
drivers �nd this to be too much trouble and don’t use
cruise control on steep hills.
Ending Cruise Control
There are two ways to turn off the cruise control:
Step lightly on the brake pedal or push the clutch
pedal, if you have a manual transmission.
Move the cruise switch to OFF.
Erasing Speed Memory
When you turn off the cruise control or the ignition, your
cruise control set speed memory is erased.
3-12
Page 139 of 436
Exterior Lamps
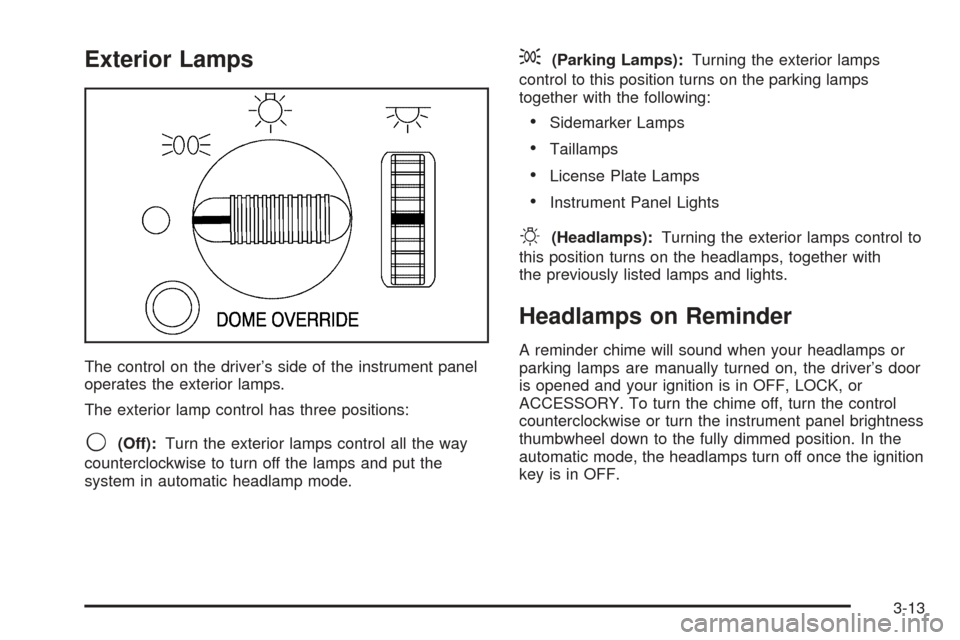
The control on the driver’s side of the instrument panel
operates the exterior lamps.
The exterior lamp control has three positions:
9(Off):Turn the exterior lamps control all the way
counterclockwise to turn off the lamps and put the
system in automatic headlamp mode.
;(Parking Lamps):Turning the exterior lamps
control to this position turns on the parking lamps
together with the following:
Sidemarker Lamps
Taillamps
License Plate Lamps
Instrument Panel Lights
O(Headlamps):Turning the exterior lamps control to
this position turns on the headlamps, together with
the previously listed lamps and lights.
Headlamps on Reminder
A reminder chime will sound when your headlamps or
parking lamps are manually turned on, the driver’s door
is opened and your ignition is in OFF, LOCK, or
ACCESSORY. To turn the chime off, turn the control
counterclockwise or turn the instrument panel brightness
thumbwheel down to the fully dimmed position. In the
automatic mode, the headlamps turn off once the ignition
key is in OFF.
3-13
Page 140 of 436
Daytime Running Lamps (DRL)
Daytime Running Lamps (DRL) can make it easier for
others to see the front of your vehicle during the
day. DRL can be helpful in many different driving
conditions, but they can be especially helpful in the short
periods after dawn and before sunset. Fully functional
daytime running lamps are required on all vehicles
�rst sold in Canada.
The DRL system will make your headlamps come on at
reduced brightness when the following conditions
are met:
The ignition is on
the exterior lamp control is in OFF
the sensor detects daytime light
an automatic transmission is not in PARK (P)
the parking brake is released.
When the DRL are on, only your headlamps will be on.
The taillamps, sidemarker and other lamps won’t be
on. The instrument panel won’t be lit up either.
When it begins to get dark, the headlamps will
automatically switch from DRL to the regular headlamps.
The DRL system on some vehicles may turn off
temporarily while the turn signals are activated.To idle an automatic transmission vehicle with the DRL
off, put the transmission in PARK (P). To idle a
manual transmission vehicle with the DRL off, set the
parking brake. The DRL will stay off until you shift out of
PARK (P) or release the parking brake.
The following does not apply to vehicles sold in Canada.
When necessary, you may turn off the automatic
headlamp system and the Daytime Running Lamps
(DRL) feature by following the steps below:
1. Turn the ignition to RUN.
2. Press the DOME OVERRIDE button four times
within six seconds. After the fourth press of the
button, a chime will sound informing you that
the system is off. The system will revert back to the
automatic on mode when the ignition is turned to
OFF and then to RUN again.
3. To return to the automatic mode, push the DOME
OVERRIDE button four times within six seconds (a
chime will sound), or turn the ignition to OFF
and then to RUN again.
As with any vehicle, you should turn on the regular
headlamp system when you need it.
3-14
Page 141 of 436
Automatic Headlamp System
When it is dark enough outside, your automatic
headlamp system will turn on your headlamps at the
normal brightness along with other lamps such as
the taillamps, sidemarker, parking lamps and the
instrument panel lights. The radio lights will also be dim.
Your vehicle is equipped with a light sensor on the
top of the instrument panel under the radio speaker grill.
Be sure it is not covered or the system will be on
whenever the ignition is on.
The system may also turn on your headlamps when
driving through a parking garage, heavy overcast
weather or a tunnel. This is normal.
There is a delay in the transition between the daytime
and nighttime operation of the Daytime Running
Lamps (DRL) and the automatic headlamp systems so
that driving under bridges or bright overhead street
lights does not affect the system. The DRL and
automatic headlamp system will only be affected when
the light sensor sees a change in lighting lasting
longer than the delay.To idle your vehicle with the automatic headlamp
system off, set the parking brake while the ignition is off.
Then start your vehicle. The automatic headlamp
system will stay off until you release the parking brake.
As with any vehicle, you should turn on the regular
headlamps when you need them.
You may be able to turn off your automatic headlamp
system. SeeDaytime Running Lamps (DRL) on
page 3-14later in this section for more information.
If you start your vehicle in a dark garage, the automatic
headlamp system will come on immediately. Once
you leave the garage, it will take approximately
one minute for the automatic headlamp system to
change to DRL if it is light outside. During that delay,
your instrument panel cluster may not be as bright
as usual. Make sure your instrument panel brightness
control is in the full bright position. SeeInstrument Panel
Brightness on page 3-16.
3-15
Page 143 of 436
Entry Lighting
Your vehicle is equipped with an illuminated entry feature.
When a door is opened, the dome lamps will come on if
the DOME OVERRIDE button is in the out position.
When the doors are closed, the lamps will stay on for a
short period of time and will turn off automatically. If
you use your keyless entry transmitter, if equipped, to
unlock your vehicle, the interior lamps will come on for a
short time whether or not the DOME OVERRIDE
button is in the out position.
Exit Lighting
With exit lighting, the interior lamps will come on when
you remove the key from the ignition to help you
see while exiting the vehicle. If the DOME OVERRIDE
button is in the out position, these lamps will stay
on for a short period of time and then will go out.
Front Reading Lamps
Press the button located near each lamp on the
overhead console to turn a reading lamp on and off.
The lamps can be swiveled to point in the desired
direction.
If you have the mini console, press the lens on each
lamp to turn it on or off.
Map Lamps
If your vehicle has front map lamps, they are located on
the inside rearview mirror. They will automatically
come on for about 40 seconds when the doors are
unlocked with the keyless entry transmitter, if equipped,
or until the ignition key is turned to RUN or
ACCESSORY. The lamps will also stay on for about
40 seconds after you exit the vehicle unless you lock the
doors with the keyless entry transmitter.
You can also turn the lamps on and off by pressing the
button near each lamp.
Battery Run-Down Protection
This feature shuts off the dome, courtesy, vanity,
reading, glove box and underhood lamps if they are left
on for more than 20 minutes when the ignition is off.
This will keep your battery from running down.
If the battery run-down protection shuts off the interior
lamps, it may be necessary to do one of the following to
return to normal operation:
Shut off all lamps and close all doors.
Turn the ignition key to RUN.
3-17
Page 151 of 436
Airbag Readiness Light
There is an airbag readiness light on the instrument
panel, which shows the airbag symbol. The system
checks the airbag’s electrical system for malfunctions.
The light tells you if there is an electrical problem.
The system check includes the airbag sensors, the
airbag modules, the wiring and the crash sensing and
diagnostic module. SeeAirbag System on page 1-50for
more information.
This light will come on
when you start your
vehicle, and it will �ash for
a few seconds. Then
the light should go out.
This means the system
is ready.
If the airbag readiness light stays on after you start the
vehicle or comes on when you are driving, your
airbag system may not work properly. Have your vehicle
serviced right away.{CAUTION:
If the airbag readiness light stays on after you
start your vehicle, it means the airbag system
may not be working properly. The airbags in
your vehicle may not in�ate in a crash, or they
could even in�ate without a crash. To help
avoid injury to yourself or others, have your
vehicle serviced right away if the airbag
readiness light stays on after you start your
vehicle.
The airbag readiness light should �ash for a few
seconds when you turn the ignition key to RUN. If the
light doesn’t come on then, have it �xed so it will
be ready to warn you if there is a problem.
3-25