2005 CHEVROLET BLAZER stop start
[x] Cancel search: stop startPage 121 of 436
Rear Storage Area
You may store items in the cargo area of your vehicle.
Convenience Net
You may have a convenience net in the rear of your
vehicle to help keep small items, like gloves and
light clothing, in place during sharp turns or quick stops
and starts.
The net is not designed to retain these items during
off-road use. The net is not for larger, heavier items.
Attach the upper loops to the retainers on both sides of
the tailgate opening. The label should be in the upper
passenger’s side corner, visible from the rear of
the vehicle. Attach the lower hooks to the rear cargo
tie-downs on the �oor.
Cargo Tie Downs
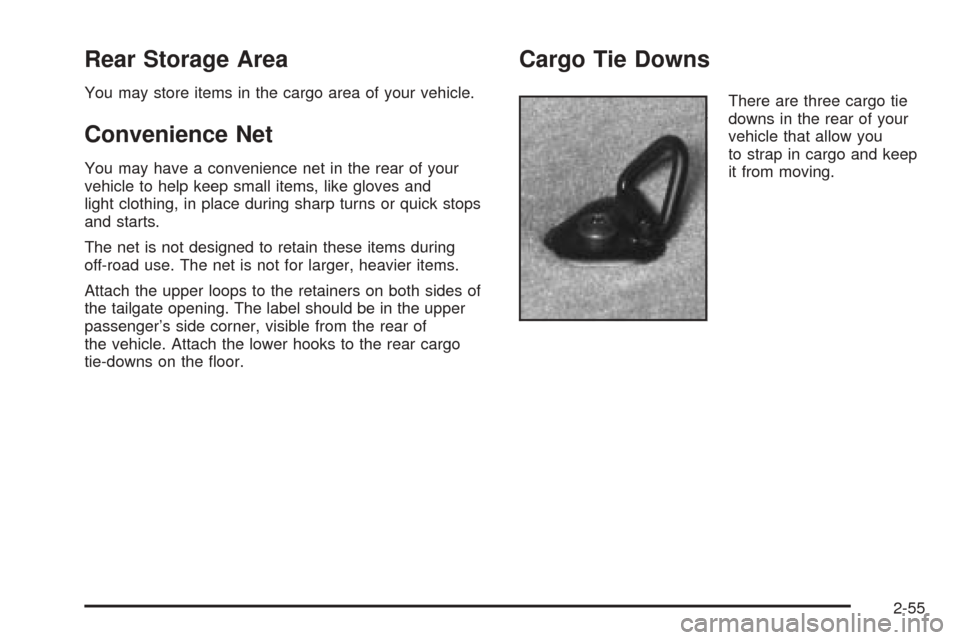
There are three cargo tie
downs in the rear of your
vehicle that allow you
to strap in cargo and keep
it from moving.
2-55
Page 126 of 436
Vehicle Personalization
Memory Seat
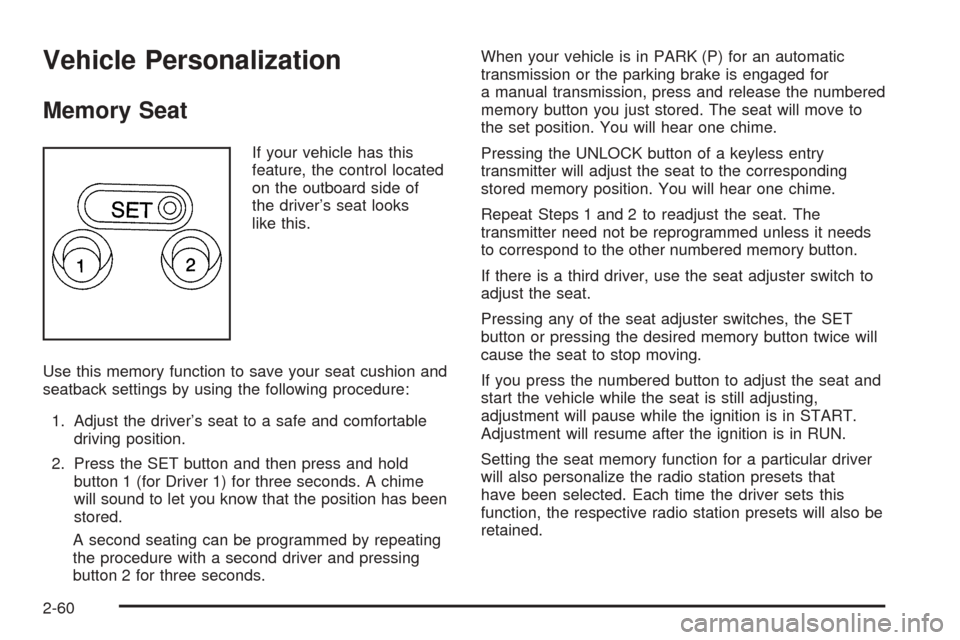
If your vehicle has this
feature, the control located
on the outboard side of
the driver’s seat looks
like this.
Use this memory function to save your seat cushion and
seatback settings by using the following procedure:
1. Adjust the driver’s seat to a safe and comfortable
driving position.
2. Press the SET button and then press and hold
button 1 (for Driver 1) for three seconds. A chime
will sound to let you know that the position has been
stored.
A second seating can be programmed by repeating
the procedure with a second driver and pressing
button 2 for three seconds.When your vehicle is in PARK (P) for an automatic
transmission or the parking brake is engaged for
a manual transmission, press and release the numbered
memory button you just stored. The seat will move to
the set position. You will hear one chime.
Pressing the UNLOCK button of a keyless entry
transmitter will adjust the seat to the corresponding
stored memory position. You will hear one chime.
Repeat Steps 1 and 2 to readjust the seat. The
transmitter need not be reprogrammed unless it needs
to correspond to the other numbered memory button.
If there is a third driver, use the seat adjuster switch to
adjust the seat.
Pressing any of the seat adjuster switches, the SET
button or pressing the desired memory button twice will
cause the seat to stop moving.
If you press the numbered button to adjust the seat and
start the vehicle while the seat is still adjusting,
adjustment will pause while the ignition is in START.
Adjustment will resume after the ignition is in RUN.
Setting the seat memory function for a particular driver
will also personalize the radio station presets that
have been selected. Each time the driver sets this
function, the respective radio station presets will also be
retained.
2-60
Page 135 of 436
Windshield Wipers
To operate the windshield wipers, turn the band located
on the multifunction lever upward or downward.
MIST:Turn the band to MIST for a single wiping cycle.
Hold it until the windshield wipers start. Then let it
go. The windshield wipers will stop after one wipe. If
you want more wipes, hold the band on MIST longer.
OFF:Turn the band to OFF to turn off the windshield
wipers.
Delayed Wiping:You can set the wiper speed for a
long or short delay between wipes. Turn the band
to choose the delay time. The closer to LO, the shorter
the delay.
LO (Low Speed):Turn the band away from you to LO
and past the delay settings for steady wiping at
low speed.
HI (High Speed):Turn the band away from you, to HI,
and past the delay settings for wiping steady at
high speed.
JPUSH (Windshield Washer):There is a paddle
marked with the windshield washer symbol at the top of
the multifunction lever. To spray washer �uid on the
windshield, push the paddle. The wipers will clear the
window and then either stop or return to your
preset speed.
Be sure to clear ice and snow from the wiper blades
before using them. If they’re frozen to the windshield,
carefully loosen or thaw them. If your blades do become
worn or damaged, get new blades or blade inserts.
Heavy snow or ice can overload your wipers. A circuit
breaker will stop them until the motor cools. Clear away
snow or ice to prevent an overload.
{CAUTION:
In freezing weather, do not use your washer
until the windshield is warmed. Otherwise the
washer �uid can form ice on the windshield,
blocking your vision.
3-9
Page 155 of 436
Anti-Lock Brake System
Warning Light
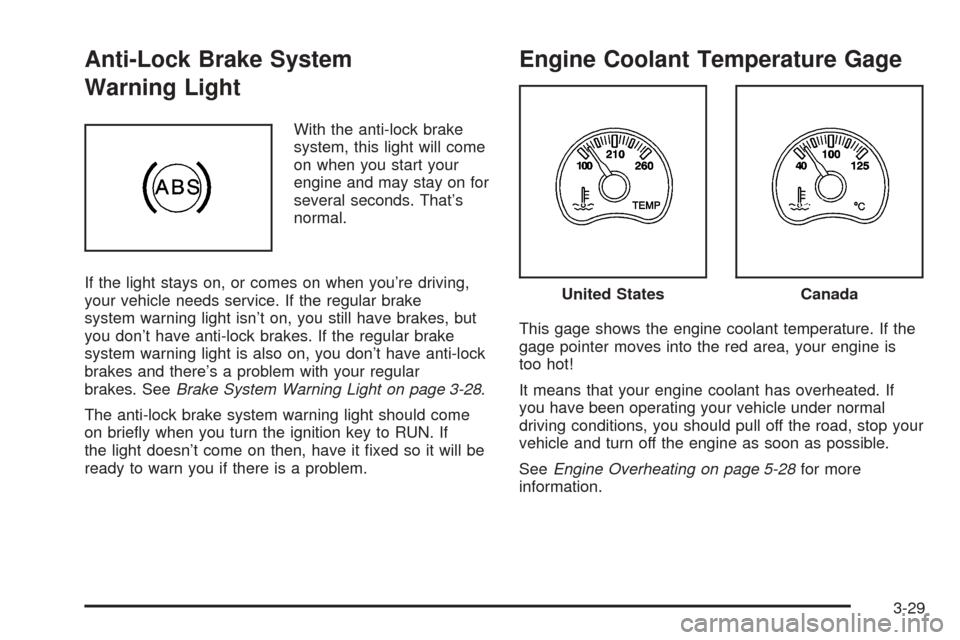
With the anti-lock brake
system, this light will come
on when you start your
engine and may stay on for
several seconds. That’s
normal.
If the light stays on, or comes on when you’re driving,
your vehicle needs service. If the regular brake
system warning light isn’t on, you still have brakes, but
you don’t have anti-lock brakes. If the regular brake
system warning light is also on, you don’t have anti-lock
brakes and there’s a problem with your regular
brakes. SeeBrake System Warning Light on page 3-28.
The anti-lock brake system warning light should come
on brie�y when you turn the ignition key to RUN. If
the light doesn’t come on then, have it �xed so it will be
ready to warn you if there is a problem.
Engine Coolant Temperature Gage
This gage shows the engine coolant temperature. If the
gage pointer moves into the red area, your engine is
too hot!
It means that your engine coolant has overheated. If
you have been operating your vehicle under normal
driving conditions, you should pull off the road, stop your
vehicle and turn off the engine as soon as possible.
SeeEngine Overheating on page 5-28for more
information.
United StatesCanada
3-29
Page 157 of 436

If the Light Is Flashing
The following may prevent more serious damage to
your vehicle:
Reducing vehicle speed
Avoiding hard accelerations
Avoiding steep uphill grades
If you are towing a trailer, reduce the amount of
cargo being hauled as soon as it is possible
If the light stops �ashing and remains on steady, see “If
the Light Is On Steady” following.
If the light continues to �ash, when it is safe to do so,
stop the vehicle. Find a safe place to park your vehicle.
Turn the key off, wait at least 10 seconds and restart
the engine. If the light remains on steady, see “If
the Light Is On Steady” following. If the light is still
�ashing, follow the previous steps, and see your dealer
for service as soon as possible.
If the Light Is On Steady
You may be able to correct the emission system
malfunction by considering the following:
Did you recently put fuel into your vehicle?
If so, reinstall the fuel cap, making sure to fully install
the cap. SeeFilling Your Tank on page 5-8. The
diagnostic system can determine if the fuel cap hasbeen left off or improperly installed. A loose or missing
fuel cap will allow fuel to evaporate into the atmosphere.
A few driving trips with the cap properly installed
should turn the light off.
Did you just drive through a deep puddle of water?
If so, your electrical system may be wet. The condition
will usually be corrected when the electrical system
dries out. A few driving trips should turn the light off.
Have you recently changed brands of fuel?
If so, be sure to fuel your vehicle with quality fuel. See
Gasoline Octane on page 5-5. Poor fuel quality will
cause your engine not to run as efficiently as designed.
You may notice this as stalling after start-up, stalling
when you put the vehicle into gear, mis�ring, hesitation
on acceleration, or stumbling on acceleration. (These
conditions may go away once the engine is warmed up.)
This will be detected by the system and cause the
light to turn on.
If you experience one or more of these conditions,
change the fuel brand you use. It will require at least
one full tank of the proper fuel to turn the light off.
If none of the above steps have made the light turn off,
your dealer can check the vehicle. Your dealer has
the proper test equipment and diagnostic tools to �x any
mechanical or electrical problems that may have
developed.
3-31
Page 175 of 436
Playing a CD
Insert a CD partway into the slot, label side up. The
player will pull it in and the CD should begin playing. If
you want to insert a CD with the ignition off, �rst
press the eject button or the INFO knob.
If the ignition or radio is turned off with the CD in the
player, it will stay in the player. When the ignition
or radio is turned on, the CD will start playing where it
stopped, if it was the last selected audio source.
When a CD is inserted, the CD symbol will appear on
the display. As each new track starts to play, the
track number will appear on the display.
The CD player can play the smaller 3 inch (8 cm) single
CDs with an adapter ring. Full-size CDs and the
smaller CDs are loaded in the same manner.
If playing a CD-R the sound quality may be reduced
due to CD-R quality, the method of recording, the quality
of the music that has been recorded, and the way the
CD-R has been handled. There may be an increase
in skipping, difficulty in �nding tracks, and/or difficulty in
loading and ejecting. If these problems occur try a
known good CD.
Do not add paper labels to CDs, they could get caught
in the CD player.
If an error appears on the display, see “CD Messages”
later in this section.1 PREV (Previous):Press this pushbutton to go to the
beginning of the current track if more than eight
seconds have played. TRACK and the track number will
appear on the display. If this pushbutton is held or
pressed more than once, the player will continue moving
backward through the CD.
2 NEXT:Press this pushbutton to go to the next track.
TRACK and the track number will appear on the
display. If this pushbutton is held or pressed more than
once, the player will continue moving forward through
the CD.
3 REV (Reverse):Press and hold this pushbutton to
quickly reverse within a track. Press and hold this
pushbutton for less than two seconds to reverse at six
times the normal playing speed. Press and hold it
for more than two seconds to reverse at 17 times the
normal playing speed. Release this pushbutton to
play the passage. ET and the elapsed time of the track
will appear on the display.
4 FWD (Forward):Press and hold this pushbutton to
quickly advance within a track. Press and hold this
pushbutton for less than two seconds to advance at six
times the normal playing speed. Press and hold it for
more than two seconds to advance at 17 times the
normal playing speed. Release this pushbutton to play
the passage. ET and the elapsed time of the track
will appear on the display.
3-49
Page 176 of 436
6 RDM (Random):Press this pushbutton to hear the
tracks in random, rather than sequential, order. RDM ON
will appear on the display. RDM T and the track
number will appear on the display when each track
starts to play. Press this pushbutton again to turn
off random play. RDM OFF will appear on the display.
©SEEK¨:Press the left arrow to go to the start
of the current or to the previous track. Press the
right arrow to go to the start of the next track. If either
arrow is held or pressed more than once, the player will
continue moving backward or forward through the CD.
©SCAN¨:Press and hold either the SCAN or
the TYPE arrows for more than two seconds until SCAN
appears on the display and you hear a beep. The
radio will go to the next track, play for 10 seconds, then
go on to the next track. Press either the SCAN or the
TYPE arrows again, to stop scanning.INFO (Information):Press this knob to see how long
the current track has been playing. ET and the elapsed
time will appear on the display. To change the default
on the display, track or elapsed time, press the
knob until you see the display you want, then hold the
knob for two seconds. The radio will produce one
beep and the selected display will now be the default.
BAND:Press this button to listen to the radio when
a CD is playing. The inactive CD will remain safely
inside the radio for future listening.
CD AUX (Auxiliary):Press this button to play a CD
when listening to the radio. The inactive CD will remain
safely inside the radio for future listening.
Z(Eject):Press this button to stop a CD when it is
playing or to eject a CD when it is not playing. Eject
may be activated with either the ignition or radio off. CDs
may be loaded with the radio and ignition off if this
button is pressed �rst.
3-50
Page 187 of 436
CLEAN:If this message appears on the display, the
cassette tape player needs to be cleaned. It will still play
tapes, but it should be cleaned as soon as possible to
prevent damage to the tapes and player. SeeCare
of Your Cassette Tape Player on page 3-75.
If the cassette tape is not playing correctly, for any other
reason, try a known good cassette.
If any error occurs repeatedly or if an error cannot be
corrected, contact your GM dealer. If the radio displays
an error message, write it down and provide it to
your GM dealer when reporting the problem.
CD Adapter Kits
It is possible to use a portable CD player with the
cassette tape player after activating the bypass feature
on your tape player.
To activate the bypass feature, perform the
following steps:
1. Turn the ignition on.
2. Turn the radio off.
3. Press and hold the TAPE DISC button for �ve
seconds. READY will appear on the display and
the tape symbol on the display will �ash, indicating
the feature is active.
4. Insert the adapter into the cassette tape slot. It will
power up the radio and begin playing.The override feature will remain active until the eject
button is pressed.
Playing a CD
Insert a CD part way into the slot, label side up. The
player will pull it in and the CD should begin playing. If
you want to insert a CD with the ignition off, �rst
press the eject button or the INFO knob.
If the ignition or radio is turned off with the CD in the
player, it will stay in the player. When the ignition
or radio is turned on, the CD will start playing where it
stopped, if it was the last selected audio source.
When a CD is inserted, the CD symbol will appear on
the display. As each new track starts to play, the
track number will appear on the display.
The CD player can play the smaller 3 inch (8 cm) single
CDs with an adapter ring. Full-size CDs and the
smaller CDs are loaded in the same manner.
If playing a CD-R the sound quality may be reduced
due to CD-R quality, the method of recording, the quality
of the music that has been recorded, and the way the
CD-R has been handled. There may be an increase
in skipping, difficulty in �nding tracks, and/or difficulty in
loading and ejecting. If these problems occur try a
known good CD.
Do not add paper labels to CDs, they could get caught
in the CD player.
3-61