2005 CHEVROLET BLAZER change time
[x] Cancel search: change timePage 141 of 436
Automatic Headlamp System
When it is dark enough outside, your automatic
headlamp system will turn on your headlamps at the
normal brightness along with other lamps such as
the taillamps, sidemarker, parking lamps and the
instrument panel lights. The radio lights will also be dim.
Your vehicle is equipped with a light sensor on the
top of the instrument panel under the radio speaker grill.
Be sure it is not covered or the system will be on
whenever the ignition is on.
The system may also turn on your headlamps when
driving through a parking garage, heavy overcast
weather or a tunnel. This is normal.
There is a delay in the transition between the daytime
and nighttime operation of the Daytime Running
Lamps (DRL) and the automatic headlamp systems so
that driving under bridges or bright overhead street
lights does not affect the system. The DRL and
automatic headlamp system will only be affected when
the light sensor sees a change in lighting lasting
longer than the delay.To idle your vehicle with the automatic headlamp
system off, set the parking brake while the ignition is off.
Then start your vehicle. The automatic headlamp
system will stay off until you release the parking brake.
As with any vehicle, you should turn on the regular
headlamps when you need them.
You may be able to turn off your automatic headlamp
system. SeeDaytime Running Lamps (DRL) on
page 3-14later in this section for more information.
If you start your vehicle in a dark garage, the automatic
headlamp system will come on immediately. Once
you leave the garage, it will take approximately
one minute for the automatic headlamp system to
change to DRL if it is light outside. During that delay,
your instrument panel cluster may not be as bright
as usual. Make sure your instrument panel brightness
control is in the full bright position. SeeInstrument Panel
Brightness on page 3-16.
3-15
Page 146 of 436
MAX A/C (Maximum Air Conditioning):This mode
recirculates much of the air inside your vehicle so
it cools quickly. It directs most of the air through the
instrument panel vents and a small amount through the
�oor vents.
You may notice a slight change in engine performance
when the air-conditioning compressor shuts off and
turns on again. This is normal. The system is designed
to make adjustments to help with fuel economy while
still maintaining the selected temperature.
The air-conditioning system removes moisture from the
air, so you may sometimes notice a small amount of
water dripping underneath your vehicle while idling
or after turning off the engine. This is normal.
Defogging and Defrosting
Fog on the inside of windows is a result of high humidity
(moisture) condensing on the cool window glass. This
can be minimized if the climate control system is
used properly. There are two modes to clear fog or frost
from your windshield and side windows. Use the
defog mode to clear the windows of fog or moisture and
warm the passengers. Use the defrost mode to
remove fog or frost from the windshield more quickly.
For best results, clear all snow and ice from the
windshield before defrosting.
-(Defog):Use this mode to direct half the air to the
windshield and half to the �oor outlet. Close the
center outlets to help defrost the side windows more
quickly. In this mode, the system will automatically force
outside air into your vehicle and it will also run the
air-conditioning compressor, unless it falls below the
temperature at which air conditioning is effective.
1(Defrost):This mode directs most of the air to the
windshield and the side window vents, with only a
little air directed to the �oor vents. When you select this
mode, the system runs the air-conditioning compressor
unless the outside temperature is at or below freezing.
Do not drive the vehicle until all the windows are clear.
Rear Window Defogger
The rear window defogger uses a warming grid to
remove fog from the rear window.
will come on to let your know that the rear window
defogger is activated.
If your vehicle has heated outside rearview mirrors,
when the rear defogger button is pressed the mirrors will
warm to help clear any fog or frost from the surface of
the mirrors.
3-20
Page 176 of 436
6 RDM (Random):Press this pushbutton to hear the
tracks in random, rather than sequential, order. RDM ON
will appear on the display. RDM T and the track
number will appear on the display when each track
starts to play. Press this pushbutton again to turn
off random play. RDM OFF will appear on the display.
©SEEK¨:Press the left arrow to go to the start
of the current or to the previous track. Press the
right arrow to go to the start of the next track. If either
arrow is held or pressed more than once, the player will
continue moving backward or forward through the CD.
©SCAN¨:Press and hold either the SCAN or
the TYPE arrows for more than two seconds until SCAN
appears on the display and you hear a beep. The
radio will go to the next track, play for 10 seconds, then
go on to the next track. Press either the SCAN or the
TYPE arrows again, to stop scanning.INFO (Information):Press this knob to see how long
the current track has been playing. ET and the elapsed
time will appear on the display. To change the default
on the display, track or elapsed time, press the
knob until you see the display you want, then hold the
knob for two seconds. The radio will produce one
beep and the selected display will now be the default.
BAND:Press this button to listen to the radio when
a CD is playing. The inactive CD will remain safely
inside the radio for future listening.
CD AUX (Auxiliary):Press this button to play a CD
when listening to the radio. The inactive CD will remain
safely inside the radio for future listening.
Z(Eject):Press this button to stop a CD when it is
playing or to eject a CD when it is not playing. Eject
may be activated with either the ignition or radio off. CDs
may be loaded with the radio and ignition off if this
button is pressed �rst.
3-50
Page 178 of 436
This system relies upon receiving speci�c information
from these stations and will only work when the
information is available. In rare cases, a radio station
may broadcast incorrect information that will cause
the radio features to work improperly. If this happens,
contact the radio station.
While the radio is tuned to an RDS station, the station
name or call letters will appear on the display instead of
the frequency. RDS stations may also provide the
time of day, a program type (PTY) for current
programming, and the name of the program being
broadcast.
XM™ Satellite Radio Service
XM™ is a satellite radio service that is based in the 48
contiguous United States. XM™ offers 100
coast-to-coast channels including music, news, sports,
talk, and children’s programming. XM™ provides
digital quality audio and text information that includes
song title and artist name. A service fee is required
in order to receive the XM™ service. For more
information, contact XM™ at www.xmradio.com or call
1-800-852-XMXM (9696).
Playing the Radio
PWR (Power):Press this knob to turn the system on
and off.
oVOLp(Volume):Turn this knob to increase or to
decrease the volume.
INFO (Information):Press this knob to switch the
display between the radio station frequency and
the time. When the ignition is off, press this knob to
display the time.
For RDS, press the INFO knob to change what appears
on the display while using RDS. The display options
are station name, RDS station frequency, PTY, and the
name of the program (if available).
For XM™ (if equipped), press the INFO knob while in
XM™ mode to retrieve four different categories of
information related to the current song or channel: Artist,
Song Title, Category or PTY, Channel Number/
Channel Name.
To change the default on the display, press the INFO
knob until you see the display you want, then hold
the knob until you hear a beep. The selected display will
now be the default.
3-52
Page 189 of 436
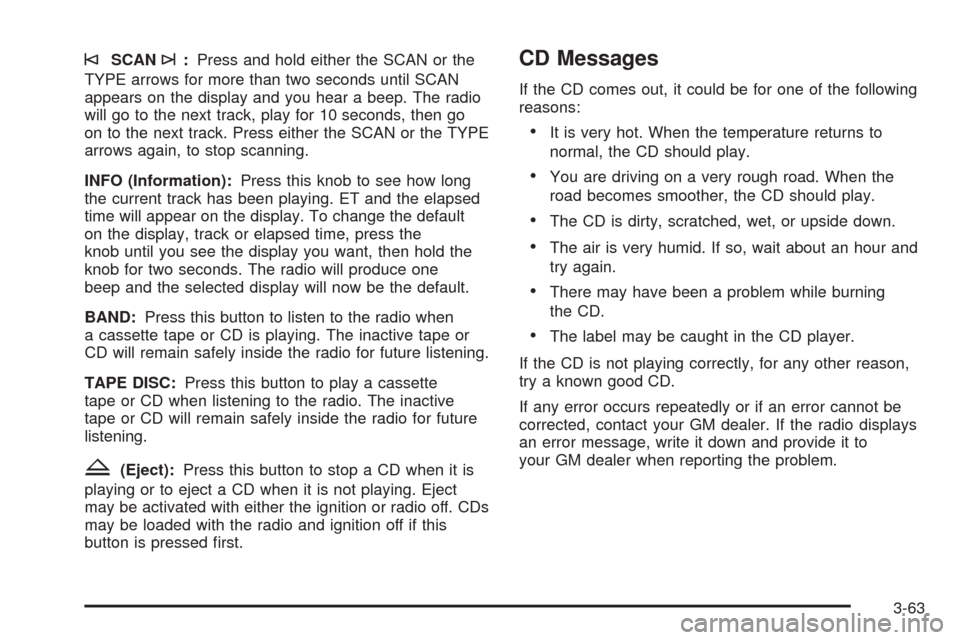
©SCAN¨:Press and hold either the SCAN or the
TYPE arrows for more than two seconds until SCAN
appears on the display and you hear a beep. The radio
will go to the next track, play for 10 seconds, then go
on to the next track. Press either the SCAN or the TYPE
arrows again, to stop scanning.
INFO (Information):Press this knob to see how long
the current track has been playing. ET and the elapsed
time will appear on the display. To change the default
on the display, track or elapsed time, press the
knob until you see the display you want, then hold the
knob for two seconds. The radio will produce one
beep and the selected display will now be the default.
BAND:Press this button to listen to the radio when
a cassette tape or CD is playing. The inactive tape or
CD will remain safely inside the radio for future listening.
TAPE DISC:Press this button to play a cassette
tape or CD when listening to the radio. The inactive
tape or CD will remain safely inside the radio for future
listening.
Z(Eject):Press this button to stop a CD when it is
playing or to eject a CD when it is not playing. Eject
may be activated with either the ignition or radio off. CDs
may be loaded with the radio and ignition off if this
button is pressed �rst.
CD Messages
If the CD comes out, it could be for one of the following
reasons:
It is very hot. When the temperature returns to
normal, the CD should play.
You are driving on a very rough road. When the
road becomes smoother, the CD should play.
The CD is dirty, scratched, wet, or upside down.
The air is very humid. If so, wait about an hour and
try again.
There may have been a problem while burning
the CD.
The label may be caught in the CD player.
If the CD is not playing correctly, for any other reason,
try a known good CD.
If any error occurs repeatedly or if an error cannot be
corrected, contact your GM dealer. If the radio displays
an error message, write it down and provide it to
your GM dealer when reporting the problem.
3-63
Page 190 of 436
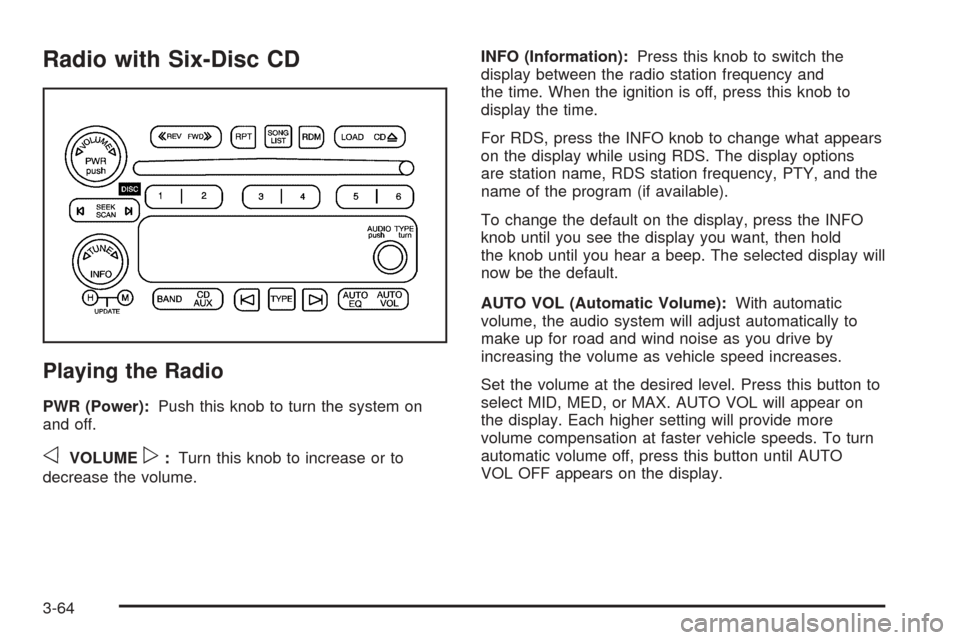
Radio with Six-Disc CD
Playing the Radio
PWR (Power):Push this knob to turn the system on
and off.
oVOLUMEp:Turn this knob to increase or to
decrease the volume.INFO (Information):Press this knob to switch the
display between the radio station frequency and
the time. When the ignition is off, press this knob to
display the time.
For RDS, press the INFO knob to change what appears
on the display while using RDS. The display options
are station name, RDS station frequency, PTY, and the
name of the program (if available).
To change the default on the display, press the INFO
knob until you see the display you want, then hold
the knob until you hear a beep. The selected display will
now be the default.
AUTO VOL (Automatic Volume):With automatic
volume, the audio system will adjust automatically to
make up for road and wind noise as you drive by
increasing the volume as vehicle speed increases.
Set the volume at the desired level. Press this button to
select MID, MED, or MAX. AUTO VOL will appear on
the display. Each higher setting will provide more
volume compensation at faster vehicle speeds. To turn
automatic volume off, press this button until AUTO
VOL OFF appears on the display.
3-64
Page 198 of 436
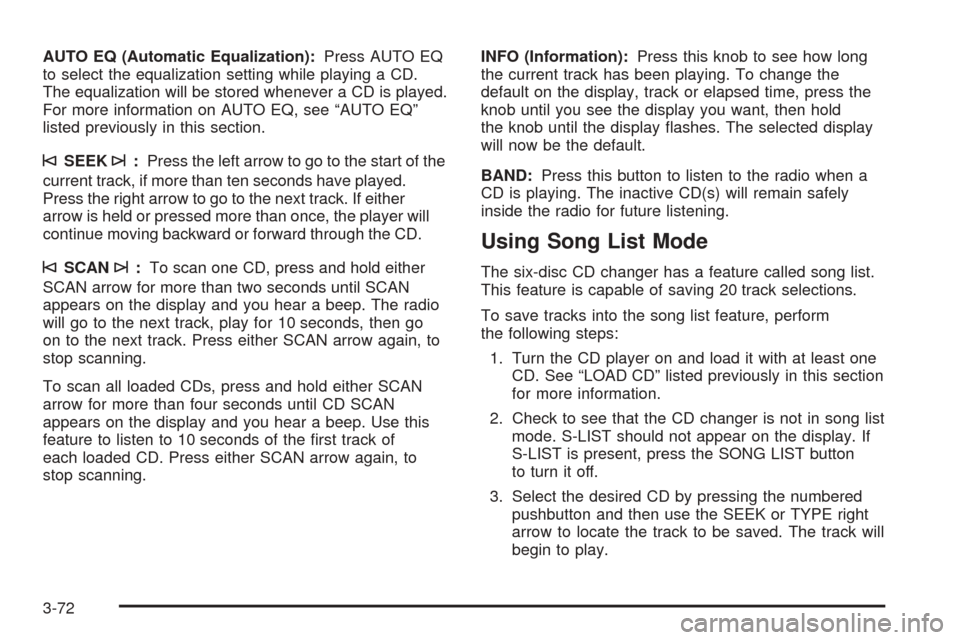
AUTO EQ (Automatic Equalization):Press AUTO EQ
to select the equalization setting while playing a CD.
The equalization will be stored whenever a CD is played.
For more information on AUTO EQ, see “AUTO EQ”
listed previously in this section.
©SEEK¨:Press the left arrow to go to the start of the
current track, if more than ten seconds have played.
Press the right arrow to go to the next track. If either
arrow is held or pressed more than once, the player will
continue moving backward or forward through the CD.
©SCAN¨:To scan one CD, press and hold either
SCAN arrow for more than two seconds until SCAN
appears on the display and you hear a beep. The radio
will go to the next track, play for 10 seconds, then go
on to the next track. Press either SCAN arrow again, to
stop scanning.
To scan all loaded CDs, press and hold either SCAN
arrow for more than four seconds until CD SCAN
appears on the display and you hear a beep. Use this
feature to listen to 10 seconds of the �rst track of
each loaded CD. Press either SCAN arrow again, to
stop scanning.INFO (Information):Press this knob to see how long
the current track has been playing. To change the
default on the display, track or elapsed time, press the
knob until you see the display you want, then hold
the knob until the display �ashes. The selected display
will now be the default.
BAND:Press this button to listen to the radio when a
CD is playing. The inactive CD(s) will remain safely
inside the radio for future listening.
Using Song List Mode
The six-disc CD changer has a feature called song list.
This feature is capable of saving 20 track selections.
To save tracks into the song list feature, perform
the following steps:
1. Turn the CD player on and load it with at least one
CD. See “LOAD CD” listed previously in this section
for more information.
2. Check to see that the CD changer is not in song list
mode. S-LIST should not appear on the display. If
S-LIST is present, press the SONG LIST button
to turn it off.
3. Select the desired CD by pressing the numbered
pushbutton and then use the SEEK or TYPE right
arrow to locate the track to be saved. The track will
begin to play.
3-72
Page 211 of 436

The anti-lock system can change the brake pressure
faster than any driver could. The computer is
programmed to make the most of available tire and road
conditions. This can help you steer around the obstacle
while braking hard.
As you brake, your computer keeps receiving updates
on wheel speed and controls braking pressure
accordingly.Remember: Anti-lock does not change the time you
need to get your foot up to the brake pedal or always
decrease stopping distance. If you get too close to
the vehicle in front of you, you will not have time to apply
your brakes if that vehicle suddenly slows or stops.
Always leave enough room up ahead to stop, even
though you have anti-lock brakes.
Using Anti-Lock
Do not pump the brakes. Just hold the brake pedal
down �rmly and let anti-lock work for you. You may feel
the brakes vibrate, or you may notice some noise,
but this is normal.
Braking in Emergencies
With anti-lock, you can steer and brake at the same
time. In many emergencies, steering can help you more
than even the very best braking.
4-9