2005 CHEVROLET AVEO turn signal
[x] Cancel search: turn signalPage 97 of 316
Instrument Panel Overview...............................3-4
Hazard Warning Flashers................................3-5
Other Warning Devices...................................3-5
Horn.............................................................3-6
Tilt Wheel.....................................................3-6
Turn Signal/Multifunction Lever.........................3-6
Turn and Lane-Change Signals........................3-7
Headlamp High/Low-Beam Changer..................3-7
Flash-to-Pass.................................................3-7
Windshield Wipers..........................................3-8
Windshield Washer.........................................3-9
Exterior Lamps...............................................3-9
Headlamps on Reminder................................3-10
Daytime Running Lamps (DRL).......................3-10
Fog Lamps..................................................3-11
Instrument Panel Brightness...........................3-11
Dome Lamp.................................................3-12
Accessory Power Outlets...............................3-12
Ashtrays and Cigarette Lighter........................3-13
Climate Controls............................................3-14
Climate Control System.................................3-14
Outlet Adjustment.........................................3-17
Passenger Compartment Air Filter...................3-18Warning Lights, Gages, and Indicators............3-19
Instrument Panel Cluster................................3-20
Speedometer and Odometer...........................3-21
Trip Odometer..............................................3-21
Tachometer.................................................3-21
Safety Belt Reminder Tone............................3-21
Brake System Warning Light..........................3-22
Engine Coolant Temperature Gage..................3-23
Highbeam On Light.......................................3-23
Fuel Gage...................................................3-23
Low Fuel Warning Light.................................3-24
Secondary Information Center (SIC).................3-25
Clock..........................................................3-26
Safety Belt Reminder Light.............................3-26
Airbag Readiness Light..................................3-26
Charging System Light..................................3-27
Anti-Lock Brake System Warning Light.............3-28
Hold Mode Light...........................................3-28
Malfunction Indicator Lamp.............................3-28
Oil Pressure Light.........................................3-31
Fog Lamp Light............................................3-32
Daytime Running Lamps (DRL)
Indicator Light...........................................3-32
Door Ajar Light.............................................3-32
Section 3 Instrument Panel
3-1
Page 101 of 316
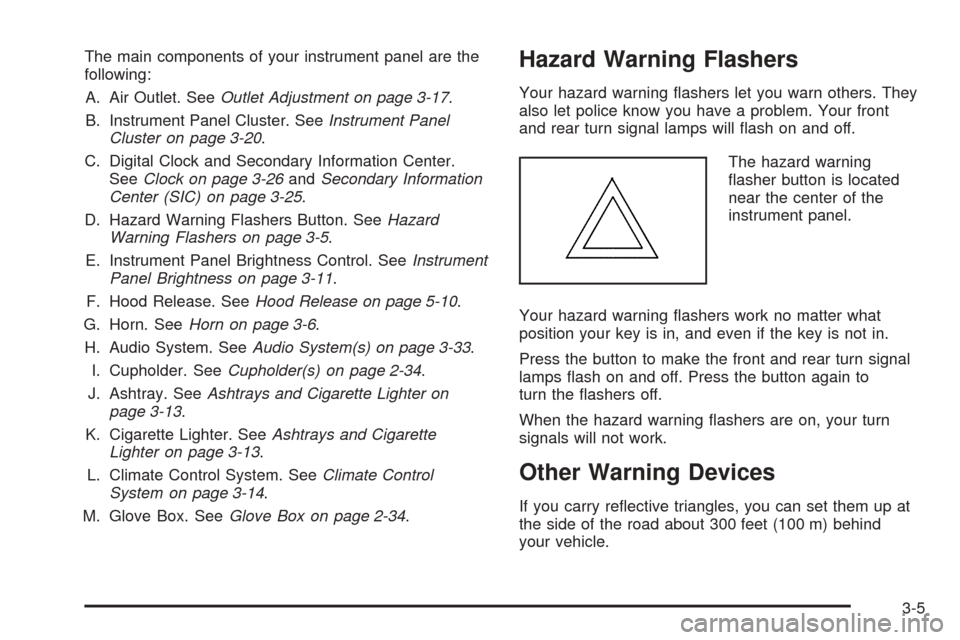
The main components of your instrument panel are the
following:
A. Air Outlet. SeeOutlet Adjustment on page 3-17.
B. Instrument Panel Cluster. SeeInstrument Panel
Cluster on page 3-20.
C. Digital Clock and Secondary Information Center.
SeeClock on page 3-26andSecondary Information
Center (SIC) on page 3-25.
D. Hazard Warning Flashers Button. SeeHazard
Warning Flashers on page 3-5.
E. Instrument Panel Brightness Control. SeeInstrument
Panel Brightness on page 3-11.
F. Hood Release. SeeHood Release on page 5-10.
G. Horn. SeeHorn on page 3-6.
H. Audio System. SeeAudio System(s) on page 3-33.
I. Cupholder. SeeCupholder(s) on page 2-34.
J. Ashtray. SeeAshtrays and Cigarette Lighter on
page 3-13.
K. Cigarette Lighter. SeeAshtrays and Cigarette
Lighter on page 3-13.
L. Climate Control System. SeeClimate Control
System on page 3-14.
M. Glove Box. SeeGlove Box on page 2-34.Hazard Warning Flashers
Your hazard warning flashers let you warn others. They
also let police know you have a problem. Your front
and rear turn signal lamps will flash on and off.
The hazard warning
flasher button is located
near the center of the
instrument panel.
Your hazard warning flashers work no matter what
position your key is in, and even if the key is not in.
Press the button to make the front and rear turn signal
lamps flash on and off. Press the button again to
turn the flashers off.
When the hazard warning flashers are on, your turn
signals will not work.
Other Warning Devices
If you carry reflective triangles, you can set them up at
the side of the road about 300 feet (100 m) behind
your vehicle.
3-5
Page 102 of 316
Horn
Press near or on the horn symbols on your steering
wheel pad to sound the horn.
Tilt Wheel
Your vehicle has a tilt wheel which allows you to adjust
the steering wheel before you drive. You can raise it
to the highest level to give your legs more room when
you exit and enter the vehicle.
The tilt wheel lever is
located underneath the
steering column slightly
to the left.
To tilt the steering wheel, hold the wheel and push the
lever down. Then, move the wheel to a comfortable
position and pull the lever up to lock the wheel in place.
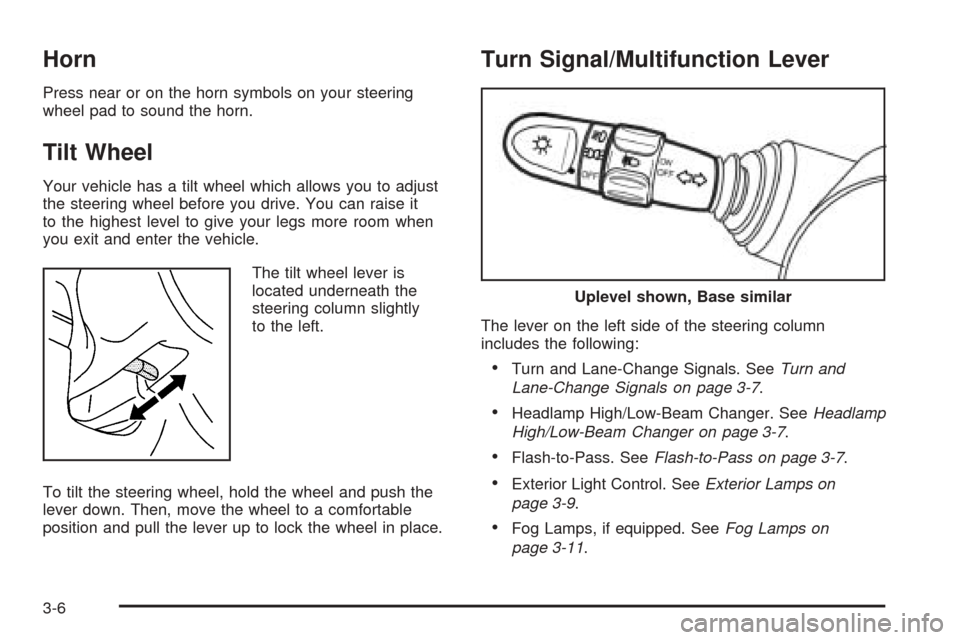
Turn Signal/Multifunction Lever
The lever on the left side of the steering column
includes the following:
•Turn and Lane-Change Signals. SeeTurn and
Lane-Change Signals on page 3-7.
•Headlamp High/Low-Beam Changer. SeeHeadlamp
High/Low-Beam Changer on page 3-7.
•Flash-to-Pass. SeeFlash-to-Pass on page 3-7.
•Exterior Light Control. SeeExterior Lamps on
page 3-9.
•Fog Lamps, if equipped. SeeFog Lamps on
page 3-11.
Uplevel shown, Base similar
3-6
Page 103 of 316
Turn and Lane-Change Signals
The turn signal has two upward (for right) and two
downward (for left) positions. These positions allow you
to signal a turn or a lane change.
To signal a turn, move the lever all the way up or down.
When the turn is finished, the lever will return
automatically.
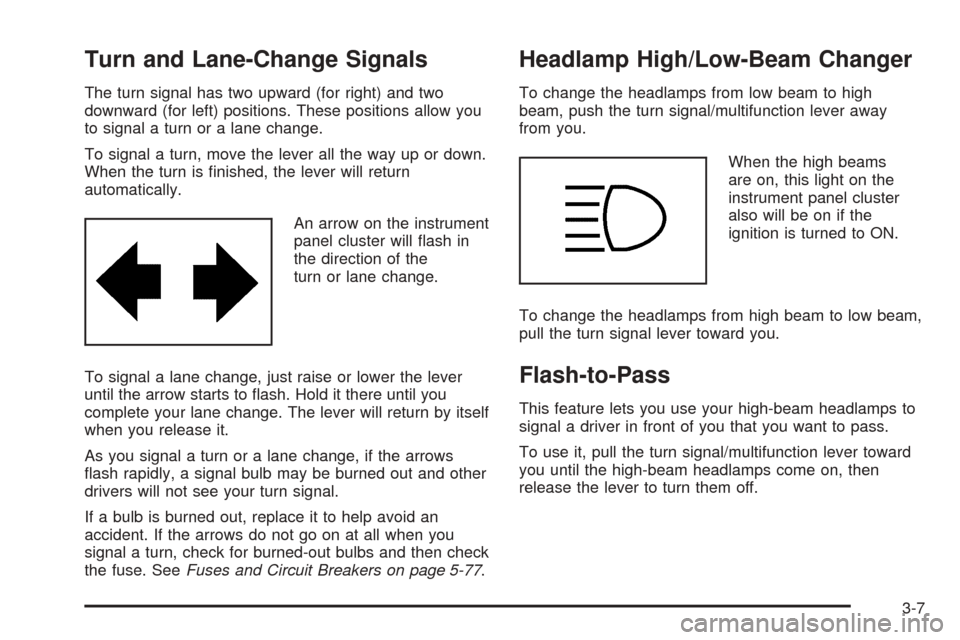
An arrow on the instrument
panel cluster will flash in
the direction of the
turn or lane change.
To signal a lane change, just raise or lower the lever
until the arrow starts to flash. Hold it there until you
complete your lane change. The lever will return by itself
when you release it.
As you signal a turn or a lane change, if the arrows
flash rapidly, a signal bulb may be burned out and other
drivers will not see your turn signal.
If a bulb is burned out, replace it to help avoid an
accident. If the arrows do not go on at all when you
signal a turn, check for burned-out bulbs and then check
the fuse. SeeFuses and Circuit Breakers on page 5-77.
Headlamp High/Low-Beam Changer
To change the headlamps from low beam to high
beam, push the turn signal/multifunction lever away
from you.
When the high beams
are on, this light on the
instrument panel cluster
also will be on if the
ignition is turned to ON.
To change the headlamps from high beam to low beam,
pull the turn signal lever toward you.
Flash-to-Pass
This feature lets you use your high-beam headlamps to
signal a driver in front of you that you want to pass.
To use it, pull the turn signal/multifunction lever toward
you until the high-beam headlamps come on, then
release the lever to turn them off.
3-7
Page 107 of 316
Fog Lamps
If your vehicle has fog lamps, use them for better
visibility in foggy or misty conditions. The control for the
fog lamps is a band located on the middle of the turn
signal/multifunction lever.
While using the fog lamps, the ignition must be turned
to ON and the low-beam headlamps or parking
lamps must be on.
Turn the band to ON to turn the fog lamps on. An
indicator light on the secondary information center will
come on when the fog lamps are on. SeeFog Lamp
Light on page 3-32.
Turn the band to OFF to turn the fog lamps off. The fog
lamps will also turn off when the high-beam headlamps
are turned on. When the high-beam headlamps are
turned off, the fog lamps will turn on again.
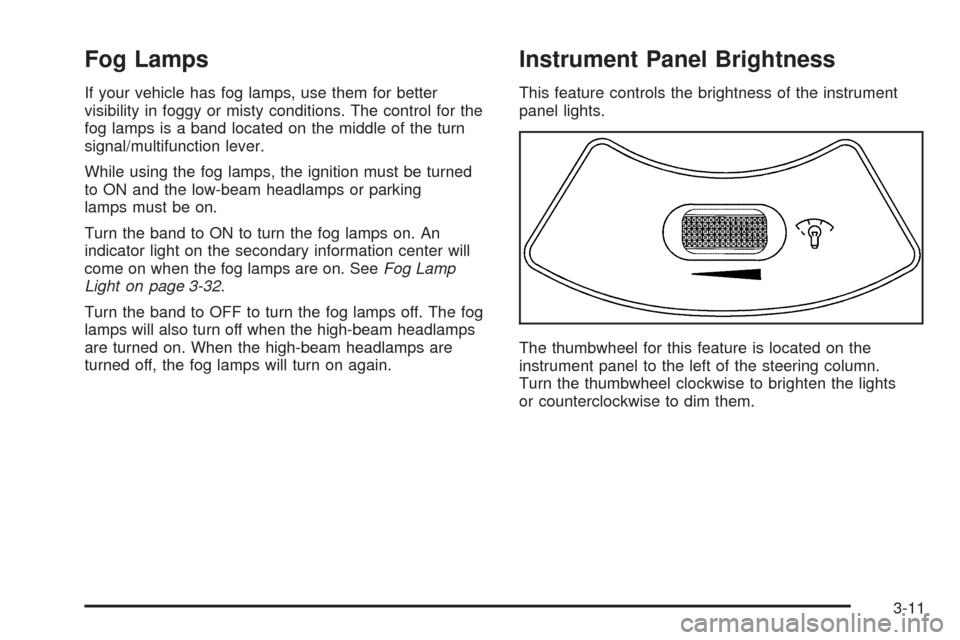
Instrument Panel Brightness
This feature controls the brightness of the instrument
panel lights.
The thumbwheel for this feature is located on the
instrument panel to the left of the steering column.
Turn the thumbwheel clockwise to brighten the lights
or counterclockwise to dim them.
3-11
Page 130 of 316
Finding a Station
AM/FM:Press this button to switch between FM1, FM2,
or AM. The display will show the selection.
p(Tune):Turn this knob to select radio stations.
tu(Scan):Press this knob until SCAN flashes on
the display, then press either the up or the down
arrow buttons to determine the direction for the radio to
scan the stations. The radio will go to a station, play
for a few seconds, then go on to the next station. Press
either arrow button again to stop scanning.
The radio will only scan stations with a strong signal
that are in the selected band.
Setting Preset Stations
Up to 18 stations (six FM1, six FM2, and six AM) can be
programmed on the six numbered pushbuttons, by
performing the following steps:
1. Turn the radio on.
2. Press AM/FM to select FM1, FM2, or AM.
3. Tune in the desired station.4. Press and hold one of the six numbered
pushbuttons for longer than two seconds. Ch will
appear on the display when the station has
been set. Whenever that numbered pushbutton is
pressed, the station that was set will return.
5. Repeat the steps for each pushbutton.
Setting the Tone (Bass/Treble)
f
(Bass/Treble):Press this button until BAS appears
on the display. Then turn the volume knob to increase
or to decrease the bass. The display will show the
bass level.
Press this button until TRE appears on the display.
Then turn the volume knob to increase or to decrease
the treble. The display will show the treble level.
If a station is weak or noisy, decrease the treble.
3-34
Page 131 of 316
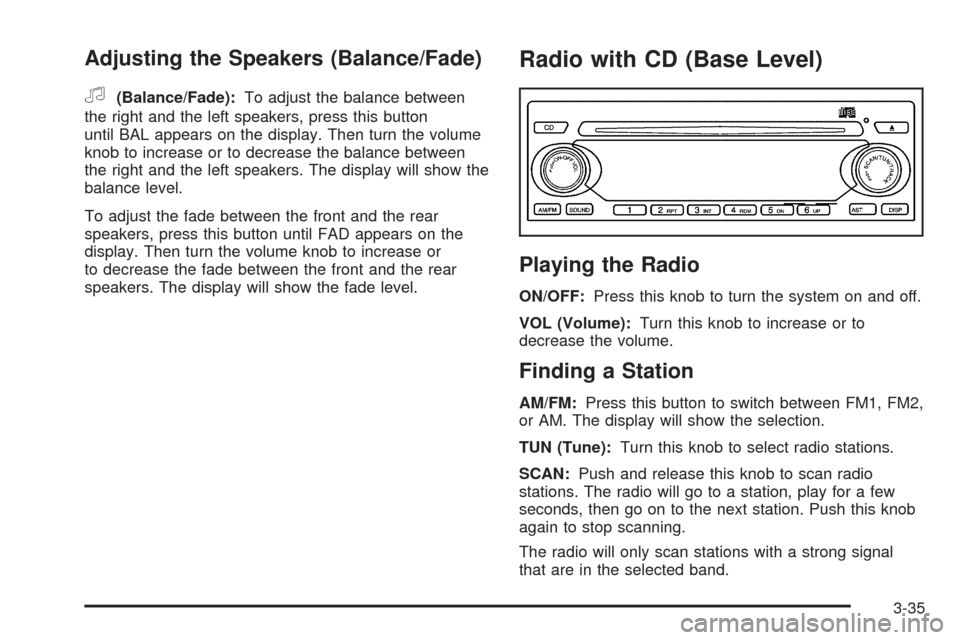
Adjusting the Speakers (Balance/Fade)
f
(Balance/Fade):To adjust the balance between
the right and the left speakers, press this button
until BAL appears on the display. Then turn the volume
knob to increase or to decrease the balance between
the right and the left speakers. The display will show the
balance level.
To adjust the fade between the front and the rear
speakers, press this button until FAD appears on the
display. Then turn the volume knob to increase or
to decrease the fade between the front and the rear
speakers. The display will show the fade level.
Radio with CD (Base Level)
Playing the Radio
ON/OFF:Press this knob to turn the system on and off.
VOL (Volume):Turn this knob to increase or to
decrease the volume.
Finding a Station
AM/FM:Press this button to switch between FM1, FM2,
or AM. The display will show the selection.
TUN (Tune):Turn this knob to select radio stations.
SCAN:Push and release this knob to scan radio
stations. The radio will go to a station, play for a few
seconds, then go on to the next station. Push this knob
again to stop scanning.
The radio will only scan stations with a strong signal
that are in the selected band.
3-35
Page 135 of 316
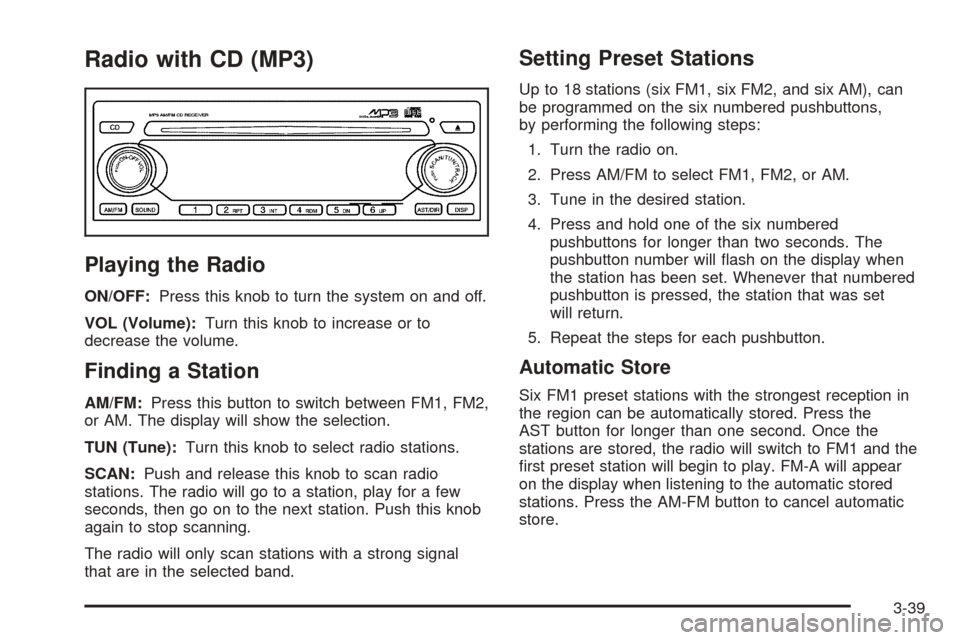
Radio with CD (MP3)
Playing the Radio
ON/OFF:Press this knob to turn the system on and off.
VOL (Volume):Turn this knob to increase or to
decrease the volume.
Finding a Station
AM/FM:Press this button to switch between FM1, FM2,
or AM. The display will show the selection.
TUN (Tune):Turn this knob to select radio stations.
SCAN:Push and release this knob to scan radio
stations. The radio will go to a station, play for a few
seconds, then go on to the next station. Push this knob
again to stop scanning.
The radio will only scan stations with a strong signal
that are in the selected band.
Setting Preset Stations
Up to 18 stations (six FM1, six FM2, and six AM), can
be programmed on the six numbered pushbuttons,
by performing the following steps:
1. Turn the radio on.
2. Press AM/FM to select FM1, FM2, or AM.
3. Tune in the desired station.
4. Press and hold one of the six numbered
pushbuttons for longer than two seconds. The
pushbutton number will flash on the display when
the station has been set. Whenever that numbered
pushbutton is pressed, the station that was set
will return.
5. Repeat the steps for each pushbutton.
Automatic Store
Six FM1 preset stations with the strongest reception in
the region can be automatically stored. Press the
AST button for longer than one second. Once the
stations are stored, the radio will switch to FM1 and the
first preset station will begin to play. FM-A will appear
on the display when listening to the automatic stored
stations. Press the AM-FM button to cancel automatic
store.
3-39