2005 CHEVROLET AVEO air condition
[x] Cancel search: air conditionPage 110 of 316
Climate Controls
Climate Control System
With this system you can control the heating, cooling
and ventilation for your vehicle.
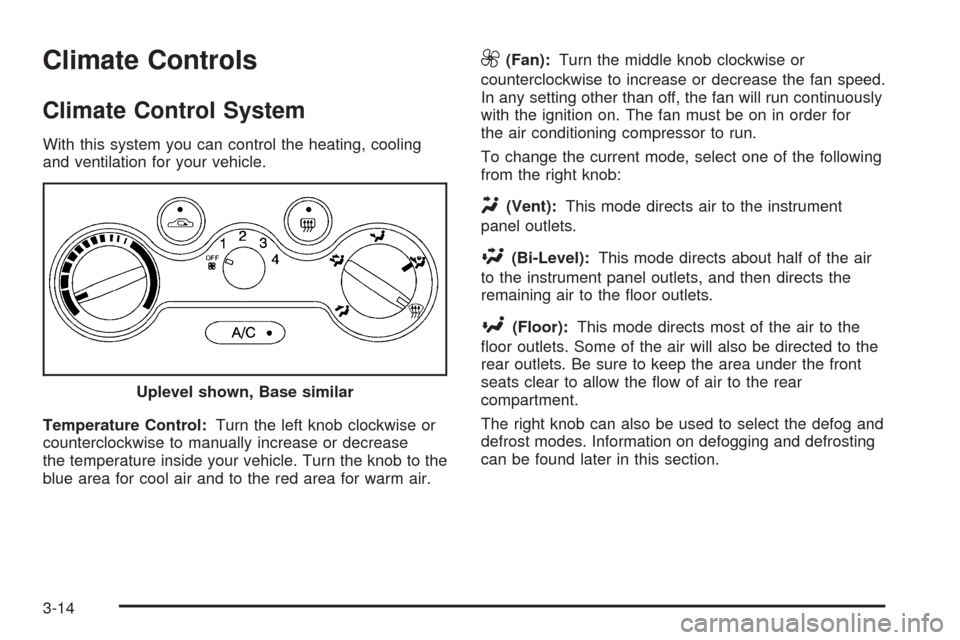
Temperature Control:Turn the left knob clockwise or
counterclockwise to manually increase or decrease
the temperature inside your vehicle. Turn the knob to the
blue area for cool air and to the red area for warm air.
9(Fan):Turn the middle knob clockwise or
counterclockwise to increase or decrease the fan speed.
In any setting other than off, the fan will run continuously
with the ignition on. The fan must be on in order for
the air conditioning compressor to run.
To change the current mode, select one of the following
from the right knob:
Y(Vent):This mode directs air to the instrument
panel outlets.
\(Bi-Level):This mode directs about half of the air
to the instrument panel outlets, and then directs the
remaining air to the floor outlets.
[(Floor):This mode directs most of the air to the
floor outlets. Some of the air will also be directed to the
rear outlets. Be sure to keep the area under the front
seats clear to allow the flow of air to the rear
compartment.
The right knob can also be used to select the defog and
defrost modes. Information on defogging and defrosting
can be found later in this section. Uplevel shown, Base similar
3-14
Page 111 of 316
?(Recirculation):This mode keeps outside air from
coming into the vehicle. It can be used to prevent outside
air and odors from entering your vehicle or to help heat or
cool the air inside your vehicle more quickly.
If your vehicle has a recirculation button (uplevel model),
press the button to turn the recirculation mode on.
When the button is pressed, an indicator light in the
button will come on. Press the button again to return to
outside air mode.
If your vehicle has an air intake lever (base model), move
the lever to choose the recirculation mode.
Using the recirculation mode for extended periods may
cause your windows to fog. If this happens, select the
defrost mode.
:(Outside Air):This mode brings outside air into
the vehicle.
If your vehicle has a recirculation button (uplevel
model), press the button until the recirculation mode is
turned off. Your vehicle will then return to outside
air mode.If your vehicle has an air intake lever (base model),
move the lever to choose the outside air mode.
A/C (Air Conditioning):If your vehicle has air
conditioning, follow these steps to use the system. Start
the engine and set the fan control knob to the desired
speed. The air conditioning compressor does not
operate when the fan control knob is in the off position.
Press the A/C button to turn the air conditioning
compressor on and off. When the A/C button is pressed,
an indicator light in the button will come on to let you
know that air conditioning is activated.
On hot days, open the windows to let hot inside air
escape; then close them. This helps to reduce the time
it takes for your vehicle to cool down. It also helps
the system to operate more efficiently.
For quick cool down on hot days, do the following:
1. Select the vent mode.
2. Select the highest fan speed.
3. Press the A/C button.
4. Select the recirculation mode.
5. Select the coolest temperature.
3-15
Page 112 of 316
Using these settings together for long periods of time
may cause the air inside of your vehicle to become too
dry. To prevent this from happening, after the air in
your vehicle has cooled, turn the recirculation mode off.
The air conditioning system removes moisture from
the air, so you may sometimes notice a small amount
of water dripping underneath your vehicle while idling or
after turning off the engine. This is normal.
Defogging and Defrosting
Fog on the inside of windows is a result of high humidity
or moisture condensing on the cool window glass.
This can be minimized if the climate control system
is used properly. There are two modes to clear fog or
frost from your windshield. Use the defog mode to
clear the windows of fog or moisture and warm
the passengers. Use the defrost mode to remove
fog or frost from the windshield more quickly.
For best results, clear all snow and ice from the
windshield before defrosting.
Select one of these available modes from the
right knob.
0(Defog):This mode directs most of the air to the
windshield and the floor outlets. A small amount of air is
also directed to the outboard outlets for the side
windows.
To help clear the side windows quickly, do the following:
1. Select the bi-level mode.
2. Select the highest fan speed.
3. Select A/C.
4. Select the temperature.
1(Defrost):This mode directs the air to the
windshield and the outboard outlets for the side
windows.
To help clear the windshield quickly, do the following:
1. Select the defrost mode.
2. Select the highest temperature.
3. Select the highest fan speed.
Do not drive the vehicle until all windows are clear.
3-16
Page 113 of 316
Rear Window and Outside Mirror
Defogger
Your vehicle may have a rear window and outside
mirror defogger. This feature will only work when the
ignition is turned to ON.
The rear window defogger uses a warming grid to
remove fog or frost from the rear window. Before using
this feature, clear as much snow from the rear
window as possible.
<(Rear Window Defogger):Press this button to
turn the rear window and outside mirror defogger on or
off. An indicator light in the button will come on to let
you know that the feature is activated.
If your vehicle has air conditioning, the rear window
defogger will turn off about 10 minutes after the button
is pressed. The defogger can also be turned off by
pressing the button again or by turning the engine off.
Notice:Do not use anything sharp on the inside
of the rear window. If you do, you could cut or
damage the warming grid, and the repairs would
not be covered by your warranty. Do not attach
a temporary vehicle license, tape, a decal or
anything similar to the defogger grid.
Outlet Adjustment
Use the knob located in the center of each outlet to
change the direction of the airflow.
Operation Tips
•
Clear away any ice, snow or leaves from the air
inlets at the base of the windshield that may
block the flow of air into your vehicle.
•Use of non-GM approved hood deflectors may
adversely affect the performance of the system.
•Keep the path under the front seats clear of objects
to help circulate the air inside of your vehicle more
effectively.
3-17
Page 123 of 316
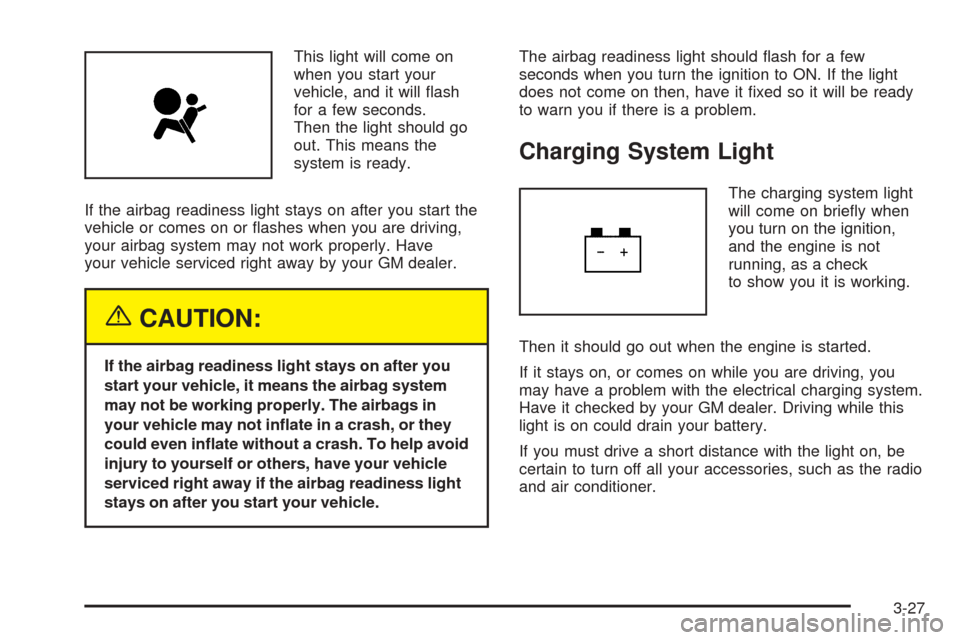
This light will come on
when you start your
vehicle, and it will flash
for a few seconds.
Then the light should go
out. This means the
system is ready.
If the airbag readiness light stays on after you start the
vehicle or comes on or flashes when you are driving,
your airbag system may not work properly. Have
your vehicle serviced right away by your GM dealer.
{CAUTION:
If the airbag readiness light stays on after you
start your vehicle, it means the airbag system
may not be working properly. The airbags in
your vehicle may not in�ate in a crash, or they
could even in�ate without a crash. To help avoid
injury to yourself or others, have your vehicle
serviced right away if the airbag readiness light
stays on after you start your vehicle.The airbag readiness light should flash for a few
seconds when you turn the ignition to ON. If the light
does not come on then, have it fixed so it will be ready
to warn you if there is a problem.
Charging System Light
The charging system light
will come on briefly when
you turn on the ignition,
and the engine is not
running, as a check
to show you it is working.
Then it should go out when the engine is started.
If it stays on, or comes on while you are driving, you
may have a problem with the electrical charging system.
Have it checked by your GM dealer. Driving while this
light is on could drain your battery.
If you must drive a short distance with the light on, be
certain to turn off all your accessories, such as the radio
and air conditioner.
3-27
Page 125 of 316
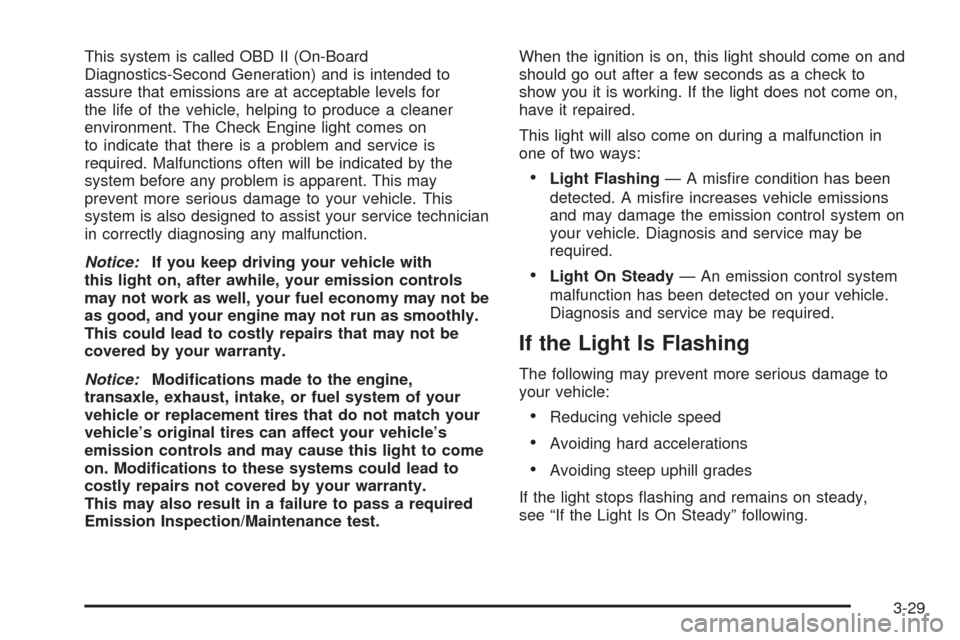
This system is called OBD II (On-Board
Diagnostics-Second Generation) and is intended to
assure that emissions are at acceptable levels for
the life of the vehicle, helping to produce a cleaner
environment. The Check Engine light comes on
to indicate that there is a problem and service is
required. Malfunctions often will be indicated by the
system before any problem is apparent. This may
prevent more serious damage to your vehicle. This
system is also designed to assist your service technician
in correctly diagnosing any malfunction.
Notice:If you keep driving your vehicle with
this light on, after awhile, your emission controls
may not work as well, your fuel economy may not be
as good, and your engine may not run as smoothly.
This could lead to costly repairs that may not be
covered by your warranty.
Notice:Modi�cations made to the engine,
transaxle, exhaust, intake, or fuel system of your
vehicle or replacement tires that do not match your
vehicle’s original tires can affect your vehicle’s
emission controls and may cause this light to come
on. Modi�cations to these systems could lead to
costly repairs not covered by your warranty.
This may also result in a failure to pass a required
Emission Inspection/Maintenance test.When the ignition is on, this light should come on and
should go out after a few seconds as a check to
show you it is working. If the light does not come on,
have it repaired.
This light will also come on during a malfunction in
one of two ways:
•Light Flashing— A misfire condition has been
detected. A misfire increases vehicle emissions
and may damage the emission control system on
your vehicle. Diagnosis and service may be
required.
•Light On Steady— An emission control system
malfunction has been detected on your vehicle.
Diagnosis and service may be required.
If the Light Is Flashing
The following may prevent more serious damage to
your vehicle:
•Reducing vehicle speed
•Avoiding hard accelerations
•Avoiding steep uphill grades
If the light stops flashing and remains on steady,
see “If the Light Is On Steady” following.
3-29
Page 183 of 316
Fuel
Use of the recommended fuel is an important part of the
proper maintenance of your vehicle.
Gasoline Octane
Use regular unleaded gasoline with a posted octane
of 87 or higher. If the octane is less than 87, you may get
a heavy knocking noise when you drive. If this occurs,
use a gasoline rated at 87 octane or higher as soon as
possible. Otherwise, you might damage your engine.
A little pinging noise when you accelerate or drive uphill
is considered normal. This does not indicate a problem
exists or that a higher-octane fuel is necessary. If you are
using 87 octane or higher-octane fuel and hear heavy
knocking, your engine needs service.
Gasoline Speci�cations
It is recommended that gasoline meet specifications
which were developed by automobile manufacturers
around the world and contained in the World-Wide Fuel
Charter which is available from the Alliance of Automobile
Manufacturers at www.autoalliance.org/fuel_charter.htm.
Gasoline meeting these specifications could provide
improved driveability and emission control system
performance compared to other gasoline.
California Fuel
If your vehicle is certified to meet California Emission
Standards, it is designed to operate on fuels that
meet California specifications. See the underhood
emission control label. If this fuel is not available
in states adopting California emissions standards, your
vehicle will operate satisfactorily on fuels meeting
federal specifications, but emission control system
performance may be affected. The malfunction indicator
lamp may turn on and your vehicle may fail a
smog-check test. SeeMalfunction Indicator Lamp on
page 3-28. If this occurs, return to your authorized
GM dealer for diagnosis. If it is determined that
the condition is caused by the type of fuel used,
repairs may not be covered by your warranty.
5-5
Page 195 of 316
Engine Air Cleaner/Filter
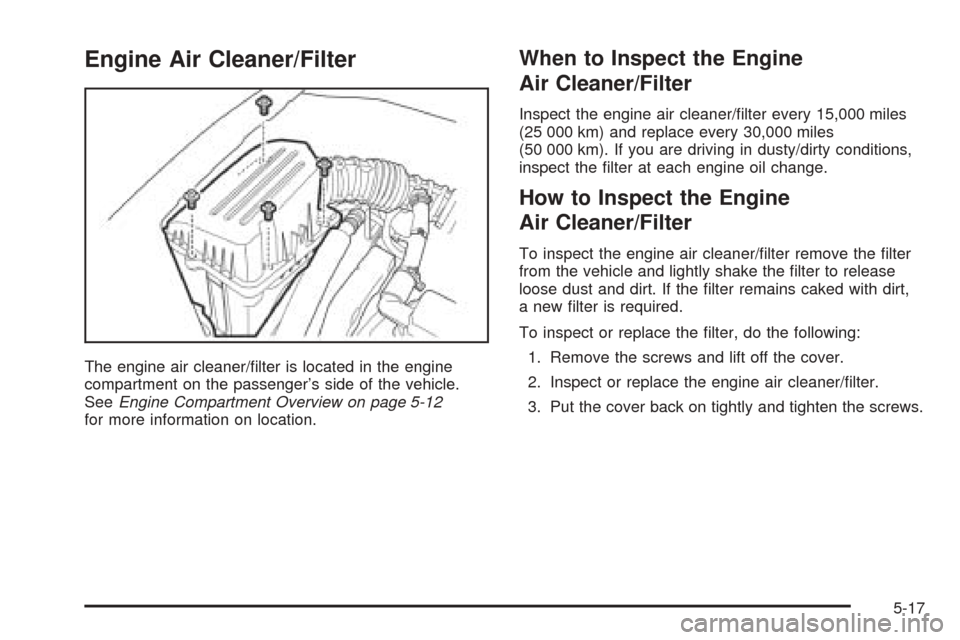
The engine air cleaner/filter is located in the engine
compartment on the passenger’s side of the vehicle.
SeeEngine Compartment Overview on page 5-12
for more information on location.
When to Inspect the Engine
Air Cleaner/Filter
Inspect the engine air cleaner/filter every 15,000 miles
(25 000 km) and replace every 30,000 miles
(50 000 km). If you are driving in dusty/dirty conditions,
inspect the filter at each engine oil change.
How to Inspect the Engine
Air Cleaner/Filter
To inspect the engine air cleaner/filter remove the filter
from the vehicle and lightly shake the filter to release
loose dust and dirt. If the filter remains caked with dirt,
a new filter is required.
To inspect or replace the filter, do the following:
1. Remove the screws and lift off the cover.
2. Inspect or replace the engine air cleaner/filter.
3. Put the cover back on tightly and tighten the screws.
5-17