2005 CHEVROLET AVALANCHE park assist
[x] Cancel search: park assistPage 73 of 496

Keys...............................................................2-3
Remote Keyless Entry System.........................2-4
Remote Keyless Entry System Operation...........2-5
Doors and Locks.............................................2-8
Door Locks....................................................2-8
Power Door Locks..........................................2-9
Delayed Locking.............................................2-9
Programmable Automatic Door Locks..............2-10
Rear Door Security Locks..............................2-10
Lockout Protection........................................2-11
Midgate.......................................................2-11
Tailgate.......................................................2-20
Windows........................................................2-22
Power Windows............................................2-23
Sun Visors...................................................2-23
Theft-Deterrent Systems..................................2-24
Content Theft-Deterrent.................................2-24
Passlock
®....................................................2-26
Starting and Operating Your Vehicle................2-26
New Vehicle Break-In....................................2-26
Ignition Positions..........................................2-27
Retained Accessory Power (RAP)...................2-27
Starting the Engine.......................................2-28
Adjustable Throttle and Brake Pedal................2-29Engine Coolant Heater..................................2-30
Automatic Transmission Operation...................2-31
Tow/Haul Mode............................................2-33
Four-Wheel Drive..........................................2-34
Parking Brake..............................................2-38
Shifting Into Park (P).....................................2-39
Shifting Out of Park (P).................................2-41
Parking Over Things That Burn.......................2-41
Engine Exhaust............................................2-42
Running the Engine While Parked...................2-42
Mirrors...........................................................2-43
Automatic Dimming Rearview Mirror with
OnStar
®, Compass and Temperature
Display....................................................2-43
Automatic Dimming Rearview Mirror with
Compass and Temperature Display..............2-46
Outside Camper-Type Mirrors.........................2-48
Outside Power Mirrors...................................2-49
Outside Convex Mirror...................................2-50
Outside Heated Mirrors..................................2-50
Outside Automatic Dimming Mirror with Curb
View Assist..............................................2-51
OnStar
®System.............................................2-51
Section 2 Features and Controls
2-1
Page 100 of 496

Starting the Engine
Your vehicle is equipped with Starter Motor Control.
This feature assists in starting the engine and protects
the electrical system. This feature may cause the
engine to crank even after the ignition key is not in
START.
Move your shift lever to PARK (P) or NEUTRAL (N).
Your engine will not start in any other position — that is
a safety feature. To restart when you are already
moving, use NEUTRAL (N) only.
Notice:Do not try to shift to PARK (P) if your
vehicle is moving. If you do, you could damage the
transmission. Shift to PARK (P) only when your
vehicle is stopped.
1. With your foot off the accelerator pedal, turn the
ignition key to START. When the engine starts,
let go of the key. The idle speed will go down as
your engine gets warm.Notice:Holding your key in START for longer than
15 seconds at a time will disengage the starter
motor, cause your battery to be drained much
sooner, and add excessive heat that can damage
your starter motor. Try not to hold the key in START
for longer than 15 seconds and wait about
15 seconds between each try to help avoid draining
your battery or damaging your starter.
2. If it does not start within 10 seconds, push the
accelerator pedal all the way to the �oor, while
you hold the ignition key in START. When
the engine starts, let go of the key and let up on the
accelerator pedal. Wait about 15 seconds between
each try.
When starting your engine in very cold weather (below
0°F or−18°C), do this:
1. With your foot off the accelerator pedal, turn the
ignition key to START and hold it there up to
15 seconds. When the engine starts, let go of
the key.
2-28
Page 123 of 496

Outside Automatic Dimming Mirror
with Curb View Assist
Your vehicle may have this feature.
The driver’s outside mirror will adjust for the glare of the
headlamps behind you. SeeAutomatic Dimming
Rearview Mirror with OnStar
®, Compass and
Temperature Display on page 2-43.
Your vehicle’s mirrors will also be capable of performing
the curb view assist mirror function. This feature will
cause the passenger’s and/or driver’s mirror to tilt to a
preselected position when the vehicle is in
REVERSE (R). This feature may be useful in allowing
you to view the curb when you are parallel parking.
When the vehicle is shifted out of REVERSE (R) and a
short delay has occurred, the passenger’s and/or
driver’s mirror will return to its original position.
To change the preselected tilt position, adjust the
mirrors to the desired position while the vehicle is in
REVERSE (R). When the vehicle is shifted out of
REVERSE (R), this new position is saved in memory as
the tilt position.
This feature can be enabled/disabled through the Driver
Information Center. SeeDriver Information Center
(DIC) on page 3-45for more information.
OnStar®System
OnStar®uses global positioning system (GPS) satellite
technology, wireless communications, and call centers
to provide you with a wide range of safety, security,
information, and convenience services.
A complete OnStar
®user’s guide and the terms and
conditions of the OnStar®Subscription Service
Agreement are included in the vehicle’s glove box
literature. For more information, visit www.onstar.com or
www.onstarcanada.com. Contact OnStar
®at
1-888-4-ONSTAR (1-888-466-7827), or press the
OnStar
®button to speak to an OnStar®advisor
24 hours a day, 7 days a week.
Terms and conditions of the Subscription Service
Agreement can be found at www.onstar.com or
www.onstarcanada.com.
2-51
Page 126 of 496

This device complies with RSS-210 of Industry Canada.
Operation is subject to the following two conditions:
(1) this device may not cause interference, and (2) this
device must accept any interference received,
including interference that may cause undesired
operation of the device.
Changes and modi�cations to this system by other than
an authorized service facility could void authorization
to use this equipment.
HomeLink®Wireless Control
System Operation
Do not use the HomeLink®Transmitter with any garage
door opener that does not have the “stop and reverse”
feature. This includes any garage door opener model
manufactured before April 1, 1982. If you have a newer
garage door opener with rolling codes, please be
sure to follow Steps 6 through 8 to complete the
programming of your HomeLink
®Transmitter.
Read the instructions completely before attempting to
program the HomeLink
®Transmitter. Because of
the steps involved, it may be helpful to have another
person available to assist you in programming the
transmitter.
Keep the original transmitter for use in other vehicles as
well as for future HomeLink
®programming. It is also
recommended that upon the sale of the vehicle,the programmed HomeLink
®buttons should be erased
for security purposes. Refer to “Erasing HomeLink®
Buttons” or, for assistance, contact HomeLink®on the
Internet at: www.homelink.com or by calling
1-800-355-3515.
Be sure that people and objects are clear of the garage
door or gate operator you are programming. When
programming a garage door, it is advised to park outside
of the garage.
It is recommended that a new battery be installed in
your hand-held transmitter for quicker and more
accurate transmission of the radio frequency.
Programming HomeLink®
Your vehicle’s engine should be turned off while
programming the transmitter. Follow these steps to
program up to three channels:
1. Press and hold down the two outside buttons,
releasing only when the indicator light begins to
�ash, after 20 seconds. Do not hold down the
buttons for longer than 30 seconds and do not
repeat this step to program a second and/or third
transmitter to the remaining two HomeLink
®buttons.
2. Position the end of your hand-held transmitter about
1 to 3 inches (3 to 8 cm) away from the HomeLink
®
buttons while keeping the indicator light in view.
2-54
Page 161 of 496

The main components of your instrument panel are the following:
A. Air Outlets. SeeOutlet Adjustment on page 3-28.
B. Exterior Lamps Control. SeeExterior Lamps
on page 3-14.
C. Cargo/Top-Box Lamps Button. SeeExterior Cargo
Lamps on page 3-17.
D. Automatic Transfer Case Buttons (If Equipped). See
Four-Wheel Drive on page 2-34. Traction Assist
System (If Equipped). SeeTraction Assist System
(TAS) on page 4-8. StabiliTrak
®Button (If Equipped).
SeeStabiliTrak®System on page 4-10.
E. OnStar®and Radio Steering Wheel Buttons (If
Equipped). SeeOnStar®System on page 2-51and
Audio Steering Wheel Controls on page 3-102.
F. Instrument Panel Cluster. SeeInstrument Panel
Cluster on page 3-30.
G. Shift Lever/Tow/Haul Selector Button. SeeAutomatic
Transmission Operation on page 2-31andTow/Haul
Mode on page 2-33.
H. Audio System. SeeAudio System(s) on page 3-64.
I. Dome Override Button. SeeDome Lamps on
page 3-18.
J. Fog Lamps Button. SeeFog Lamps on page 3-16.K. Turn Signal/Multifunction Lever. SeeTurn
Signal/Multifunction Lever on page 3-7.
L. Hood Release. SeeHood Release on page 5-10.
M. Tilt Lever. SeeTilt Wheel on page 3-6.
N. Driver Information Center (DIC) Buttons. SeeDriver
Information Center (DIC) on page 3-45.
O. Parking Brake Release. SeeParking Brake on
page 2-38.
P. Climate Control Systems. SeeDual Automatic
Climate Control System on page 3-23andDual
Climate Control System on page 3-20.
Q. Lighter (If Equipped) or Accessory Power Outlet (If
Equipped). SeeAshtrays and Cigarette Lighter
on page 3-20andAccessory Power Outlets
on page 3-19.
R. Accessory Power Outlet (If Equipped). See
Accessory Power Outlets on page 3-19.
S. StabiliTrak
®or Traction Assist System (TAS) Button.
SeeStabiliTrak®System on page 4-10orTraction
Assist System (TAS) on page 4-8.
T. Glove Box. SeeGlove Box on page 2-57.
3-5
Page 195 of 496

When your ignition is on, the gage shows the
temperature of the transmission �uid. The normal
operating range is from 180°F (82°C) to about
200°F (93°C).
At approximately 265°F (130°C), the driver information
center will display a TRANSMISSION HOT message
and the transmission will enter a transmission protection
mode. When the transmission enters the protection
mode, you may notice a change in the transmission
shifting patterns. The transmission will return to normal
shifting patterns when the transmission �uid temperature
falls below 260°F (127°C).
SeeDriver Information Center (DIC) on page 3-45for
further information.
If your vehicle has an Allison transmission, and the �uid
reaches temperatures of approximately 275°F (135°C)
or greater, the driver information center will display
a TRANS HOT IDLE ENGINE warning message and a
chime will sound until the temperature falls below
265°F (129°C). Pull the vehicle off the roadway when it
is safe to do so. Set the parking brake, place the
transmission in PARK (P) and allow the engine to idle
until the transmission temperature falls below 265°F
(129°C). If the transmission continues to operate above
265°F (130°C), contact your nearest dealer or the
GM Roadside Assistance Center. SeeRoadside
Assistance Program on page 7-5.Notice:If you drive your vehicle with the
transmission temperature gage above normal
operating range, you can damage the transmission.
This could lead to costly repairs that would not
be covered by your warranty. Do not drive your
vehicle while the transmission temperature gage
reading is above normal. See your dealer for service.
The following situations can cause the transmission to
operate at higher temperatures:
Towing a trailer
Hot outside air temperatures
Vehicle overloading
Hauling a large or heavy load
Low transmission �uid level
High transmission �uid level
Restricted air �ow to the radiator and the auxiliary
transmission oil cooler (if equipped).
A temporary solution to hotter transmission operating
temperatures may be to let the transmission cool down.
If the transmission is operated at higher temperatures
on a frequent basis, seeScheduled Maintenance
on page 6-4for the proper transmission maintenance
intervals.
3-39
Page 326 of 496

Tow/Haul Mode
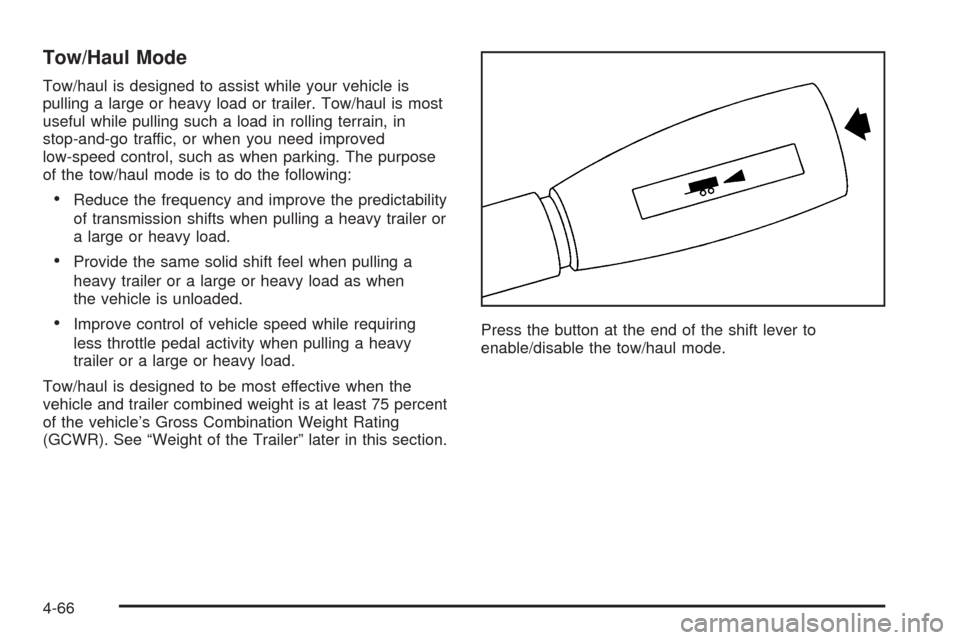
Tow/haul is designed to assist while your vehicle is
pulling a large or heavy load or trailer. Tow/haul is most
useful while pulling such a load in rolling terrain, in
stop-and-go traffic, or when you need improved
low-speed control, such as when parking. The purpose
of the tow/haul mode is to do the following:
Reduce the frequency and improve the predictability
of transmission shifts when pulling a heavy trailer or
a large or heavy load.
Provide the same solid shift feel when pulling a
heavy trailer or a large or heavy load as when
the vehicle is unloaded.
Improve control of vehicle speed while requiring
less throttle pedal activity when pulling a heavy
trailer or a large or heavy load.
Tow/haul is designed to be most effective when the
vehicle and trailer combined weight is at least 75 percent
of the vehicle’s Gross Combination Weight Rating
(GCWR). See “Weight of the Trailer” later in this section.Press the button at the end of the shift lever to
enable/disable the tow/haul mode.
4-66
Page 481 of 496

To contact NHTSA, you may either call the Auto Safety
Hotline toll-free at 1-800-424-9393 (or 366-0123 in
the Washington, D.C. area) or write to:
NHTSA, U.S. Department of Transportation
Washington, D.C. 20590
You can also obtain other information about motor
vehicle safety from the hotline.
Reporting Safety Defects to the
Canadian Government
If you live in Canada, and you believe that your vehicle
has a safety defect, you should immediately notify
Transport Canada, in addition to notifying General
Motors of Canada Limited. You may call them at
1-800-333-0510 or write to:
Transport Canada
Place de Ville Tower C
330 Sparks Street
Ottawa, Ontario K1A 0N5
Reporting Safety Defects to
General Motors
In addition to notifying NHTSA (or Transport Canada) in
a situation like this, we certainly hope you will notify
General Motors. Please call the Chevrolet Customer
Assistance Center at 1-800-222-1020, or write:
Chevrolet Motor Division
Chevrolet Customer Assistance Center
P.O. Box 33170
Detroit, MI 48232-5170
In Canada, please call us at 1-800-263-3777 (English)
or 1-800-263-7854 (French). Or, write:
General Motors of Canada Limited
Customer Communication Centre, 163-005
1908 Colonel Sam Drive
Oshawa, Ontario L1H 8P7
Service Publications Ordering
Information
Service Manuals
Service Manuals have the diagnosis and repair
information on engines, transmission, axle suspension,
brakes, electrical, steering, body, etc.
7-11