Page 43 of 376
4. Buckle, position and release the safety belt as
described inRear Seat Passengers on page 1-31.
Make sure that the shoulder belt crosses the
shoulder.
To remove and store the comfort guides, squeeze the
belt edges together so that you can take them out of the
guides. Slide the guide onto the storage clip.
Safety Belt Extender
If the vehicle’s safety belt will fasten around you,
you should use it.
But if a safety belt is not long enough, your dealer will
order you an extender. It is free. When you go in to
order it, take the heaviest coat you will wear, so
the extender will be long enough for you. To help avoid
personal injury, do not let someone else use it, and
use it only for the seat it is made to �t. The extender
has been designed for adults. Never use it for securing
child seats. To wear it, just attach it to the regular
safety belt. For more information, see the instruction
sheet that comes with the extender.
1-37
Page 44 of 376
Child Restraints
Older Children
Older children who have outgrown booster seats
should wear the vehicle’s safety belts.
If you have the choice, a child should sit next to a
window so the child can wear a lap-shoulder belt and
get the additional restraint a shoulder belt can provide.
Q:What is the proper way to wear safety belts?
A:If possible, an older child should wear a
lap-shoulder belt and get the additional restraint
a shoulder belt can provide. The shoulder belt
should not cross the face or neck. The lap
belt should �t snugly below the hips, just touching
the top of the thighs. It should never be worn
over the abdomen, which could cause severe or
even fatal internal injuries in a crash.
Accident statistics show that children are safer if they
are restrained in the rear seat.
In a crash, children who are not buckled up can strike
other people who are buckled up, or can be thrown
out of the vehicle. Older children need to use safety
belts properly.
1-38
Page 53 of 376
A forward-facing child seat (C-E) provides restraint for
the child’s body with the harness and also sometimes
with surfaces such as T-shaped or shelf-like shields.A booster seat (F-G) is a child restraint designed to
improve the �t of the vehicle’s safety belt system. Some
booster seats have a shoulder belt positioner, and
some high-back booster seats have a �ve-point harness.
A booster seat can also help a child to see out the
window.
1-47
Page 59 of 376
Passenger Van
Bucket Seats:An anchoring point is located below
the rear of the seat cushion on the spacer bar. Anchor
the top strap through the two slots on the bar.Passenger Van Bucket Seats
Passenger Van Bench Seat (Second Row)
1-53
Page 60 of 376

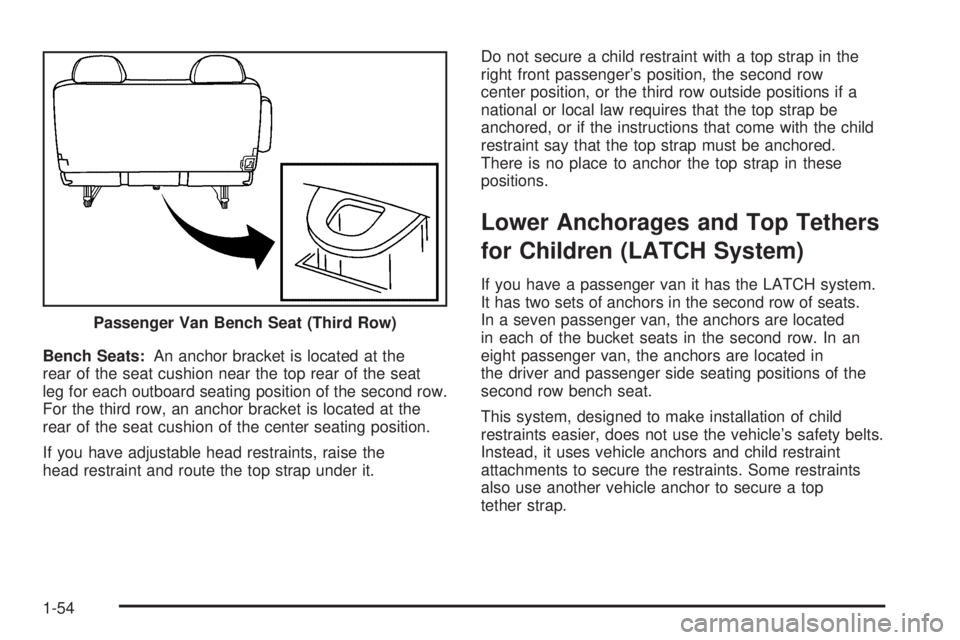
Bench Seats:An anchor bracket is located at the
rear of the seat cushion near the top rear of the seat
leg for each outboard seating position of the second row.
For the third row, an anchor bracket is located at the
rear of the seat cushion of the center seating position.
If you have adjustable head restraints, raise the
head restraint and route the top strap under it.Do not secure a child restraint with a top strap in the
right front passenger’s position, the second row
center position, or the third row outside positions if a
national or local law requires that the top strap be
anchored, or if the instructions that come with the child
restraint say that the top strap must be anchored.
There is no place to anchor the top strap in these
positions.
Lower Anchorages and Top Tethers
for Children (LATCH System)
If you have a passenger van it has the LATCH system.
It has two sets of anchors in the second row of seats.
In a seven passenger van, the anchors are located
in each of the bucket seats in the second row. In an
eight passenger van, the anchors are located in
the driver and passenger side seating positions of the
second row bench seat.
This system, designed to make installation of child
restraints easier, does not use the vehicle’s safety belts.
Instead, it uses vehicle anchors and child restraint
attachments to secure the restraints. Some restraints
also use another vehicle anchor to secure a top
tether strap. Passenger Van Bench Seat (Third Row)
1-54
Page 66 of 376

Securing a Child Restraint in the
Right Front Seat Position
If your child restraint is equipped with the LATCH
system, seeLower Anchorages and Top Tethers for
Children (LATCH System) on page 1-54.
If your vehicle is a passenger van, there is no top strap
anchor in the right front passenger’s position. Do not
secure a child seat in this position if a national or local
law requires that the top strap be anchored, or if the
instructions that come with the child restraint say that the
top strap must be anchored. SeeTop Strap on
page 1-50if the child restraint has one.
Your vehicle has a front passenger airbag.Neverput a
rear facing child restraint in this seat. Here is why:
{CAUTION:
A child in a rear-facing child restraint can
be seriously injured or killed if the front
passenger’s airbag in�ates. This is because
the back of the rear-facing child restraint
would be very close to the in�ating airbag.
CAUTION: (Continued)
CAUTION: (Continued)
If your vehicle is a passenger van, always
secure a rear-facing child restraint in a rear
seat. If your vehicle is a cargo van, do not use
a rear-facing child restraint in this vehicle.
If you need to secure a forward-facing child
restraint in the right front seat, always move
the passenger seat as far back as it will go.
A rear seat is a safer place to secure a forward-facing
child restraint.
If you need to secure a forward-facing child restraint in
the right front seat, you will be using the lap-shoulder
belt to secure the child restraint in this position. Be sure
to follow the instructions that came with the child
restraint. Secure the child in the child restraint when
and as the instructions say.
1. Because your vehicle has a right front passenger
airbag, always move the seat as far back as it will
go before securing a forward-facing child restraint.
SeeManual Seats on page 1-3.
2. Put the child restraint on the seat.
1-60
Page 137 of 376

Notice:Using a razor blade or sharp object to
clear the inside rear window may damage the rear
window defogger. Repairs would not be covered
by your warranty. Do not clear the inside of the rear
window with sharp objects.
Outlet Adjustment
Move the thumbwheel in the center of the outlets up or
down to change the direction of air�ow.
Operation Tips
Clear away any ice, snow or leaves from the air
inlets at the base of the windshield that may
block the �ow of air into your vehicle.
Use of non-GM approved hood de�ectors may
adversely affect the performance of the system.
Keep the path under the front seats clear of objects
to help circulate the air inside of your vehicle more
effectively.
Rear Heating System
Your vehicle may have a rear heating system that
allows you to adjust the amount of air �owing into the
rear of the vehicle, from the front seating area. This
feature works with the main climate control system in
your vehicle.
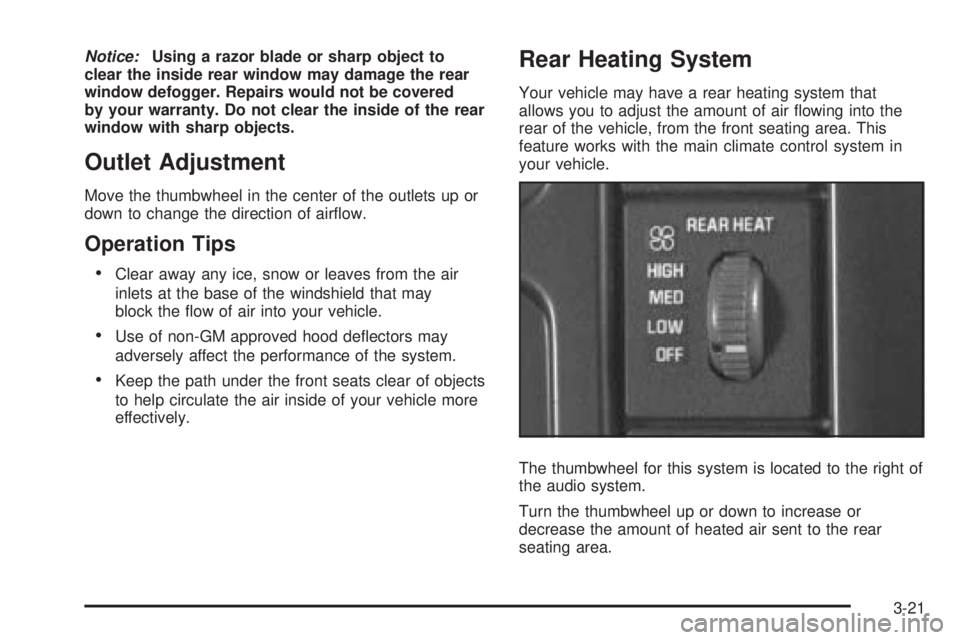
The thumbwheel for this system is located to the right of
the audio system.
Turn the thumbwheel up or down to increase or
decrease the amount of heated air sent to the rear
seating area.
3-21
Page 139 of 376

To increase or decrease the temperature for the entire
vehicle, use the center knob located on the main
climate control panel.
The air conditioning system on the main climate control
panel must be turned on to direct cooled air to the
rear of the vehicle. If it is not on, then the temperature
in the rear of the vehicle will remain at cabin
temperature.
Be sure to keep the area under the front seats clear of
any objects so that the air inside of your vehicle can
circulate effectively.
For information on how to use the main climate control
system, seeClimate Control System on page 3-19.
For information on ventilation, seeOutlet Adjustment
on page 3-21.
Warning Lights, Gages, and
Indicators
This part describes the warning lights and gages that
may be on your vehicle. The pictures will help you
locate them.Warning lights and gages can signal that something is
wrong before it becomes serious enough to cause
an expensive repair or replacement. Paying attention
to your warning lights and gages could also save you or
others from injury.
Warning lights come on when there may be or is a
problem with one of your vehicle’s functions. As you
will see in the details on the next few pages, some
warning lights come on brie�y when you start the engine
just to let you know they’re working. If you are familiar
with this section, you should not be alarmed when
this happens.
Gages can indicate when there may be or is a problem
with one of your vehicle’s functions. Often gages
and warning lights work together to let you know when
there’s a problem with your vehicle.
When one of the warning lights comes on and stays on
when you are driving, or when one of the gages shows
there may be a problem, check the section that tells
you what to do about it. Please follow this manual’s
advice. Waiting to do repairs can be costly – and even
dangerous. So please get to know your warning lights
and gages. They’re a big help.
3-23