2005 CHEVROLET ASTRO CARGO VAN heating
[x] Cancel search: heatingPage 86 of 370
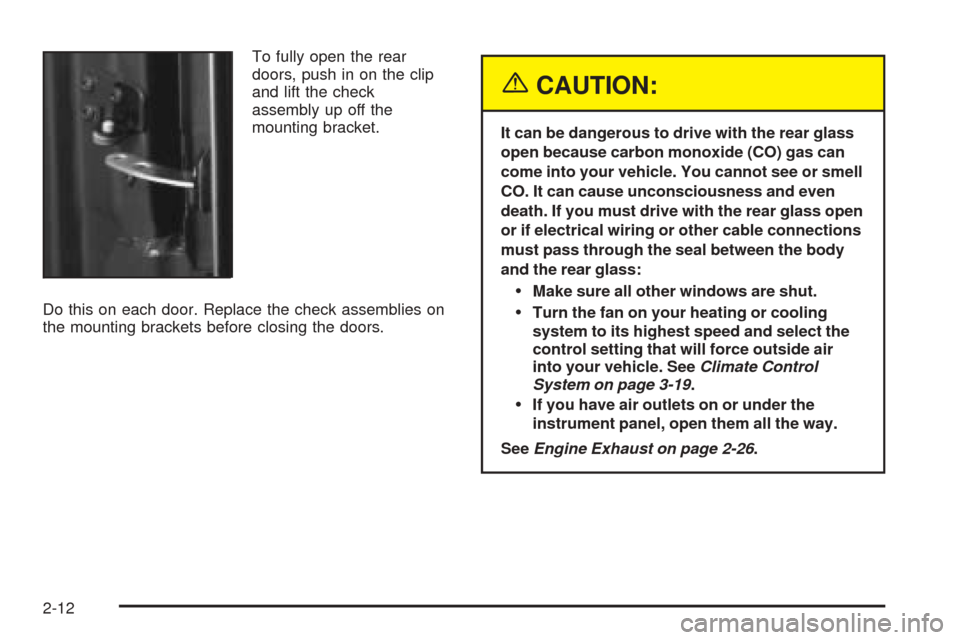
To fully open the rear
doors, push in on the clip
and lift the check
assembly up off the
mounting bracket.
Do this on each door. Replace the check assemblies on
the mounting brackets before closing the doors.
{CAUTION:
It can be dangerous to drive with the rear glass
open because carbon monoxide (CO) gas can
come into your vehicle. You cannot see or smell
CO. It can cause unconsciousness and even
death. If you must drive with the rear glass open
or if electrical wiring or other cable connections
must pass through the seal between the body
and the rear glass:
Make sure all other windows are shut.
Turn the fan on your heating or cooling
system to its highest speed and select the
control setting that will force outside air
into your vehicle. SeeClimate Control
System on page 3-19.
If you have air outlets on or under the
instrument panel, open them all the way.
SeeEngine Exhaust on page 2-26.
2-12
Page 113 of 370

Instrument Panel Overview...............................3-4
Hazard Warning Flashers................................3-6
Other Warning Devices...................................3-6
Horn.............................................................3-6
Tilt Wheel.....................................................3-6
Turn Signal/Multifunction Lever.........................3-7
Turn and Lane-Change Signals........................3-8
Headlamp High/Low-Beam Changer..................3-9
Flash-to-Pass.................................................3-9
Windshield Wipers..........................................3-9
Windshield Washer.......................................3-10
Cruise Control..............................................3-11
Exterior Lamps.............................................3-14
Headlamps on Reminder................................3-15
Daytime Running Lamps (DRL).......................3-15
Automatic Headlamp System..........................3-16
Instrument Panel Brightness...........................3-17
Dome Lamps...............................................3-17
Entry Lighting...............................................3-17
Exit Lighting.................................................3-17
Battery Run-Down Protection..........................3-18
Accessory Power Outlets...............................3-18
Ashtrays and Cigarette Lighter........................3-18Climate Controls............................................3-19
Climate Control System.................................3-19
Outlet Adjustment.........................................3-21
Rear Heating System....................................3-22
Rear Air Conditioning System.........................3-22
Warning Lights, Gages, and Indicators............3-24
Instrument Panel Cluster................................3-25
Speedometer and Odometer...........................3-26
Trip Odometer..............................................3-26
Safety Belt Reminder Light.............................3-26
Airbag Readiness Light..................................3-27
Charging System Light..................................3-28
Voltmeter Gage............................................3-28
Brake System Warning Light..........................3-29
Anti-Lock Brake System Warning Light.............3-30
Engine Coolant Temperature Gage..................3-30
Malfunction Indicator Lamp.............................3-31
Oil Pressure Gage........................................3-34
Security Light...............................................3-35
Highbeam On Light.......................................3-35
Service All-Wheel Drive Light.........................3-35
Tow/Haul Mode Light....................................3-36
Check Gages Warning Light...........................3-36
Fuel Gage...................................................3-37
Low Fuel Warning Light.................................3-37
Section 3 Instrument Panel
3-1
Page 117 of 370
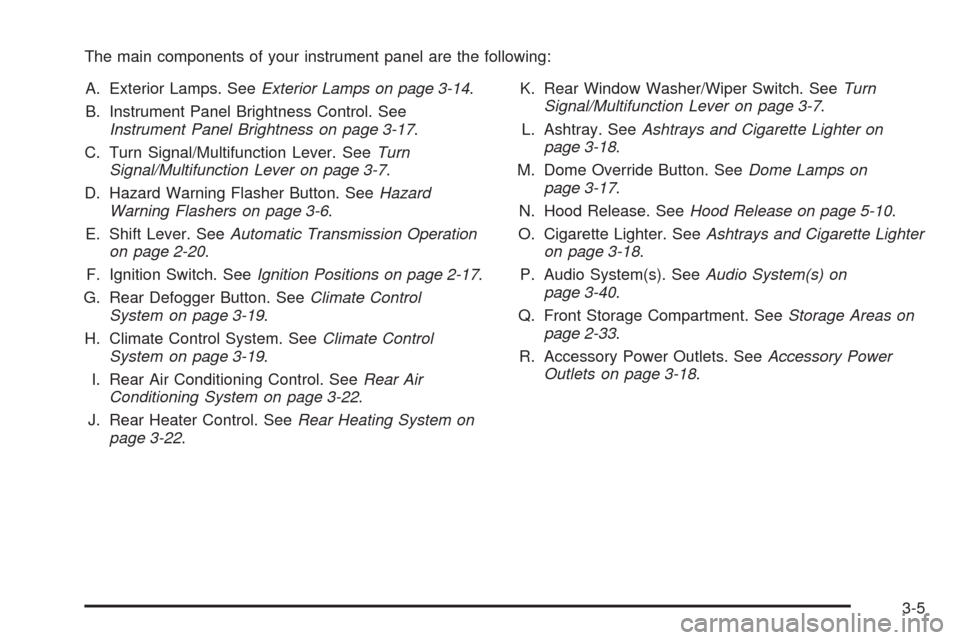
The main components of your instrument panel are the following:
A. Exterior Lamps. SeeExterior Lamps on page 3-14.
B. Instrument Panel Brightness Control. See
Instrument Panel Brightness on page 3-17.
C. Turn Signal/Multifunction Lever. SeeTurn
Signal/Multifunction Lever on page 3-7.
D. Hazard Warning Flasher Button. SeeHazard
Warning Flashers on page 3-6.
E. Shift Lever. SeeAutomatic Transmission Operation
on page 2-20.
F. Ignition Switch. SeeIgnition Positions on page 2-17.
G. Rear Defogger Button. SeeClimate Control
System on page 3-19.
H. Climate Control System. SeeClimate Control
System on page 3-19.
I. Rear Air Conditioning Control. SeeRear Air
Conditioning System on page 3-22.
J. Rear Heater Control. SeeRear Heating System on
page 3-22.K. Rear Window Washer/Wiper Switch. SeeTurn
Signal/Multifunction Lever on page 3-7.
L. Ashtray. SeeAshtrays and Cigarette Lighter on
page 3-18.
M. Dome Override Button. SeeDome Lamps on
page 3-17.
N. Hood Release. SeeHood Release on page 5-10.
O. Cigarette Lighter. SeeAshtrays and Cigarette Lighter
on page 3-18.
P. Audio System(s). SeeAudio System(s) on
page 3-40.
Q. Front Storage Compartment. SeeStorage Areas on
page 2-33.
R. Accessory Power Outlets. SeeAccessory Power
Outlets on page 3-18.
3-5
Page 130 of 370
Battery Run-Down Protection
This feature shuts off the dome, courtesy, vanity,
reading and glove box lights if they are left on for
more than 20 minutes when the ignition is off. This will
keep your battery from running down.
If the battery run-down protection shuts off the interior
lamps, it may be necessary to do one of the following to
return to normal operation:
Shut off all lamps and close all doors, or
turn the ignition key to RUN.
Accessory Power Outlets
You can plug accessory electrical equipment into an
accessory power outlet. Just pull on the outlet cover to
remove it and follow the proper installation instructions
that are included with any electrical equipment that
you install.
The accessory power outlet is located on the
passenger’s side of the front storage compartment.
These circuits are protected by a fuse and have
maximum current levels.Certain power accessory plugs may not be compatible
to the power accessory outlet and could result in
blown vehicle or adapter fuses. If you experience a
problem, see your dealer for additional information on
the power accessory plugs.
Notice:Leaving electrical equipment on for
extended periods will drain the battery. Always turn
off electrical equipment when not in use and do
not plug in equipment that exceeds the maximum
amperage rating.
Notice:Improper use of the power outlet can cause
damage not covered by your warranty. Do not
hang any type of accessory or accessory bracket
from the plug because the power outlets are
designed for accessory power plugs only.
Ashtrays and Cigarette Lighter
The cigarette lighter is on the left of the engine cover
console.
To use the lighter, press it in all the way and let go.
When it’s done heating, it will pop back out by itself.
3-18
Page 131 of 370
Notice:Holding a cigarette lighter in while it is
heating will not allow the lighter to back away from
the heating element when it is hot. Damage from
overheating may occur to the lighter or heating
element, or a fuse could be blown. Do not hold a
cigarette lighter in while it is heating.
Notice:Leaving electrical equipment on for
extended periods will drain the battery. Always turn
off electrical equipment when not in use and do
not plug in equipment that exceeds the maximum
amperage rating.
The front ashtray is located above the passenger’s side
front cupholder. To remove the front ashtray, open it
and gently pull it slightly past its stop.
To remove the ashtray on the sliding door, open it, then
press down on the inside tab and pull it out.
You may have another ashtray on the driver’s sidewall.
Press the right side to turn the ashtray around for
use. To remove the ashtray, open it and gently pull it off
the hinge.
Notice:If you put papers, pins, or other �ammable
items in the ashtray, hot cigarettes or other
smoking materials could ignite them and possibly
damage your vehicle. Never put �ammable items in
the ashtray.Climate Controls
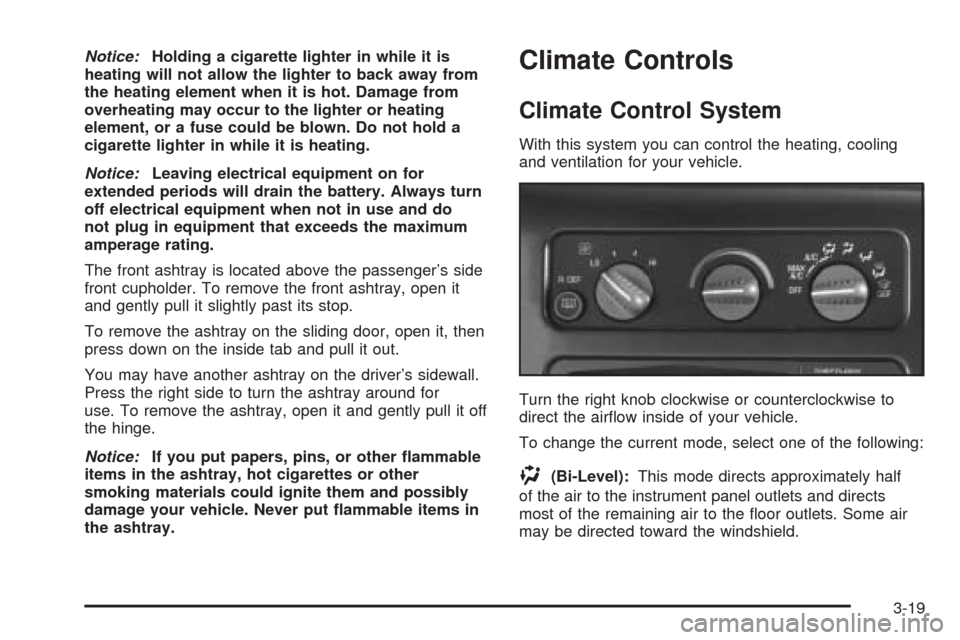
Climate Control System
With this system you can control the heating, cooling
and ventilation for your vehicle.
Turn the right knob clockwise or counterclockwise to
direct the air�ow inside of your vehicle.
To change the current mode, select one of the following:
)(Bi-Level):This mode directs approximately half
of the air to the instrument panel outlets and directs
most of the remaining air to the �oor outlets. Some air
may be directed toward the windshield.
3-19
Page 134 of 370
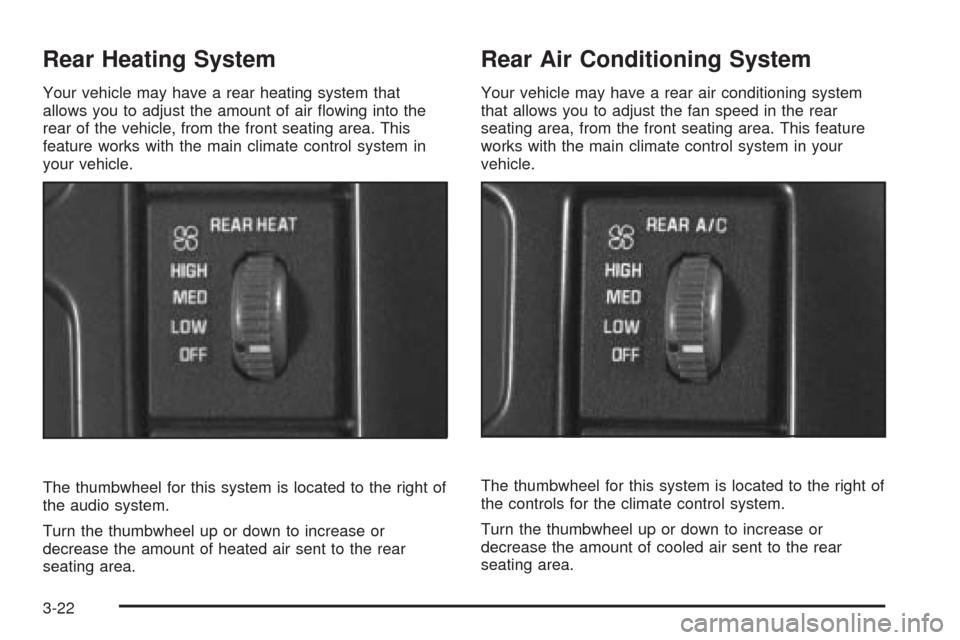
Rear Heating System
Your vehicle may have a rear heating system that
allows you to adjust the amount of air �owing into the
rear of the vehicle, from the front seating area. This
feature works with the main climate control system in
your vehicle.
The thumbwheel for this system is located to the right of
the audio system.
Turn the thumbwheel up or down to increase or
decrease the amount of heated air sent to the rear
seating area.
Rear Air Conditioning System
Your vehicle may have a rear air conditioning system
that allows you to adjust the fan speed in the rear
seating area, from the front seating area. This feature
works with the main climate control system in your
vehicle.
The thumbwheel for this system is located to the right of
the controls for the climate control system.
Turn the thumbwheel up or down to increase or
decrease the amount of cooled air sent to the rear
seating area.
3-22
Page 135 of 370
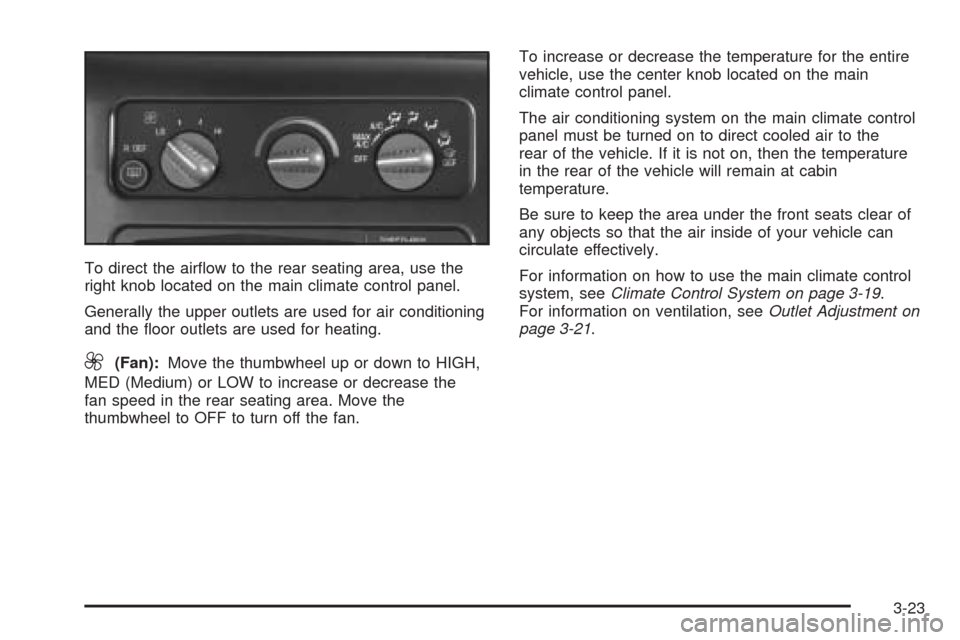
To direct the air�ow to the rear seating area, use the
right knob located on the main climate control panel.
Generally the upper outlets are used for air conditioning
and the �oor outlets are used for heating.
9(Fan):Move the thumbwheel up or down to HIGH,
MED (Medium) or LOW to increase or decrease the
fan speed in the rear seating area. Move the
thumbwheel to OFF to turn off the fan.To increase or decrease the temperature for the entire
vehicle, use the center knob located on the main
climate control panel.
The air conditioning system on the main climate control
panel must be turned on to direct cooled air to the
rear of the vehicle. If it is not on, then the temperature
in the rear of the vehicle will remain at cabin
temperature.
Be sure to keep the area under the front seats clear of
any objects so that the air inside of your vehicle can
circulate effectively.
For information on how to use the main climate control
system, seeClimate Control System on page 3-19.
For information on ventilation, seeOutlet Adjustment on
page 3-21.
3-23
Page 142 of 370
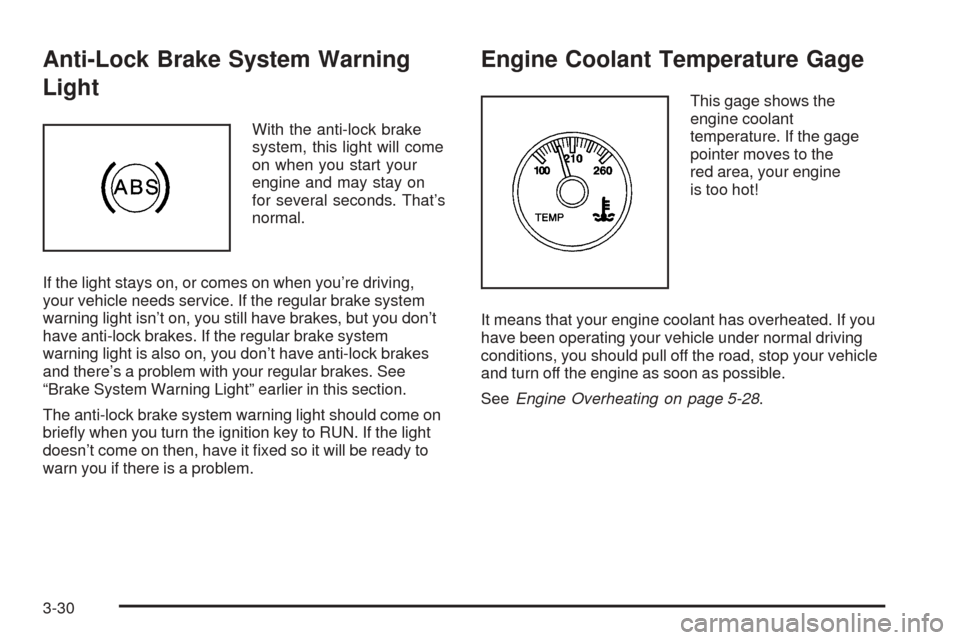
Anti-Lock Brake System Warning
Light
With the anti-lock brake
system, this light will come
on when you start your
engine and may stay on
for several seconds. That’s
normal.
If the light stays on, or comes on when you’re driving,
your vehicle needs service. If the regular brake system
warning light isn’t on, you still have brakes, but you don’t
have anti-lock brakes. If the regular brake system
warning light is also on, you don’t have anti-lock brakes
and there’s a problem with your regular brakes. See
“Brake System Warning Light” earlier in this section.
The anti-lock brake system warning light should come on
brie�y when you turn the ignition key to RUN. If the light
doesn’t come on then, have it �xed so it will be ready to
warn you if there is a problem.
Engine Coolant Temperature Gage
This gage shows the
engine coolant
temperature. If the gage
pointer moves to the
red area, your engine
is too hot!
It means that your engine coolant has overheated. If you
have been operating your vehicle under normal driving
conditions, you should pull off the road, stop your vehicle
and turn off the engine as soon as possible.
SeeEngine Overheating on page 5-28.
3-30