2005 BUICK LACROSSE hood release
[x] Cancel search: hood releasePage 119 of 410

The main components of the instrument panel are the following:
A. Air Outlets. SeeOutlet Adjustment on page 3-28.
B. Interior Lamps Control. SeeInterior Lamps on
page 3-16.
C. Exterior Lamps Control. SeeExterior Lamps on
page 3-13. Fog Lamp Control. SeeFog Lamps on
page 3-15.
D. Turn Signal/Multifunction Lever. SeeTurn
Signal/Multifunction Lever on page 3-7.
E. Audio Steering Wheel Controls. SeeAudio Steering
Wheel Controls on page 3-118.
F. Instrument Panel Cluster. SeeInstrument Panel
Cluster on page 3-31.
G. DIC Buttons. SeeDIC Operation and Displays on
page 3-47.
H. Passenger Airbag Status Indicator. SeePassenger
Airbag Status Indicator on page 3-34.I. Audio System Controls. SeeAudio System(s) on
page 3-79.
J. Hood Release. SeeHood Release on page 5-11.
K. Parking Brake. SeeParking Brake on page 2-27.
L. Cruise Controls. SeeCruise Control on page 3-10.
M. Horn. SeeHorn on page 3-6.
N. Steering Wheel Climate Controls. SeeSteering
Wheel Climate Controls on page 3-30.
O. Climate Controls. SeeClimate Control System on
page 3-21orDual Automatic Climate Control System
on page 3-24.
P. Shift Lever. SeeShifting Into Park (P) on page 2-28.
Q. Accessory Power Outlet. SeeAccessory Power
Outlets on page 3-20.
R. Glove Box. SeeGlove Box on page 2-40.
3-5
Page 172 of 410
HOOD AJAR
This message will display when the hood is not closed
properly. When this message appears, you should
make sure that the hood is closed completely. SeeHood
Release on page 5-11.
This message will display while the ignition is in RUN.
Press any of the DIC buttons to acknowledge this
message and to clear it from the screen.
This message will continue to display for two seconds if
it has not been acknowledged when the engine is
turned off. It will also re-display for two seconds if the
message has been acknowledged, but the condition still
exists when the engine is turned off.
If the condition still exists, the message will re-appear
when the engine is turned on.
HOT TRANS FLUID
This message will display when the transaxle �uid in
your vehicle is too hot. Stop the vehicle and allow it to
idle until it cools down. If the warning message
continues to display, have the vehicle serviced by your
GM dealer as soon as possible.
This message will display and a chime will sound only
while the ignition is in RUN. Press any of the DIC
buttons to acknowledge this message and to clear it
from the screen.This message will continue to display for two seconds if
it has not been acknowledged when the engine is
turned off. It will also re-display for two seconds if the
message has been acknowledged, but the condition still
exists when the engine is turned off.
If the condition still exists, the message will re-appear
when the engine is turned on.
KEY FOB BATTERY LOW
This message will display when the battery in the
remote keyless entry transmitter needs to be replaced.
To replace the battery, see “Battery Replacement”
underRemote Keyless Entry System Operation
on page 2-4.
This message will display while the ignition is in RUN.
Press any of the DIC buttons to acknowledge this
message and to clear it from the screen.
This message will continue to display for two seconds if
it has not been acknowledged when the engine is
turned off. It will also re-display for two seconds if the
message has been acknowledged, but the condition still
exists when the engine is turned off.
If the condition still exists, the message will re-appear
when the engine is turned on.
3-58
Page 277 of 410

Service............................................................5-3
Doing Your Own Service Work.........................5-4
Adding Equipment to the Outside of Your
Vehicle......................................................5-5
Fuel................................................................5-5
Gasoline Octane............................................5-5
Gasoline Speci�cations....................................5-6
California Fuel...............................................5-6
Additives.......................................................5-6
Fuels in Foreign Countries...............................5-7
Filling the Tank..............................................5-8
Filling a Portable Fuel Container.....................5-10
Checking Things Under the Hood....................5-10
Hood Release..............................................5-11
Engine Compartment Overview.......................5-12
Engine Oil...................................................5-15
Engine Oil Life System..................................5-18
Engine Air Cleaner/Filter................................5-19
Automatic Transmission Fluid.........................5-21
Engine Coolant.............................................5-21
Radiator Pressure Cap..................................5-24
Engine Overheating.......................................5-24
Overheated Engine Protection
Operating Mode........................................5-26
Cooling System............................................5-26Power Steering Fluid.....................................5-33
Windshield Washer Fluid................................5-34
Brakes........................................................5-35
Battery........................................................5-38
Jump Starting...............................................5-39
Headlamp Aiming...........................................5-43
Bulb Replacement..........................................5-45
Halogen Bulbs..............................................5-45
Headlamps and Sidemarker Lamps.................5-46
Front Turn Signal and Parking Lamps..............5-47
Fog Lamps..................................................5-48
Taillamps, Turn Signal, Sidemarker,
Stoplamps and Back-up Lamps...................5-48
Windshield Wiper Blade Replacement..............5-51
Tires..............................................................5-52
Tire Sidewall Labelling...................................5-53
Tire Terminology and De�nitions.....................5-55
In�ation - Tire Pressure.................................5-58
Tire Inspection and Rotation...........................5-60
When It Is Time for New Tires.......................5-61
Buying New Tires.........................................5-62
Uniform Tire Quality Grading..........................5-63
Wheel Alignment and Tire Balance..................5-64
Wheel Replacement......................................5-65
Section 5 Service and Appearance Care
5-1
Page 287 of 410
Hood Release
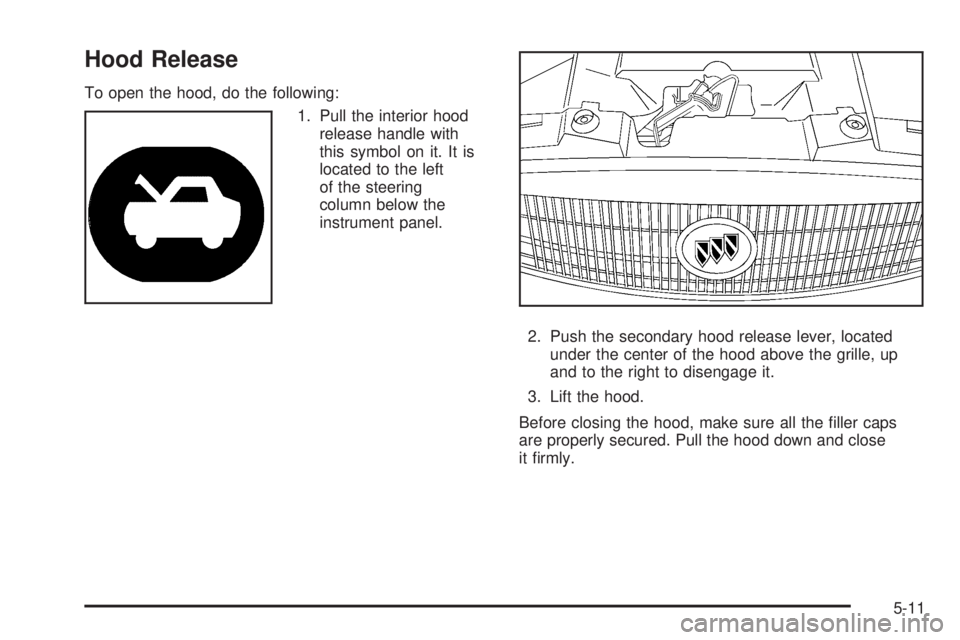
To open the hood, do the following:
1. Pull the interior hood
release handle with
this symbol on it. It is
located to the left
of the steering
column below the
instrument panel.
2. Push the secondary hood release lever, located
under the center of the hood above the grille, up
and to the right to disengage it.
3. Lift the hood.
Before closing the hood, make sure all the �ller caps
are properly secured. Pull the hood down and close
it �rmly.
5-11
Page 322 of 410
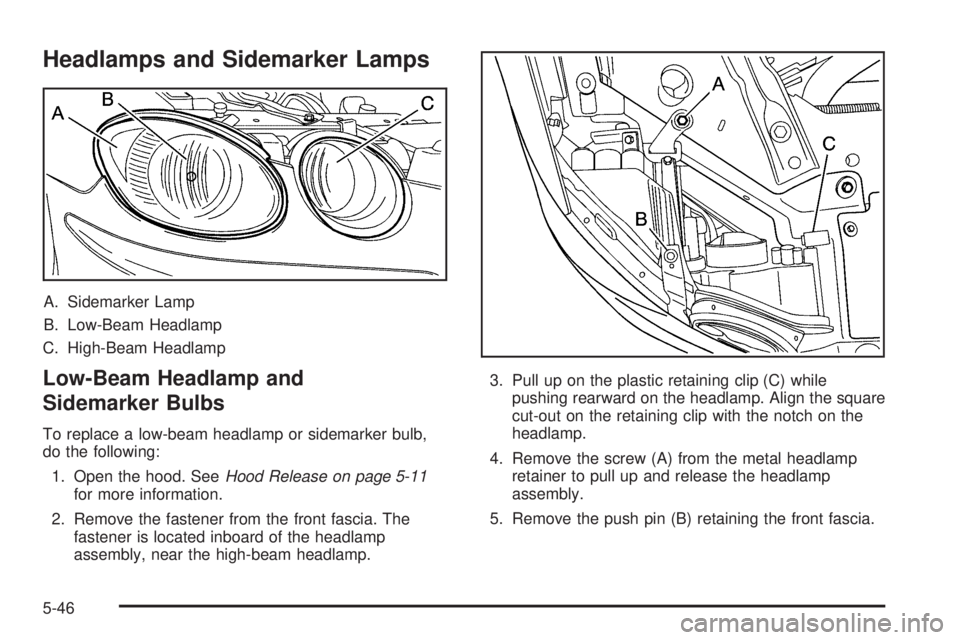
Headlamps and Sidemarker Lamps
A. Sidemarker Lamp
B. Low-Beam Headlamp
C. High-Beam Headlamp
Low-Beam Headlamp and
Sidemarker Bulbs
To replace a low-beam headlamp or sidemarker bulb,
do the following:
1. Open the hood. SeeHood Release on page 5-11
for more information.
2. Remove the fastener from the front fascia. The
fastener is located inboard of the headlamp
assembly, near the high-beam headlamp.3. Pull up on the plastic retaining clip (C) while
pushing rearward on the headlamp. Align the square
cut-out on the retaining clip with the notch on the
headlamp.
4. Remove the screw (A) from the metal headlamp
retainer to pull up and release the headlamp
assembly.
5. Remove the push pin (B) retaining the front fascia.
5-46
Page 323 of 410
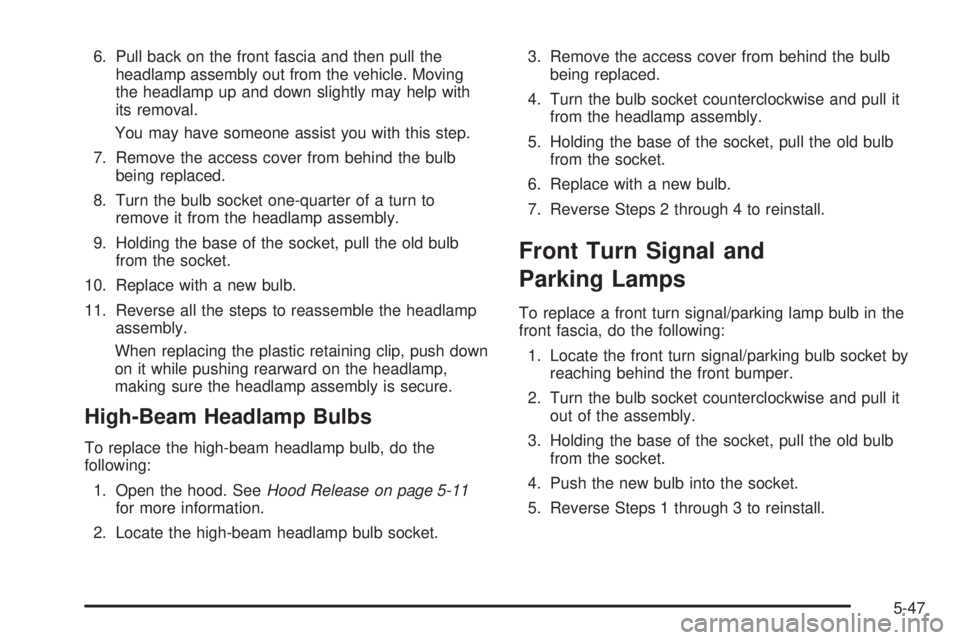
6. Pull back on the front fascia and then pull the
headlamp assembly out from the vehicle. Moving
the headlamp up and down slightly may help with
its removal.
You may have someone assist you with this step.
7. Remove the access cover from behind the bulb
being replaced.
8. Turn the bulb socket one-quarter of a turn to
remove it from the headlamp assembly.
9. Holding the base of the socket, pull the old bulb
from the socket.
10. Replace with a new bulb.
11. Reverse all the steps to reassemble the headlamp
assembly.
When replacing the plastic retaining clip, push down
on it while pushing rearward on the headlamp,
making sure the headlamp assembly is secure.
High-Beam Headlamp Bulbs
To replace the high-beam headlamp bulb, do the
following:
1. Open the hood. SeeHood Release on page 5-11
for more information.
2. Locate the high-beam headlamp bulb socket.3. Remove the access cover from behind the bulb
being replaced.
4. Turn the bulb socket counterclockwise and pull it
from the headlamp assembly.
5. Holding the base of the socket, pull the old bulb
from the socket.
6. Replace with a new bulb.
7. Reverse Steps 2 through 4 to reinstall.
Front Turn Signal and
Parking Lamps
To replace a front turn signal/parking lamp bulb in the
front fascia, do the following:
1. Locate the front turn signal/parking bulb socket by
reaching behind the front bumper.
2. Turn the bulb socket counterclockwise and pull it
out of the assembly.
3. Holding the base of the socket, pull the old bulb
from the socket.
4. Push the new bulb into the socket.
5. Reverse Steps 1 through 3 to reinstall.
5-47
Page 375 of 410
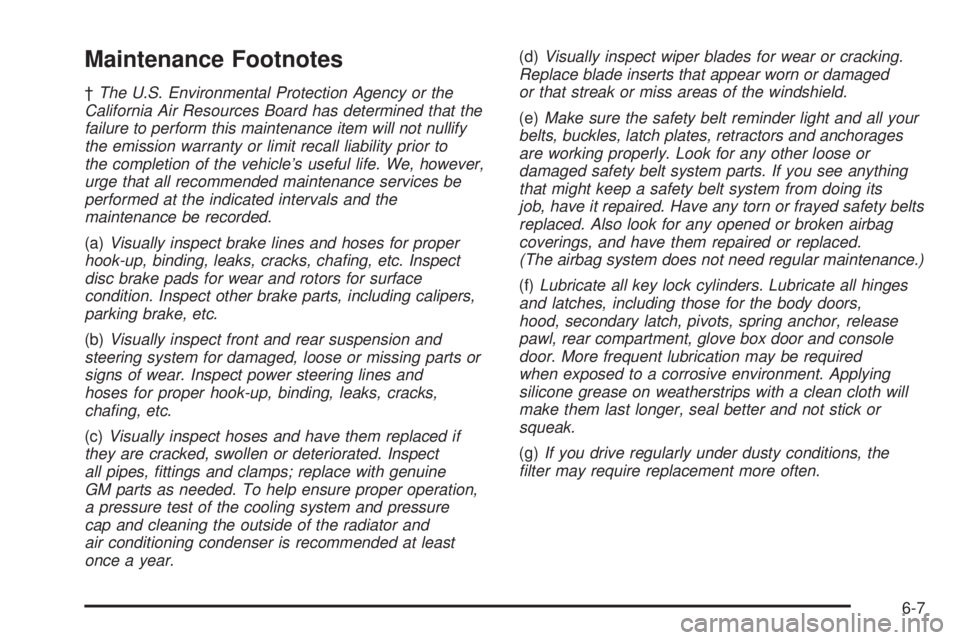
Maintenance Footnotes
†The U.S. Environmental Protection Agency or the
California Air Resources Board has determined that the
failure to perform this maintenance item will not nullify
the emission warranty or limit recall liability prior to
the completion of the vehicle’s useful life. We, however,
urge that all recommended maintenance services be
performed at the indicated intervals and the
maintenance be recorded.
(a)Visually inspect brake lines and hoses for proper
hook-up, binding, leaks, cracks, cha�ng, etc. Inspect
disc brake pads for wear and rotors for surface
condition. Inspect other brake parts, including calipers,
parking brake, etc.
(b)Visually inspect front and rear suspension and
steering system for damaged, loose or missing parts or
signs of wear. Inspect power steering lines and
hoses for proper hook-up, binding, leaks, cracks,
cha�ng, etc.
(c)Visually inspect hoses and have them replaced if
they are cracked, swollen or deteriorated. Inspect
all pipes, �ttings and clamps; replace with genuine
GM parts as needed. To help ensure proper operation,
a pressure test of the cooling system and pressure
cap and cleaning the outside of the radiator and
air conditioning condenser is recommended at least
once a year.(d)Visually inspect wiper blades for wear or cracking.
Replace blade inserts that appear worn or damaged
or that streak or miss areas of the windshield.
(e)Make sure the safety belt reminder light and all your
belts, buckles, latch plates, retractors and anchorages
are working properly. Look for any other loose or
damaged safety belt system parts. If you see anything
that might keep a safety belt system from doing its
job, have it repaired. Have any torn or frayed safety belts
replaced. Also look for any opened or broken airbag
coverings, and have them repaired or replaced.
(The airbag system does not need regular maintenance.)
(f)Lubricate all key lock cylinders. Lubricate all hinges
and latches, including those for the body doors,
hood, secondary latch, pivots, spring anchor, release
pawl, rear compartment, glove box door and console
door. More frequent lubrication may be required
when exposed to a corrosive environment. Applying
silicone grease on weatherstrips with a clean cloth will
make them last longer, seal better and not stick or
squeak.
(g)If you drive regularly under dusty conditions, the
�lter may require replacement more often.
6-7
Page 380 of 410
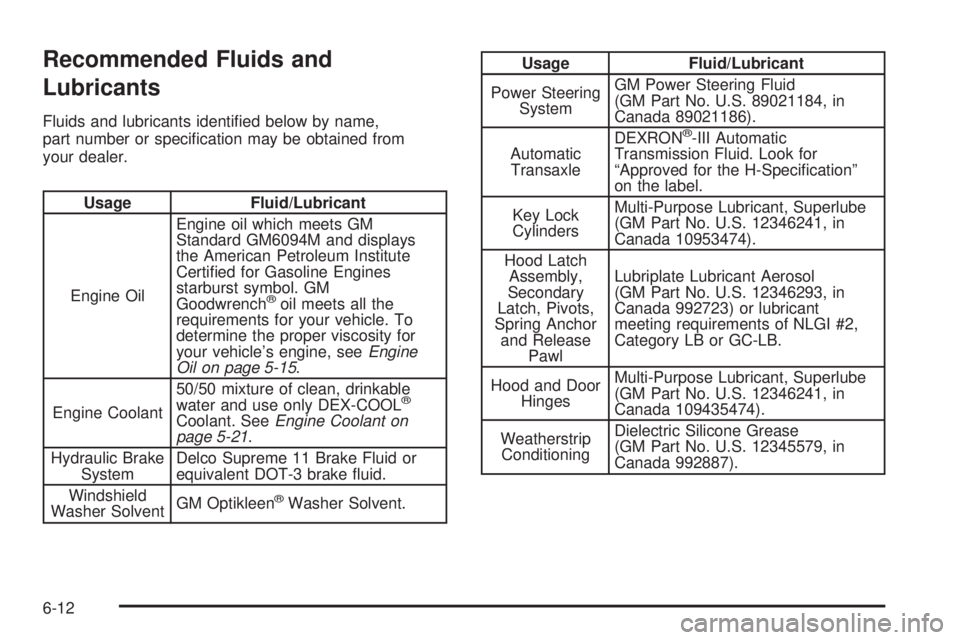
Recommended Fluids and
Lubricants
Fluids and lubricants identi�ed below by name,
part number or speci�cation may be obtained from
your dealer.
Usage Fluid/Lubricant
Engine OilEngine oil which meets GM
Standard GM6094M and displays
the American Petroleum Institute
Certi�ed for Gasoline Engines
starburst symbol. GM
Goodwrench
®oil meets all the
requirements for your vehicle. To
determine the proper viscosity for
your vehicle’s engine, seeEngine
Oil on page 5-15.
Engine Coolant50/50 mixture of clean, drinkable
water and use only DEX-COOL
®
Coolant. SeeEngine Coolant on
page 5-21.
Hydraulic Brake
SystemDelco Supreme 11 Brake Fluid or
equivalent DOT-3 brake �uid.
Windshield
Washer SolventGM Optikleen
®Washer Solvent.
Usage Fluid/Lubricant
Power Steering
SystemGM Power Steering Fluid
(GM Part No. U.S. 89021184, in
Canada 89021186).
Automatic
TransaxleDEXRON
®-III Automatic
Transmission Fluid. Look for
“Approved for the H-Speci�cation”
on the label.
Key Lock
CylindersMulti-Purpose Lubricant, Superlube
(GM Part No. U.S. 12346241, in
Canada 10953474).
Hood Latch
Assembly,
Secondary
Latch, Pivots,
Spring Anchor
and Release
PawlLubriplate Lubricant Aerosol
(GM Part No. U.S. 12346293, in
Canada 992723) or lubricant
meeting requirements of NLGI #2,
Category LB or GC-LB.
Hood and Door
HingesMulti-Purpose Lubricant, Superlube
(GM Part No. U.S. 12346241, in
Canada 109435474).
Weatherstrip
ConditioningDielectric Silicone Grease
(GM Part No. U.S. 12345579, in
Canada 992887).
6-12