2005 BUICK LACROSSE mirror
[x] Cancel search: mirrorPage 1 of 410

Seats and Restraint Systems........................... 1-1
Front Seats
............................................... 1-3
Rear Seats
............................................... 1-8
Safety Belts
.............................................1-10
Child Restraints
.......................................1-31
Airbag System
.........................................1-51
Restraint System Check
............................1-65
Features and Controls..................................... 2-1
Keys
........................................................ 2-2
Doors and Locks
......................................2-10
Windows
.................................................2-15
Theft-Deterrent Systems
............................2-17
Starting and Operating Your Vehicle
...........2-21
Mirrors
....................................................2-32
OnStar
®System
......................................2-34
HomeLink®Transmitter
.............................2-36
Storage Areas
.........................................2-40
Sunroof
..................................................2-42
Instrument Panel............................................. 3-1
Instrument Panel Overview
.......................... 3-4
Climate Controls
......................................3-21
Warning Lights, Gages, and Indicators
........3-30
Driver Information Center (DIC)
..................3-47
Audio System(s)
.......................................3-79Driving Your Vehicle....................................... 4-1
Your Driving, the Road, and Your Vehicle
..... 4-2
Towing
...................................................4-34
Service and Appearance Care.......................... 5-1
Service
..................................................... 5-3
Fuel
......................................................... 5-5
Checking Things Under the Hood
...............5-10
Headlamp Aiming
.....................................5-43
Bulb Replacement
....................................5-45
Windshield Wiper Blade Replacement
.........5-51
Tires
......................................................5-52
Appearance Care
.....................................5-78
Vehicle Identi�cation
.................................5-86
Electrical System
......................................5-87
Capacities and Speci�cations
.....................5-92
Maintenance Schedule..................................... 6-1
Maintenance Schedule
................................ 6-2
Customer Assistance and Information.............. 7-1
Customer Assistance and Information
........... 7-2
Reporting Safety Defects
...........................7-10
Index................................................................ 1
2005 Buick LaCrosse Owner ManualM
Page 73 of 410

Keys...............................................................2-2
Remote Keyless Entry System.........................2-3
Remote Keyless Entry System Operation...........2-4
Doors and Locks............................................2-10
Door Locks..................................................2-10
Power Door Locks........................................2-11
Delayed Locking...........................................2-11
Automatic Door Locks...................................2-12
Lockout Protection........................................2-12
Trunk..........................................................2-13
Windows........................................................2-15
Power Windows............................................2-16
Sun Visors...................................................2-17
Theft-Deterrent Systems..................................2-17
Content Theft-Deterrent.................................2-17
PASS-Key
®III ..............................................2-19
PASS-Key®III Operation...............................2-19
Starting and Operating Your Vehicle................2-21
New Vehicle Break-In....................................2-21
Ignition Positions..........................................2-21
Retained Accessory Power (RAP)...................2-22
Starting the Engine.......................................2-22
Engine Coolant Heater..................................2-23
Automatic Transaxle Operation.......................2-24
Parking Brake..............................................2-27Shifting Into Park (P).....................................2-28
Shifting Out of Park (P).................................2-29
Parking Over Things That Burn.......................2-30
Engine Exhaust............................................2-30
Running the Engine While Parked...................2-31
Mirrors...........................................................2-32
Manual Rearview Mirror.................................2-32
Manual Rearview Mirror with OnStar
®..............2-32
Automatic Dimming Rearview Mirror................2-32
Automatic Dimming Rearview Mirror
with OnStar
®............................................2-33
Outside Power Mirrors...................................2-33
Outside Power Heated Mirrors........................2-34
Outside Convex Mirror...................................2-34
OnStar
®System.............................................2-34
HomeLink®Transmitter...................................2-36
HomeLink®..................................................2-36
Programming the HomeLink®..........................2-36
Storage Areas................................................2-40
Glove Box...................................................2-40
Cupholder(s)................................................2-40
Center Console Storage Area.........................2-41
Convenience Net..........................................2-41
Sunroof.........................................................2-42
Section 2 Features and Controls
2-1
Page 89 of 410

Sun Visors
To block out glare, you can swing down the visors and
slide them along the rod to cover different areas of
the front window. You can also move them to cover the
side windows.
Visor Vanity Mirror
Swing down the sun visors and lift the cover to expose
the vanity mirror. If your vehicle has lighted vanity
mirrors, the light will come on when you lift the cover.
Theft-Deterrent Systems
Vehicle theft is big business, especially in some cities.
Although your vehicle has a number of theft-deterrent
features, we know that nothing we put on it can make it
impossible to steal.
Content Theft-Deterrent
Your vehicle may have a content theft-deterrent
alarm system.
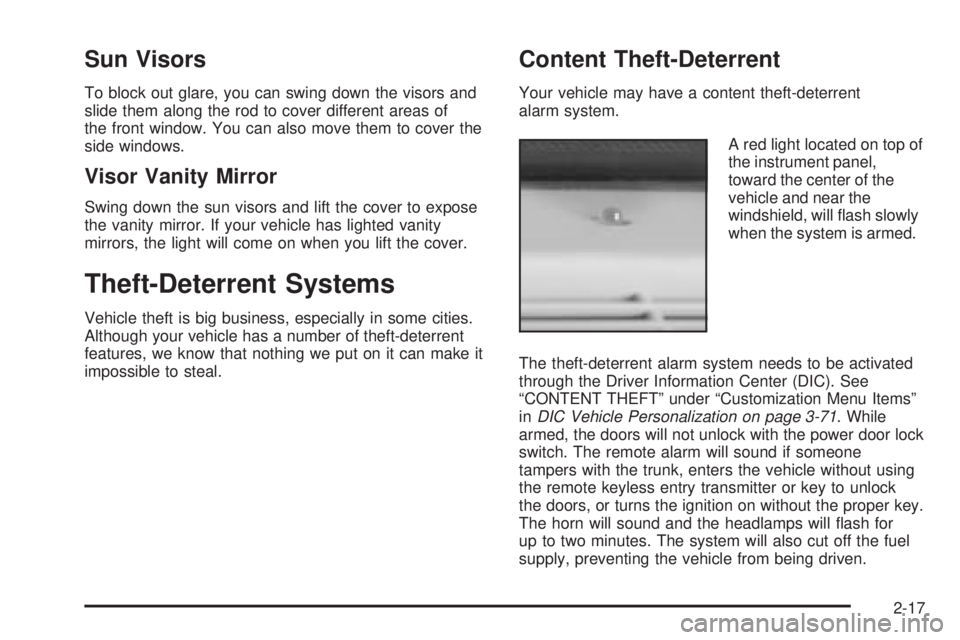
A red light located on top of
the instrument panel,
toward the center of the
vehicle and near the
windshield, will �ash slowly
when the system is armed.
The theft-deterrent alarm system needs to be activated
through the Driver Information Center (DIC). See
“CONTENT THEFT” under “Customization Menu Items”
inDIC Vehicle Personalization on page 3-71. While
armed, the doors will not unlock with the power door lock
switch. The remote alarm will sound if someone
tampers with the trunk, enters the vehicle without using
the remote keyless entry transmitter or key to unlock
the doors, or turns the ignition on without the proper key.
The horn will sound and the headlamps will �ash for
up to two minutes. The system will also cut off the fuel
supply, preventing the vehicle from being driven.
2-17
Page 104 of 410

Mirrors
Manual Rearview Mirror
While sitting in a comfortable driving position, adjust the
mirror so you can see clearly behind your vehicle. Grip
the mirror in the center to move it up or down and side to
side. The day/night control at the bottom of the mirror lets
you adjust the mirror to avoid glare from the lamps behind
you. Turn the control to the right for nighttime conditions
and to the center for daytime conditions.
Manual Rearview Mirror
with OnStar
®
The vehicle may have a mirror with Onstar®. While
sitting in a comfortable driving position, adjust the mirror
so you can see clearly behind your vehicle. Grip the
mirror in the center to move it up and down and side
to side.
The mirror has a day/night control located at the bottom.
Turn the control to the right for the night position to
reduce glare from other vehicles’ headlamps. Turn the
control to the front for the day position.There are also three OnStar
®buttons located at the
bottom of the mirror. See your dealer for more
information on the system and how to subscribe to
OnStar
®. SeeOnStar®System on page 2-34for more
information about the services OnStar®provides.
Automatic Dimming Rearview Mirror
While sitting in a comfortable driving position, adjust
the mirror so you can see clearly behind your vehicle.
Grip the mirror in the center to move it up or down
and side to side.
The vehicle may have an automatic dimming rearview
mirror that darkens gradually to reduce the glare of
headlamps from behind. Push the button in the center
of the mirror to turn this feature on or off.
One photocell on the front of the mirror senses when it
is becoming dark outside. Another photocell, facing
rearward, senses headlamps behind you.
To keep the photocells operating well, occasionally
clean them with a cotton swab and glass cleaner.
Push the two outer buttons at the bottom of the mirror
to turn the map lamps on or off.
2-32
Page 105 of 410

Automatic Dimming Rearview Mirror
with OnStar
®
While sitting in a comfortable driving position, adjust the
mirror so you can see clearly behind your vehicle.
Grip the mirror in the center to move it up or down and
side to side.
The vehicle may have an automatic dimming rearview
mirror with the OnStar
®System.
The automatic dimming feature is turned on or off by
pressing the left button, located on the lower part of the
mirror, for up to three seconds. When turned on, this
mirror functions like the automatic dimming rearview
mirror described previously. SeeAutomatic Dimming
Rearview Mirror on page 2-32.
There are also three OnStar
®buttons located at the
bottom of the mirror. See your dealer for more
information on the system and how to subscribe to
OnStar
®. SeeOnStar®System on page 2-34for more
information about the services OnStar®provides.
Outside Power Mirrors
The controls for the
outside power mirrors, are
located on the driver’s
door armrest.
Move the selector switch located below the four-way
control pad to the left or right to choose either the driver’s
side or passenger’s side mirror. To adjust a mirror, use
the arrows located on the four-way control pad to move
the mirror in the desired direction. Adjust each outside
mirror so that a little of the vehicle and the area behind it
can be seen while sitting in a comfortable driving position.
Keep the selector switch in the center position when not
adjusting either outside mirror.
2-33
Page 106 of 410

Outside Power Heated Mirrors
For information on the operation of the outside power
mirrors seeOutside Power Mirrors on page 2-33.
If the vehicle has heated mirrors, they will warm up to
melt ice and snow, and dissolve condensation when the
defroster is turned on. SeeDual Automatic Climate
Control System on page 3-24orClimate Control System
on page 3-21.
Outside Convex Mirror
{CAUTION:
A convex mirror can make things (like other
vehicles) look farther away than they really are.
If you cut too sharply into the right lane, you
could hit a vehicle on your right. Check your
inside mirror or glance over your shoulder
before changing lanes.
The passenger’s side mirror is convex. A convex
mirror’s surface is curved so more can be seen from the
driver’s seat, but it also makes things look farther
away than they really are.
OnStar®System
OnStar®uses global positioning system (GPS) satellite
technology, wireless communications, and call centers
to provide you with a wide range of safety, security,
information, and convenience services.
A complete OnStar
®user’s guide and the terms and
conditions of the OnStar®Subscription Service
Agreement are included in the vehicle’s glove box
literature. For more information, visit www.onstar.com or
www.onstarcanada.com. Contact OnStar
®at
1-888-4-ONSTAR (1-888-466-7827), or press the
OnStar
®button to speak to an OnStar®advisor 24 hours
a day, 7 days a week.
Terms and conditions of the Subscription Service
Agreement can be found at www.onstar.com or
www.onstarcanada.com.
OnStar®Services
For new vehicles equipped with OnStar®, the Safe and
Sound Plan is included for the �rst year. You can
extend this plan beyond the �rst year, or upgrade to the
Directions and Connections Plan to meet your needs.
For more information, press the OnStar
®button to speak
with an advisor.
2-34
Page 133 of 410

The URPA display is located inside the vehicle,
above the rear window. It has three color-coded lights
that can be seen through the rearview mirror or by
turning around.
{CAUTION:
Even with the Ultrasonic Rear Park Assist
system, the driver must check carefully
before backing up. The system does not
operate above typical backing speeds of
3 mph (5 km/h) while parking. And, the system
does not detect objects that are more than
5 feet (1.5 meters) behind the vehicle.
So, unless you check carefully behind you
before and when you back up, you could strike
children, pedestrians, bicyclists or pets behind
you, and they could be injured or killed.
Whether or not you are using rear park assist,
always check carefully behind your vehicle
before you back up and then watch closely as
you do.
How the System Works
URPA comes on automatically when the shift lever is
moved into REVERSE (R). When the system comes on,
the three lights on the display will brie�y illuminate to
let you know that the system is working. If your vehicle is
moving in REVERSE (R) at a speed greater than
3 mph (5 km/h), the red light will �ash to remind you the
system does not work at this speed.
The �rst time an object is detected while in
REVERSE (R), a chime will sound and the following will
occur in sequence, depending on the distance from
the object:
At 5 feet (1.5 m) a chime will sound and one amber
light will be lit.
At 40 inches (1.0 m) both amber lights will be lit.
At 20 inches (0.5 m) a continuous chime will sound
and all three lights (amber/amber/red) will be lit.
At 1 foot (0.3 m) a continuous chime will sound and
all three lights (amber/amber/red) will �ash.
URPA can detect objects 3 inches (7.6 cm) and wider,
and at least 10 inches (25.4 cm) tall, but it cannot detect
objects that are above trunk level. In order for the
rear sensors to recognize an object, it must be within
operating range.
3-19
Page 247 of 410

Do not get too close to the vehicle you want to pass
while you are awaiting an opportunity. For one thing,
following too closely reduces your area of vision,
especially if you are following a larger vehicle. Also,
you will not have adequate space if the vehicle
ahead suddenly slows or stops. Keep back a
reasonable distance.
When it looks like a chance to pass is coming up,
start to accelerate but stay in the right lane and do
not get too close. Time your move so you will be
increasing speed as the time comes to move into the
other lane. If the way is clear to pass, you will have a
running start that more than makes up for the
distance you would lose by dropping back. And if
something happens to cause you to cancel your
pass, you need only slow down and drop back again
and wait for another opportunity.
If other vehicles are lined up to pass a slow vehicle,
wait your turn. But take care that someone is not
trying to pass you as you pull out to pass the slow
vehicle. Remember to glance over your shoulder and
check the blind spot.
Check your mirrors, glance over your shoulder, and
start your left lane change signal before moving out
of the right lane to pass. When you are far enough
ahead of the passed vehicle to see its front in yourinside mirror, activate your right lane change signal
and move back into the right lane. Remember that
your right outside mirror is convex. The vehicle you
just passed may seem to be farther away from you
than it really is.
Try not to pass more than one vehicle at a time on
two-lane roads. Reconsider before passing the
next vehicle.
Do not overtake a slowly moving vehicle too rapidly.
Even though the brake lamps are not �ashing, it may
be slowing down or starting to turn.
If you are being passed, make it easy for the
following driver to get ahead of you. Perhaps you can
ease a little to the right.
Loss of Control
Let us review what driving experts say about what
happens when the three control systems — brakes,
steering, and acceleration — do not have enough
friction where the tires meet the road to do what the
driver has asked.
In any emergency, do not give up. Keep trying to
steer and constantly seek an escape route or area of
less danger.
4-13