2005 BUICK CENTURY brakes
[x] Cancel search: brakesPage 74 of 348

Programming Delayed Locking
Delayed locking has two modes.
Mode One (One Chime):Delayed locking is turned off.
Mode Two (Two Chimes):Delayed locking is
turned on.
1. Close the doors.
2. Move the ignition key to the RUN position.
3. Apply the regular brakes.
4. Press and hold the power door unlock switch. While
holding the power door unlock switch, move the
shift lever out of and back into PARK (P).
One or two chimes will sound indicating what mode
the delayed locking is in.
5. Release the power door unlock switch, after one
of the chime mode sequences, to set the
desired mode.
Illumination on Remote Activation
This feature provides interior lighting when a remote
keyless entry door unlock command is received by the
vehicle. The ignition must be off for this feature to
work. The interior lamps will stay on until either the
ignition is turned to RUN or until 40 seconds has
elapsed. If a door is opened during this time, the timed
lighting will be canceled, and the interior lamps will
remain on. Also see “Entry Lighting” underInterior
Lamps on page 3-15for more information.
Matching Transmitter(s) to
Your Vehicle
Each remote keyless entry transmitter is uniquely coded
to prevent another transmitter from unlocking your
vehicle. If a transmitter is lost or stolen, a replacement
can be purchased through your dealer. Remember
to bring any additional transmitters so they also can be
re-coded to match the new transmitter. Once your
dealer has coded the new transmitter, the lost
transmitter cannot unlock the vehicle. The vehicle can
have a maximum of four transmitters coded to it.
2-8
Page 77 of 348
Power Door Locks
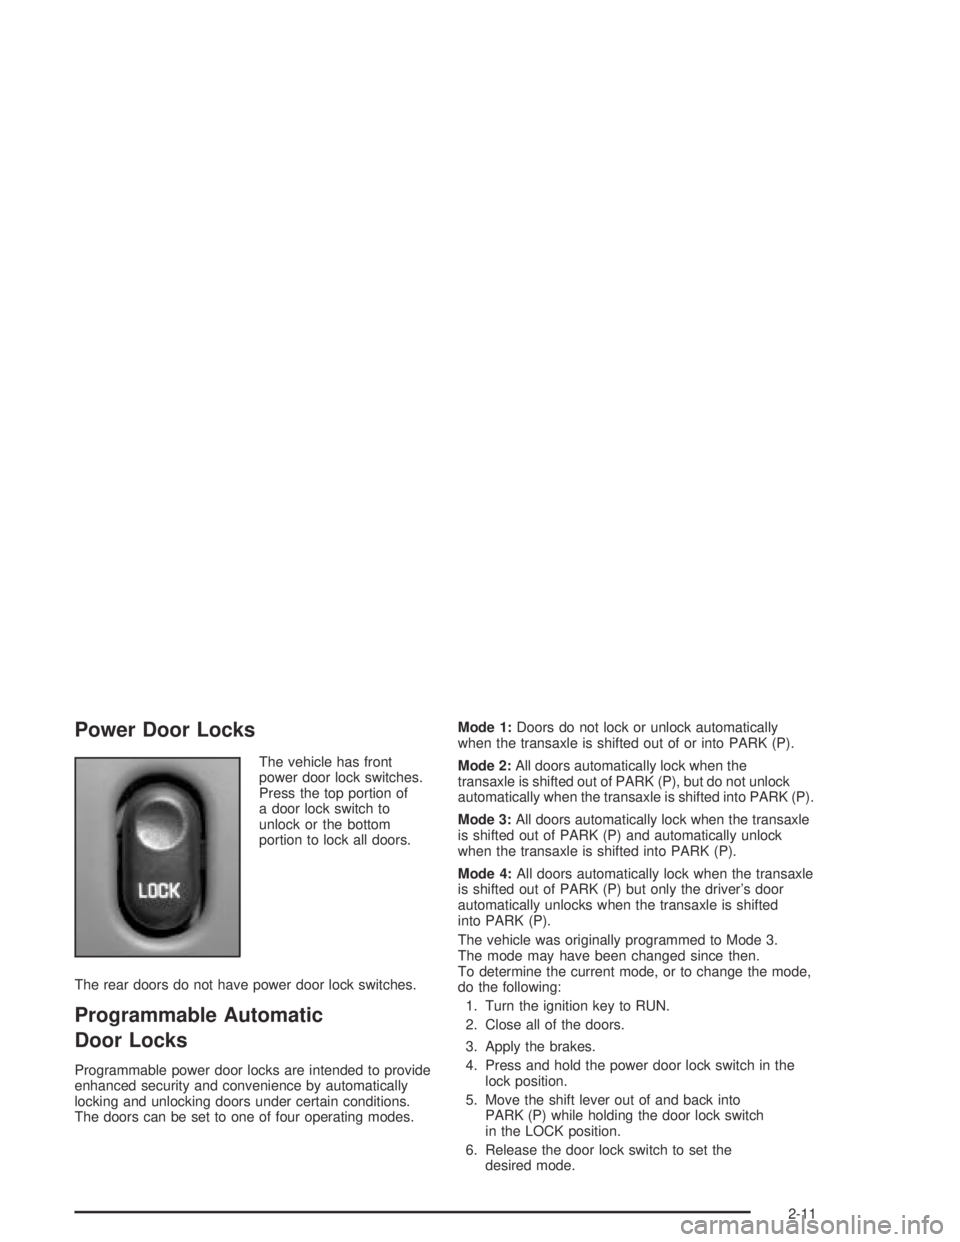
The vehicle has front
power door lock switches.
Press the top portion of
a door lock switch to
unlock or the bottom
portion to lock all doors.
The rear doors do not have power door lock switches.
Programmable Automatic
Door Locks
Programmable power door locks are intended to provide
enhanced security and convenience by automatically
locking and unlocking doors under certain conditions.
The doors can be set to one of four operating modes.Mode 1:Doors do not lock or unlock automatically
when the transaxle is shifted out of or into PARK (P).
Mode 2:All doors automatically lock when the
transaxle is shifted out of PARK (P), but do not unlock
automatically when the transaxle is shifted into PARK (P).
Mode 3:All doors automatically lock when the transaxle
is shifted out of PARK (P) and automatically unlock
when the transaxle is shifted into PARK (P).
Mode 4:All doors automatically lock when the transaxle
is shifted out of PARK (P) but only the driver’s door
automatically unlocks when the transaxle is shifted
into PARK (P).
The vehicle was originally programmed to Mode 3.
The mode may have been changed since then.
To determine the current mode, or to change the mode,
do the following:
1. Turn the ignition key to RUN.
2. Close all of the doors.
3. Apply the brakes.
4. Press and hold the power door lock switch in the
lock position.
5. Move the shift lever out of and back into
PARK (P) while holding the door lock switch
in the LOCK position.
6. Release the door lock switch to set the
desired mode.
2-11
Page 88 of 348

Make sure the shift lever is fully in PARK (P) before
starting the engine. The vehicle has an automatic
transaxle shift lock control system. The regular brakes
must be fully applied before shifting from PARK (P)
when the ignition is in RUN. If the vehicle cannot
be shifted out of PARK (P), increase pressure on the
shift lever by pushing it all the way into PARK (P) while
keeping the brake pedal pushed down. Then move
the shift lever out of PARK (P). SeeShifting Out of
Park (P) on page 2-26.
Notice:Shifting to REVERSE (R) while your vehicle
is moving forward could damage the transaxle.
The repairs would not be covered by your warranty.
Shift to REVERSE (R) only after your vehicle
is stopped.
REVERSE (R): Use this gear to back up.
To rock the vehicle back and forth in order to get it out
of snow, ice, or sand without damaging the transaxle,
seeIf You Are Stuck: In Sand, Mud, Ice or Snow
on page 4-30.
NEUTRAL (N): In this position, the engine does not
connect with the wheels. To restart when the vehicle is
already moving, use NEUTRAL (N) only. Also, use
NEUTRAL (N) when the vehicle is being towed.
{CAUTION:
Shifting into a drive gear while your engine is
running at high speed is dangerous. Unless
your foot is �rmly on the brake pedal, your
vehicle could move very rapidly. You could
lose control and hit people or objects. Do not
shift into a drive gear while your engine is
running at high speed.
Notice:Shifting out of PARK (P) or NEUTRAL (N)
with the engine racing may damage the transaxle.
The repairs would not be covered by your warranty.
Be sure the engine is not racing when shifting
your vehicle.
Notice:Driving your vehicle if you notice that it is
moving slowly or not shifting gears as you
increase speed may damage the transaxle. Have
your vehicle serviced right away. You can drive in
SECOND (2) when you are driving less than 35 mph
(55 km/h) and AUTOMATIC OVERDRIVE (D) for
higher speeds until then.
2-22
Page 89 of 348
AUTOMATIC OVERDRIVE (X): This position is for
normal driving. If more power is needed for passing, and
the vehicle is:
Going less than 35 mph (55 km/h), push the
accelerator pedal about halfway down.
Going about 35 mph (55 km/h) or more, push the
accelerator pedal all the way down.
By doing this the vehicle will shift down to the next gear
and have more power.
THIRD (3): This position is also used for normal driving,
but it offers more power and lower fuel economy than
AUTOMATIC OVERDRIVE (
X).
Here are some times you might choose THIRD (3)
instead of AUTOMATIC OVERDRIVE (
X):
When driving on hilly, winding roads.
When towing a trailer, so there is less shifting
between gears.
When going down a steep hill.
When driving in no-highway scenarios such as
city streets.Notice:Driving in SECOND (2) for more than
25 miles (40 km) or at speeds over 55 mph (90 km/h)
may damage the transaxle. Also, shifting into
SECOND (2) at speeds above 65 mph (105 km/h) can
cause damage. Drive in THIRD (3) or AUTOMATIC
OVERDRIVE (D) instead of SECOND (2).
SECOND (2): This position gives the vehicle more
power than THIRD (3) but lower fuel economy
than THIRD (3). You can use SECOND (2) on hills. It
can help control the speed going down steep mountain
roads, but then you would also want to use your
brakes off and on.
FIRST (1): This position gives the vehicle even more
power but lower fuel economy than SECOND (2). It can
be used on very steep hills, or in deep snow or mud.
If the shift lever is put in FIRST (1), the transaxle will
not shift into �rst gear until the vehicle is going
slowly enough.
Notice:Spinning the tires or holding the vehicle in
one place on a hill using only the accelerator
pedal may damage the transaxle. If you are stuck,
do not spin the tires. When stopping on a hill,
use the brakes to hold the vehicle in place.
2-23
Page 92 of 348

Torque Lock
If parking the vehicle on a hill and the transaxle is not
shifted into PARK (P) properly, the weight of the vehicle
may put too much force on the parking pawl in the
transaxle. It might be difficult to pull the shift lever out of
PARK (P). This is called torque lock. To prevent
torque lock, set the parking brake and then shift into
PARK (P) properly before leaving the driver’s seat.
To �nd out how, seeShifting Into Park (P) on page 2-25.
When you are ready to drive, move the shift lever out
of PARK (P) before releasing the parking brake.
If torque lock does occur, another vehicle might have to
push yours a little uphill. This takes some of the
pressure off the parking pawl in the transaxle, enabling
the shift lever to be moved out of PARK (P).
Shifting Out of Park (P)
The vehicle has an automatic transaxle shiftlock control
system which locks the shift lever in PARK (P) when
the ignition is in the OFF position. The regular brakes
have to be fully applied before the vehicle can be shifted
from PARK (P) when the ignition is in RUN. See
Automatic Transaxle Operation on page 2-21.
If the vehicle cannot be shifted out of PARK (P), ease
pressure on the shift lever and push the shift lever all
the way up into PARK (P) as brake application is
maintained. Then move the shift lever into the
desired gear.
If the brake pedal is held down but still cannot be
shifted out of PARK (P), try this:
1. Turn the ignition key to ACCESSORY. There is no
shift interlock in this key position.
2. Apply and hold the brake until the end of Step 4.
3. Shift the transaxle to NEUTRAL (N).
4. Start the vehicle and then shift to the desired gear.
5. Have the system �xed as soon as possible.
2-26
Page 110 of 348
Cruise Control
If the vehicle has cruise control, a speed of about
25 mph (40 km/h) or more can be maintained without
keeping your foot on the accelerator. This can really help
on long trips. Cruise control does not work at speeds
below about 25 mph (40 km/h).
When the brakes are applied, the cruise control shuts off.
{CAUTION:
Cruise control can be dangerous where you
cannot drive safely at a steady speed. So, do
not use your cruise control on winding roads
or in heavy traffic.
Cruise control can be dangerous on slippery
roads. On such roads, fast changes in tire
traction can cause needless wheel spinning,
and you could lose control. Do not use cruise
control on slippery roads.The cruise control will automatically disengage when the
enhanced traction system begins to limit wheel spin.
SeeEnhanced Traction System (ETS) on page 4-9.
When road conditions allow, the cruise control can be
used again.
Setting Cruise Control
{CAUTION:
If you leave your cruise control on when you
are not using cruise, you might hit a button
and go into cruise when you do not want to.
You could be startled and even lose control.
Keep the cruise control switch off until you
want to use cruise control.
3-10
Page 111 of 348
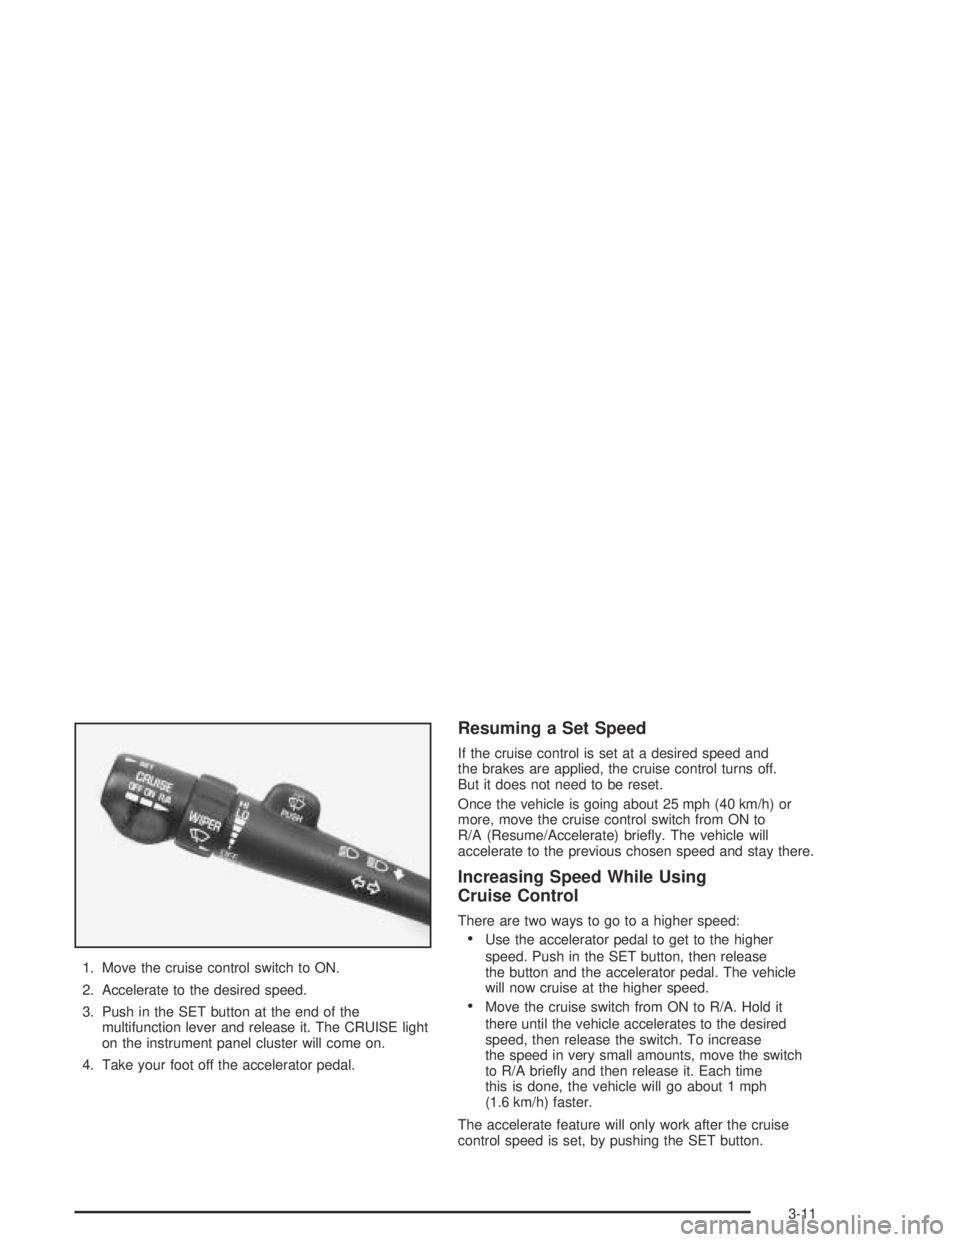
1. Move the cruise control switch to ON.
2. Accelerate to the desired speed.
3. Push in the SET button at the end of the
multifunction lever and release it. The CRUISE light
on the instrument panel cluster will come on.
4. Take your foot off the accelerator pedal.
Resuming a Set Speed
If the cruise control is set at a desired speed and
the brakes are applied, the cruise control turns off.
But it does not need to be reset.
Once the vehicle is going about 25 mph (40 km/h) or
more, move the cruise control switch from ON to
R/A (Resume/Accelerate) brie�y. The vehicle will
accelerate to the previous chosen speed and stay there.
Increasing Speed While Using
Cruise Control
There are two ways to go to a higher speed:
Use the accelerator pedal to get to the higher
speed. Push in the SET button, then release
the button and the accelerator pedal. The vehicle
will now cruise at the higher speed.
Move the cruise switch from ON to R/A. Hold it
there until the vehicle accelerates to the desired
speed, then release the switch. To increase
the speed in very small amounts, move the switch
to R/A brie�y and then release it. Each time
this is done, the vehicle will go about 1 mph
(1.6 km/h) faster.
The accelerate feature will only work after the cruise
control speed is set, by pushing the SET button.
3-11
Page 112 of 348
Reducing Speed While Using
Cruise Control
There are two ways to reduce the vehicle’s speed while
using cruise control:
Push in the SET button until the vehicle slows down
to the desired, then release it.
To slow the vehicle down in very small amounts,
push the SET button brie�y. Each time this is down,
the vehicle will go about 1 mph (1.6 km/h) slower.
Passing Another Vehicle While Using
Cruise Control
Use the accelerator pedal to increase the vehicle’s
speed. When you take your foot off the pedal, the
vehicle will slow down to the cruise control speed that
was set earlier.
Using Cruise Control on Hills
How well the cruise control will work on hills depends
upon the speed and load of the vehicle, and the
steepness of the hills. When going up steep hills, the
accelerator pedal may have to be pressed to maintain
the vehicle’s speed. When going downhill, the vehicle’s
brakes may have to be used, or a lower gear may
have to be used to keep the vehicle’s speed down.
Of course, applying the brake takes the vehicle out of
cruise control. Many drivers �nd this to be too much
trouble and do not use cruise control on steep hills.
Ending Cruise Control
There are two ways to turn off the cruise control:
Step lightly on the brake pedal.
Move the cruise switch to OFF.
Ending Speed Memory
When the cruise control or the ignition is turned off, or
the vehicle is shifted into PARK (P) or NEUTRAL (N),
the cruise control set speed memory is erased.
3-12