Page 258 of 348

5. Remove the rubber access cover from behind the
bulb being replaced.
6. Turn the bulb socket one-quarter turn and remove it
from the headlamp assembly.
7. Lift the plastic locking tab on the electrical connector
and pull the connector from the headlamp
bulb socket.8. Connect the new headlamp bulb to the electrical
connector, making sure the connector tab snaps
into place.
9. Insert the bulb socket into the headlamp assembly.
10. Reverse all steps to reassemble the headlamp
assembly, then check the lamps.
Front Turn Signal and Parking Lamps
1. Remove the headlamp assembly. Refer to the
removal procedure earlier in this section.
2. Remove the rubber bulb access cover.
3. Twist the sidemarker lamp socket, located on
the outboard side of the headlamp assembly,
counterclockwise and pull it from the
headlamp assembly.
4. Holding the base of the socket, pull the old bulb
from the socket.
5. Push the new bulb into the socket.
6. Reverse Steps 1 through 3 to reinstall the
lamp assembly.
5-48
Page 259 of 348
Center High-Mounted
Stoplamp (CHMSL)
1. Open the trunk.
2. Reach through the access opening in the trunk lid.3. Remove the old bulb by turning it counterclockwise
one-quarter turn.
4. Push the new bulb into the bulb socket.
5. Turn the socket clockwise one-quarter turn
to reinstall.
5-49
Page 260 of 348
Taillamps, Turn Signal,
and Stoplamps
1. Open the trunk.
2. Remove the convenience net If the vehicle has one.3. Remove the three plastic wing nuts (A).
One wing nut is located on top of the carpet.
The other two are located underneath the carpet.
4. Pull the taillamp housing (B) away from the body of
the vehicle.
5. Squeeze the tab on the socket and turn the
socket counterclockwise.
6. Pull out the socket.
7. Pull the old bulb out of the socket. There are
two bulbs on each taillamp.
8. Push in a new bulb.
9. Reverse these steps to reinstall the lamp assembly.
5-50
Page 281 of 348
Removing the Spare Tire and Tools
The equipment you will need is in the trunk.
1. Turn the center nut on
the compact spare tire
cover counterclockwise
to remove it.
Then lift and remove the cover. SeeCompact
Spare Tire on page 5-81for more information about
the compact spare tire.2. Remove the spare tire.
5-71
Page 282 of 348
3. Turn the nut holding the jack counterclockwise and
remove it. Then remove the jack and wrench.The tools you will be using include the jack (A),
extension and protection guide (B) and wheel
wrench (C).
5-72
Page 283 of 348

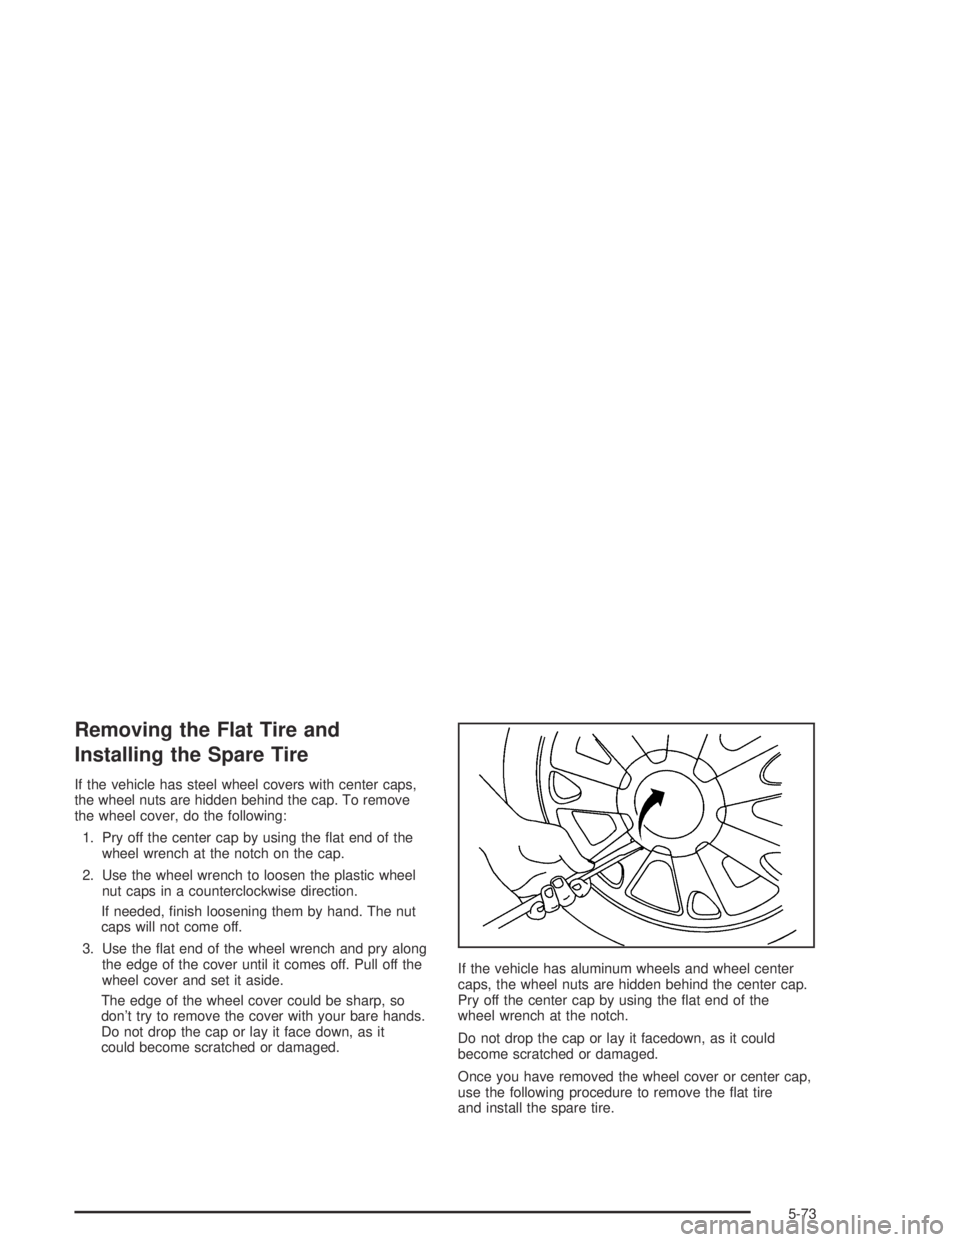
Removing the Flat Tire and
Installing the Spare Tire
If the vehicle has steel wheel covers with center caps,
the wheel nuts are hidden behind the cap. To remove
the wheel cover, do the following:
1. Pry off the center cap by using the �at end of the
wheel wrench at the notch on the cap.
2. Use the wheel wrench to loosen the plastic wheel
nut caps in a counterclockwise direction.
If needed, �nish loosening them by hand. The nut
caps will not come off.
3. Use the �at end of the wheel wrench and pry along
the edge of the cover until it comes off. Pull off the
wheel cover and set it aside.
The edge of the wheel cover could be sharp, so
don’t try to remove the cover with your bare hands.
Do not drop the cap or lay it face down, as it
could become scratched or damaged.If the vehicle has aluminum wheels and wheel center
caps, the wheel nuts are hidden behind the center cap.
Pry off the center cap by using the �at end of the
wheel wrench at the notch.
Do not drop the cap or lay it facedown, as it could
become scratched or damaged.
Once you have removed the wheel cover or center cap,
use the following procedure to remove the �at tire
and install the spare tire.
5-73
Page 284 of 348
1. Using the wheel wrench, loosen all the wheel nuts,
but do not remove them yet.
2. Turn the jack handle clockwise to raise the
jack lift head.3. For jacking at the vehicle’s front location, put the
jack lift head (C) about 6 inches (15 cm) from the
rear edge of the front wheel opening (B) or just
behind the two bolts (A) as shown.
5-74
Page 286 of 348
5. Raise the vehicle by turning the jack handle
clockwise. It should be far enough off the ground
for the spare compact tire to �t underneath the
wheel well.
6. Remove all of the wheel nuts and take off the
�at tire.
{CAUTION:
Rust or dirt on the wheel, or on the parts to
which it is fastened, can make the wheel nuts
become loose after a time. The wheel could
come off and cause an accident. When you
change a wheel, remove any rust or dirt from
the places where the wheel attaches to the
vehicle. In an emergency, you can use a cloth
or a paper towel to do this; but be sure to use
a scraper or wire brush later, if you need to,
to get all the rust or dirt off.
7. Remove any rust or dirt
from the wheel bolts,
mounting surfaces
and spare wheel.
5-76