2005 BMW Z4 2.5I lock
[x] Cancel search: lockPage 73 of 120
Reference
At a glance
Controls
Driving tips
Mobility
71
Load
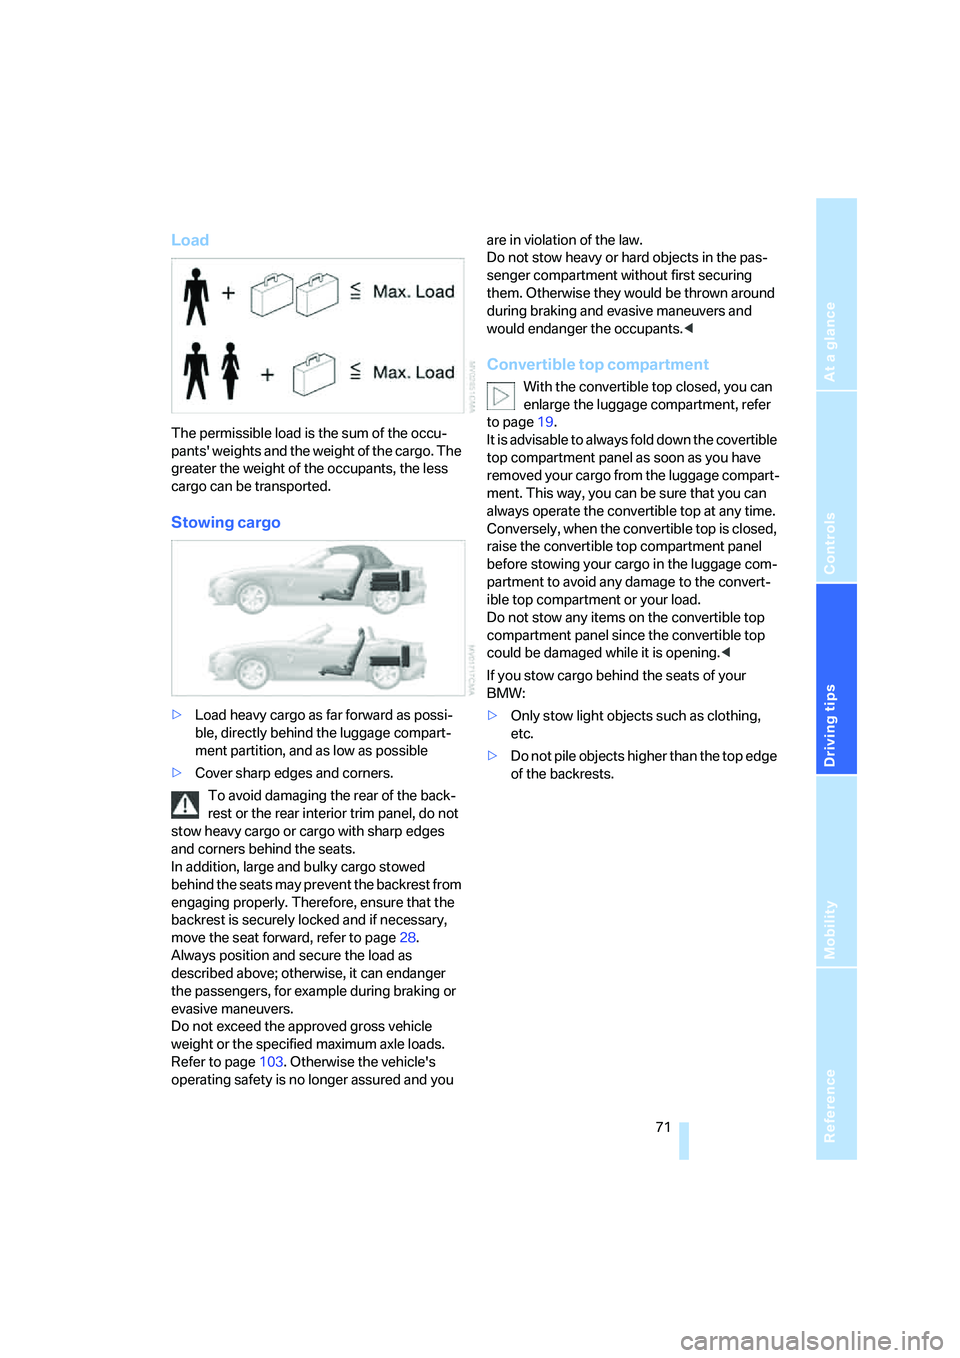
The permissible load is the sum of the occu-
pants' weights and the weight of the cargo. The
greater the weight of the occupants, the less
cargo can be transported.
Stowing cargo
>Load heavy cargo as far forward as possi-
ble, directly behind the luggage compart-
ment partition, and as low as possible
>Cover sharp edges and corners.
To avoid damaging the rear of the back-
rest or the rear interior trim panel, do not
stow heavy cargo or cargo with sharp edges
and corners behind the seats.
In addition, large and bulky cargo stowed
behind the seats may prevent the backrest from
engaging properly. Therefore, ensure that the
backrest is securely locked and if necessary,
move the seat forward, refer to page28.
Always position and secure the load as
described above; otherwise, it can endanger
the passengers, for example during braking or
evasive maneuvers.
Do not exceed the approved gross vehicle
weight or the specified maximum axle loads.
Refer to page103. Otherwise the vehicle's
operating safety is no longer assured and you are in violation of the law.
Do not stow heavy or hard objects in the pas-
senger compartment without first securing
them. Otherwise they would be thrown around
during braking and evasive maneuvers and
would endanger the occupants.<
Convertible top compartment
With the convertible top closed, you can
enlarge the luggage compartment, refer
to page19.
It is advisable to always fold down the covertible
top compartment panel as soon as you have
removed your cargo from the luggage compart-
ment. This way, you can be sure that you can
always operate the convertible top at any time.
Conversely, when the convertible top is closed,
raise the convertible top compartment panel
before stowing your cargo in the luggage com-
partment to avoid any damage to the convert-
ible top compartment or your load.
Do not stow any items on the convertible top
compartment panel since the convertible top
could be damaged while it is opening.<
If you stow cargo behind the seats of your
BMW:
>Only stow light objects such as clothing,
etc.
>Do not pile objects higher than the top edge
of the backrests.
Page 78 of 120

Refueling
76
Refueling
Fuel filler door
1.Open fuel filler door
2.Turn the gas cap in a counter-clockwise
direction
3.Place the cap in the bracket on the filler
door.
Releasing manually
If an electrical malfunction occurs, you can
unlock the fuel filler door manually:
1.Remove the covers of the tail lamps by turn-
ing the lock to the right; refer also to
page93
2.Pull the luggage compartment trim panel
slightly toward the interior.
The green button with the fuel pump sym-
bol becomes visible
3.Undo the adhesive strip and pull off
4.Pull the button
The fuel filler door is released.
Pull on the button slowly and carefully
as it could otherwise be torn off.<
Note when refueling
When handling fuels, comply with all of
the applicable safety precautions posted
at the service station.<
When refueling, insert the filler nozzle com-
pletely into the filler pipe. Lifting the nozzle dur-
ing refueling
>results in premature shutoff
>and will reduce the effect of the vapor
recovery system on the pump.
The fuel tank is full when the filler nozzle shuts
off the first time.
Closing the fuel filler cap
Place the cap in position and turn it clockweise
until a clearly audible click is heard.
Close the filler cap carefully after refueling
until a click is heard. While closing, be
sure not to squeeze the strap which is fastened
to the cap. A loose or missing cap will activate
the Check gas cap lamp
*.<
Warning lamp
* lights up.
The gas cap is not properly closed or is
missing. Check if the gas cap is prop-
erly closed.
Contents of the fuel tank
Approx. 14.5 gallons/55 liters, of which approx.
2.1 gallons/8 liters are reserve capacity.
Fill the fuel tank before it is completely
empty. Driving to the last drop of fuel can
prevent the engine from operating properly and
result in damage.<
Fuel specifications
The engine uses lead-free gasoline only.
Required fuel
Premium Unleaded Gasoline, Minimum Octane
Rating: 91.
Page 90 of 120

In the engine compartment
88
Checking the coolant level
1.The engine must be at ambient tempera-
ture
2.Open the cap of the expansion tank by turn-
ing it slightly counterclockwise to allow
accumulated pressure to escape, then
open completely
3.The coolant level is correct when the upper
end of the red float is at least even with the
upper edge of the filler neck but no more
than 3/4 in/2 cm above it, that is up to the
second mark on the float. Refer also to the
schematic diagram next to the filler neck
4.Slowly add coolant, if necessary, until the
correct level is reached; do not overfill
5.Turn the cap clockwise until it is tightly
closed
6.Have the cause for the coolant loss
removed as soon as possible.
Brake system
Malfunction
Brake fluid
The warning lamp lights up although
the parking brake is not engaged:
Stop the vehicle immediately.
The brake fluid level in the reservoir is too low.
At the same time, you may notice that brake
pedal travel is longer. Have the system checked
as soon as possible.
If you continue driving, extended pedal
travel may be necessary and braking dis-
tances may be significantly longer. Be sure to
adapt your driving style accordingly.
Brake pads
The warning lamp lights up. The brake
pads have worn down to the minimum
safe limit. Have the brake pads
replaced as soon as possible.
For your own safety: use only brake pads
which BMW has approved for your spe-
cific vehicle model. BMW cannot evaluate non-
approved brake pads to determine if they are
suitable for use, and therefore cannot guaran-
tee the operating safety of the vehicle in the
event of their use.<
Page 93 of 120
Reference
At a glance
Controls
Driving tips
Mobility
91
Replacement procedures
Onboard tool kit
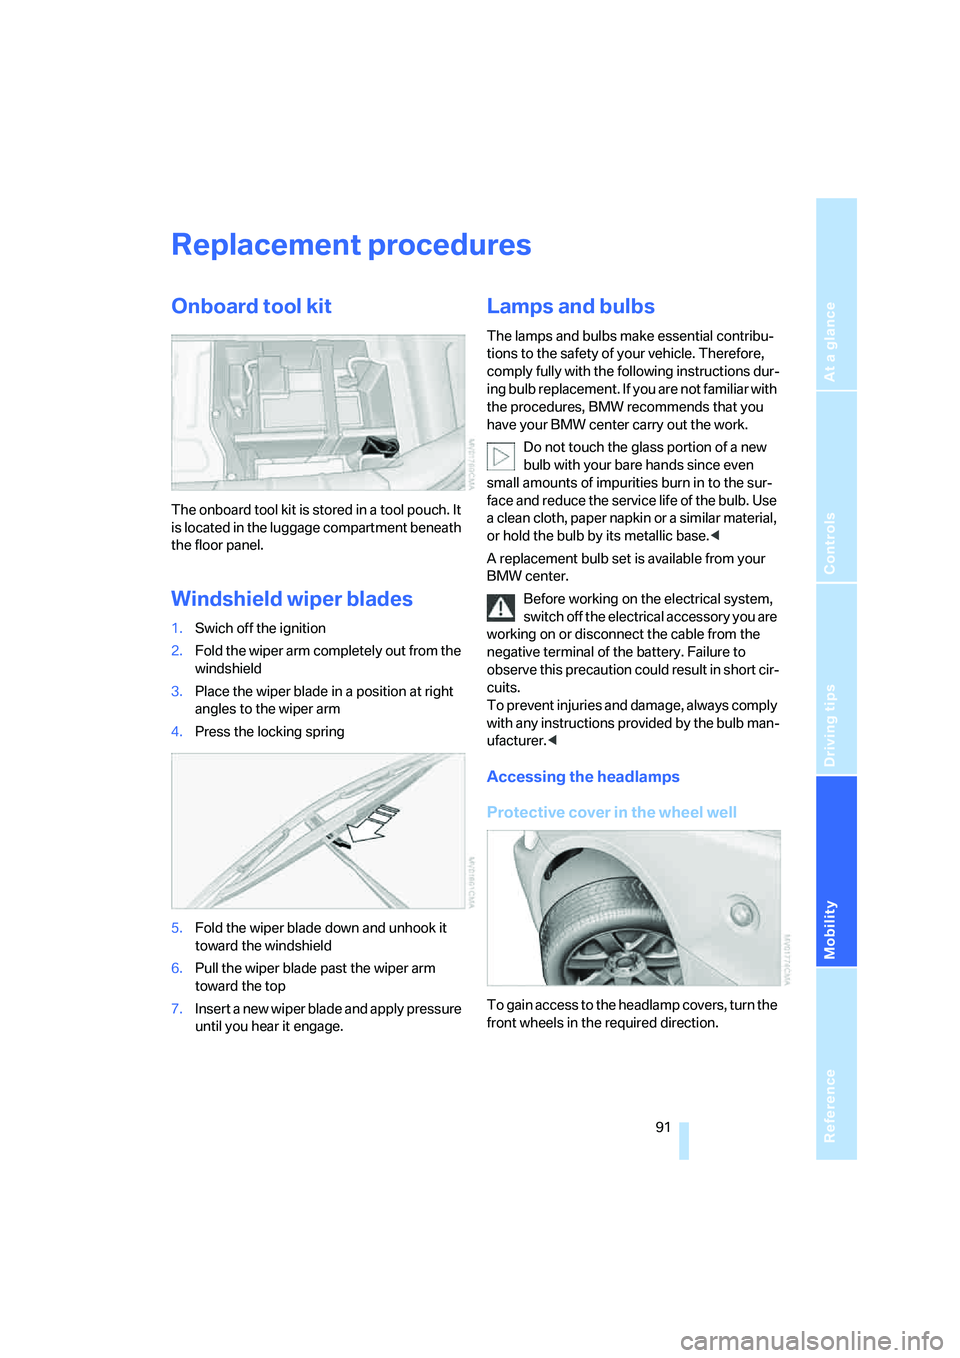
The onboard tool kit is stored in a tool pouch. It
is located in the luggage compartment beneath
the floor panel.
Windshield wiper blades
1.Swich off the ignition
2.Fold the wiper arm completely out from the
windshield
3.Place the wiper blade in a position at right
angles to the wiper arm
4.Press the locking spring
5.Fold the wiper blade down and unhook it
toward the windshield
6.Pull the wiper blade past the wiper arm
toward the top
7.Insert a new wiper blade and apply pressure
until you hear it engage.
Lamps and bulbs
The lamps and bulbs make essential contribu-
tions to the safety of your vehicle. Therefore,
comply fully with the following instructions dur-
ing bulb replacement. If you are not familiar with
the procedures, BMW recommends that you
have your BMW center carry out the work.
Do not touch the glass portion of a new
bulb with your bare hands since even
small amounts of impurities burn in to the sur-
face and reduce the service life of the bulb. Use
a clean cloth, paper napkin or a similar material,
or hold the bulb by its metallic base.<
A replacement bulb set is available from your
BMW center.
Before working on the electrical system,
switch off the electrical accessory you are
working on or disconnect the cable from the
negative terminal of the battery. Failure to
observe this precaution could result in short cir-
cuits.
To prevent injuries and damage, always comply
with any instructions provided by the bulb man-
ufacturer.<
Accessing the headlamps
Protective cover in the wheel well
To gain access to the headlamp covers, turn the
front wheels in the required direction.
Page 95 of 120
Reference
At a glance
Controls
Driving tips
Mobility
93
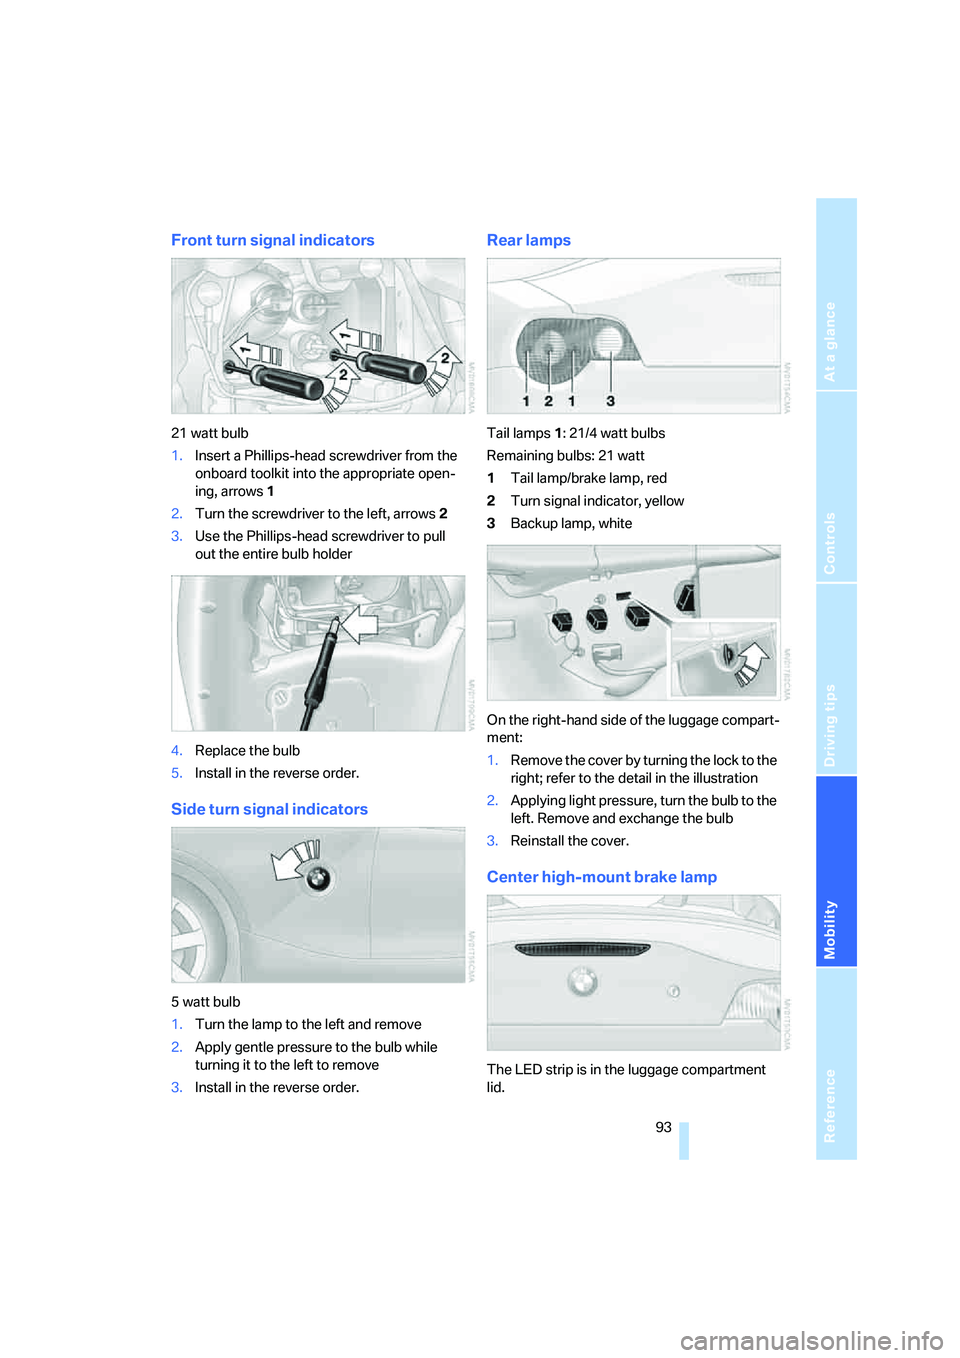
Front turn signal indicators
21 watt bulb
1.Insert a Phillips-head screwdriver from the
onboard toolkit into the appropriate open-
ing, arrows1
2.Turn the screwdriver to the left, arrows2
3.Use the Phillips-head screwdriver to pull
out the entire bulb holder
4.Replace the bulb
5.Install in the reverse order.
Side turn signal indicators
5 watt bulb
1.Turn the lamp to the left and remove
2.Apply gentle pressure to the bulb while
turning it to the left to remove
3.Install in the reverse order.
Rear lamps
Tail lamps1: 21/4 watt bulbs
Remaining bulbs: 21 watt
1Tail lamp/brake lamp, red
2Turn signal indicator, yellow
3Backup lamp, white
On the right-hand side of the luggage compart-
ment:
1.Remove the cover by turning the lock to the
right; refer to the detail in the illustration
2.Applying light pressure, turn the bulb to the
left. Remove and exchange the bulb
3.Reinstall the cover.
Center high-mount brake lamp
The LED strip is in the luggage compartment
lid.
Page 97 of 120
Reference
At a glance
Controls
Driving tips
Mobility
95
Charging the battery
Charge the battery in the vehicle only when the
engine has been switched off. Terminals, refer
to Jump starting, page97.
Battery disposal
After changing a battery, have the used
battery disposed of by your BMW center
or bring it to a recycling point. Maintain the bat-
tery in an upright position for transport and stor-
age. Secure the battery against tilting when
transporting.<
Power loss
After a temporary power loss, e.g. due to a dis-
charged battery, some equipment will be lim-
ited in its use and must be reinitialized. Individ-
ual settings are also lost and must be reset:
>Seat memory
The positions must be stored again, refer to
page29
>Time
must be reset, refer to page47.
Fuses
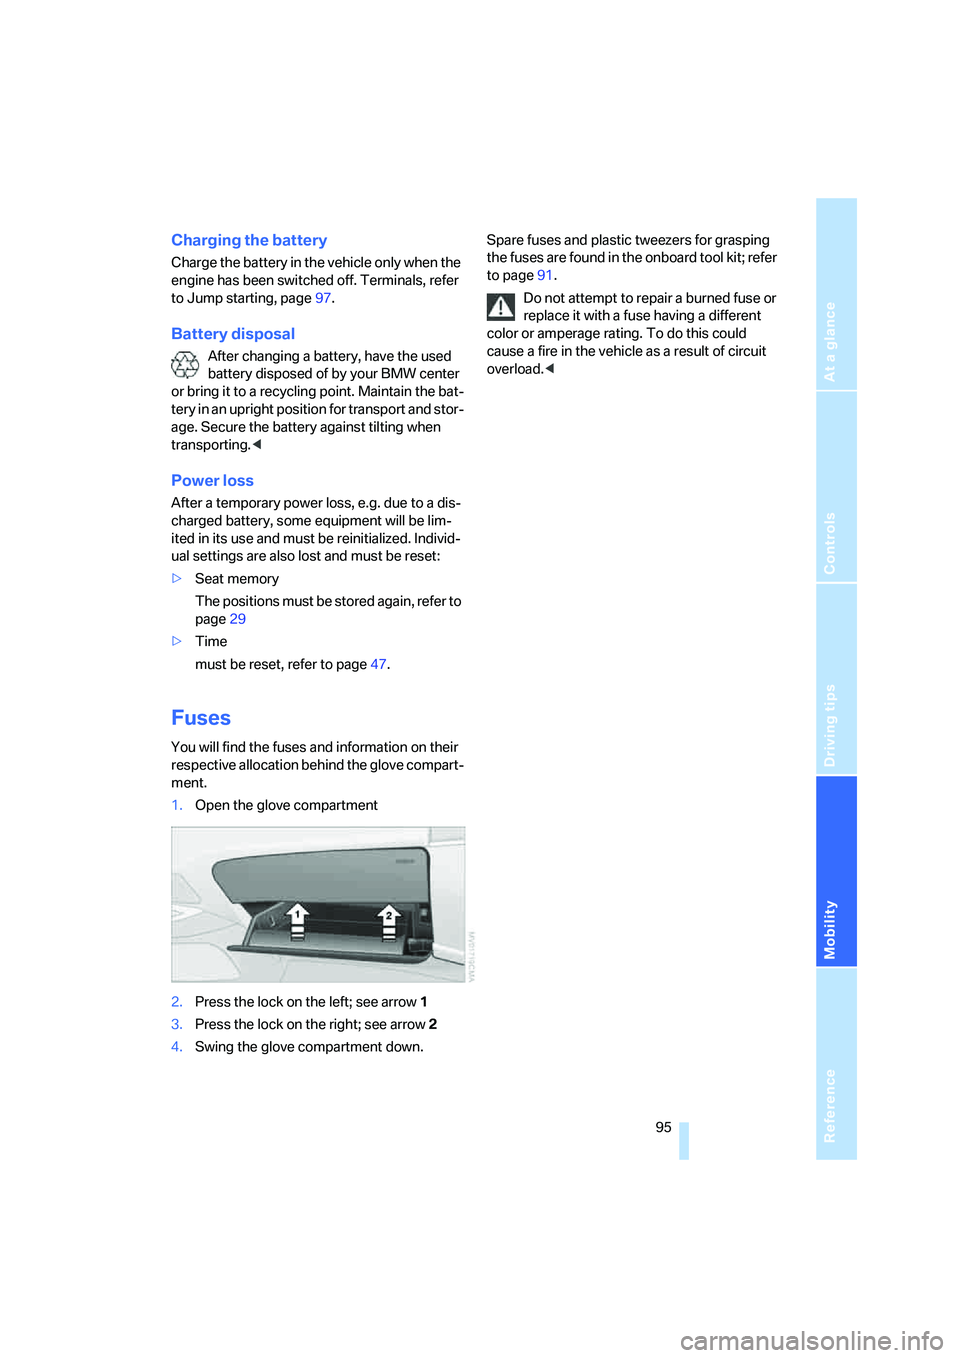
You will find the fuses and information on their
respective allocation behind the glove compart-
ment.
1.Open the glove compartment
2.Press the lock on the left; see arrow1
3.Press the lock on the right; see arrow2
4.Swing the glove compartment down.Spare fuses and plastic tweezers for grasping
the fuses are found in the onboard tool kit; refer
to page91.
Do not attempt to repair a burned fuse or
replace it with a fuse having a different
color or amperage rating. To do this could
cause a fire in the vehicle as a result of circuit
overload.<
Page 100 of 120
Giving and receiving assistance
98 positive terminal of the battery or to an aux-
iliary jump-starting terminal of the vehicle to
be jump-started.
Your BMW is equipped with a special nut,
refer also to the engine compartment over-
view on page85
3.With the– jumper cable, connect the nega-
tive terminals of both vehicles.
To do this:
Attach one cable clamp to the negative bat-
tery terminal or to a suitable ground on the
engine or body work of the support vehicle.
Attach the second cable clamp to the nega-
tive battery terminal or to a suitable ground
on the engine or body work of the vehicle to
be jump-started.
Starting the engine
1.Start the engine of the support vehicle and
let it run for several minutes at a slightly ele-
vated engine idle speed
2.Start the engine of the other vehicle as
usual.
If the first start attempt is not successful,
wait a few minutes before another attempt
in order to allow the discharged battery to
recharge
3.Allow the engines to run for several minutes
4.Then disconnect the jumper cables in
reverse sequence
5.Depending on the cause of the fault, have
the battery checked and recharged.
Never use spray starter fluids to start the
engine.<
Towing and tow-starting the
vehicle
Using the towing eyelet
The screw-in towing eyelet is stored in the
onboard tool kit; be sure that it remains in the
vehicle at all times. It can be attached at the
front or rear of your BMW.
Observe the following instructions in
order to avoid damaging the towing eye-
let or the vehicle: use only the towing eyelet
supplied with the vehicle, and screw it in firmly
until it stops. Use the towing eyelet for towing
on paved roads only. Avoid subjecting the tow-
ing eyelet to lateral loads, e.g. do not lift the
vehicle using the towing eyelet.<
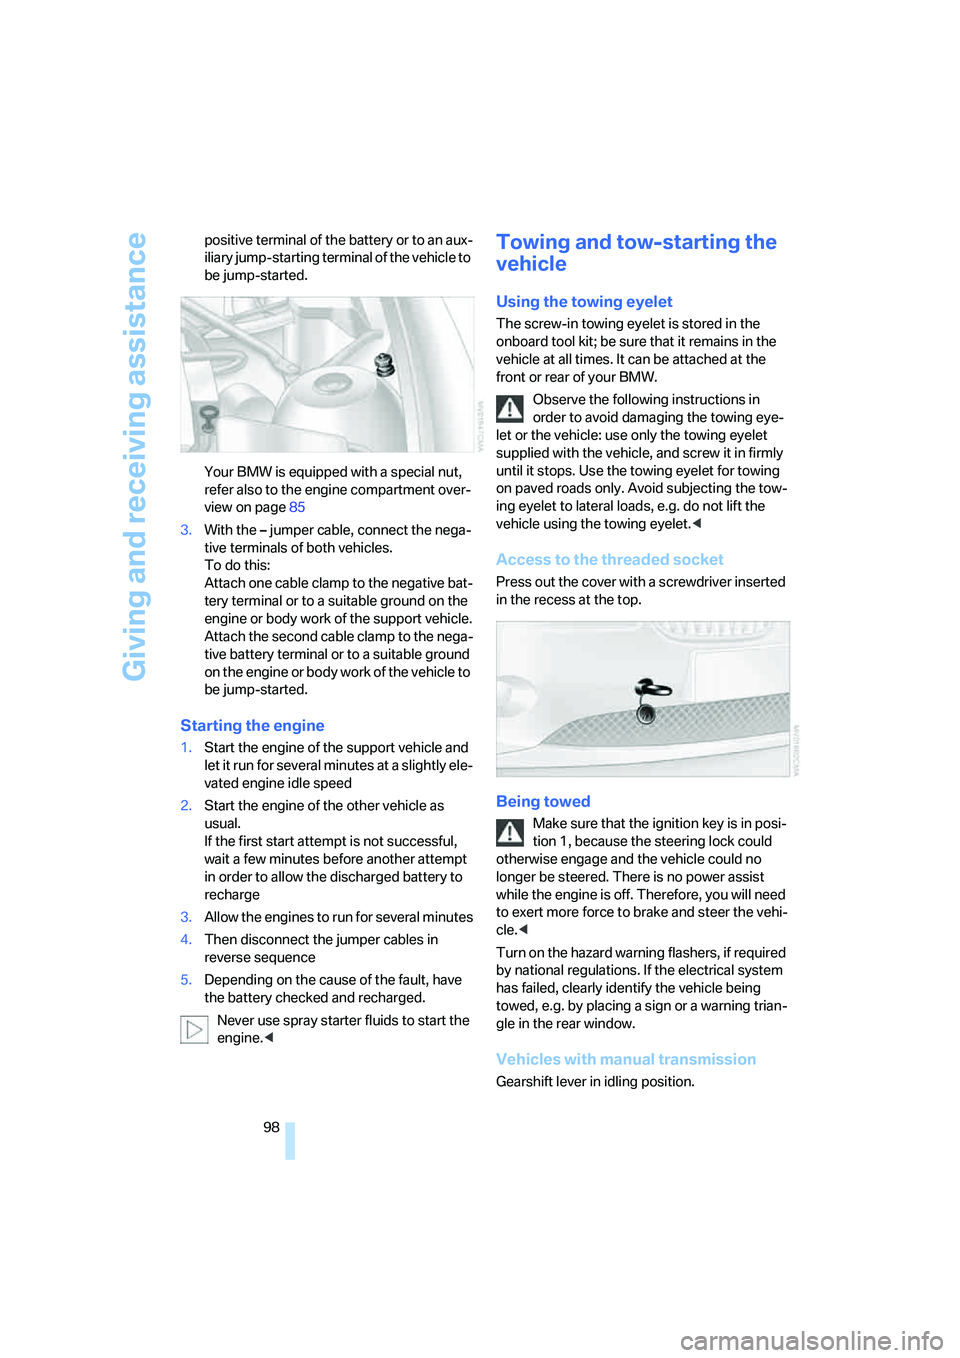
Access to the threaded socket
Press out the cover with a screwdriver inserted
in the recess at the top.
Being towed
Make sure that the ignition key is in posi-
tion 1, because the steering lock could
otherwise engage and the vehicle could no
longer be steered. There is no power assist
while the engine is off. Therefore, you will need
to exert more force to brake and steer the vehi-
cle.<
Turn on the hazard warning flashers, if required
by national regulations. If the electrical system
has failed, clearly identify the vehicle being
towed, e.g. by placing a sign or a warning trian-
gle in the rear window.
Vehicles with manual transmission
Gearshift lever in idling position.
Page 108 of 120

Everything from A to Z
106
A
ABS Antilock Brake
System50
– indicator lamp13
Acceleration assistant42
Accessories, refer to
– For your own safety6
– Your individual vehicle5
Accident, refer to Emergency
call96
Acknowledgment signal for
vehicle locking/unlocking16
Activated-charcoal filter63
Adjusting the thigh support29
Air, drying,
refer to Air conditioning
mode59,62
Airbags53
– deactivation33
– indicator lamp12
– passenger airbags indicator
lamp34
– reactivation33
– safe seating position27
Airbag switch33
Air conditioning58
Air conditioning mode
– air conditioning59
– automatic climate control62
Air conditioning mode
switching on/off
manually59,62
Air distribution
– air conditioning59
– automatic climate control62
Airing out, refer to
Ventilation59,63
Air outlets,
refer to Ventilation59,63
Air pressure, refer to Tire
inflation pressure78Air recirculation, refer to
Recirculated air
mode59,62
Air supply/blower
– air conditioning59
– automatic climate control62
AKI, refer to Fuel
specifications76
Alarm system25
– avoiding unintentional
alarms26
All-season tires, refer to
Winter tires81
Antenna, refer to the
Caring for your vehicle
brochure
Antifreeze86,87
– coolant87
– washing fluids86
Antilock Brake System
ABS50
– indicator lamp13
Anti-theft alarm system, refer
to Alarm system25
Anti-theft protection16,25
Approved axle load, refer to
Weights103
Approved engine oils87
Approved gross vehicle
weight, refer to Weights103
Artificial leather, refer to the
Caring for your vehicle
brochure
Ashtray65
Assistant systems,
refer to Dynamic Stability
Control DSC50
AUC Automatic recirculated
air control62Automatic
– air distribution62
– air supply/blower62
– cruise control44
– headlamp control56
– luggage compartment lid
operation19
Automatically dimming
interior rearview mirror31
Automatic car wash, refer to
the Caring for your vehicle
brochure
Automatic climate control61
Automatic recirculated air
control AUC62
Automatic transmission with
Steptronic38
– ignition36
– indicator lamp13
– interlock36
– selector lever lock38
– shiftlock38
– towing the vehicle99
– tow-starting99
AUTO program,
refer to Automatic air
distribution62
Average fuel consumption49
– setting unit of measure48
Average speed49
– setting unit of measure48
Avoiding unintentional
alarms26
Axle loads, refer to
Weights103
B
Backrest, refer to Seat
adjustment28
Backup lamps38
– bulb replacement93
Everything from A to Z
Index