2005 BMW 760i reset
[x] Cancel search: resetPage 88 of 239

Everything under control
86 >Energy Control/
current fuel consumption86
>Average fuel consumption86
>Average speed86
>Time of arrival87.
Maintain pressure on button1 to can-
cel the display from the computer.
Briefly press the button again to return to
the last display.
It will not be possible to cancel the display
if the fuel level has fallen into the reserve
range or if a Check Control status report is
currently on the screen.
Briefly press the button again to view the
last display.<
Fuel gauge
The fuel gauge mode appears automati-
cally once the fuel level falls into the
reserve range. At the same time, the words
"Fuel reserve" appear. The tank still con-
tains approx. 2.6 gallons/10 liters of fuel.
If the tilt of the vehicle varies, when you are
driving in mountainous areas, for example,
the indicator may fluctuate slightly.
It will not be possible to cancel the
computer display once the fuel level
drops into the reserve range. However, you
can still request a display of the travel
range. Computer, refer to page85.<
Fuel tank capacity: approx. 23.2 gallons/
88 liters. You can find information on refu-
eling on page186.
Refuel well before the tank is empty,
as otherwise engine functions will not
be ensured and damage can occur if you
drive down to the last drop.<
Cruising range
Displays the estimated cruising range avail-
able with the remaining fuel. The fuel level
is measured and the range is calculated
taking the driving style over the last
20 miles/30 km into account.
Always refuel as soon as possible
once your range falls to below
30 miles/50 km, as otherwise engine func-tions are not ensured and damage can
occur.<
Refueling is only registered by the com-
puter for fuel amounts above approx.
1.3 gallons/5 liters.
Remaining distance
When you enter a destination in the naviga-
tion system or manually enter a distance in
the computer prior to departure, the system
can also display the distance remaining to
your destination, refer to page132 or87.
The system automatically applies the dis-
tance to your destination using the route
recommended by the navigation system.
When you enter a destination in the
navigation system, any manual entries
will be overwritten no later than once
1,640 ft/500 meters of the calculated dis-
tance have elapsed.<
Energy Control/
current fuel consumption
Shows the current fuel consumption. This
allows you to see whether your current
driving style is conducive to fuel economy
with minimum exhaust emissions.
Average fuel consumption
The average fuel consumption is calculated
for the time during which the engine is run-
ning.
You can use the Control Display to view
your fuel consumption rate over two differ-
ent distances, refer to Computer or Trip
computer.
Average speed
Periods with the vehicle parked and the
engine off are not included in the calcula-
tions of average speed.
Reset average speed: Press button2 in the
turn indicator lever for approx. 2 seconds.
Page 89 of 239

Controls
87Reference
At a glance
Driving tips
Communications
Navigation
Entertainment
Mobility
Time of arrival
A display of your estimated time of arrival is
available whenever you enter a destination
in the navigation system, refer to page132,
or enter the distance manually in the com-
puter, refer to page87, prior to departure.
A requirement is that you have cor-
rectly set the time in the Control Cen-
ter, refer to page90.<
Control Display screen contents
You can activate the computer function at
any time by selecting it from the "Car data"
menu.
You have two possibilities to display infor-
mation of the computer:
>Computer
>Trip computer
Use this, for example, for driving on
vacation, as when you reset the values
to zero, all the functions are reset
together and then restart.
Computer
>Time of arrival
>Distance to destination.
Enter a destination in the navigation
system, or enter a distance in the com-
puter manually, refer to page132 or87
>Cruising range
>Average fuel consumption
>Average speed.
You can reset calculations of both
average speed and average fuel con-
sumption to zero. Select the menu item and
confirm your selection.<
Trip computer
Reset all data to zero:
Select "START / RESET" and confirm your
selection.
>Time of departure
>Driving time
>Elapsed distance
>Average fuel consumption since
"START / RESET"
>Average speed since "START /
RESET".
Entering a distance manually
1.Select "BC"
2.Select and activate the "Distance" entry
function. Turn the controller to the left
or right to select the distance to your
destination
3.Press the controller to confirm your
entry.
Speed limit
You can enter a speed and a Check Control
message indicates when you have reached
this speed. This enables you, for example,
to receive warnings if you exceed a speed
limit in an urban area.
Page 90 of 239

Everything under control
88 You are only warned of reaching this speed
a second time if you again drive at least
3 mph/5 km/h slower.
Adjusting, changing
1.Select "Limit" and confirm your selec-
tion
2.Select "SET" and confirm your selection
3.Turn the controller to the left or right to
select the preset speed
4.Press the controller to confirm your
entry. The speed limit function is now
active.
Switching on or off
1.Select "Limit" and confirm your selec-
tion
2.Select "ON / OFF" and confirm your
selection. "ON / OFF" is highlighted
when the speed limit function is acti-
vated.
Applying your current speed as limit
1.Select "Limit" and confirm your selec-
tion
2.Select and confirm your selec-
tion. The system applies your current
speed as the limit.
Limit on Info Display
If, for instance, the warning sector in the
tachometer is visible, refer to page81, the
speed limit will be indicated by a warning
sector in the speedometer, refer to arrow.
Stopwatch
Starting and stopping
1.Select and confirm your selection
2.Select and confirm your selection.
The stopwatch is reset to 0 and starts
3.Select and confirm your selection.
This stops the timer.
Confirm again to reset the stopwatch to
zero.
Taking an intermediate time reading
Select "INTERM. TIME" and confirm your
selection. This intermediate time appears
below the ongoing primary stopwatch
count.
All of the remaining functions remain
available at all times while the stop-
watch is running. The stopwatch continues
operation in the background.<
Page 92 of 239

Everything under control
90
Time and date
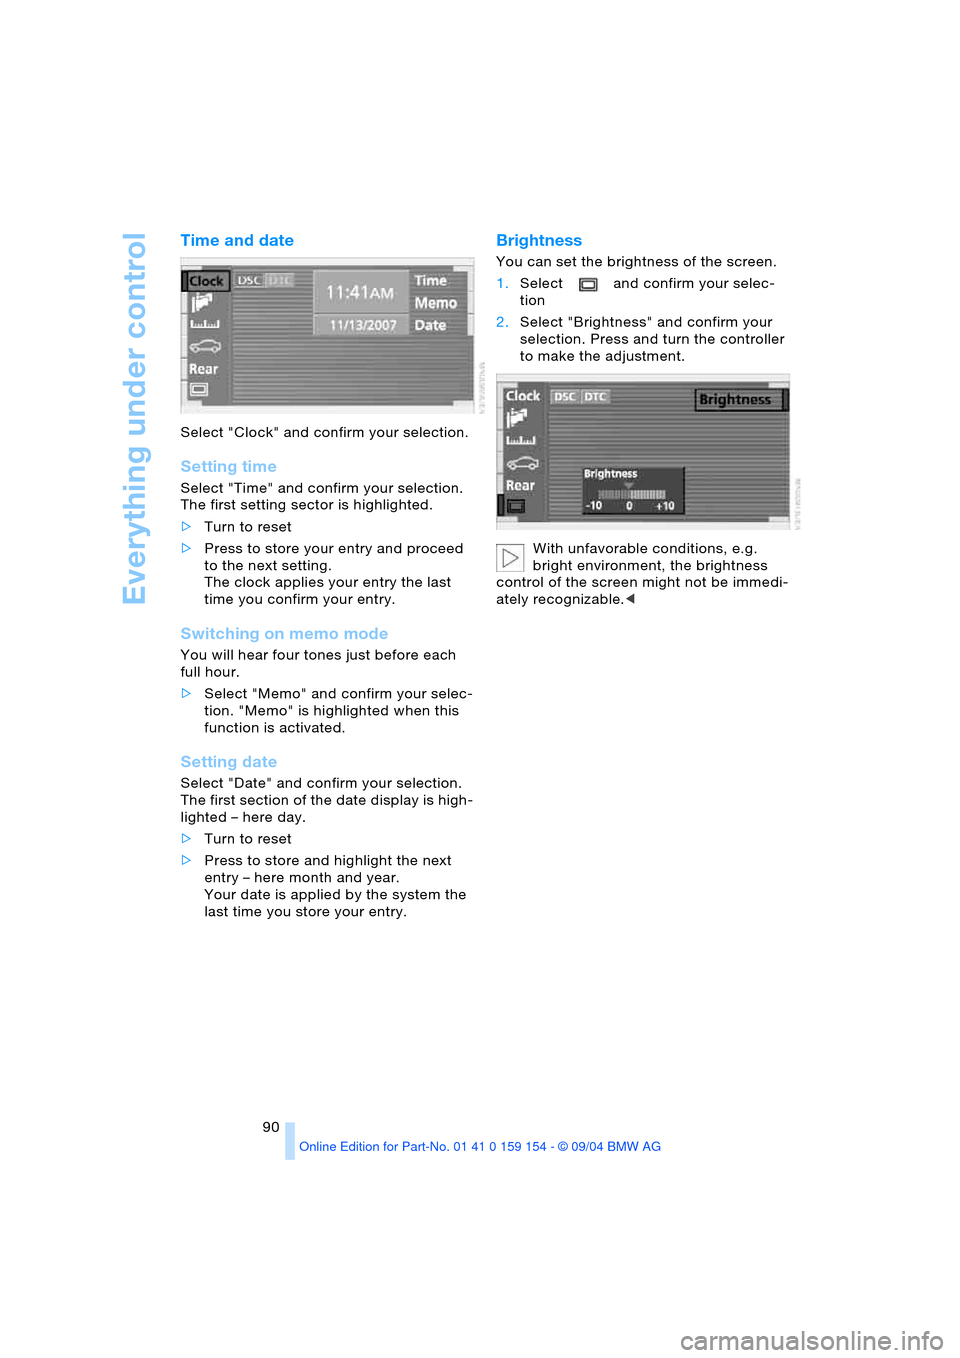
Select "Clock" and confirm your selection.
Setting time
Select "Time" and confirm your selection.
The first setting sector is highlighted.
>Turn to reset
>Press to store your entry and proceed
to the next setting.
The clock applies your entry the last
time you confirm your entry.
Switching on memo mode
You will hear four tones just before each
full hour.
>Select "Memo" and confirm your selec-
tion. "Memo" is highlighted when this
function is activated.
Setting date
Select "Date" and confirm your selection.
The first section of the date display is high-
lighted – here day.
>Turn to reset
>Press to store and highlight the next
entry – here month and year.
Your date is applied by the system the
last time you store your entry.
Brightness
You can set the brightness of the screen.
1.Select and confirm your selec-
tion
2.Select "Brightness" and confirm your
selection. Press and turn the controller
to make the adjustment.
With unfavorable conditions, e.g.
bright environment, the brightness
control of the screen might not be immedi-
ately recognizable.<
Page 110 of 239

A congenial climate
108
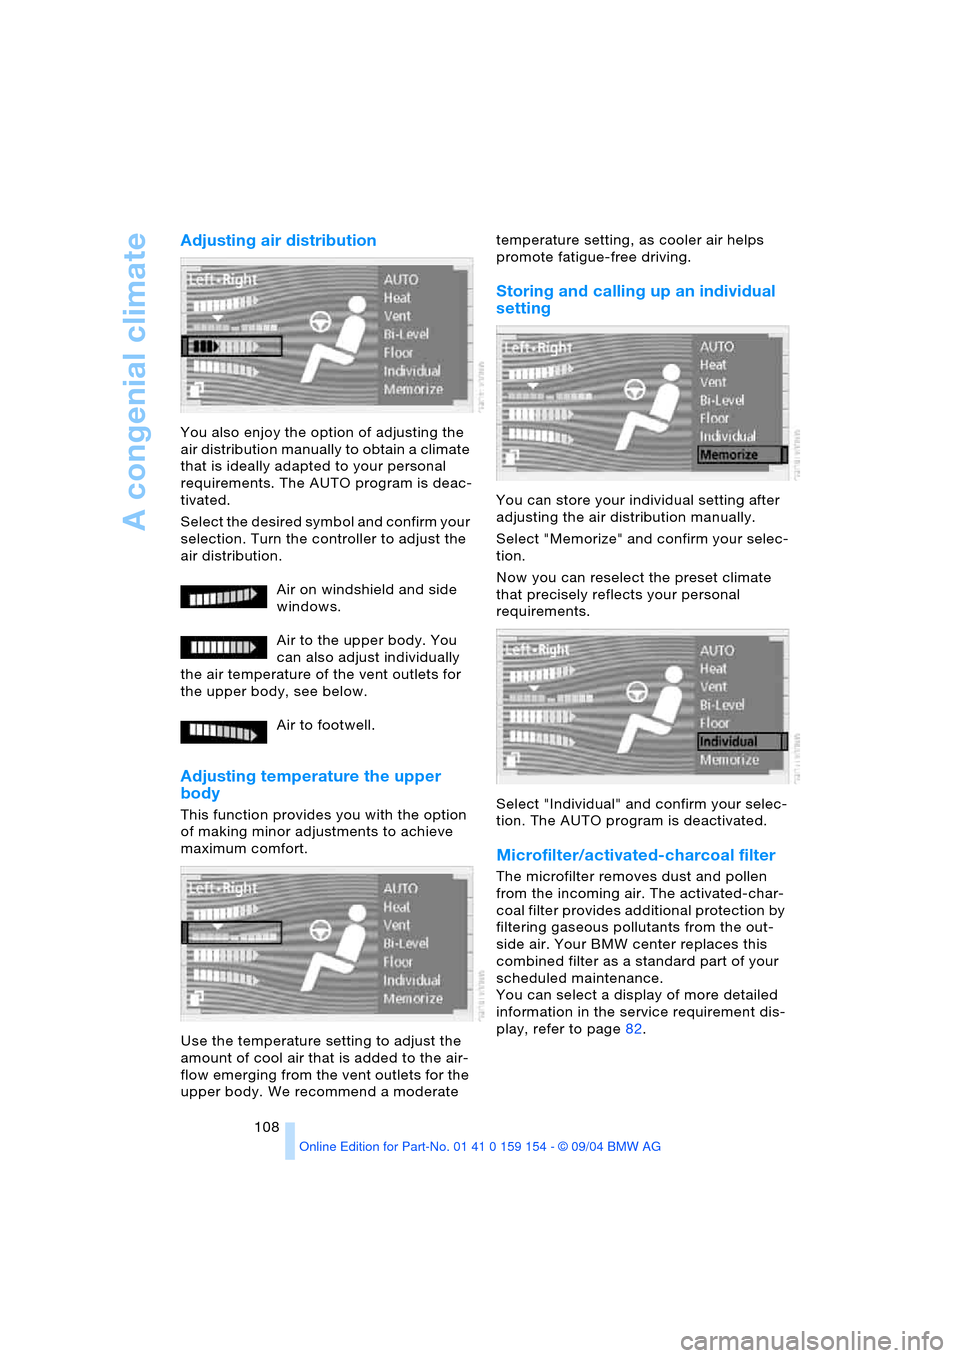
Adjusting air distribution
You also enjoy the option of adjusting the
air distribution manually to obtain a climate
that is ideally adapted to your personal
requirements. The AUTO program is deac-
tivated.
Select the desired symbol and confirm your
selection. Turn the controller to adjust the
air distribution.
Air on windshield and side
windows.
Air to the upper body. You
can also adjust individually
the air temperature of the vent outlets for
the upper body, see below.
Air to footwell.
Adjusting temperature the upper
body
This function provides you with the option
of making minor adjustments to achieve
maximum comfort.
Use the temperature setting to adjust the
amount of cool air that is added to the air-
flow emerging from the vent outlets for the
upper body. We recommend a moderate temperature setting, as cooler air helps
promote fatigue-free driving.
Storing and calling up an individual
setting
You can store your individual setting after
adjusting the air distribution manually.
Select "Memorize" and confirm your selec-
tion.
Now you can reselect the preset climate
that precisely reflects your personal
requirements.
Select "Individual" and confirm your selec-
tion. The AUTO program is deactivated.
Microfilter/activated-charcoal filter
The microfilter removes dust and pollen
from the incoming air. The activated-char-
coal filter provides additional protection by
filtering gaseous pollutants from the out-
side air. Your BMW center replaces this
combined filter as a standard part of your
scheduled maintenance.
You can select a display of more detailed
information in the service requirement dis-
play, refer to page82.
Page 151 of 239

Navigation
Entertainment
Driving tips
149Reference
At a glance
Controls
Communications
Mobility
Care instructions
You can find everything you need to know
on this topic by consulting the separate
Caring for your vehicle brochure.
Switching on/off
Press the button.
The system returns to the most recently
selected audio or video source, radio, CD,
DVD or TV.
Using with ignition off
Switching the ignition off simultaneously
deactivates the sound system.
To switch on again: press the button.
The audio and video functions remain avail-
able for use for a period of approx.
20 minutes after you switch off the ignition.
Volume adjustment
Adjusting volume
Turn the button to the desired volume level.The sound system automatically
reverts to its mute mode automati-
cally whenever you use your portable
phone.<
The system automatically selects your
individual volume setting each time
you unlock the vehicle using your personal
remote control.<
Tone control
Playing audio recordings
You can choose from the following tone
settings:
>Treble:
To amplify or reduce high frequencies
>Bass:
To amplify or reduce low frequencies
>Right/left volume balance, balance:
Left or right, high/low volume
>Front-to-rear volume balance, fader:
Front or rear, high/low volume
>Default settings, RESET:
This feature resets the tone settings to
their standard default settings
>Speed-dependent volume adjustment,
Speed Volume
>Spatial sound effect Professional
LOGIC7
*
>Equalizer*.
The speakers and headphones can
be adjusted separately. The tone set-
tings of the headphones are made in the
rear screen with the headphones con-
nected. Only treble, bass and balance can
be adjusted.<
The system automatically selects your
individual tone setting each time you
unlock the vehicle using your personal
remote control.< {Radio} or {Audio off}.
Page 153 of 239

Navigation
Entertainment
Driving tips
151Reference
At a glance
Controls
Communications
Mobility
Resetting tone settings
You can reset all tone settings except
"Speed Vol." to the standard default set-
tings.
Select "RESET" and confirm your selection.
Page 159 of 239

Navigation
Entertainment
Driving tips
157Reference
At a glance
Controls
Communications
Mobility
3.Storing channels and selecting memory
locations, refer to next section. Addi-
tional information, refer to page156.
Storing a channel
1.Select "SAT" and confirm your selection
2.Select the desired channel
3.Select "STORE" and confirm your
selection. After confirming, you are in
the 'preset list'
4.Turn the controller and select a memory
location where the channel is to be
stored and press the controller for sev-
eral seconds.
Selecting a stored channel
Turn the controller to select and confirm
stored channels in the preset list.
Up to twelve stations on which you have
previously stored the channels can be
selected.
Next station
Press to select the desired direction.
The next channel that appears on the Con-
trol Display is selected.
1.{Radio}
2.{Station 1 ..12}.