2005 BMW 645CI COUPE&CONVERTIBLE wheel
[x] Cancel search: wheelPage 57 of 217
Driving
56 Vehicles with manual or SMG transmission:
When parking on inclines, engage the hand-
brake, as even engaging the first or reverse gear
might not under certain circumstances secure
the vehicle against moving.
Vehicles with automatic transmission
*:
Engage selector-lever position P.<
To prevent corrosion and one-sided brak-
ing action, occasionally engage the hand-
brake lightly when the vehicle is slowly coming
to a stop if the traffic conditions are suitable.<
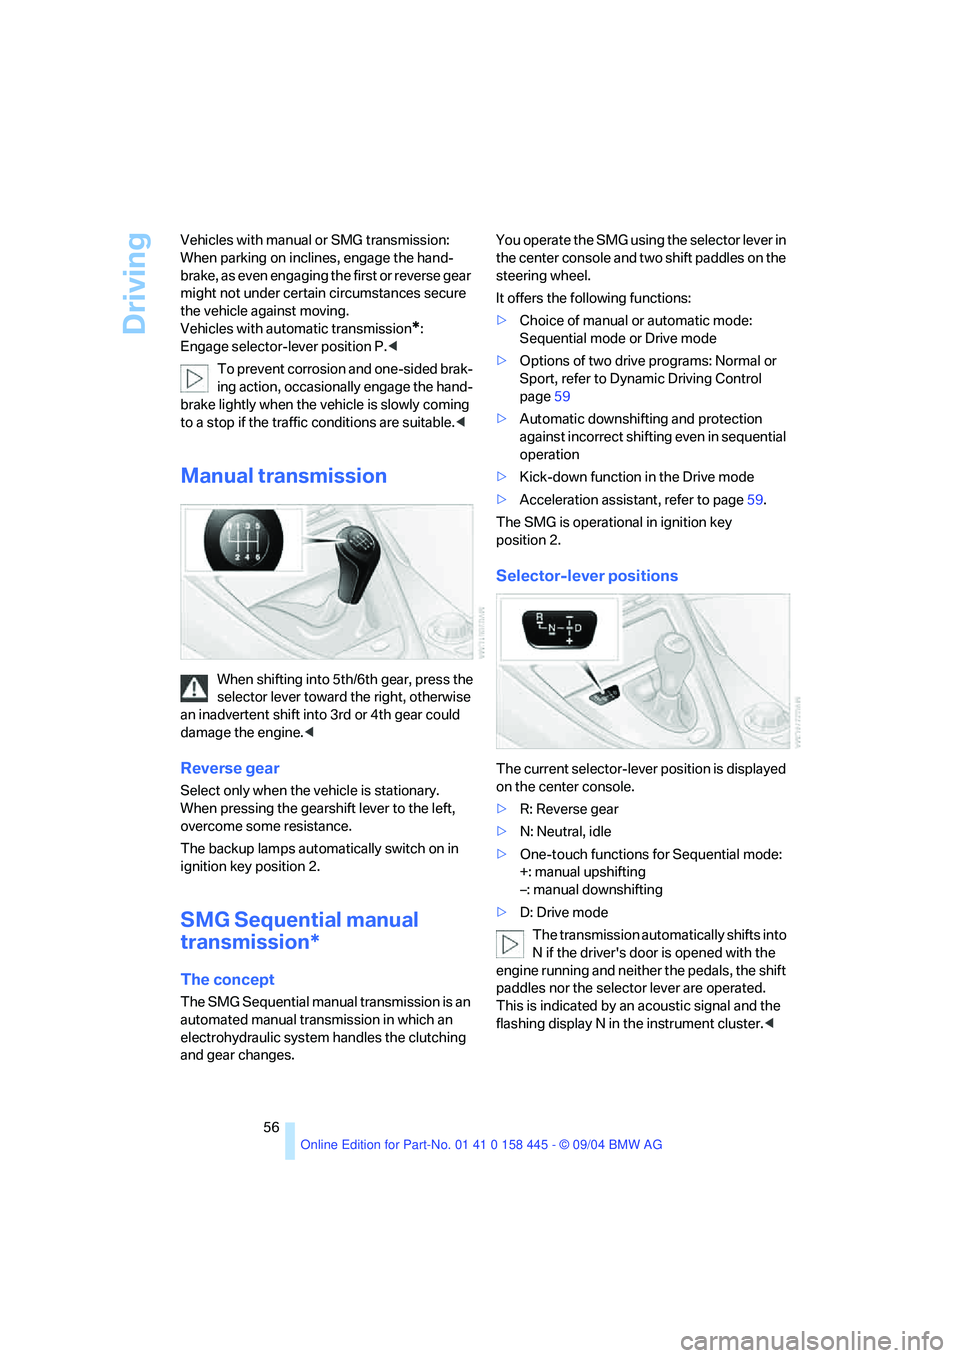
Manual transmission
When shifting into 5th/6th gear, press the
selector lever toward the right, otherwise
an inadvertent shift into 3rd or 4th gear could
damage the engine.<
Reverse gear
Select only when the vehicle is stationary.
When pressing the gearshift lever to the left,
overcome some resistance.
The backup lamps automatically switch on in
ignition key position 2.
SMG Sequential manual
transmission*
The concept
The SMG Sequential manual transmission is an
automated manual transmission in which an
electrohydraulic system handles the clutching
and gear changes.You operate the SMG using the selector lever in
the center console and two shift paddles on the
steering wheel.
It offers the following functions:
>Choice of manual or automatic mode:
Sequential mode or Drive mode
>Options of two drive programs: Normal or
Sport, refer to Dynamic Driving Control
page59
>Automatic downshifting and protection
against incorrect shifting even in sequential
operation
>Kick-down function in the Drive mode
>Acceleration assistant, refer to page59.
The SMG is operational in ignition key
position 2.
Selector-lever positions
The current selector-lever position is displayed
on the center console.
>R: Reverse gear
>N: Neutral, idle
>One-touch functions for Sequential mode:
+: manual upshifting
–: manual downshifting
>D: Drive mode
The transmission automatically shifts into
N if the driver's door is opened with the
engine running and neither the pedals, the shift
paddles nor the selector lever are operated.
This is indicated by an acoustic signal and the
flashing display N in the instrument cluster.<
Page 58 of 217
Controls
57Reference
At a glance
Driving tips
Communications
Navigation
Entertainment
Mobility
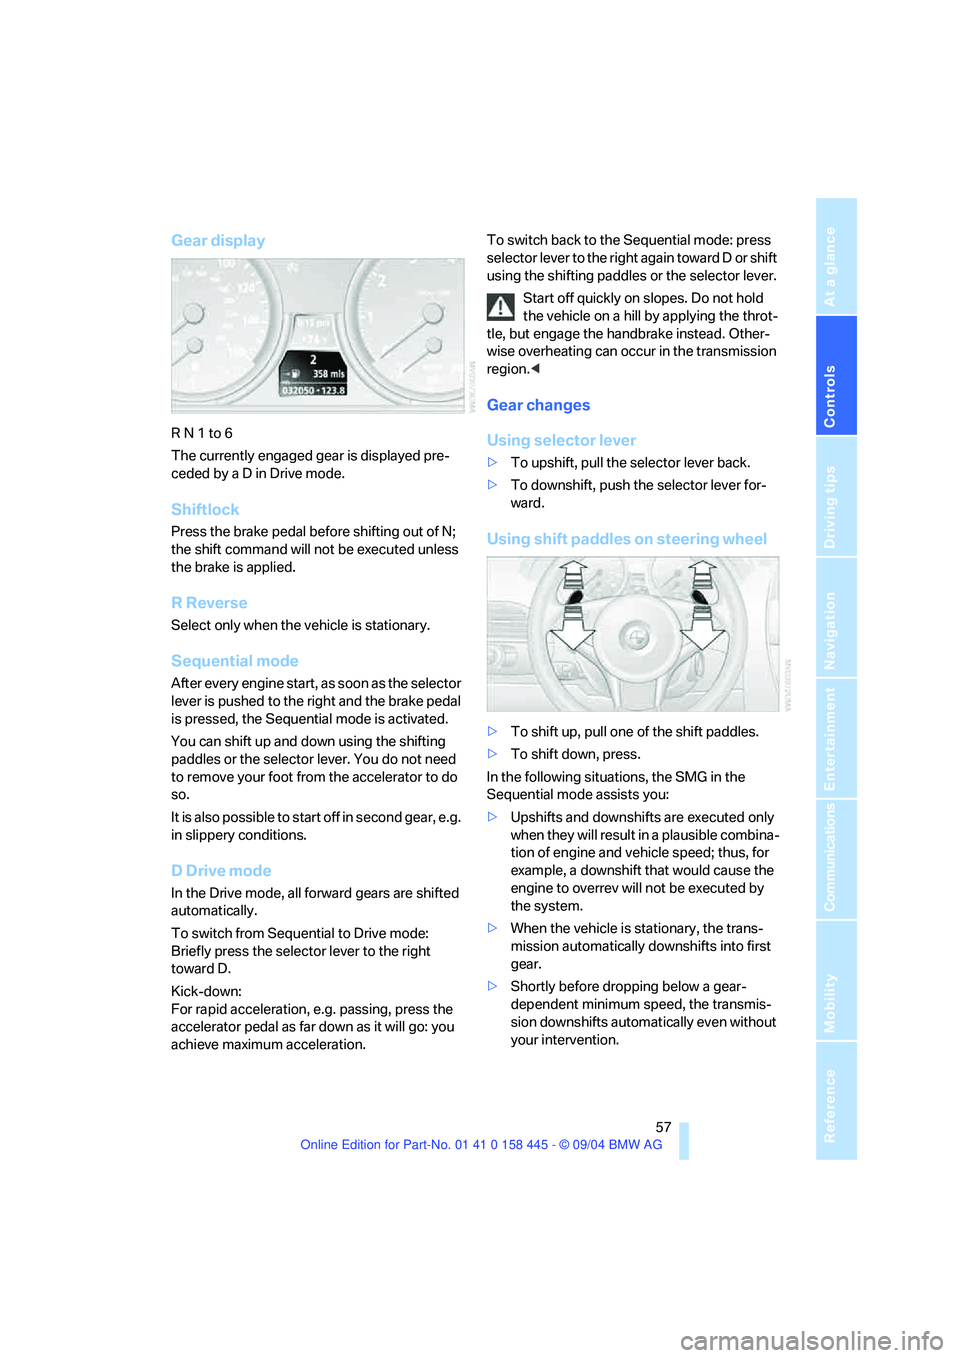
Gear display
R N 1 to 6
The currently engaged gear is displayed pre-
ceded by a D in Drive mode.
Shiftlock
Press the brake pedal before shifting out of N;
the shift command will not be executed unless
the brake is applied.
R Reverse
Select only when the vehicle is stationary.
Sequential mode
After every engine start, as soon as the selector
lever is pushed to the right and the brake pedal
is pressed, the Sequential mode is activated.
You can shift up and down using the shifting
paddles or the selector lever. You do not need
to remove your foot from the accelerator to do
so.
It is also possible to start off in second gear, e.g.
in slippery conditions.
D Drive mode
In the Drive mode, all forward gears are shifted
automatically.
To switch from Sequential to Drive mode:
Briefly press the selector lever to the right
toward D.
Kick-down:
For rapid acceleration, e.g. passing, press the
accelerator pedal as far down as it will go: you
achieve maximum acceleration.To switch back to the Sequential mode: press
selector lever to the right again toward D or shift
using the shifting paddles or the selector lever.
Start off quickly on slopes. Do not hold
the vehicle on a hill by applying the throt-
tle, but engage the handbrake instead. Other-
wise overheating can occur in the transmission
region.<
Gear changes
Using selector lever
>To upshift, pull the selector lever back.
>To downshift, push the selector lever for-
ward.
Using shift paddles on steering wheel
>To shift up, pull one of the shift paddles.
>To shift down, press.
In the following situations, the SMG in the
Sequential mode assists you:
>Upshifts and downshifts are executed only
when they will res ult in a plausible combina-
tion of engine and vehicle speed; thus, for
example, a downshift that would cause the
engine to overrev will not be executed by
the system.
>When the vehicle is stationary, the trans-
mission automatically downshifts into first
gear.
>Shortly before dropping below a gear-
dependent minimum speed, the transmis-
sion downshifts automatically even without
your intervention.
Page 59 of 217
Driving
58
Automatic transmission with
Steptronic*
In addition to the fully automatic mode, you can
also shift manually with Steptronic, refer to
page58.
Selector-lever positions
P R N D M/S + –
Displays in instrument cluster
P R N D DS M1 to M6
The selector lever position is indicated, and in
the manual mode, the gear currently engaged.
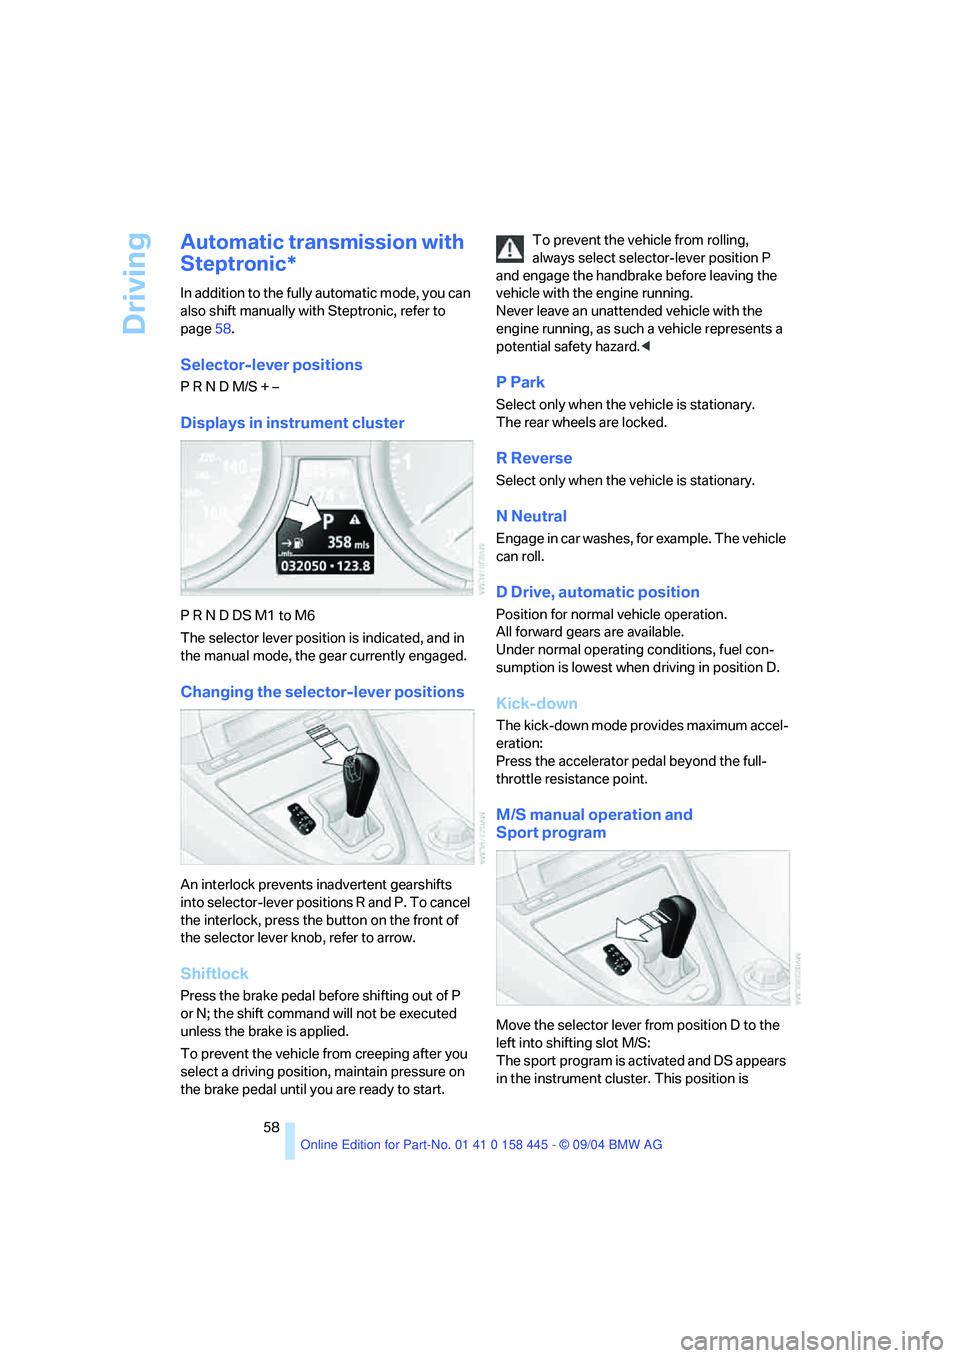
Changing the selector-lever positions
An interlock prevents inadvertent gearshifts
into selector-lever positions R and P. To cancel
the interlock, press the button on the front of
the selector lever knob, refer to arrow.
Shiftlock
Press the brake pedal before shifting out of P
or N; the shift command will not be executed
unless the brake is applied.
To prevent the vehicle from creeping after you
select a driving position, maintain pressure on
the brake pedal until you are ready to start.To prevent the vehicle from rolling,
always select selector-lever position P
and engage the handbrake before leaving the
vehicle with the engine running.
Never leave an unattended vehicle with the
engine running, as such a vehicle represents a
potential safety hazard.<
P Park
Select only when the vehicle is stationary.
The rear wheels are locked.
R Reverse
Select only when the vehicle is stationary.
N Neutral
Engage in car washes, for example. The vehicle
can roll.
D Drive, automatic position
Position for normal vehicle operation.
All forward gears are available.
Under normal operating conditions, fuel con-
sumption is lowest when driving in position D.
Kick-down
The kick-down mode provides maximum accel-
eration:
Press the accelerator pedal beyond the full-
throttle resistance point.
M/S manual operation and
Sport program
Move the selector lever from position D to the
left into shifting slot M/S:
The sport program is activated and DS appears
in the instrument cluster. This position is
Page 82 of 217

Controls
81Reference
At a glance
Driving tips
Communications
Navigation
Entertainment
Mobility
1.Press button.
This opens the start menu.
2.Press the controller to open the menu.
3.Select "Vehicle settings" and press the
controller.
4.Select "PDC" and press the controller.
5.Select "Monitor display on" and press the
controller.
The PDC screen is activated.
The display appears on the Control Display as
soon as PDC is activated.
The setting is stored for the remote control cur-
rently in use.
System limits
Even with PDC, final responsibility for
estimating the distance between the
vehicle and any obstructions always remains
with the driver. Even when sensors are involved,
there is a blind spot in which objects cannot be
detected. The system is also subject to the
physical limits that apply to all forms of ultra-
sonic measurement, such as those encoun-
tered with thin and wedge-shaped objects, etc.
Low objects already displayed, e.g. a curb, can
also disappear from the detection area of the sensors again before a continuous tone
sounds.
Loud noises from outside and inside your vehi-
cle may prevent you from hearing the PDC sig-
nal tone.<
Do not apply high pressure spray to the
sensors for a prolonged period of time.
Keep the spray at least 4 in/10 cm away from
the sensors.<
Driving stability control
systems
Your BMW is equipped with an extended array
of systems designed to enhance and maintain
vehicle stability under extreme conditions.
ABS Antilock Brake System
ABS prevents the wheels from locking during
braking. Safe steering response is maintained
even during hard braking. This increases active
driving safety.
ABS is operational every time you start the
engine. For information on safe braking, refer to
page109.
CBC Cornering Brake Control
This system provides further enhancements to
vehicle stability and steering response when
braking while cornering or when braking during
a lane change.
Electronic brake-force distribution
This system controls the brake system's appli-
cation pressure at the rear wheels to ensure
stable deceleration.
DBC Dynamic Brake Control
When you apply the brakes rapidly, this system
automatically produces the maximum braking
force boost and thus helps to achieve the short-
est possible braking distance during panic
stops. This system exploits all of the benefits
provided by ABS.
Page 83 of 217
Technology for comfort, convenience and safety
82 Do not reduce the pressure on the brake pedal
for the duration of the brake application. When
the brake pedal is released, DBC is deactivated.
DSC Dynamic Stability Control
The system prevents slip at the drive wheels
when driving off and accelerating. DSC also
detects unstable driving conditions such as
fishtailing or sliding of the front wheels. In these
cases DSC helps the vehicle safely stay on
course within the physical limits by reducing the
engine output and through braking actions in
the individual wheels.
The DSC is operational every time you start the
engine.
The laws of physics cannot be repealed,
even with DSC. An appropriate driving
style always remains the responsibility of the
driver. Therefore, do not reduce the additional
safety margin again by taking risks.<
DTC Dynamic Traction Control
DTC is a variant of DSC for special road condi-
tions, e.g. uncleared snow-covered roads, that
is optimized for forward momentum. The sys-
tem ensures maximum forward momentum, but
with limited driving stability. Therefore, drive
with the corresponding caution.
You may find it useful to briefly activate DTC
under the following special circumstances:
>When driving on snow-covered uphill
grades, in slushy snow or on uncleared,
snow-covered roads
>When rocking a stuck vehicle free or when
starting off in deep snow or on loose ground
>When driving with snow chains
*
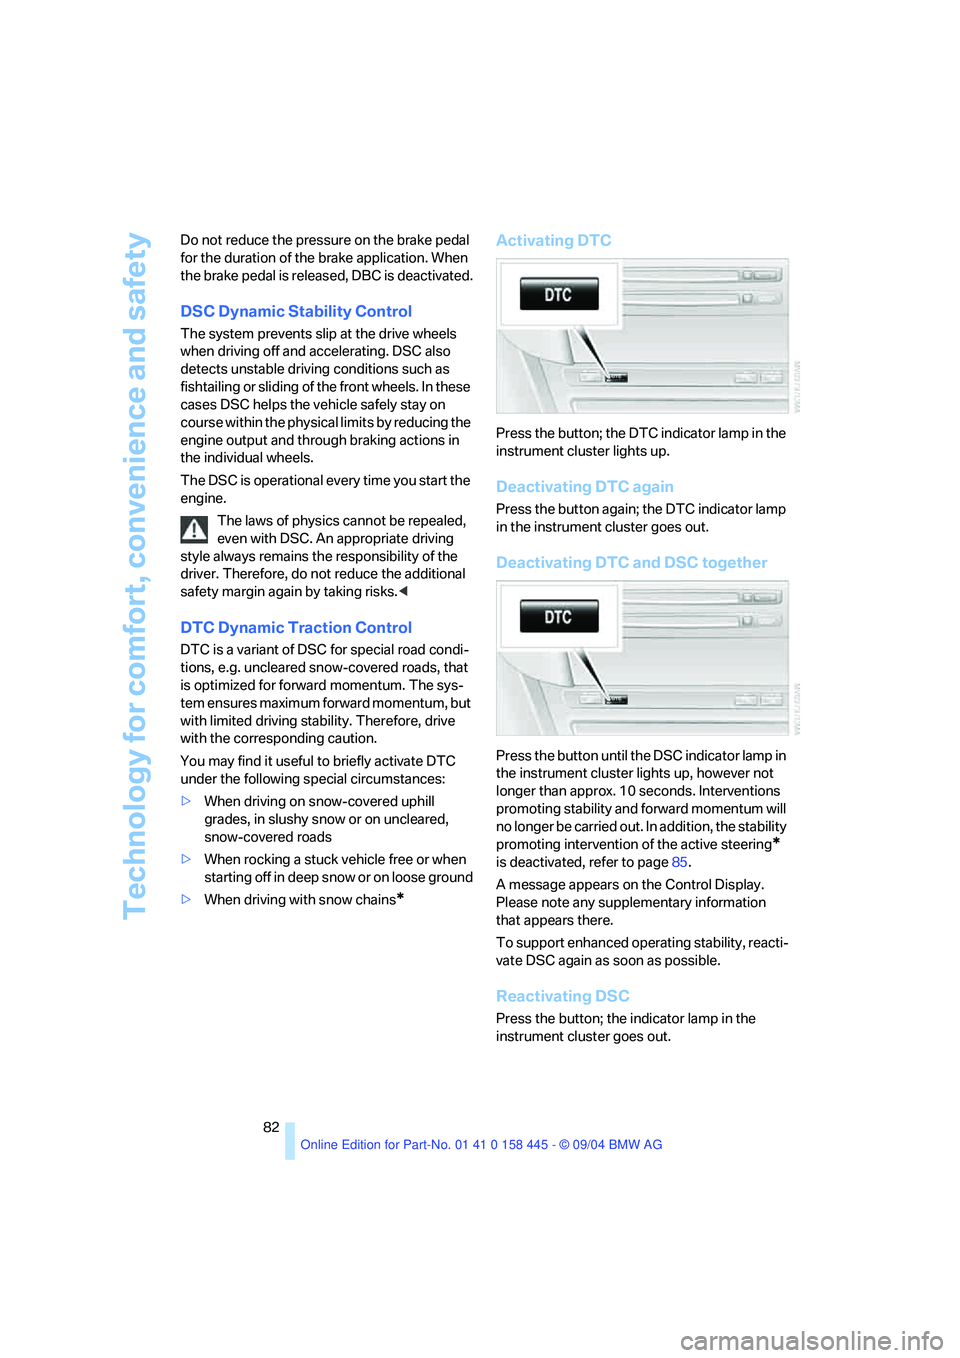
Activating DTC
Press the button; the DTC indicator lamp in the
instrument cluster lights up.
Deactivating DTC again
Press the button again; the DTC indicator lamp
in the instrument cluster goes out.
Deactivating DTC and DSC together
Press the button until the DSC indicator lamp in
the instrument cluster lights up, however not
longer than approx. 10 seconds. Interventions
promoting stability and forward momentum will
no longer be carried out. In addition, the stability
promoting intervention of the active steering
*
is deactivated, refer to page85.
A message appears on the Control Display.
Please note any supplementary information
that appears there.
To support enhanced operating stability, reacti-
vate DSC again as soon as possible.
Reactivating DSC
Press the button; the indicator lamp in the
instrument cluster goes out.
Page 85 of 217
Technology for comfort, convenience and safety
84
Flat Tire Monitor
The concept
The Flat Tire Monitor keeps track of the infla-
tion pressures in the four tires as you drive. The
system provides an alert whenever the inflation
pressure drops significantly in relation to the
pressure in another tire.
When a loss of pressure occurs, the rolling
radius changes and with it, the rotational speed
of the wheels. This change is detected and sig-
naled as a flat tire.
Functional requirement
To ensure the reliable signaling of a flat tire, the
system must be initialized at the correct tire
inflation pressure.
The initialization must be repeated after
every correction of the tire inflation pres-
sure and after every tire or wheel change.<
System limits
The Flat Tire Monitor cannot indicate
sudden severe tire damage caused by
outside factors and does not detect a natural,
even pressure drop in all four tires.<
In the following situations, the system could be
delayed or malfunction:
>System has not been initialized
>Driving on snow-covered or slippery roads
>Sporty driving style: slip in the drive wheels,
high lateral acceleration
>When driving with snow chains
*
Initializing system
The initialization is completed during driv-
ing, which can be interrupted at any time.
When driving continues, the initialization is also
automatically continued.
Do not initialize the system when driving with
snow chains
*.<
Control Center, for principle details, refer to
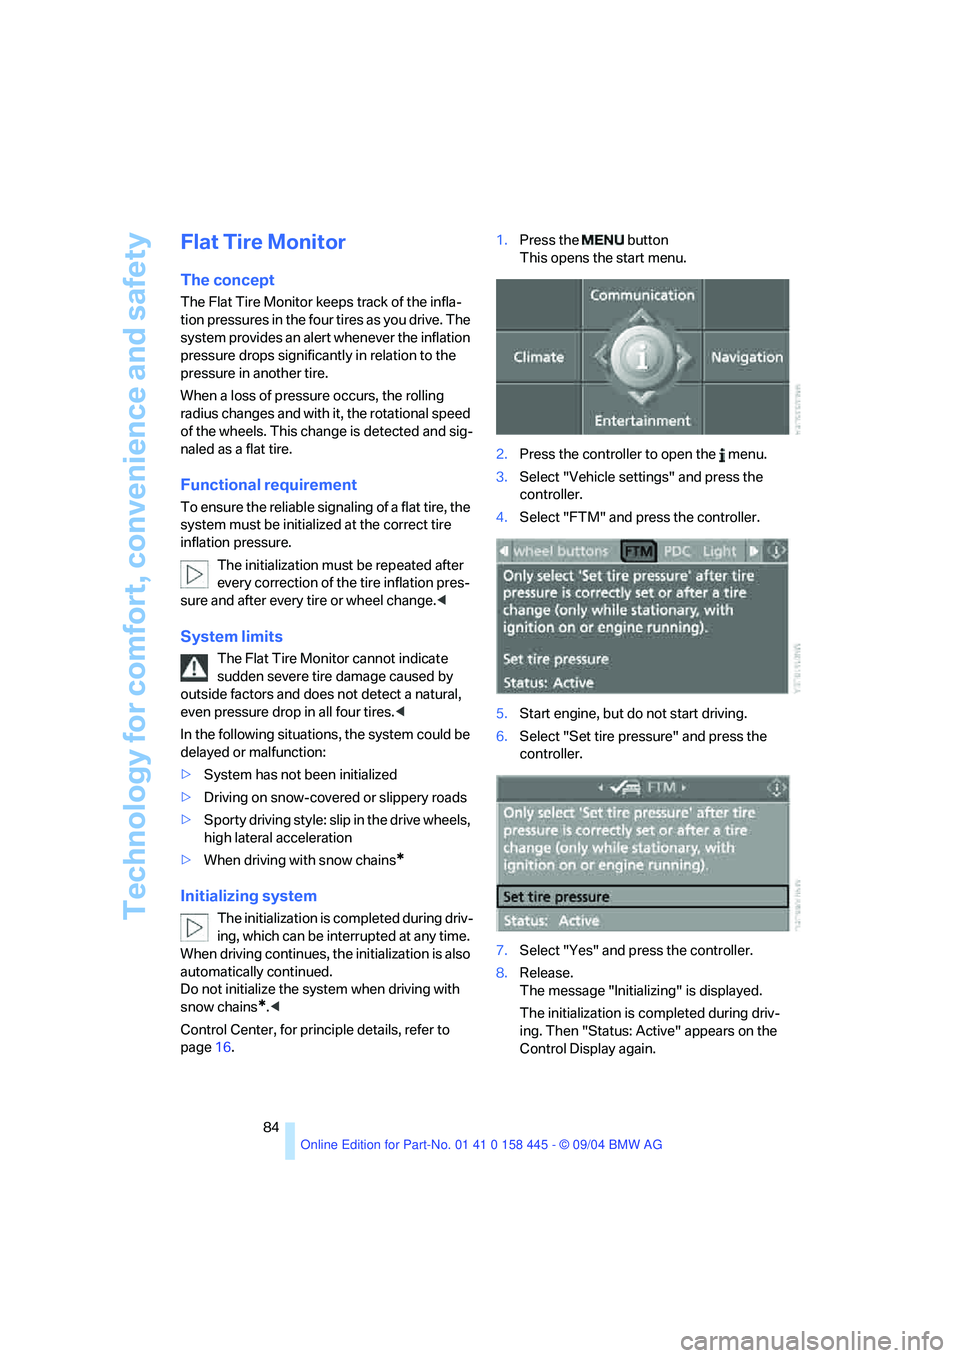
page16.1.Press the button
This opens the start menu.
2.Press the controller to open the menu.
3.Select "Vehicle settings" and press the
controller.
4.Select "FTM" and press the controller.
5.Start engine, but do not start driving.
6.Select "Set tire pressure" and press the
controller.
7.Select "Yes" and press the controller.
8.Release.
The message "Initializing" is displayed.
The initialization is completed during driv-
ing. Then "Status: Active" appears on the
Control Display again.
Page 86 of 217

Controls
85Reference
At a glance
Driving tips
Communications
Navigation
Entertainment
Mobility
Report of a flat tire
The warning lamp lights up in red. A
message appears on the Control Dis-
play. In addition, an acoustic signal
sounds. There is a flat tire or extensive inflation
pressure loss.
1.Cautiously reduce the vehicle speed to
below 50 mph/80 km/h. Avoid sudden brak-
ing and steering maneuvers. Do not exceed
a vehicle speed of 50 mph/80 km/h.
If the vehicle is not, as provided at the
factory, equipped with run-flat tires,
refer to page172, stop driving. Continued
driving after a flat tire can result in serious
accidents.<
2.Check the air pressure in all four tires at the
next opportunity.
If the tire inflation pressure in all four
tires is correct, the Flat Tire Monitor
may not have been initialized. The system
must then be initialized.<
3.In case of a complete loss of the tire inflation
pressure or obvious tire damage, you can
estimate the possible driving distance for
continued driving base on the following ref-
erence values:
>With low load:
1 to 2 persons without luggage:
approx. 155 miles/250 km.
>With medium load:
2 persons, luggage compartment full, or
4 persons without luggage:
approx. 94 miles/150 km.
>With full load:
4 persons, luggage compartment full:
approx. 30 miles/50 km.
Drive reservedly and do not exceed
a speed of 50 mph/80 km/h. In the
event of pressure loss, vehicle handling
changes. This includes reduced tracking
stability in braking, extended braking dis-
tance and altered natural steering charac-
teristics.
If unusual vibrations occur while the vehicle
is being driven, this can indicate final failure
of the damaged tire. Reduce speed and stop as soon as possible. Do not continue
driving. Contact your BMW center.<
Malfunction
The warning lamp lights up in yellow. A
message appears on the Control Dis-
play. The Flat Tire Monitor has a mal-
function or has failed. Have the system checked
as soon as possible.
Active steering*
The concept
The active steering is a system that actively var-
ies the steering angle of the front wheels in rela-
tion to the steering wheel movements.
A t l o w s p e e d , e . g . i n a t o w n o r w h e n p a r k i n g , t h e
steering angle of the wheels is reinforced, i.e.
the steering becomes very direct.
In the higher speed range, on the other hand,
the steering angle is reduced more and more.
This improves the handling capability of your
BMW over the entire speed range.
In critical situations, the system can make tar-
geted corrections to the steering angle pro-
vided by the driver and thus stabilize the vehicle
before the driver intervenes. This stability-pro-
moting intervention is deactivated when DSC is
switched off, refer to page82.
Malfunction
The warning lamp lights up. The active
steering is no longer operational. At low
speed, larger steering wheel move-
ments are required, while the vehicle reacts
more sensitively to steering wheel movements
in the higher road-speed range. Have the sys-
tem checked.
If the warning lamp lights up during the first
engine starting following a power supply inter-
ruption, the system must be activated by being
initialized.
Page 87 of 217
Technology for comfort, convenience and safety
86
Initializing system
1.Start the engine.
2.With the vehicle stationary, turn the steer-
ing wheel from the straight-ahead position
to the left as far as it will go and then back to
the straight-ahead position.
3.Switch off the engine.
When you start the engine again, all the func-
tions of the active steering will be available once
again.
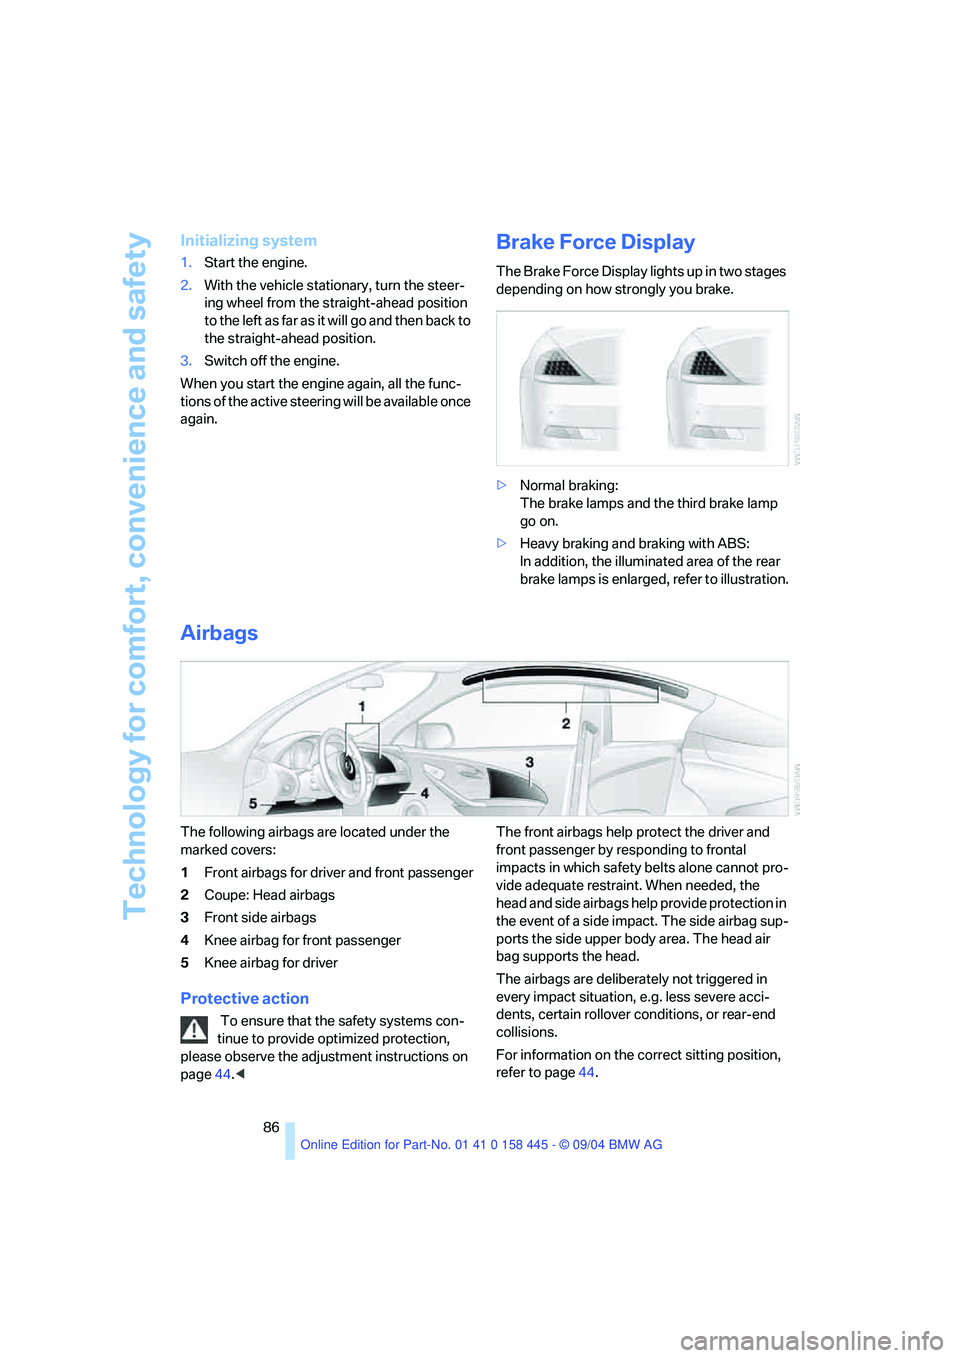
Brake Force Display
The Brake Force Display lights up in two stages
depending on how strongly you brake.
>Normal braking:
The brake lamps and the third brake lamp
go on.
>Heavy braking and braking with ABS:
In addition, the illuminated area of the rear
brake lamps is enlarged, refer to illustration.
Airbags
The following airbags are located under the
marked covers:
1Front airbags for driver and front passenger
2Coupe: Head airbags
3Front side airbags
4Knee airbag for front passenger
5Knee airbag for driver
Protective action
To ensure that the safety systems con-
tinue to provide optimized protection,
please observe the adjustment instructions on
page44.
impacts in which safety belts alone cannot pro-
vide adequate restraint. When needed, the
head and side airbags help provide protection in
the event of a side impact. The side airbag sup-
ports the side upper body area. The head air
bag supports the head.
The airbags are deliberately not triggered in
every impact situation, e.g. less severe acci-
dents, certain rollover conditions, or rear-end
collisions.
For information on the correct sitting position,
refer to page44.