2005 BMW 645CI COUPE&CONVERTIBLE tow
[x] Cancel search: towPage 97 of 217
A congenial climate
96 it off while also increasing the air volume as
required.
The recirculated-air mode should not be used
over a longer period of time, as the air quality
inside the vehicle deteriorates continuously.<
Residual heat mode
Press the button when the motor is
switched off and warm.
The heat stored in the engine is
used to heat the passenger com-
partment, e.g. when stopped at a school to pick
up a child.
You can adjust the automatic climate control
settings as of ignition key position 1.
Provided that the engine has warmed to its nor-
mal operating temperature and the battery is
charged, you can use this function for up to
15 minutes after switching off the ignition. The
LED in the button lights up to confirm compli-
ance with both of these conditions.
Switching off automatic climate control
The air volume, the heater and the
cooling function are all switched
off.
You can restart the automatic cli-
mate control by pressing any of its buttons
except the REST button.
Settings using Control Center
Ignition key:
>In vehicles with separate drives for audio
CDs and navigation DVDs, ignition key in
position 2.
>In vehicles with one drive for audio CDs,
ignition key in position 1.
Control Center, for principle details, refer to
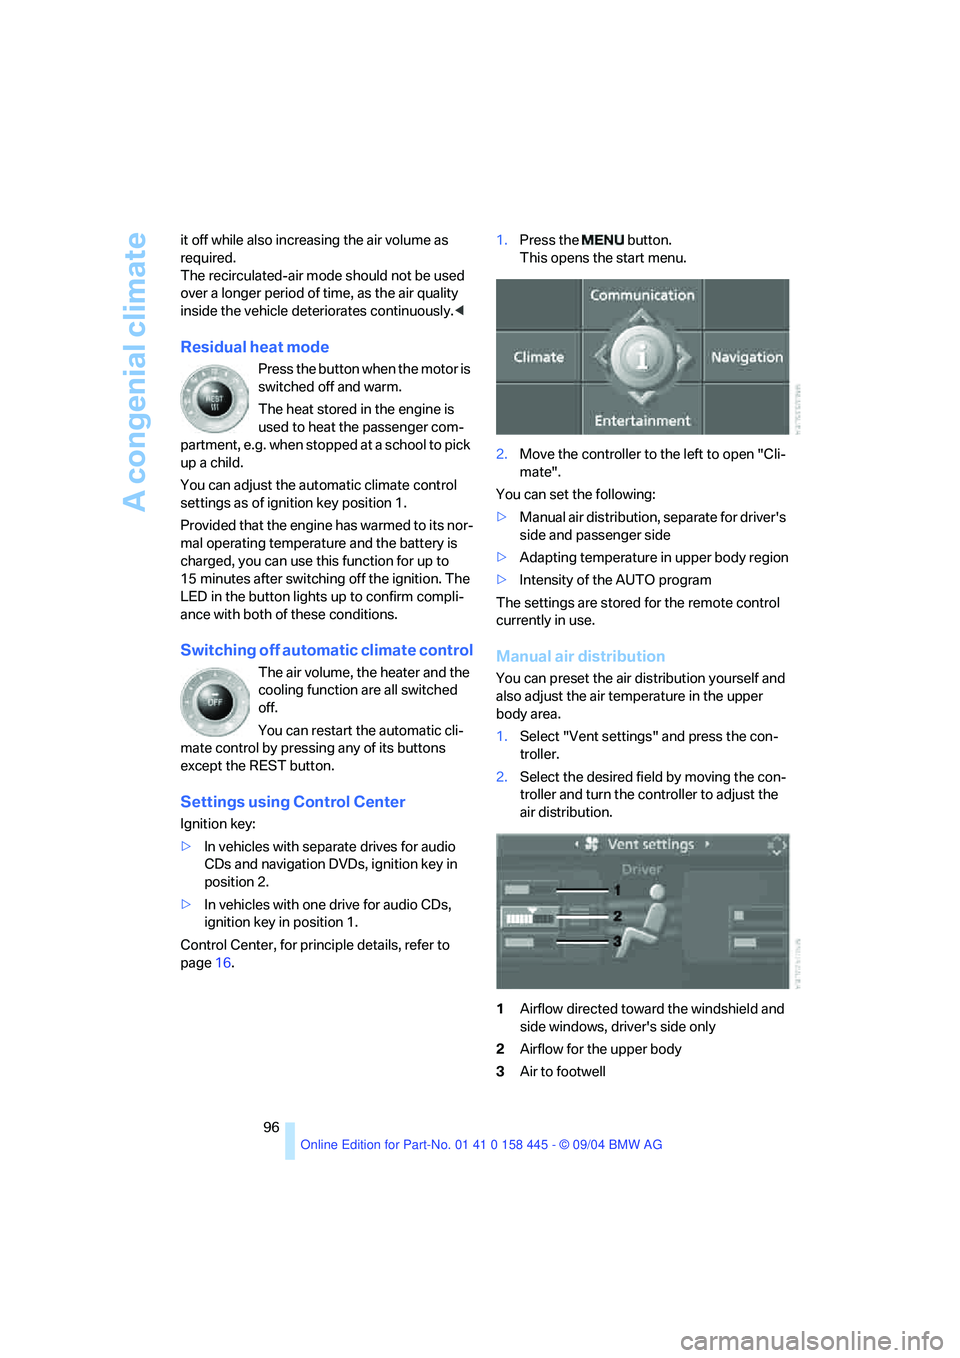
page16.1.Press the button.
This opens the start menu.
2.Move the controller to the left to open "Cli-
mate".
You can set the following:
>Manual air distribution, separate for driver's
side and passenger side
>Adapting temperature in upper body region
>Intensity of the AUTO program
The settings are stored for the remote control
currently in use.
Manual air distribution
You can preset the air distribution yourself and
also adjust the air temperature in the upper
body area.
1.Select "Vent settings" and press the con-
troller.
2.Select the desired field by moving the con-
troller and turn the controller to adjust the
air distribution.
1Airflow directed toward the windshield and
side windows, driver's side only
2Airflow for the upper body
3Air to footwell
Page 105 of 217
Practical interior accessories
104
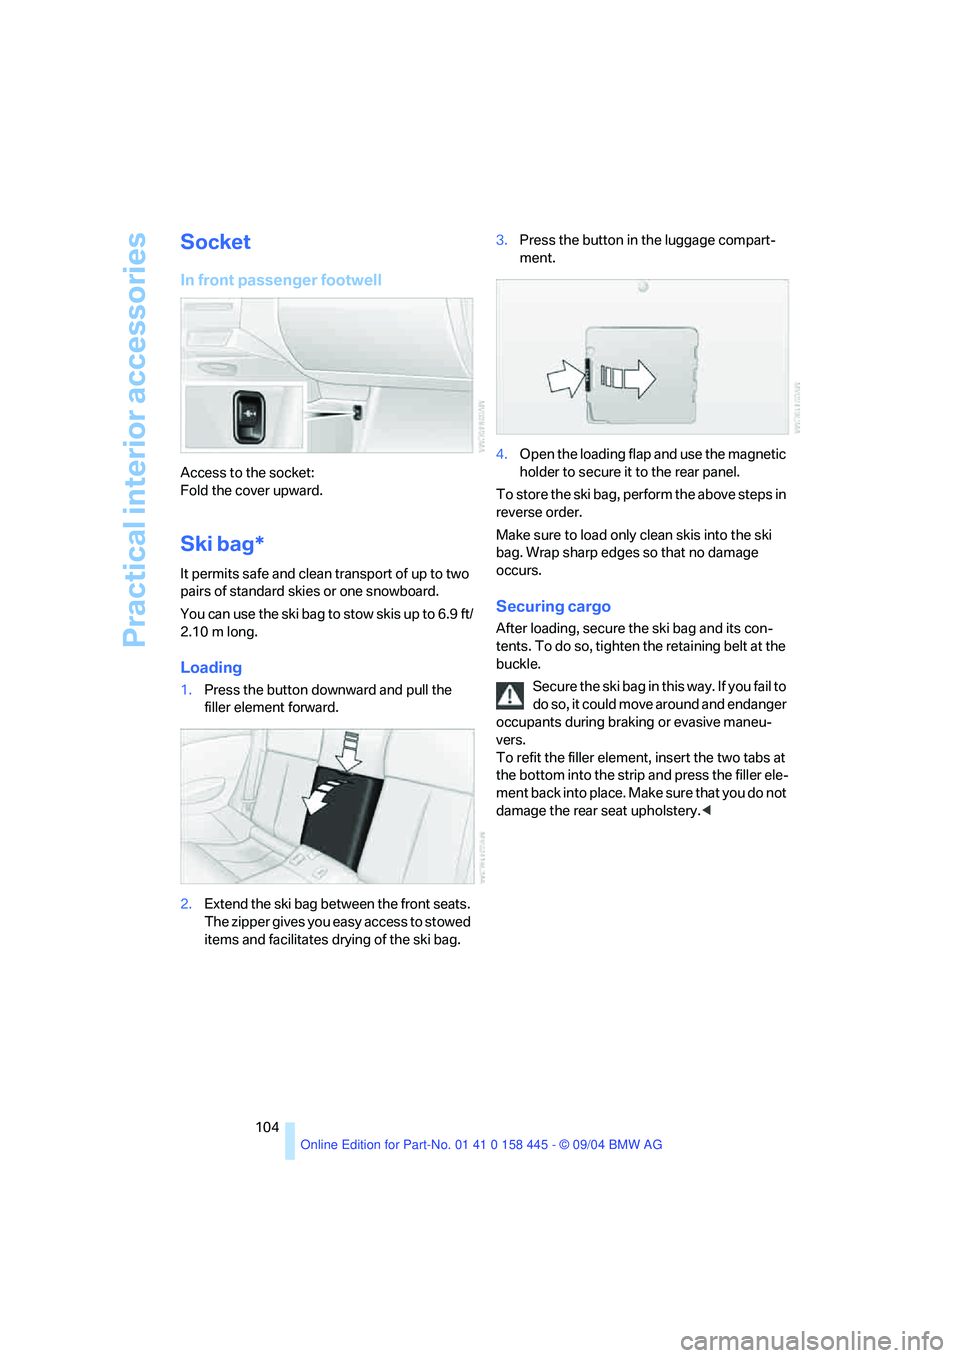
Socket
In front passenger footwell
Access to the socket:
Fold the cover upward.
Ski bag*
It permits safe and clean transport of up to two
pairs of standard skies or one snowboard.
You can use the ski bag to stow skis up to 6.9 ft/
2.10 m long.
Loading
1.Press the button downward and pull the
filler element forward.
2.Extend the ski bag between the front seats.
The zipper gives you easy access to stowed
items and facilitates drying of the ski bag.3.Press the button in the luggage compart-
ment.
4.Open the loading flap and use the magnetic
holder to secure it to the rear panel.
To store the ski bag, perform the above steps in
reverse order.
Make sure to load only clean skis into the ski
bag. Wrap sharp edges so that no damage
occurs.
Securing cargo
After loading, secure the ski bag and its con-
tents. To do so, tighten the retaining belt at the
buckle.
Secure the ski bag in this way. If you fail to
do so, it could move around and endanger
occupants during braking or evasive maneu-
vers.
To refit the filler element, insert the two tabs at
the bottom into the strip and press the filler ele-
m e n t b a c k i n t o p l a c e . M a k e s u r e t h a t y o u d o n o t
damage the rear seat upholstery.<
Page 111 of 217
Things to remember when driving
110 Never allow floor mats, carpets or any other
objects to protrude into the area around the
accelerator and brake pedals and obstruct their
movement.<
Corrosion on brake rotors
When the vehicle is driven only occasionally,
during extended periods when the vehicle is not
used at all, and in operating conditions where
brake applications are less frequent, there is an
increased tendency for corrosion to form on
rotors, while contaminants accumulate on the
brake pads. This occurs because the minimum
pressure which must be exerted by the pads
during brake applications to clean the rotors is
not reached.
Should corrosion form on the brake rotors, the
brakes will tend to respond with a pulsating
effect that even extended application will fail to
cure.
When the vehicle is parked
Condensation forms in the automatic air condi-
tioner system during operation, and then exits
under the vehicle. Traces of condensed water
under the vehicle are therefore normal.
Before driving into a car wash
To prevent the exterior mirrors from being
damaged due to the width of the vehicle,
always fold them in by hand before entering an
automatic car wash.<
Cargo loading
To avoid loading the tires beyond their
approved carrying capacity, never over-
load the vehicle. Overloading can lead to over-
heating and increases the rate at which damage
develops inside the tires. The ultimate result
can assume the form of a sudden blow-out.<
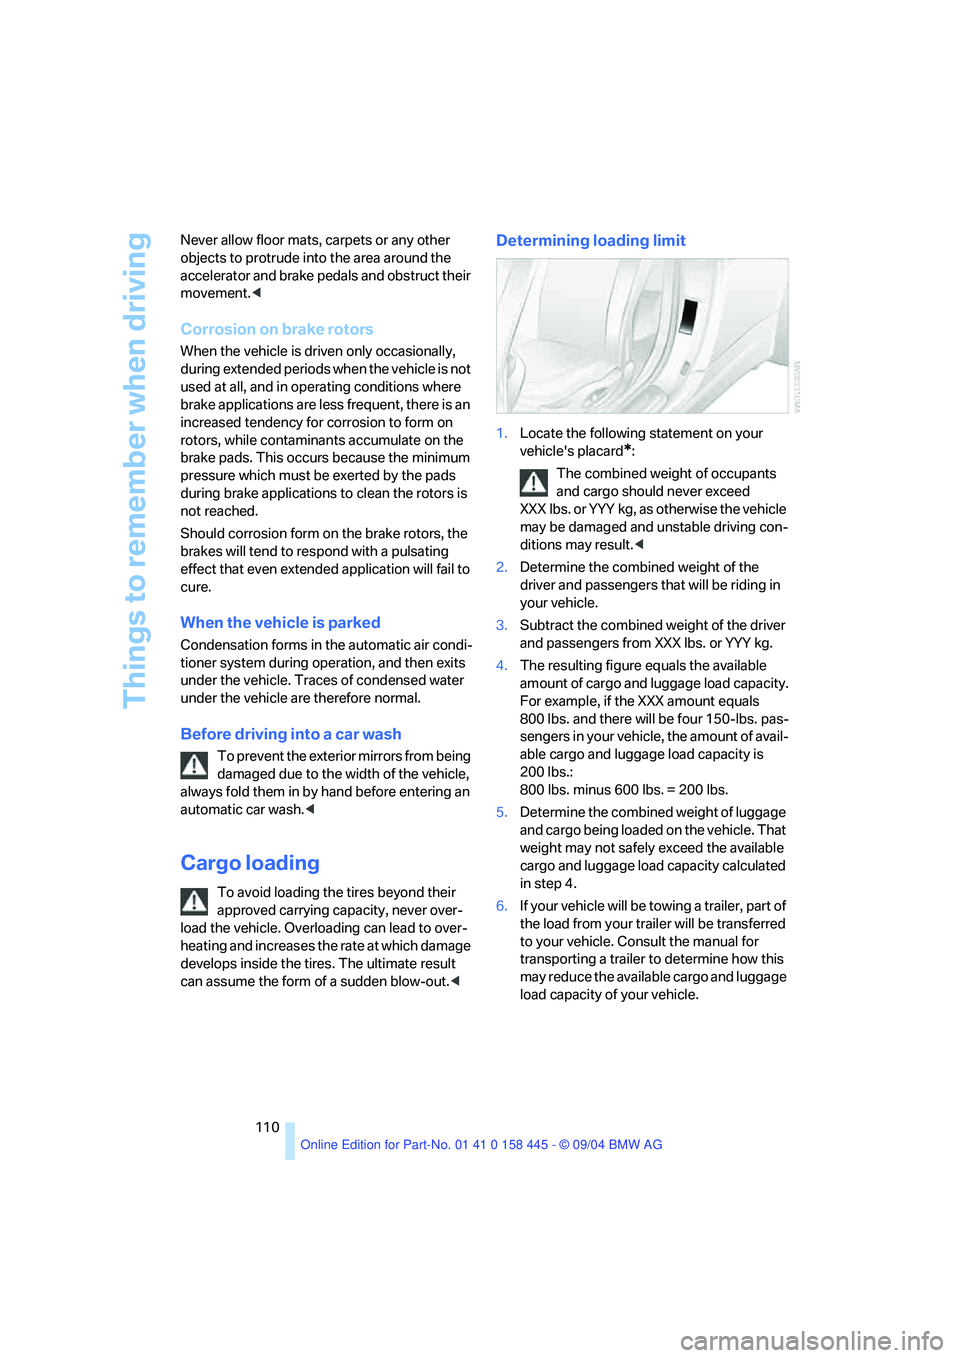
Determining loading limit
1.Locate the following statement on your
vehicle's placard
*:
The combined weight of occupants
and cargo should never exceed
XXX lbs. or YYY kg, as otherwise the vehicle
may be damaged and unstable driving con-
ditions may result.<
2.Determine the combined weight of the
driver and passengers that will be riding in
your vehicle.
3.Subtract the combined weight of the driver
and passengers from XXX lbs. or YYY kg.
4.The resulting figure equals the available
amount of cargo and luggage load capacity.
For example, if the XXX amount equals
800 lbs. and there will be four 150-lbs. pas-
sengers in your vehicle, the amount of avail-
able cargo and luggage load capacity is
200 lbs.:
800 lbs. minus 600 lbs. = 200 lbs.
5.Determine the combined weight of luggage
and cargo being loaded on the vehicle. That
weight may not safely exceed the available
cargo and luggage load capacity calculated
in step 4.
6.If your vehicle will be towing a trailer, part of
the load from your trailer will be transferred
to your vehicle. Consult the manual for
transporting a trailer to determine how this
may reduce the available cargo and luggage
load capacity of your vehicle.
Page 112 of 217
Driving tips
111Reference
At a glance
Controls
Communications
Navigation
Entertainment
Mobility
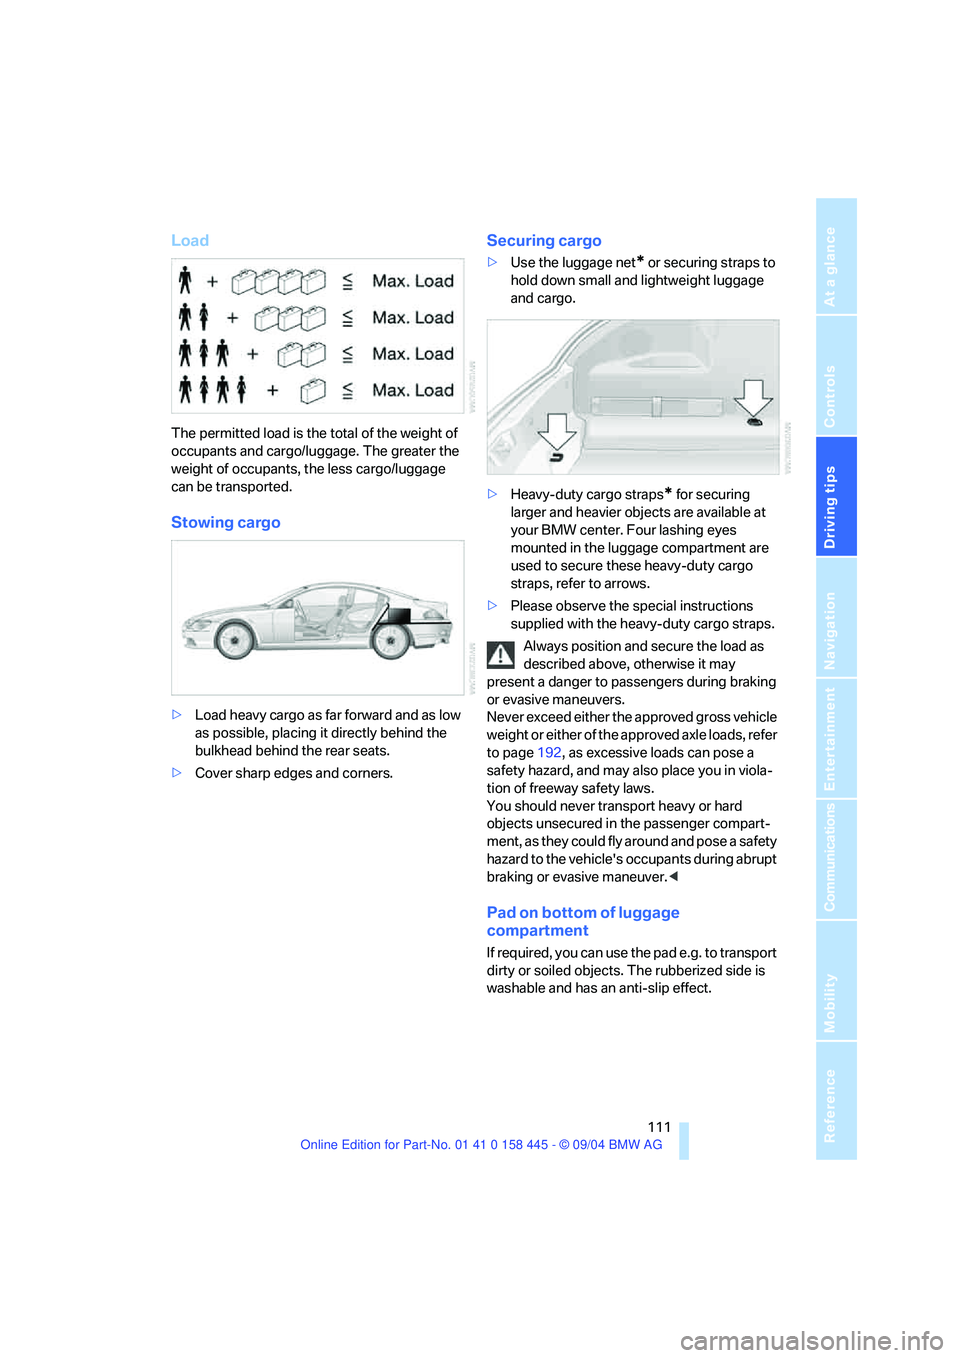
Load
The permitted load is the total of the weight of
occupants and cargo/luggage. The greater the
weight of occupants, the less cargo/luggage
can be transported.
Stowing cargo
>Load heavy cargo as far forward and as low
as possible, placing it directly behind the
bulkhead behind the rear seats.
>Cover sharp edges and corners.
Securing cargo
>Use the luggage net* or securing straps to
hold down small and lightweight luggage
and cargo.
>Heavy-duty cargo straps
* for securing
larger and heavier objects are available at
your BMW center. Four lashing eyes
mounted in the luggage compartment are
used to secure these heavy-duty cargo
straps, refer to arrows.
>Please observe the special instructions
supplied with the heavy-duty cargo straps.
Always position and secure the load as
described above, otherwise it may
present a danger to passengers during braking
or evasive maneuvers.
Never exceed either the approved gross vehicle
weight or either of the approved axle loads, refer
to page192, as excessive loads can pose a
safety hazard, and may also place you in viola-
tion of freeway safety laws.
You should never transport heavy or hard
objects unsecured in the passenger compart-
ment, as they could fly around and pose a safety
hazard to the vehicle's occupants during abrupt
braking or evasive maneuver.<
Pad on bottom of luggage
compartment
If required, you can use the pad e.g. to transport
dirty or soiled objects. The rubberized side is
washable and has an anti-slip effect.
Page 116 of 217
Navigation
Driving tips
115Reference
At a glance
Controls
Communications
Entertainment
Mobility
Destination entry
In entering your destination you can select from
among the following options:
>Manual entry of destination, see below
>Select destination using information, refer
to page118
>Select from among recent destinations,
refer to Destination list, page119
>Select destination from address book, refer
to page120.
>Select home address, refer to page122
After selecting your destination you can pro-
ceed to start the destination guidance, refer to
page124.
Operating navigation system
Enter data only when the vehicle is sta-
tionary, and always obey the traffic regu-
lations and road signs in the event of any con-
tradiction between traffic and road conditions
and the instructions issued by the navigation
system. If you do not observe this precaution,
you may be in violation of the law, and can
endanger vehicle occupants and other road
users.<
Control Center, for principle details, refer to
page16.
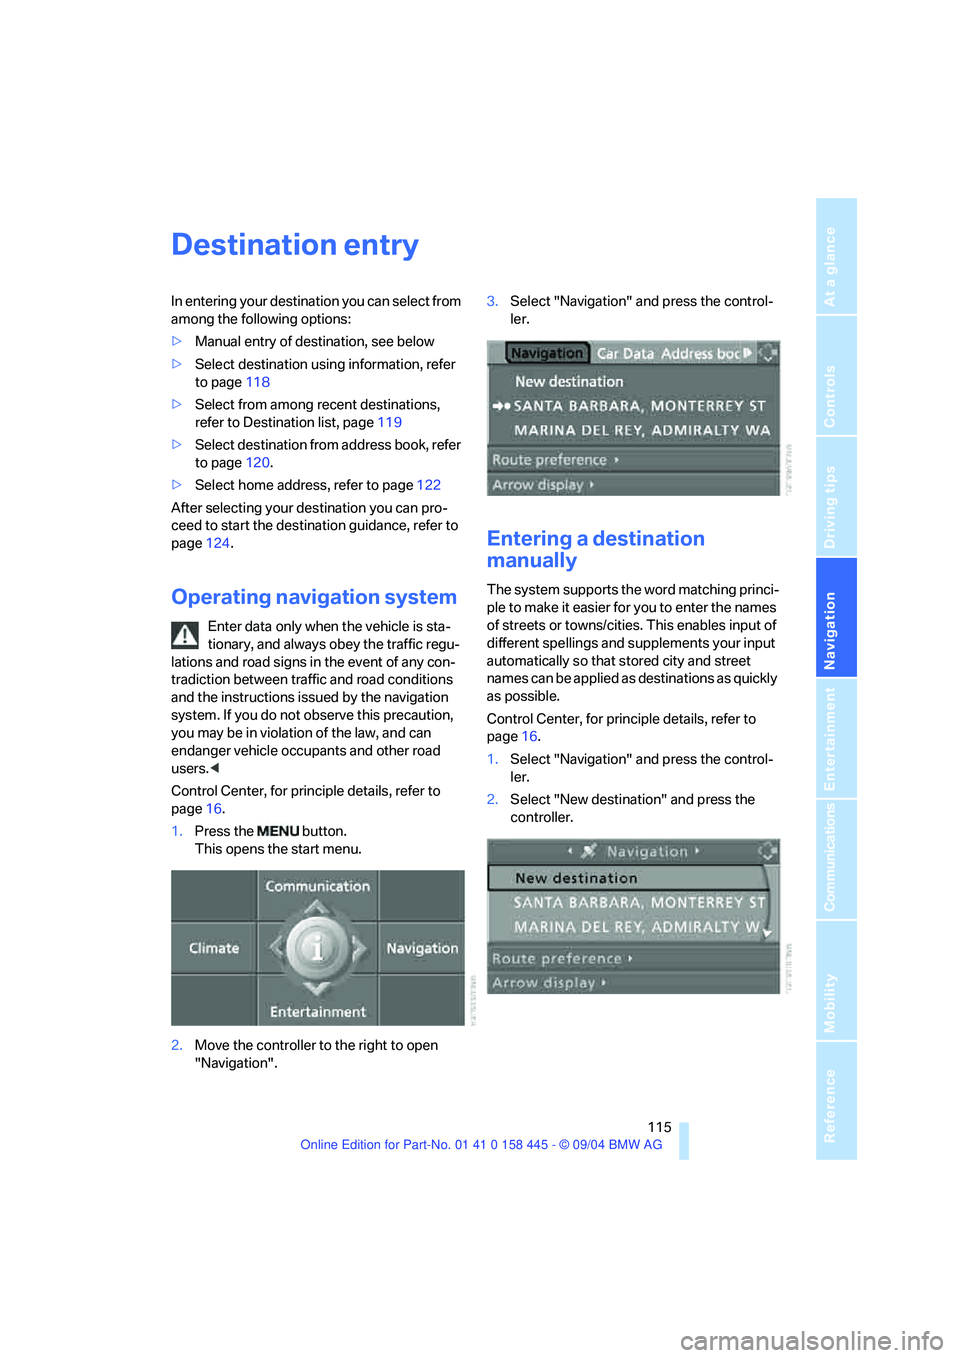
1.Press the button.
This opens the start menu.
2.Move the controller to the right to open
"Navigation".3.Select "Navigation" and press the control-
ler.
Entering a destination
manually
The system supports the word matching princi-
ple to make it easier for you to enter the names
of streets or towns/cities. This enables input of
different spellings and supplements your input
automatically so that stored city and street
names can be applied as destinations as quickly
as possible.
Control Center, for principle details, refer to
page16.
1.Select "Navigation" and press the control-
ler.
2.Select "New destination" and press the
controller.
Page 117 of 217
Destination entry
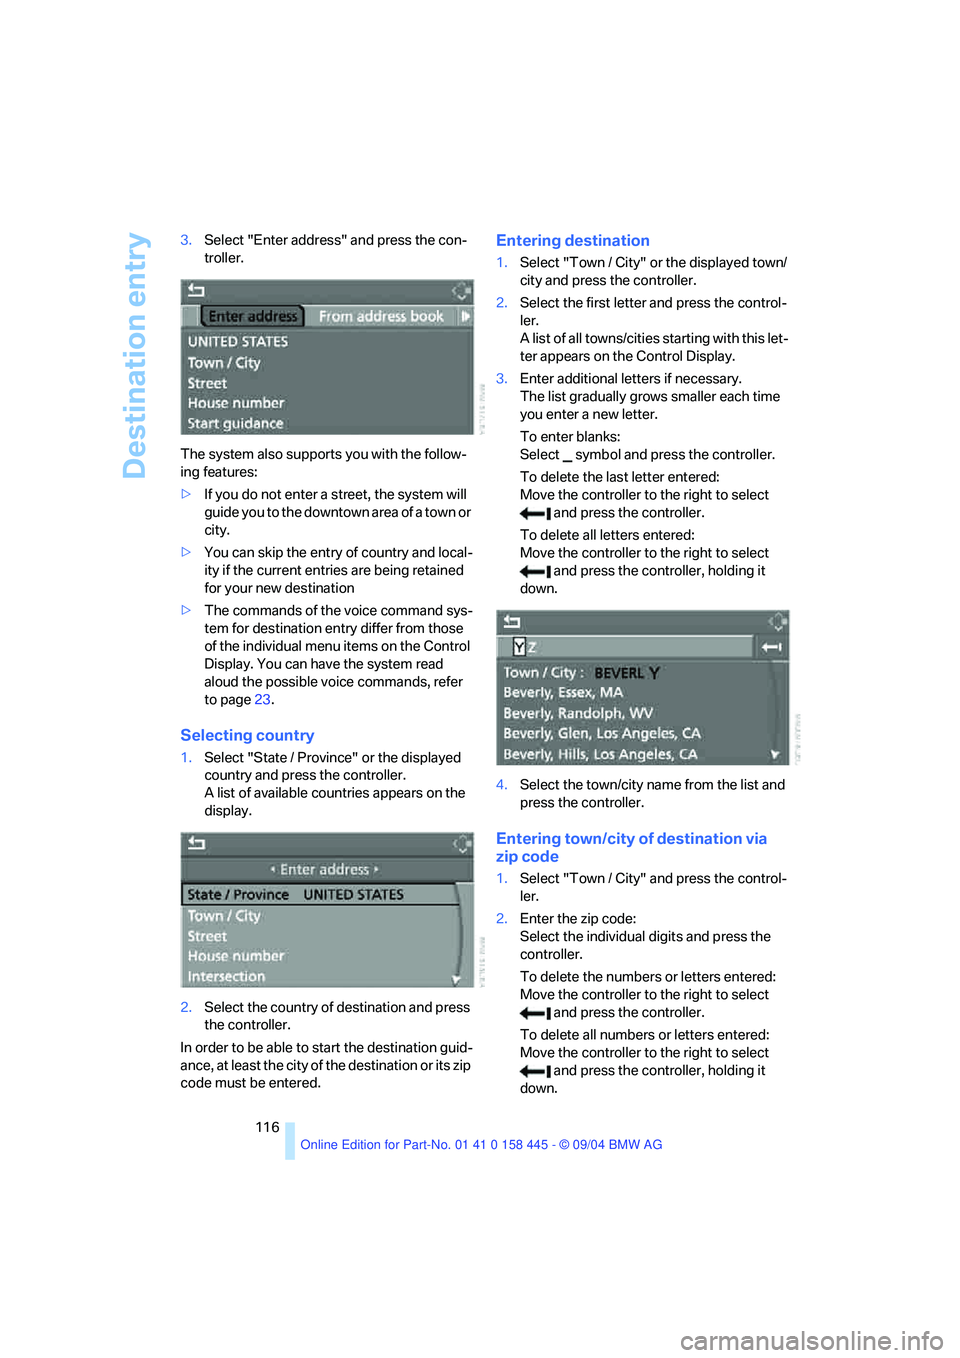
116 3.Select "Enter address" and press the con-
troller.
The system also supports you with the follow-
ing features:
>If you do not enter a street, the system will
guide you to the downtown area of a town or
city.
>You can skip the entry of country and local-
ity if the current entries are being retained
for your new destination
>The commands of the voice command sys-
tem for destination entry differ from those
of the individual menu items on the Control
Display. You can have the system read
aloud the possible voice commands, refer
to page23.
Selecting country
1.Select "State / Province" or the displayed
country and press the controller.
A list of available countries appears on the
display.
2.Select the country of destination and press
the controller.
In order to be able to start the destination guid-
ance, at least the city of the destination or its zip
code must be entered.
Entering destination
1.Select "Town / City" or the displayed town/
city and press the controller.
2.Select the first letter and press the control-
ler.
A list of all towns/cities starting with this let-
ter appears on the Control Display.
3.Enter additional letters if necessary.
The list gradually grows smaller each time
you enter a new letter.
To enter blanks:
Select symbol and press the controller.
To delete the last letter entered:
Move the controller to the right to select
and press the controller.
To delete all letters entered:
Move the controller to the right to select
and press the controller, holding it
down.
4.Select the town/city name from the list and
press the controller.
Entering town/city of destination via
zip code
1.Select "Town / City" and press the control-
ler.
2.Enter the zip code:
Select the individual digits and press the
controller.
To delete the numbers or letters entered:
Move the controller to the right to select
and press the controller.
To delete all numbers or letters entered:
Move the controller to the right to select
and press the controller, holding it
down.
Page 118 of 217
Navigation
Driving tips
117Reference
At a glance
Controls
Communications
Entertainment
Mobility
3.Select the zip code and press the controller.
The corresponding town/city of destination
is displayed.
4.Select the town/city of destination and
press the controller.
Entering street, house number and
intersection
1.Select "Street" or the displayed street and
press the controller.
2.For instructions on entry, refer to Entering
town/city of destination.
After the street, you can also enter the intersec-
tion or the house number.
The intersection is entered in the same way as
the street.
To enter the house number:
1.Select "House number" and press the con-
troller.
2.Enter the house number:
Select the individual digits and press the
controller.
To delete entered digits or letters:
Move the controller to the right to select
and press the controller.
To delete all numbers or letters entered:
Move the controller to the right to select
and press the controller, holding it
down.
3.Select the house number and press the
controller.
Only house numbers stored for the street
on the navigation DVD can be entered.
Starting destination guidance with
manual destination entry
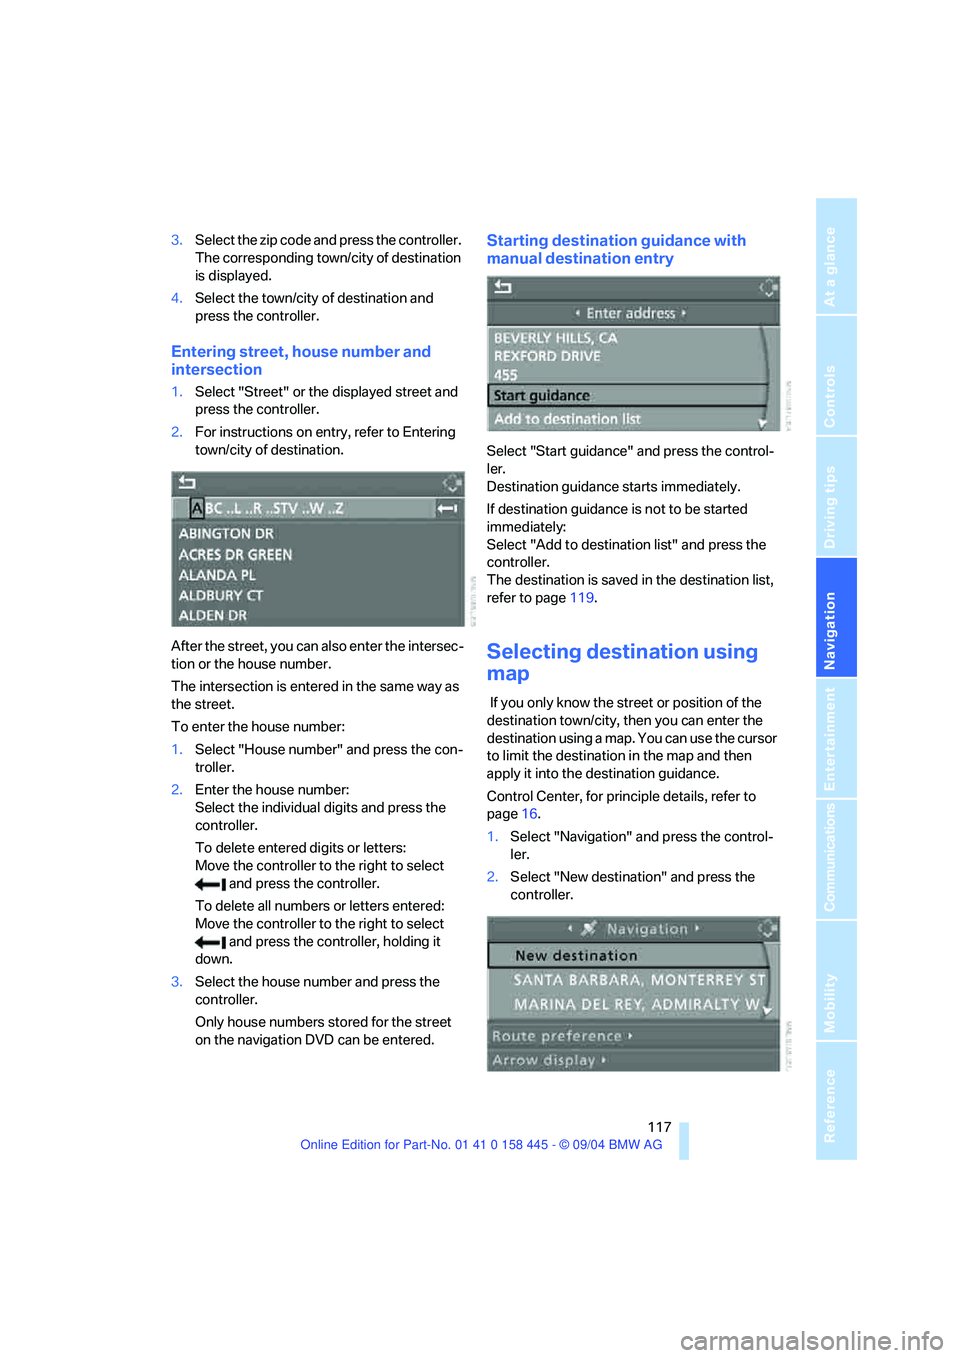
Select "Start guidance" and press the control-
ler.
Destination guidance starts immediately.
If destination guidance is not to be started
immediately:
Select "Add to destination list" and press the
controller.
The destination is saved in the destination list,
refer to page119.
Selecting destination using
map
If you only know the street or position of the
destination town/city, then you can enter the
destination using a map. You can use the cursor
to limit the destination in the map and then
apply it into the destination guidance.
Control Center, for principle details, refer to
page16.
1.Select "Navigation" and press the control-
ler.
2.Select "New destination" and press the
controller.
Page 119 of 217
Destination entry
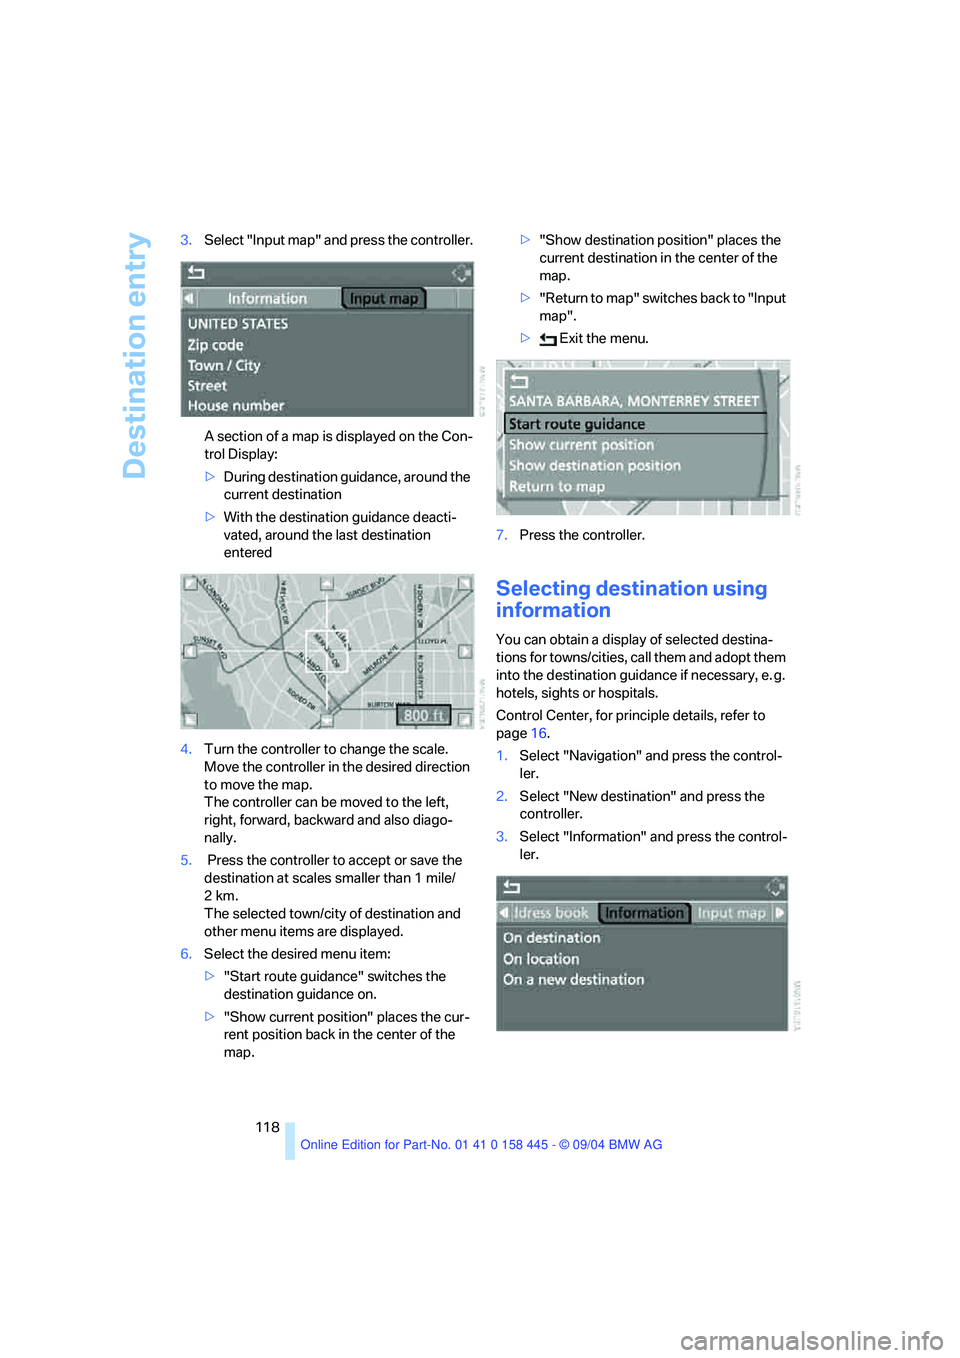
118 3.Select "Input map" and press the controller.
A section of a map is displayed on the Con-
trol Display:
>During destination guidance, around the
current destination
>With the destination guidance deacti-
vated, around the last destination
entered
4.Turn the controller to change the scale.
Move the controller in the desired direction
to move the map.
The controller can be moved to the left,
right, forward, backward and also diago-
nally.
5. Press the controller to accept or save the
destination at scales smaller than 1 mile/
2km.
The selected town/city of destination and
other menu items are displayed.
6.Select the desired menu item:
>"Start route guidance" switches the
destination guidance on.
>"Show current position" places the cur-
rent position back in the center of the
map.>"Show destination position" places the
current destination in the center of the
map.
>" R e t ur n t o m a p " s w i t c he s b a c k t o " I n p u t
map".
> Exit the menu.
7.Press the controller.
Selecting destination using
information
You can obtain a display of selected destina-
tions for towns/cities, call them and adopt them
into the destination guidance if necessary, e. g.
hotels, sights or hospitals.
Control Center, for principle details, refer to
page16.
1.Select "Navigation" and press the control-
ler.
2.Select "New destination" and press the
controller.
3.Select "Information" and press the control-
ler.